
Hey there, crafty cool kids and memory hoarders! One of the most frequently asked questions I get asked is how to put paper in resin.
After long trials and many, many errors I have finally found the perfect techniques! Ready to dip your toes (or rather, your papers) into the sparkly pool of resin art? Let’s do it!
Why might you include paper in resin?
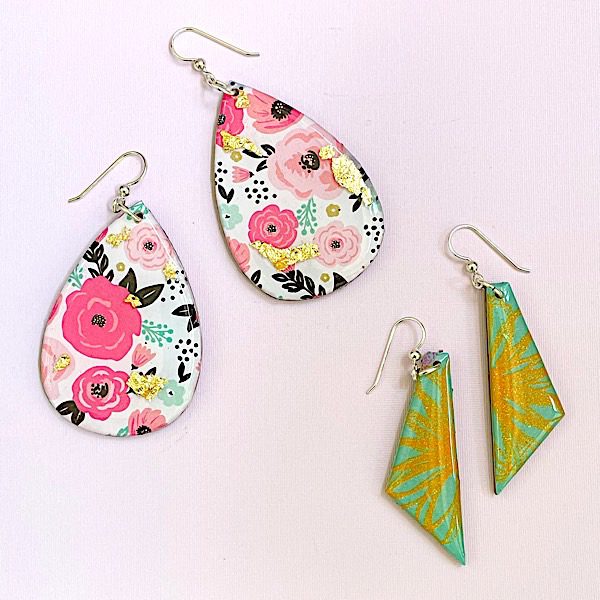
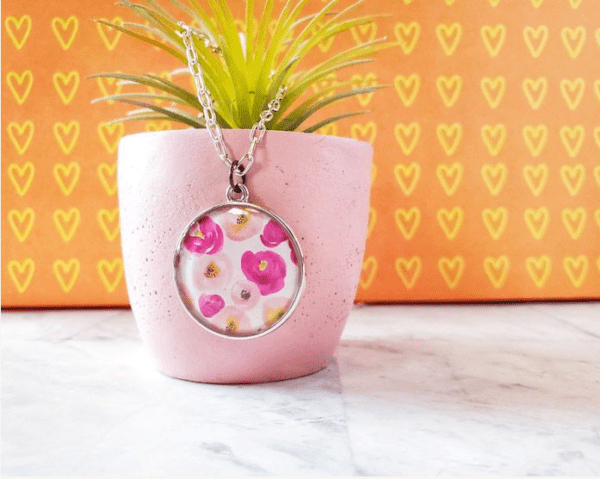
Picture this: your favorite concert ticket, that oh-so-precious love letter, or even your favorite photo turned into a pendant frozen in time with a shiny, glass-like finish. We can turn just about any of your paper trinkets into everlasting gems. Let’s get this resin party started!
Why do I need to seal paper for resin?
Some types of papers can be super temperamental! And depending on the types on resin you are using, the paper needs to be prepped to ensure they last forever.
- Prevent the Resin from Staining the Paper: Without a sealant, resin can be a bit of a bully, absorbing into your paper and causing unsightly stains or dark spots. It’s like spilling coffee on a white shirt – once it’s there, it’s hard to ignore!
- Maintain the True Colors and Details: Ever noticed how paper can turn translucent and lose its vibrant colors when wet? Sealing it ensures that your paper’s colors and details remain as sharp and snazzy as the day they were created.
- Stop Ink or Colors from Bleeding: If your paper has ink or paint, resin can make these colors run wild. Sealing forms a protective barrier, keeping everything in its place – like a good traffic cop at a busy intersection.
- Avoid Air Bubbles: Unsealed paper can trap air, and when you pour resin over it, these tiny air pockets can escape and create bubbles in your resin. Sealing helps to keep these mischievous bubbles at bay.
- Control Paper Texture: Some papers can wrinkle or warp when they come into contact with resin. Sealing helps to preserve the paper’s texture, ensuring it stays as smooth as a jazz tune.
How do you seal paper for resin?
Gather Your Gear
- Paper of choice: Photos, comics, tissue paper, book pages, love notes, or that ticket from the first concert where you crowd-surfed.
- A well-ventilated Hideout: Because fumes are party crashers.
- Protective Gloves and Gear: Suit up! It’s about to get artsy.
- A Sense of Adventure: Mandatory for crafting escapades.
- Follow one of the options below!
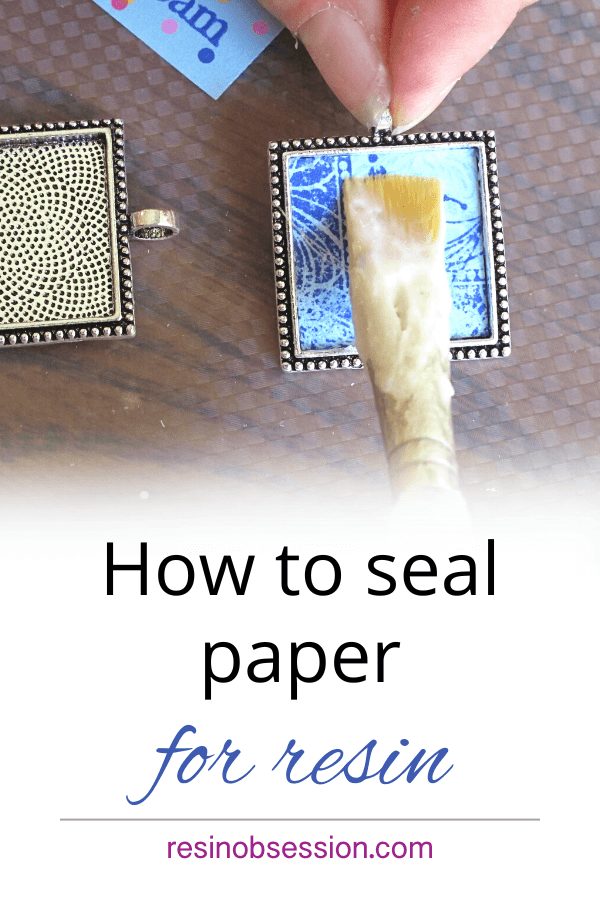
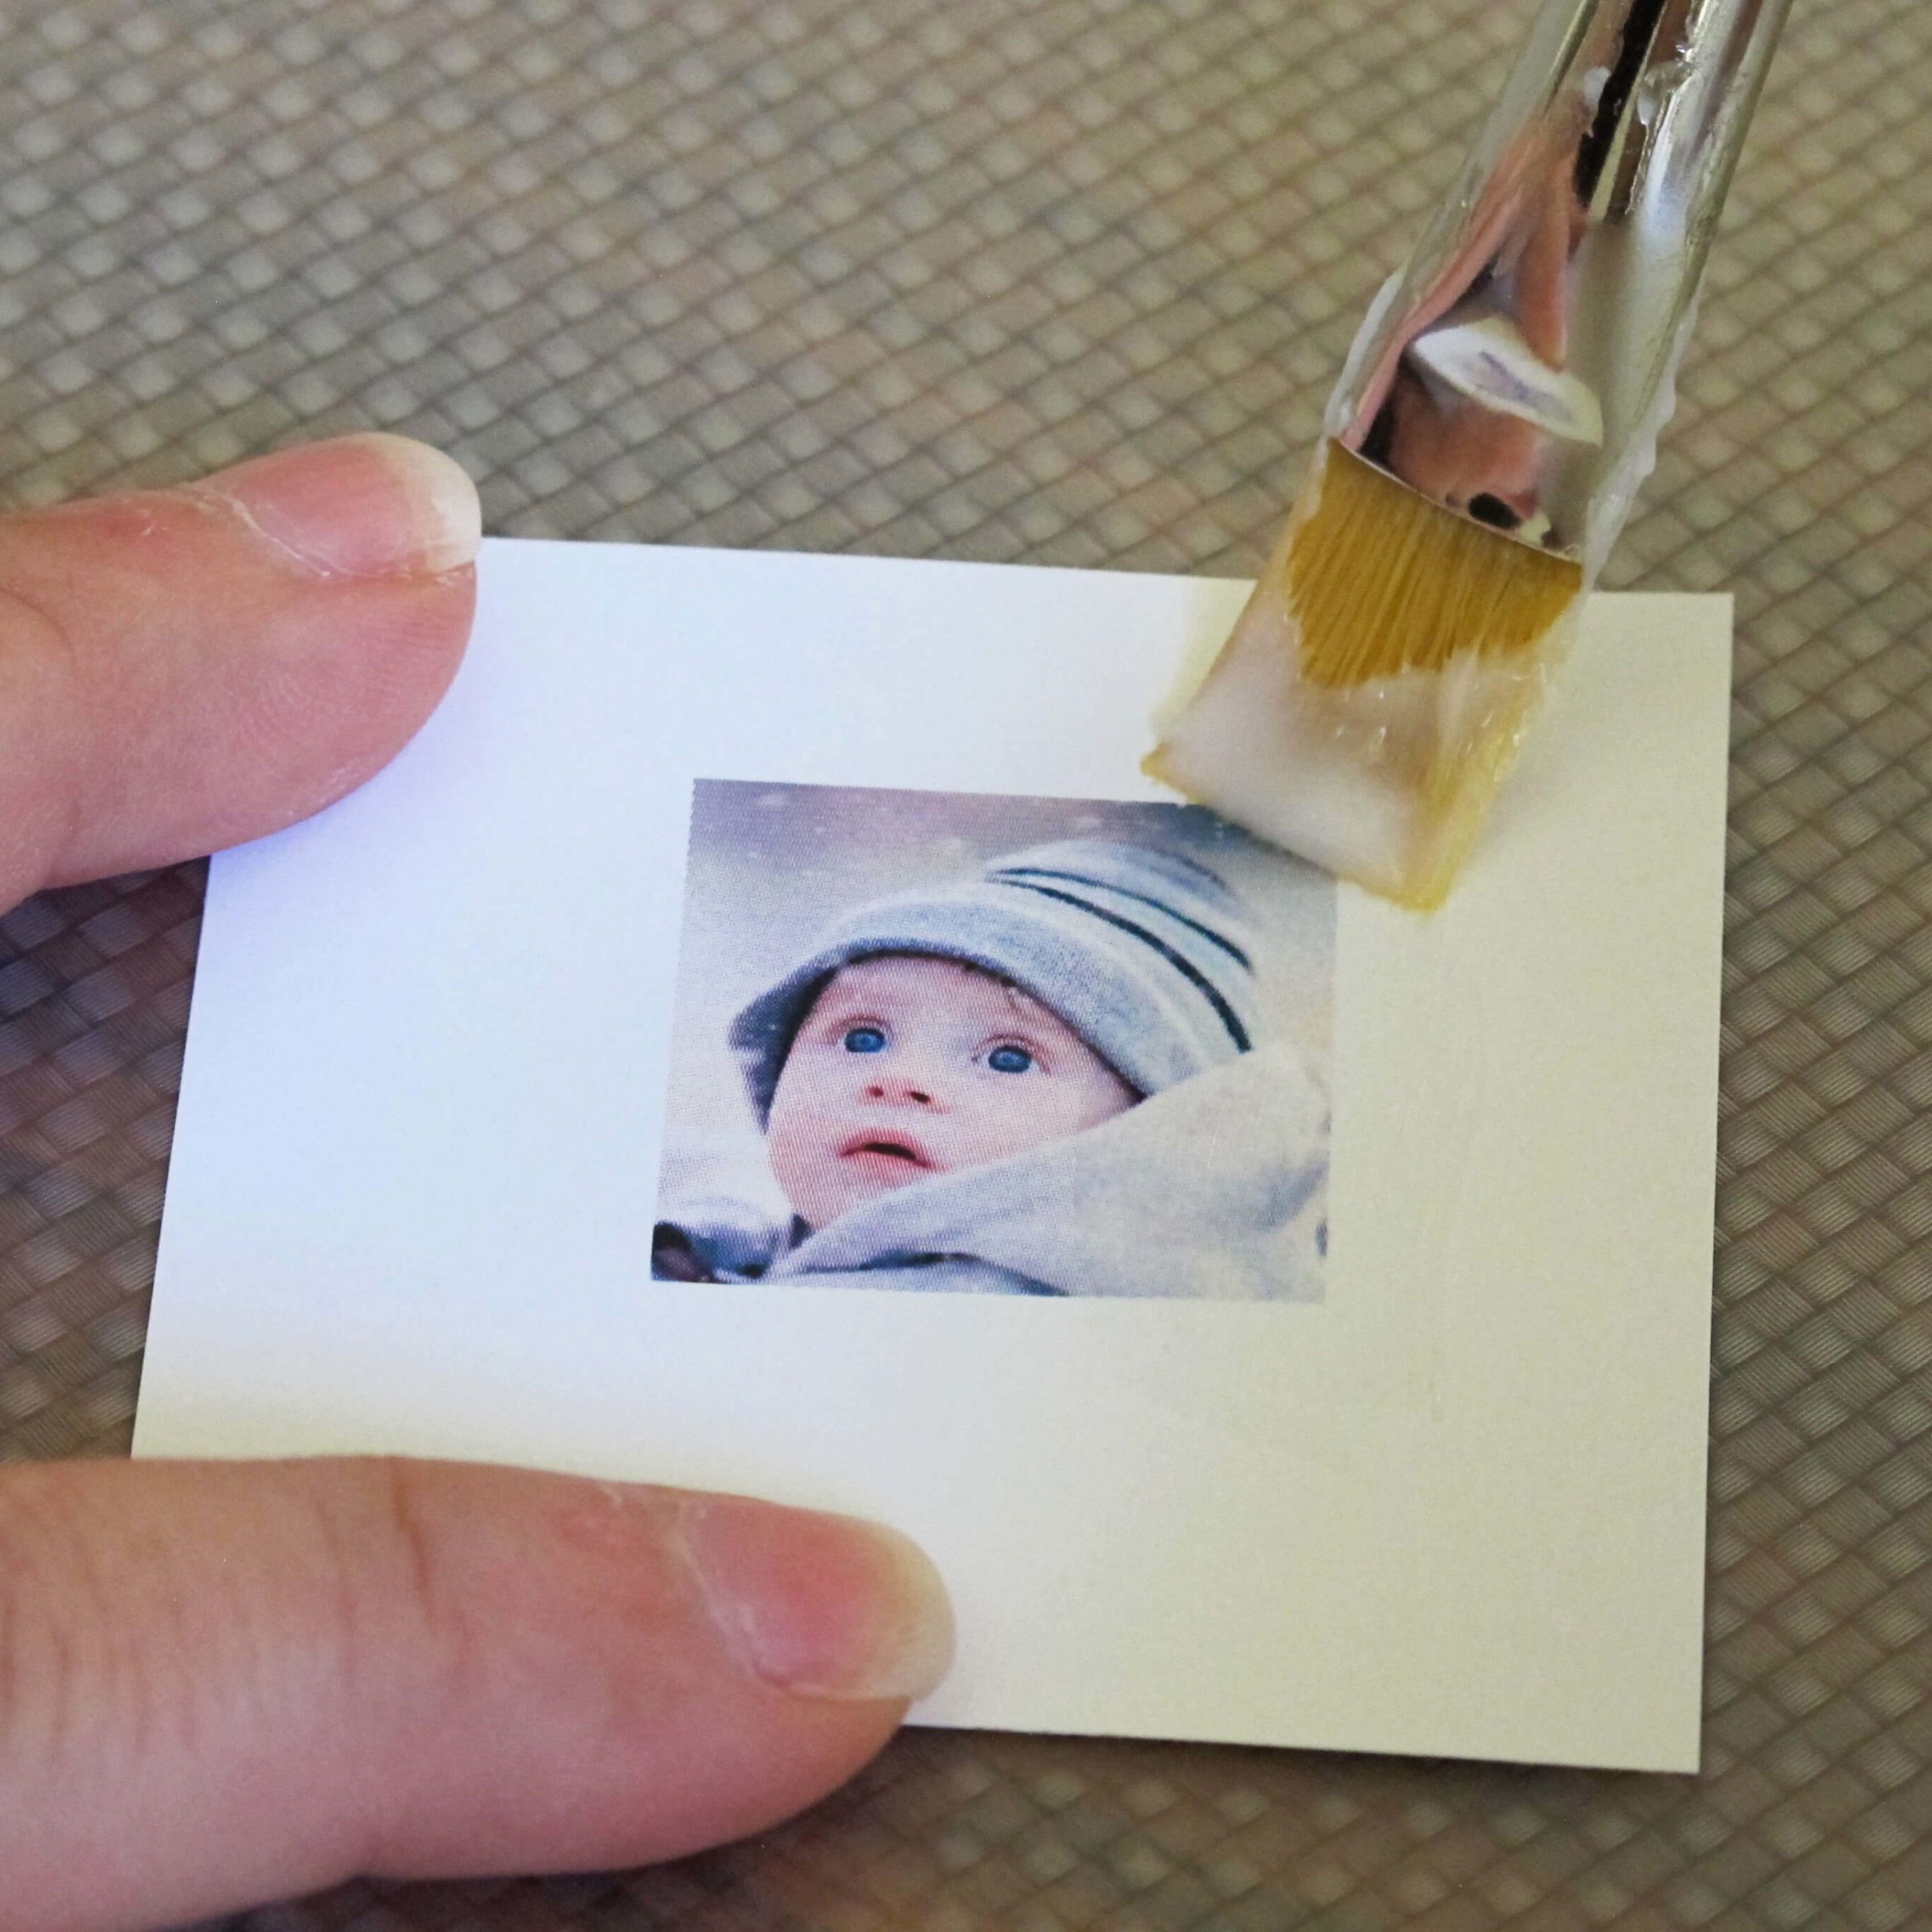
Option 1: Apply glue.
Use a paintbrush and clear drying glue to apply at least two coats to your papers. Be sure to also apply glue to the edges of your papers. Allow the glue to dry completely before including them in resin. This may be a couple of hours but can take a couple of days if you’re living somewhere humid.
If your papers are not fully dry, and you put them in resin, they will absorb the resin. This can cause moisture stains on the paper. And we definitely don’t want that!
And you don’t need to worry about the brush strokes the glue makes. They’ll disappear when you add your epoxy resin.
Here’s how you can prep paper for resin using glue:
Option 2: Apply tape.
If you don’t like using glue, or hate waiting for the glue to dry, you can use packing tape or any kind of clear tape you can find. (Guess who said ‘Waiting is the Hardest Part?‘)
Apply clear tape over the front and back of your papers, so they overlap. Trim the edges of the tape as necessary but be sure to leave a tape margin. You want there to be a tight seal to prevent the paper edges from being exposed and wicking in moisture. This can ruin your paper or photo.
Here’s how to seal paper for resin using tape:
Option 3: Use a Spray Sealer
Pop open windows or craft outside. Fresh air keeps the crafting brain happy.
Holding the sealant spray like the Excalibur, anoint your paper evenly. Not too close, not too far – Goldilocks style. While you’re letting the first layer dry go grab a snack, do a dance, or start plotting your next crafting conquest!
Flip it and repeat. Two coats are better than one. Think of it as double armor for your papery pal. Let your paper achieve ultimate dryness. No rushing art!
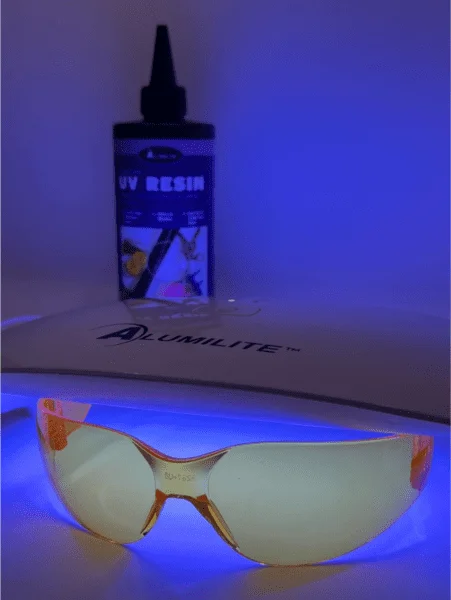
Option 4: UV Resin (Updated and new favorite!)
Now this is where things can get crazy. I have found the easiest and best way to prepare your paper for resin. Drum roll please……….Using UV resin!
You heard that right! UV resin is perfect for sealing your paper and adding that epoxy layer on top all in one step. No prep needed!
Grab your UV resin and add a small amount to your paper straight from the bottle. Apply a thin layer to avoid uneven patches and make sure it is completely covering your paper. Place your paper under the UV light to cure. Viola, you have cured, covered, and completed your paper!
Why Stop There? Get Creative!
- Try combining different paper types for a collage that tells a story.
- Seal and resin old letters or postcards for a trip down memory lane, but in 3D!
- Create bookmarks that can survive a coffee flood. Handy, right?
Pro tips when using paper for resin projects:
- Test the sealant on a similar paper scrap first.
It’s like a mini dress rehearsal before the grand premiere.
- Print on “very bright white” paper (brightness of 96 U.S. or above).
The colors will come through much brighter than on a standard copy paper.
- Use a color LaserJet printer instead of an inkjet printer.
The colors are crisper, and they don’t smear when applying glue. If you don’t have a color LaserJet printer, you can go to a copy store. They can print these pages for you on a LaserJet printer for a small fee.
Mission Accomplished!
And there you have it, fellow adventurers! You have sealed, geared up, and prepared your paper to confidently take the resin plunge. As you embark on your resin journey, remember: the world is your oyster, and the paper is your pearl. Go forth and craft something that makes your heart sing!
What if I told you that making resin crafts could be easy?
It’s why I wrote the ebook Resin Fundamentals. Learn from my 17 years of resin experience instead. You can read this PDF book today and feel confident you won’t be making costly mistakes. It’s the book I wish I had when I started.
Unpublished Blog Posts of Resin Obsession, LLC © 2023 Resin Obsession, LLC
I purchased very high quality paper. And I take it to Staples and or office depot with my USB and just ask them to print out the pics and or images that i want printed out on there laser printers..for about .25 to .50 cents a sheet. I then coat them with mod podge once on each side. Instead of 4 to 5 times. Also the picture is so much more crisp with a laser printer. It’s worth the extra time that save coating with mod podge so many times.
I print my own artwork and cover tiles I’m having trouble with finding a tape that doesn’t take the print off any suggestions
I don’t know if anyone has thought to use a laminator. I have a project on the go and that’s what I am going to use, unless someone can tell me it doesn’t work
Hi Brian, I laminator works great!
Hi, brian.. I used it.. it’s way better than tape 😂 i used it to make photo keychain resin.. after cutting the photo to the exact size, laminate them and cut the edges then I used uv resin first because it fast dry.. after that I used epoxy resin…
That’s a great idea Margaret. Color laser jet printers are expensive and making copies somewhere else can help save on costs.
Hi Katherine,
My mother’s birthday is coming up, and I wanted to make her a gift this year. For various reasons, cherry blossoms hold a certain amount of sentimental value for her. As such, I was hoping to preserve some fresh cherry blossoms in resin for her- is this just totally unrealistic? If it is, I understand, but any help at all would be hugely appreciated.
Thanks in advance!
Hey Shawna you can buy a special powdered form of silica at any craft store. You cover your flowers in that and leave it for a day. Your flowers come out not only preserved but they don’t lose their color like regular drying does and it doesn’t make them super crispy. Plus it’s reusable! I preserve all of my flowers using this method and then they are ready to go straight in the resin.
Hi, I have been unhappy with the sealers I have used as they leave brush marks on the photos, even Mod Podge.
Help!
Kate,
Are you still seeing brush marks when you pour resin on top? I always see brush marks when I’m sealing my items, but because the glue dries clear, the clear resin fills in nicely and the brush marks go away.
The matte spray modge podge works great.. Also, you can envelope smaller items in clear packing tape, just be sure and seal the edges well and leave a tiny margin.. and try not to get fingerprints on the tape 🙂
I captured a Northern Black Widow spider & wish to preserve it in resin. What is the best way to go about doing this? I’ve heard others say that the spider needs to first be sprayed with a sealer & then it will be fine. Others say it has to be dried out… But if it dries out it will completely lose its shape, which I don’t want. Please help!
Angie, we have a discussion about this on our forum: https://www.resinobsession.com/Resin-Jewelry-Making-Forum/5/How-can-I-……/Help-embedding-a-spider/125.html
I make origami figures from candy wrappers that are usually wax paper, and colored. I’m wanting to put them into small glass jars with resin inside to make miniature landscapes for them. What do I need to do, if anything, to prep the figures?
Hi Charles, unfortunately, I don’t know how well resin will work for this. Resin doesn’t stick to wax paper. This article explains more: https://www.resinobsession.com/resin-resin-resin/surfaces-resin-wont-stick-to/
Yep, I totally messed up a dragon fly trying to resin it.
I remember years ago my moehtr gave some man in our church an necklace that instead of a chain , it was a thick leather cord and the pendant was shaped like a cross but the cross was made out of nails that was driven in Christ hand. I found out that this necklace did in fact come from Israel. It was very unique.
hello!
I am casting resin for the first time…right now! haha and like always have not tried it on something that doesnt matter first…so we will see how THAT goes. I am casting a ‘whirly-gig’ or samara….it is dry and brown and i want it that way….do I still need to seal it with mode podge? or becasue I dont care about the color is it ok the way it is? I am casting it into a little shallow wooden frame…
thanks!
Kim,
I’m not sure what you’re referring to when you say samara, but I can tell you if it is porous at all to seal it. If you’re unsure, basically it comes down to whether or not the consistency and/or color would change if this item got wet. if so, then the answer is to seal.
To dry flowers, get drying crystals from a hardware like Ace, Home Depot, or Lowes. Advertised for use in closets or areas that become “musty”, you can take a wide container that has a tight fitting lid, put at least 1/2″ layer of crystals in it, lay the flower(s) on it, and carefully pour the drying agent all around, between petals, and covering completely. Be gentle so as not to bruise the petals. They should be ready in a very few days. Small flowers like cherry blossoms should take less than a week. Larger ones, or “juicier”, like roses, carnations or chrysanthemums take up to 10 days to two weeks. The drying agent may have to be “recharged” afterward before using again.(It helps to get the kind you can dry in the oven to recharge.)
I found this out from my sister, who used the drying agent in her work, and I tried it on flowers. It would be much too drying for the spider mentioned!
Great tip Rhonda. Thanks for sharing!
Hello,
I would like to layer some of my pet’s ashes in resin but I am a little intimidated by the fact that the ashes are porous. It would just be a pinch and maybe a little sand from her favorite beach. Do you think this would work without ruining the resin and therefore the precious ashes?
Thanks!
Lesli, I haven’t done anything with ashes, but in talking with our customers, several of them have used ashes. I would suggest trying some test pieces first. Perhaps you can try with some wood ashes first? Sand also works very well with resin. Make sure it is completely dry before using it, as the moisture will inhibit curing.
I wanted to start making resin pendents of my art work which i pain in acrylic, what is the best way to (material) to make the resin pendants with my acrylic painting skill, should i be painting directly on to paper and than sealing it or should i make a laser jet copy of the original painting to use in the painting?
@Crystal, I would suggest making a copy of your original painting and printing those on paper. (It’s a great way to make many of that original you love!) If you wanted to seal one of your originals before including in resin, I would suggest trying our resin gloss sealer spray.
I have some rub on tattoos that I would like to use in resin. Would I seal them like I would regular paper?
Katherine I was just wondering when you do your resin jewelry with photos ….Do you print them out on regular good quality printing paper or do you print them on a good quality photo paper? I use Photo paper and use a sealant on it as well …But I was just wanting to know what you thought was the best on this?
Thanks Kathy Howington
@Kathy,
I have a professional grade laser printer and print them on super bright white paper. I think that does better to prevent ‘runs’ and protect the color versus photo paper.
I’m planning on making a photo frame keychain with craft sticks and laminated clip art. If I put the craft sticks into a frame, can the resin (mine is Gedeo epoxy resin) still leak out of the sticks?
Yes, if they are not sealed around the edges first.
Then how do i seal the sticks? If they are painted and had marker on them?
A clear drying white glue will work well.
Then how do I prevent the spill? And how can I make my craft sticks glossy and stuff proof?
You can apply a layer of resin to the top or a couple of light coats of sealer spray to make them glossy. I’m not sure what you mean by ‘stuff’ proof.
Then how do I prevent the resin from spilling out of the sticks and picture frame if I want to make the picture look bevelled?
I would seal the edges of the sticks with a clear drying white glue. You could also use a 5 minute epoxy to do this as well.
I have PVA white glue. Can it be used to prevent the resin from spilling? Because I have no ideas and there are no things available in Malaysia!
I don’t know. I have not tried that kind of glue.
Is it okay to put resin onto laminated images?
Yes.
thanks for info..
thanks info..sharing to creat page
I’m lucky enough to have access to a freeze dryer at work which is pretty good at drying petals. Another tip from a chemistry lab could be to seal the blossoms in an airtight box with a dessicant such as silica gel. The seal will need to be good so you can add some vaseline around it or similar. This will mean you don’t have to flatten them as with pressing. You could also try a dehydrator at about 40 deg C.
You know how you use transparency and won’t have to seal? I wonder if you just laminate it….. lol would it work??? I’m going to test it.
We can make bowl of resin by using decorating dry flower and can use some sparkle if want cause sparkle looks amazing
Question…. would I seal drift wood the same way? I work with wood…. or would a spray sealer work of polyeuethane?
You need to seal the wood first, but this isn’t my area of expertise. I’ve also heard woodworkers talking about using cactus juice.
I am becoming artist inspired by Bob Ross & others on Twitch & learning of mod podge, which will use after then maybe white pain on old white formica cabinets facing, but wood foldable tables top use resin when get 50 off at Michael’s, cuz expensive in my opinion for me a poor person. I am glad in my 1st search that I found this article, so now I know more & exactly what I needed clear & precised instructions. My lucky day finally. Lol Thanks.
I’m so happy to hear we could help you Lily. 🙂
What if you wanted to resin coat an 8×10 photograph. If you tried to tape up the photo, you will see lines from the tape from the different strips of tape. How can you seal an 8×10 photo? Or even a 5×7 photo for that matter.
Hi Rob, we have an article on how to do that here: https://www.resinobsession.com/resin-tutorials/how-to-resin-a-photo/
I am trying to make an epoxy tumbler with old comic books. How is the best way to seal the comics to preserve color since they are thin like newspaper? Please advise.
I would use the ICE resin paper sealer. You can find it in our store here: https://shop.resinobsession.com/collections/tools-and-supplies/products/ice-resin-paper-sealer
I used a roll of clear sticky school book cover. No lines to deal with.
Can I use a picture of a loved one
Sure! That sounds like it would be a beautiful project.
Some fabulous tips here. I’d thought about mod podge but hadn’t tried it. I’m going to try PVA (or school glue/Elmer’s I think it’s called elsewhere?) To see if that also works. Has anyone tried clear nail polish or spray varnish?
Late to the party but that’s ok…. I just got some pretty scrapbook paper at the dollar store AND they had Mod Podge 👍, so I will be trying this soon! They also have totally clear school glue now, also super cheap,, which would probably also work. I’m going to try both and see which turns out better. Thank you for another great tutorial ❤ I had a lot of silver pendant blanks just sitting around waiting for the perfect project LOL
P.S. just don’t do what I did initially and accidentally glue your paper to the wax paper! It was stuck good…think I overdid the Modge Podge a bit, lol
Can I color a coloring book page or image then resin it to make a charm or something with it? If so, what can I use to color the page?
Hi Becky, yes, you can do this. Inks work best.
I want to use watercolor paper in the bottom of an acrylic tray. I think lamination would be best, but do I need to use adhesive to stick the art to the tray before using resin?
Thanks in advance.
Yes, Janice, you do. This one will work: https://shop.resinobsession.com/products/mod-podge-water-based-glue-sealant-for-resin-items
When I want to seal something I am using in a project, I use a spray Gloss Paint to seal the paper. I have an inkjet printer and this seals the ink and the paper. I usually spray it two times. Make sure not to saturate it in the spray as the ink will run and ruin it. This has worked very well for my projects.