
Did you know that you can use various surfaces for resin painting? If you look around your home, you probably have many available that you have never considered before. This article will discuss several substrates that you can use making epoxy art.
If you are new to resin painting, you might want to get started with this resin art beginners guide.
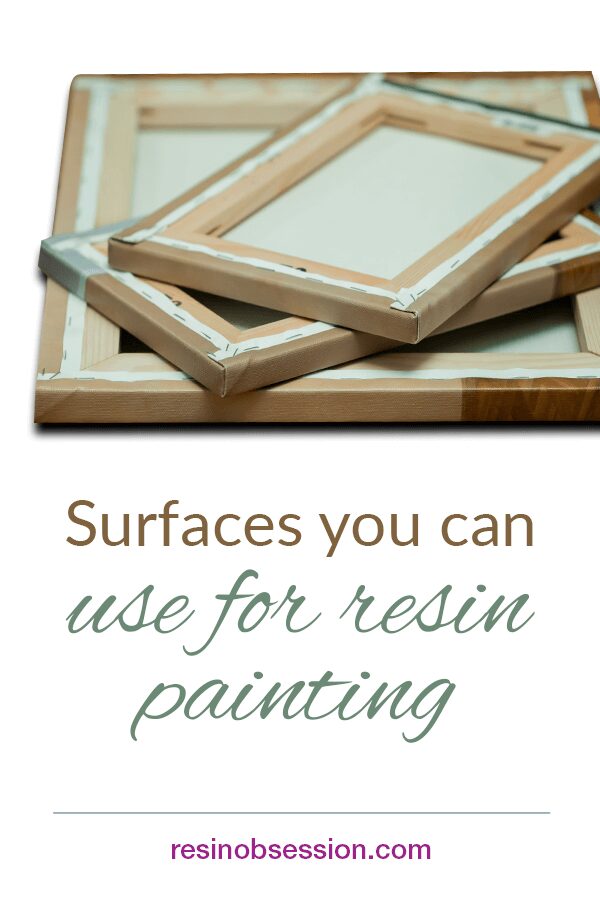
1. Canvas
Canvas is a great surface to paint with resin. They come in a wide range of sizes and are pre-primed and ready to use. I like to do test pours on small canvases ranging in size from 6 inches to 12 inches square. This is great for working out color schemes or experimenting with techniques or resin colors. I usually do them on small canvases because they are inexpensive.
Then, once I’ve tested different color combinations and the method, I will do a “true pour” on a larger substrate such as cradled birch or others listed in this article.
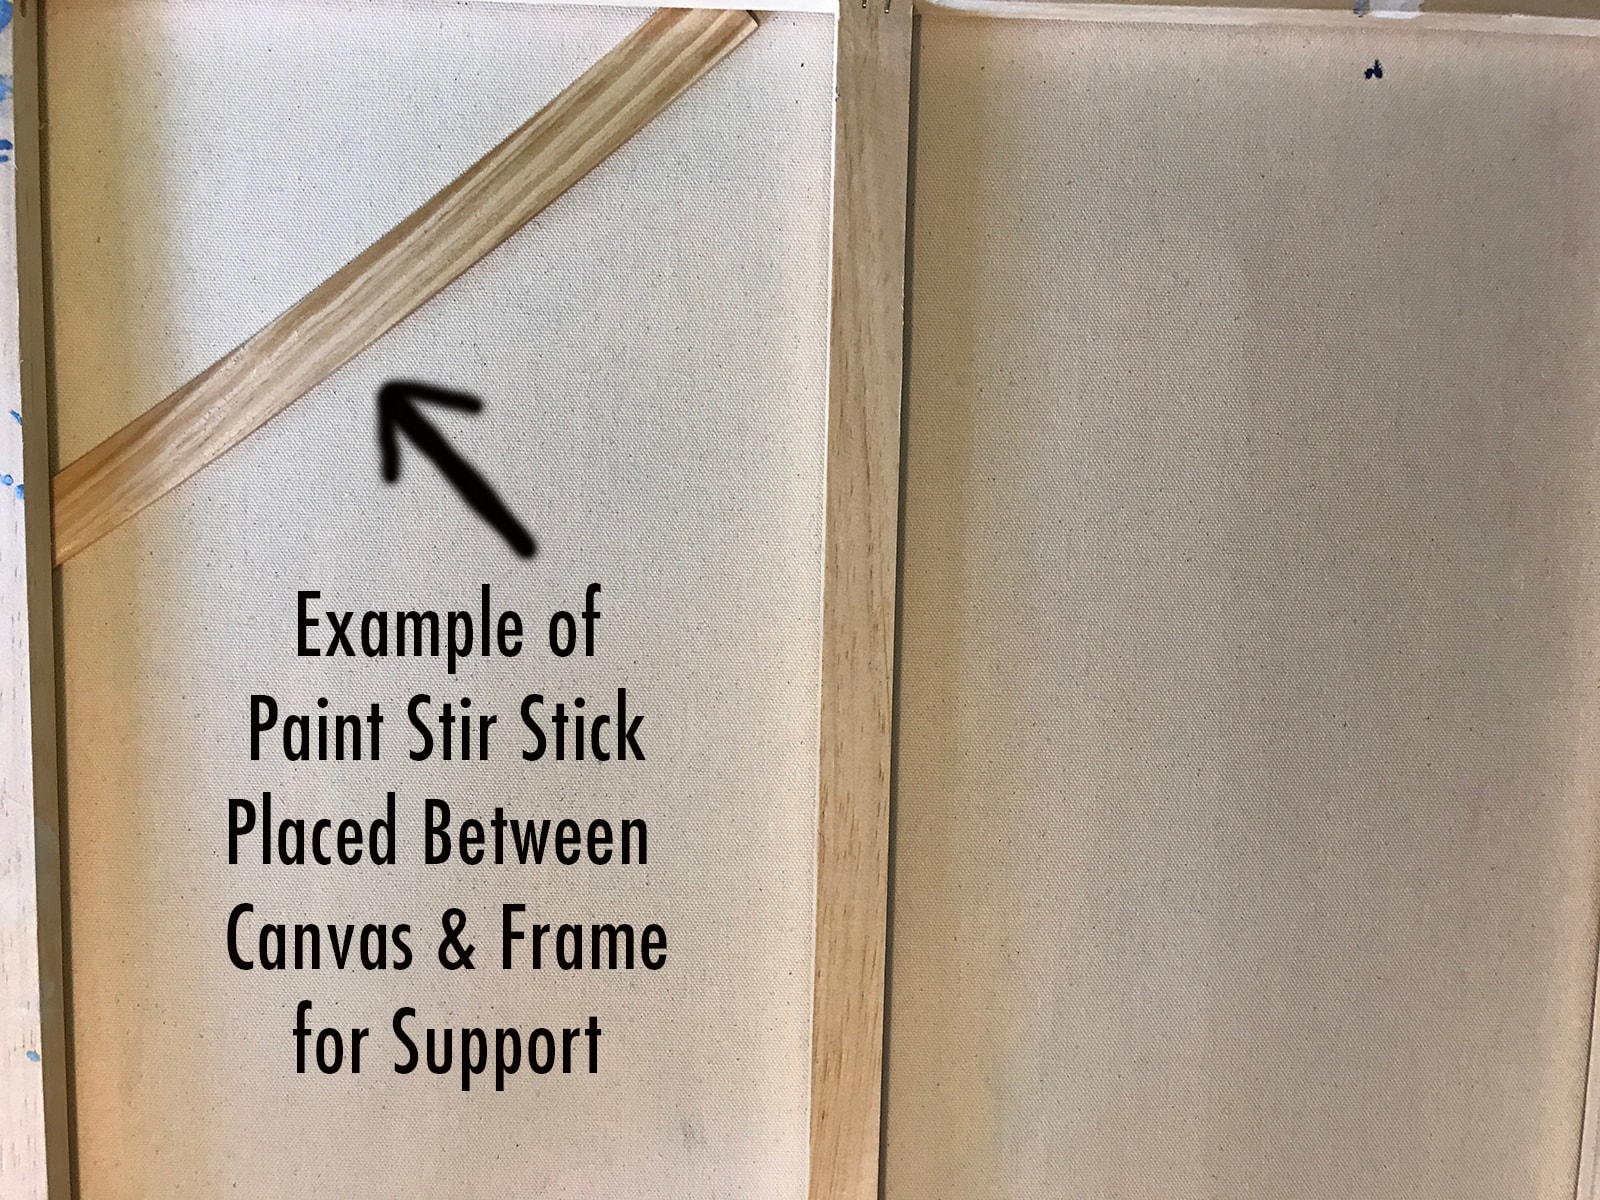
💡 Pro tip: If you use a huge canvas for your pour, make sure you have added evenly spaced support underneath. Failure to evenly support your canvas will pool resin because the canvas surface will not stay level.
Before painting with resin, use a spray bottle to mist water over your canvas. Allow it to dry completely. This will tighten the canvas.
To prevent sagging in the center, add extra support under the canvas before starting your painting. I have found that anything 24” x 24” requires additional support. On that size canvas, I place paint stir sticks between the canvas and the wood frame. Once the painting has cured, remove them.
2. Cradled Birch & Wooden Artist Panel
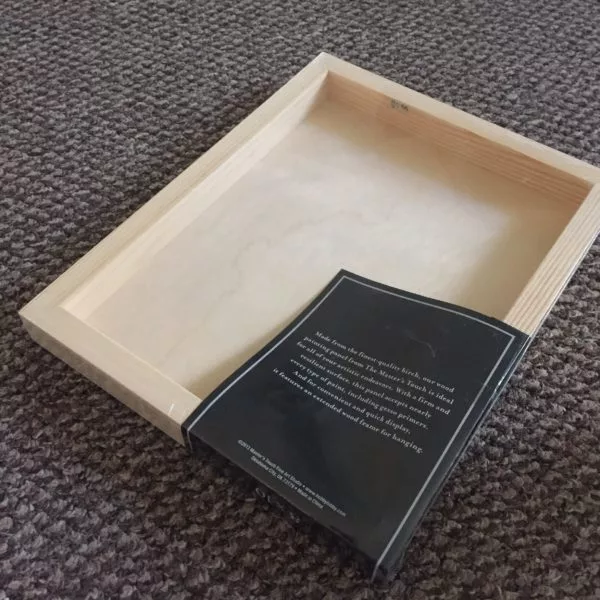
Cradled birch and wooden art panels are more expensive than canvas but still affordable. These wood surfaces are my preferred surface for resin painting because sagging isn’t an issue, and they are very sturdy.
The cradled birch and wooden art panels work so well because the wood substrate is framed with more wood. This is what prevents the wood from warping. If you were doing a resin painting on a sheet of plywood or a wood panel from the hardware store, your artwork would twist because it isn’t secured with the frame.
Priming cradled birch and wooden artist panels is a matter of personal preference. Primed boards make the colors pop because you’re pouring them on a white surface. If you use translucent resin colors in your pours, it is wise to prime your board before pouring. Otherwise, if you are painting with opaque colors in your resin, there is no need to prime the surface.
When pouring on cradled birch and wooden artist panels, you need to consider how you want the sides to look when the painting is complete. You have two choices on how to treat the sides of your substrate:
Allow the resin to flow off the sides
By allowing your epoxy resin to flow over the edges of the panel, your painting will continue to the sides. This look can be pretty stunning. Before pouring:
1. Put a thin layer of petroleum jelly on the underside of your substrate, starting at the edge and going inward about an inch. This will help keep the resin from curing on the underside of your painting.
2. After you finish, drag a popsicle stick along the underside to help remove the extra resin. You’ll need to do this several times as your painting cures since resin for art continues to self-level as it cures.
3. After the resin cures, use a cloth or paper towel to wipe off the petroleum jelly and resin drips.
Tape off the sides
Taping off the sides of your substrate will help keep your sides clear of resin. I prefer to use two-inch wide flashing tape because it adheres to the substrate well. You can purchase flashing tape at your local hardware store. It is a stiffer tape made from aluminum and looks like regular aluminum foil.
You’ll need to apply the tape to your substrate so that it sits at least half an inch higher than the surface of your substrate. Use a plastic credit card to smooth the tape over the edges of your substrate. Ensure there are no wrinkles or bubbles and that the tape has firmly adhered to your substrate. The tape will keep the resin contained on the surface of the substrate.
After the resin cures, peel the tape off. You’ll probably need to sand the edges with extra fine-grit sandpaper to remove any sharp or uneven spots. You can either leave the sides of your substrate unfinished or paint in your choice of color.
3. MDF Board
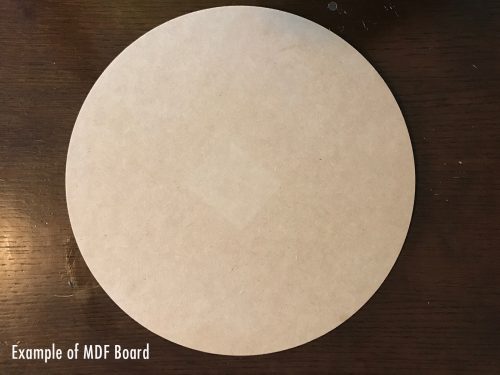
Medium-density fiberboard (MDF) is an engineered wood product and is generally denser than plywood. These make great surfaces for resin painting because they come in a wide range of sizes and shapes. They are relatively inexpensive and can be found at your local craft store and online. They require no priming.
Like with the cradled birch and wooden artboards, you can prime the surface if you wish for your colors to really pop.
4. Vinyl Records
Vinyl records make excellent substrates for small resin paintings. If you don’t have any packed up somewhere, head to your local Goodwill store. They often have entire albums or box sets for sale for about $1 each. You can also find inexpensive used vinyl records on eBay.
Tape the hole in the center to prevent resin from dripping through to the other side. I prefer to prime vinyl records before I start painting so that I am working on a white surface. Otherwise, some colors won’t show up as well against the black background.
Always put a thin layer of petroleum jelly on the outer edge of the same side as the tape. This will help keep the resin from sticking to the backside of your painting. When the painting has cured, wipe the petroleum jelly off the back with a paper towel or dry cloth. If you have any resin drips, trim with a pair of scissors or an Exacto knife.
If you use a heat gun or torch to manipulate the resin and remove air bubbles, do so carefully. Keep the heat at least 4 inches from the surface of your record, and avoid focusing the heat in one place for more than a few seconds. Too much heat will warp your record.
5. Tile
Tile is another of my favorite surfaces for resin artwork. You can use glazed or unglazed tiles. Both will work well. Regular white square bathroom tiles can be found at your local hardware store for about half a dollar each. Resined tiles make great coasters or trivets. They require no priming and make for quick projects as well as great.
So now that you’ve picked out a surface for your resin painting, what supplies do you need?
Check out our {FREE} downloadable guide that shares all the supplies you need for epoxy pouring.
Want more help getting started with resin painting?
Check out the ebook, Resin Fundamentals, written especially for beginners. Instead of wasting your time and making costly mistakes, learn the important details to make you successful with your first resin painting. Buy the PDF book now and get a download link to your email in minutes.
Originally written by Becky Wanamaker
Unpublished Blog Posts of Resin Obsession, LLC © 2024 Resin Obsession, LLC
Love the ideas you constantly come up with!
Regarding substrates, What about glass and plexiglass?
I don’t know. Let me see if I can have a couple others comment.
You can use glass and plexiglass as a substrate. I suggest tempered glass as a precaution though. Keep in mind that those substrates can be heavy once you add a layer or two of resin to them.
I’ve used resin on glass on several projects. Initially it adheres well with the glass but after about 6 months it starts to peel away from the glass.
Interesting. Is the glass changing temperatures at all? Like does it get really cold?
That’s what I feared because glass is smooth that it may peel off (over time) like how cured resin just peels off the plastic cups. I prefer not to use something smooth as a base because of that issue. But I only recently started on my resin adventure so there’s still plenty of experimenting!
how about a light sanding of the glass? just enough to break the surface of the glass. it seems it would give a little “tooth” to the surface and prevent peeling.
What about textured glass. Like the bottom of a round microwave turntable? It is tempered glass. Will the resin adhere and stay adhered to that?
Could you possibly spray paint the glass with a matte paint before putting the epoxy on it? That may give the resin something to adhere to as opposed to the smooth surface?
I have certainly used Plexiglass as a substrate many times in my acrylic pouring paintings. In fact that is my preferred substrate for them. I haven’t yet used Resin on them, though I am keen to try that on them, just haven’t plucked up the courage yet.
You could possibly use gesso with extra tooth before pouring resin.
Great tip about using petroleum jelly on the backside; this may solve a problem I’ve been having with my resin work. Thank you!
Mirrors are also great!
Where do you get the boards in the photo at the top of the blog post? I love those.
Sources for substrates the discussed are included in the article.
Je recherche la résine en 4 litre 1.2 et le gallon durcisseur ce que madame utilisé comme produit pour sa tablette en mélanine je suis pas capable de le
Commander direct en 4 litres svp
J ai besoin d aide à savoir qu elle compagnie est capable
De
Mem’ivrer ce
Produit et say elle prix je vien du Québec merci Josee Lebel
Nous ne parlons pas français.
I have 2 questions about using records…. If I were to create a resin art piece, what would I need to do about the hole in the center? Taping it up on face value doesn’t seem that it would hold up well long term.
What can I do to be able to mount it like a picture on the wall? Do I need to create something on the back of it for it to hang without fear of it falling due to the possible weight?
I am ABSOLUTELY a beginner. So much a beginner that I am in the research phase. I haven’t started painting or using resin just yet. But I am very eager to begin. Hopefully, I’ll be able to sell some of my pieces in the future. Thanks so much for taking the time to read and respond. Any links to sources I can learn from would be helpful.
I would tape the hole on the backside to keep the resin from running through. You can remove the tape after casting.
If I wanted a piece that didn’t showcase the hole, what would you suggest? I’d like a flat surface. Maybe adhering a piece of thin balsa wood or something a bit more sturdy on the back side?
Are you not wanting people to notice a divot for the hole? If so, I would use a little bit of a quick cure epoxy to fill the hole. Once that is cured, apply resin with your desired colors.
I also am a complete beginner and am interested in making jewelry and other items. I don’t know if resin is used for mixed media wall hangings but would appreciate any advice as to where I should start. I believe getting books would help with more information so that will be my starting point. Also any websites, shops, blogs, etc that you may recommend would be helpful. Thank you so much. I could not publish without filling in website space. My website is pending.
Hi Eva, we have an entire shop of supplies to help you get started: https://shop.resinobsession.com/ Since you are new to resin, I would also recommend a copy of my book, Resin Jewelry Making. It has a lot of good beginner advice to get you started. https://shop.resinobsession.com/collections/books/products/resin-jewelry-making
Hi I’m wondering what Resin to use to cover pre-painted (Acrylic) coasters or Lazy Susan’s that will with stand normal heat from dinner plates or coffee cups. Thanks in advance and love your very informative site. Also what do you use on Records to hang them up if hole is covered in Resin. Cheers
Jax
Unfortunately, I’m not aware of a resin that will withstand the heat of a hot plate. 🙁 To hang a record that has been painted with resin, I would suggest attaching a picture hanger to the back.
FX Epoxy I just read about. It can withstand up to 500 degrees 🙂
Thanks, I’m excited to get started with resin. 🙂
I’m new to Resin, but learning. I’m also a Potter (20 years exp.), and it’s good to hear that Resin will adhere to both glazed and un-glazed Pots. When first seeing Resin Painting, I immediately thought of using it on my large Urns, but haven’t tried it yet. I will now, on smaller pieces. Yay!
I would love to see pieces you have created using urns or pottery. I am thinking fo using antique jewelry and pottery as base pieces in art research phase thank you to Katherine for this awesome site Cathleen
Hi have you any idea why my resin is not sticking to the sides?
I did prime with white paint?
Love your idea about the Vaseline!
Thanks trish
What kind/brand of resin are you using?
Can I use it on cedar or cypress wood I have some very unique pieces that I want to make a desk and table out of
Yes, I would expect that to work.
Hi. Great article. Re MDF Board, what thickness is the norm for acrylic painting, resin painting etc. there are a few thicknesses. Thanks.
One-half inch thick is what I like to use.
Hi, I am a collage artist and have several pieces that I have added a layer of cutout matt laminate on top of glued papers. I am wanting to resin all over so was wondering if the resin will be ok ontop of the matt laminate.
Yes, I would expect it to do fine.
What about laminate furniture? Like ikea or Walmart fake wood things? It has that glossy finish to it?
Hmm. I haven’t tried that. I worry that resin will peel off the surface though.
I have quite a few “laminated” boards from an old shelf that I use under smaller projects ts such as trays, and whatnot. I can assure you, the resin does NOT come off easily. In fact I have yet to be able to get any of the cured resin off. Now, I have purposely poured resin on the same laminated wood(particle board) and used them for other shelves and they look amazing. No worry of peeling(even when using silicone in the colors to create cells) p.s you don’t have to use silicone oil, you can get away with silicone lubricant spray, just a squirt or 2 per color works great. I have used many different brands of resin as well and it works in all of them.
I’m new to working with Resin. I am wondering if I can use tiles made from clay and covered in a resin design as tile for my back splash and other tile projects typically made with commercial tiles? Or cement covered with resin tiles? I hope you say yes!
Hi Amy, yes, you can do this, but I can’t comment as to how well they will hold up to ‘kitchen wear’ like grease, cleaning products, etc.
For a wood panel or circle, what is the best thickness to use?
Thanks!
I think a 1/4 inch thick works well.
Do you have any problems with warping? I have had my 1/4 inch warp and it is rather disheartening. I find the 1/2 inch to be pretty heavy.
Are you referring to MDF? or something else?
And how do you then mount the art?
If you are pouring onto something like a canvas or artboard, there will be hardware on the back for mounting.
Can I use resin on aluminium,
Yes. Make sure your surface is clean and the resin should adhere without any problems.
Another Question, as I do very Large pieces on canvas. Do you think that if I did a epoxy on the reverse side of the stretched canvas that it would then give me the strenght to hold a resin painting on the front side of the canvas?
I wouldn’t try that only because it would add a lot of weight and expense to your artwork. Perhaps there is a way to brace it from the back like using the paint stirring sticks shown in the article?
I have tried round thick table tops from home depot, looked great but warped the next day, once it was laid flat on a suface it straightened out.
Ok!! Sometimes I make skins out of acrylic paint applied to freezer paper. If I where to put the freezer paper onto a canvas and paint or pour onto that, let dry and remove from canvas can I apply resin to the acrylic painted freezer paper????😬
Resin won’t stick to freezer paper.
I’ve carefully peeled the skins off the freezer paper, mod podge (or glue) it to a substrate and then pour resin. Looks great
I poured resin on a canvas and it didnt fully cure. I have spots that are still tacky/sticky. Can I pour another layer without sanding it first?
As long as it’s sticky and not gooey, then the answer is yes.
Hi Katherine. I have done an acrylic pour over canvas and would like to Resin it, however I have read in a couple of different places that over time it will warp if I put resin on. Is that true?
That has not been my experience provided the board/substrate the painting is on is strong enough to hold the weight of the painting and the resin.
What kind of product and how is the best way to attach the hanging hardware on the back of a heavy 1/4 inch resin geode mdf piece.
You will need to find hardware that will support that weight. A shop that sells framing supplies should be able to help.
I want to resin placemats. What thickness of MDF would be best?
At least 1/4 inch.
Hello, how do I prep glass so Resin would stick to it permanently? Can I use modge podge first so resin would permanently stick to it? Thanks much 🙂
The glass needs to be clean and free of grease. Don’t use Mod Podge. Glass cleaner is better.
Can I pour resin on my hardy board?
Yes, except I don’t know how much air hardie board traps. You may find that it releases bubbles into your resin.
Try using a wood sealer. I’ve used two coats of wood sealer prior to pouring resin. Make sure you allow about 24 hours to dry after the second coat. It dries clear. You can find it in the paint section of your hardware store.
Try using a wood sealer. I’ve used two coats of wood sealer prior to pouring resin. Make sure you allow about 24 hours to dry after the second coat. It dries clear. You can find it in the paint section of your hardware store.
Ok. Thank you 🙂👌
My family has a roofing company & we have alot of flat slate stone pieces that can be shaped into any shape & size but they are very heavy, so i recently started using a faux slate (its more like cement or a hard plastic but textured like slate) so resin adheres well to it. Its inexpensive, but dont know where you can buy it except going to a roofing company & asking them for their extras! Theres so many options at businesses that use many types of material for their own business & throw out great pieces to be used by us!!
What should I use to prime the wooden panels?
I like to use a simple white primer when I prime my panels.
Thank you for your answer. So is it ok a water based primer?
Thank you for the valuable information. I would like to know how to go about using left over Laminated Wood planks from flooring for Resin art. is it advisable, if so how to I prepare the laminated wood planks? Thank you in advance
Hi Shen, I haven’t done this. I’m afraid I don’t have any advice to share.
Hi! I have taken vinyl ‘wood’ flooring planks and cut them down to coaster size and poured resin on them, I found that if you clean them(wipe down) with 99% alcohol the resin sticks beautifully. I have also used larger scraps as substrates for resin art. Same goes for ‘pergo’ or laminated fake wood flooring panels.
Can I use plywood or chipboard for a large resin pour would it be durable for hanging the piece
You could, but I would expect it to be quite heavy. You will need strong reinforcements and brackets to hang it.
Hi I have a quick question- is there any substance that can be added to resin to thicken it up? I’d like to tint the color of the resin and have it flow over a vertical surface so it looks like molten lava.. any ideas? I’ve tried a couple times and it looks great at first and then slowly flattens/ levels off and makes a big puddle on the bottom
Hi Leah, you can use a thicker mixing resin, or wait until closer to the end of the pot time to pour it. This article explains more: https://www.resinobsession.com/resin-tutorials/resin-waterfall/
Do you know how Resin stands up to humidity? Is it more tolerant of humidity than paper would be? I am assuming so, but would welcome some comment.
Hi Anja, fully cured resin should weather well with a lot of humidity.
Hi Thanks for all the info. I’d just like to clarify, if I were to use pine plywood and build a cradled frame for it, would that stop it from warping? I’d also seal it with a primer like killz. Would that do the trick or is birch plywood the only one I could use? Is pine an absolute no no?
Hi Kayla, I haven’t tried pine, so I don’t know how well that would work. Yes, Killz primer will work for this project.
Hi,
I am looking for a resin artist to do my countertops. I live in Florida. Any suggestions please. Thank you
Can you pour resin on cork?
You can Eva, but I would expect the cork to release so many bubbles that it would be hard to get them all out before the resin starts to cure.
Any recommendations for flashing tape? I’ve never used it before and I’m swimming in a sea of different brands!
What about metal?
Hi Haley, yes, you can use metal as a base for resin artwork, but it can get heavy once the resin is applied.
I need to make a very large resin wall piece (80x 200cm) as far as I can tell I will need a wooden panel that is framed to prevent it from warping – but I’m having difficulty finding wooden art boards in general, let alone one that size. Any ideas on this? Or a website I can order it from? I basically just need a wooden substrate that won’t warp
Hi, I want to do resin art work on my round glass table top, could you please advise me its steps.