
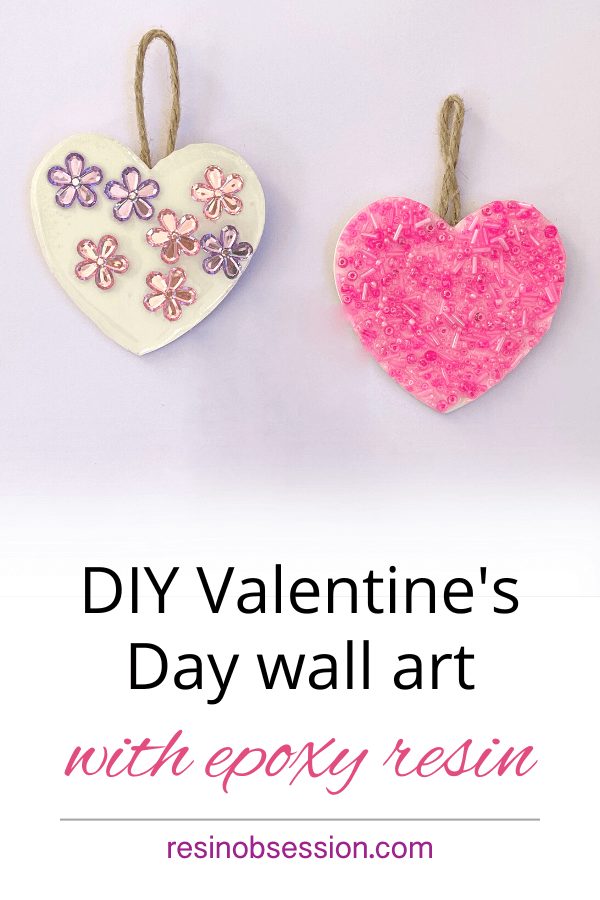
So you’re looking for Valentine’s Day crafts to make. And you want craft ideas you can DIY with the wooden heart pieces you already have. (Because any committed crafter squirrels away supplies for those what-if moments.)
But you also want something easy.
What if I told you that you could have all of those with epoxy resin?
Even if you’ve never created with resin before.
I’m going to show you 3 craft ideas to use your wooden heart collection to DIY Valentine’s Day wall art.
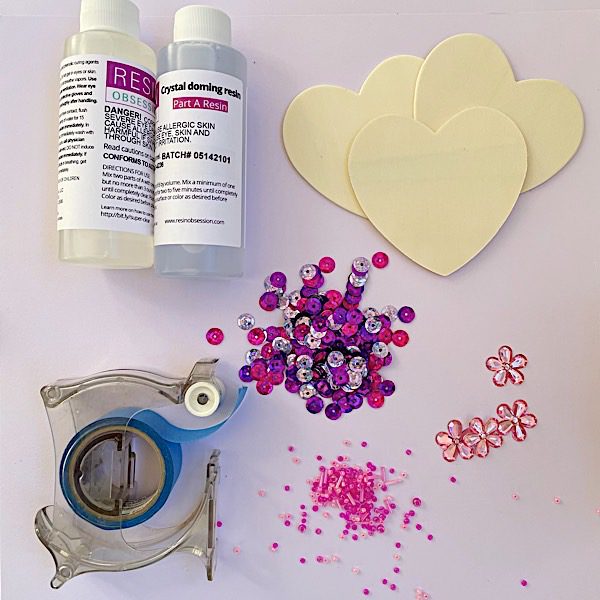
Supply list:
Wooden heart cutouts
Primer
Resin Obsession crystal doming resin
Mixing cups
Stirring sticks
Protective gloves
Assorted beads, sequins, gems, or other cute charms
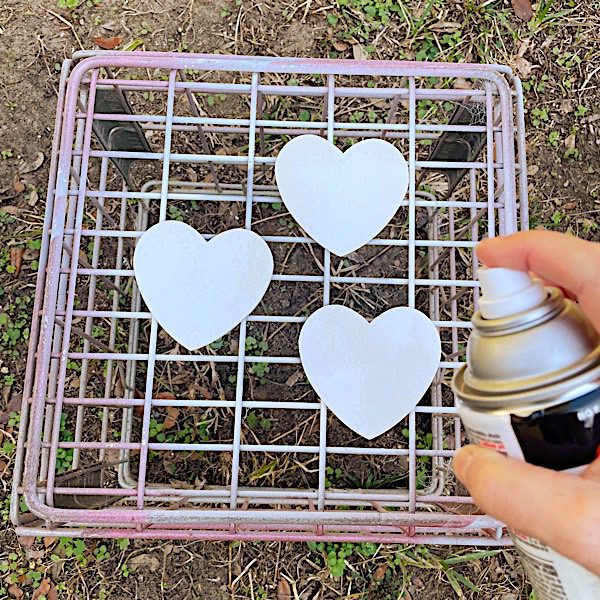
Step 1: Paint the wood
Because wood can release bubbles into resin, you need to prime it first. My go-to paint color is white because it helps the colors you put on top of it pop.
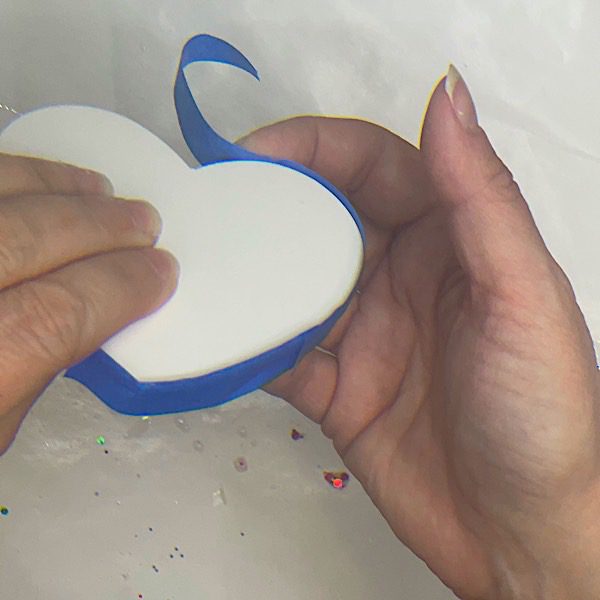
Step 2: Add painter’s tape
Add the tape to the edge of the hearts. The edge can resin a little above the wooden heart edge, so it acts like a dam to keep the resin on the surface.

Once your tape is secure on the edge, prop it up on a mixing cup.
Step 3: Add resin and decorations
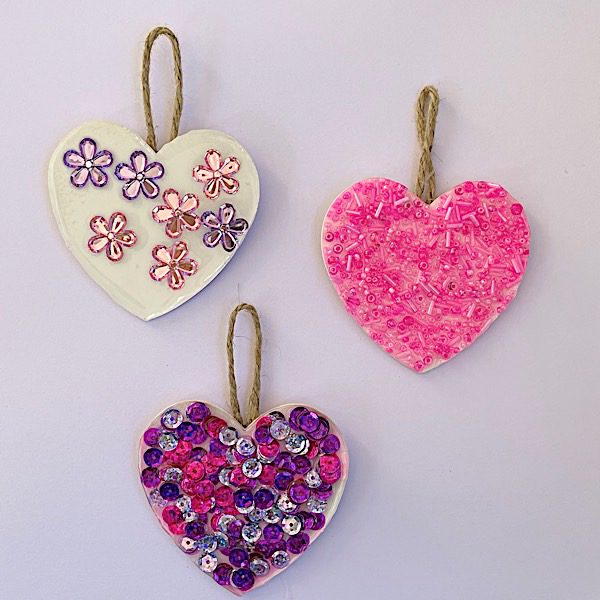
Here’s where you get to DIY your craft ideas for the wooden heart. Choose beads, charms, or something else that gives you the look you want. (Because matchy-matchy anything drives me crazy, I chose three different designs instead of making hearts that all look the same.)
Then, mix your crystal doming resin. Using that jewelry epoxy resin is important here because it mixes thick. It makes it easier for everything to stay on your wood surface.
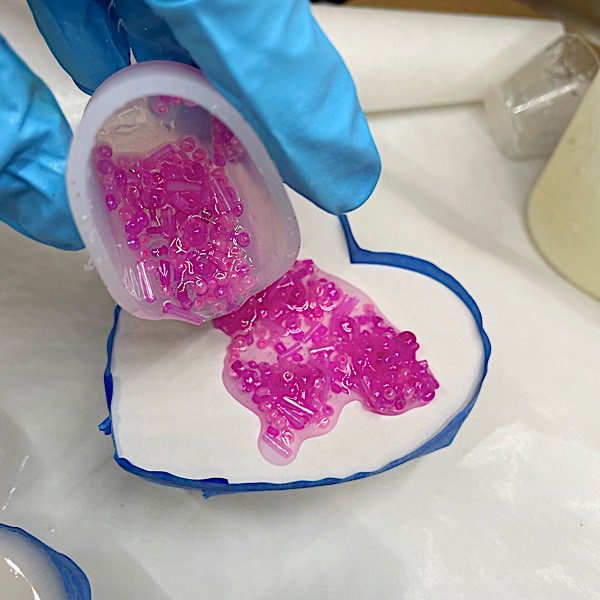
For the first heart, I added pink glass beads in different sizes and shapes.
💡 Pro tip: Mix your beads with the resin before adding them to the surface. That will help the beads release bubbles more easily.
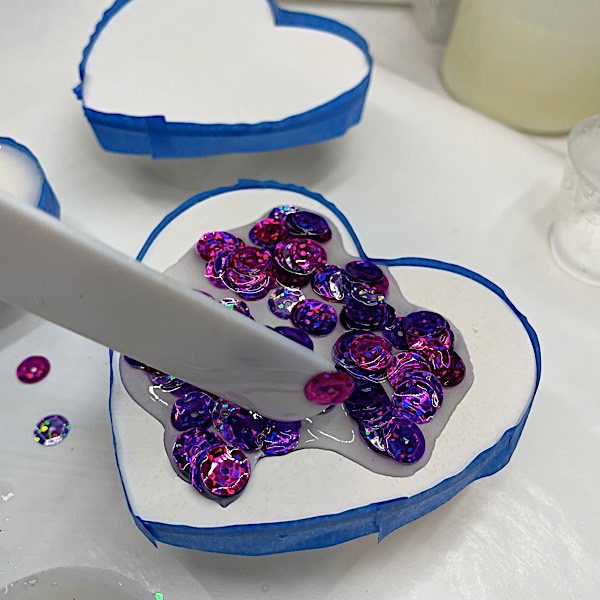
For the second heart, I used pink and purple sequins.
You can use your stirring stick to push the resin and shiny things over the wooden heart surface to help it spread evenly.
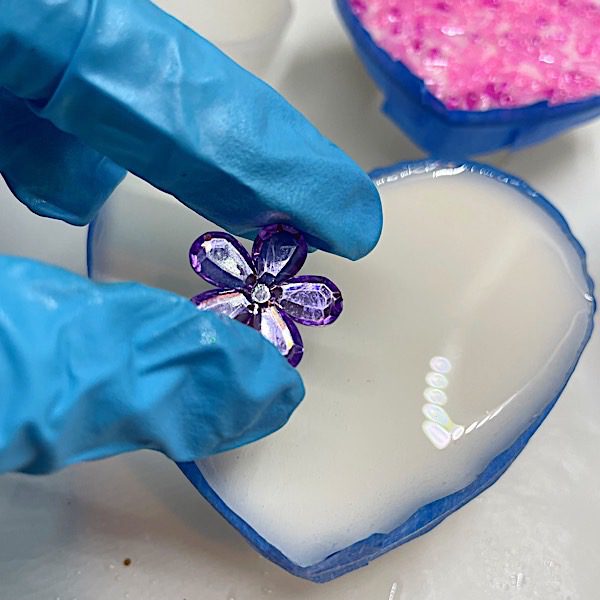
Or, you can add clear epoxy to the surface, and then add your charms. Which is what I did with these crystal flowers for the third heart.
Check for bubbles, then let the resin cure.
Step 4: Remove tape
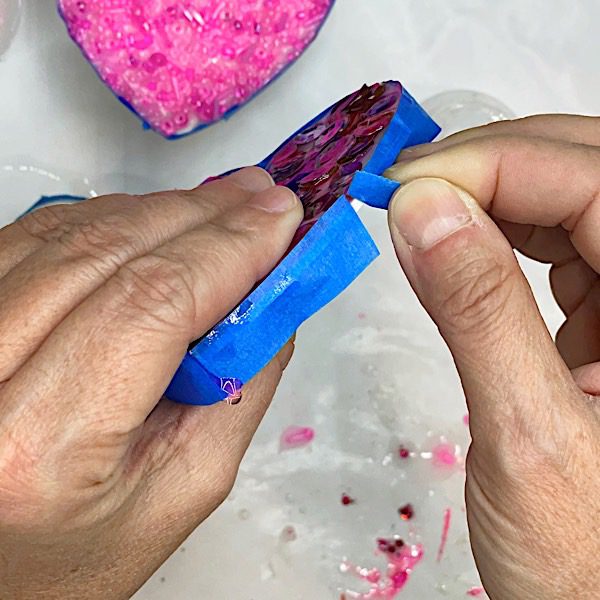
After the resin cures, remove the tape from the edge. Sand drips or high spots as necessary.

💡 Pro tip: If you remove the tape and find you have a resin edge, you can use scissors to trim the edge if the resin is still rubbery.

Step 5: Add hangers
Glue rope cord to the back of the hearts to hang them.
Ta-da! You just learned 3 craft ideas to take a wooden heart and DIY it into Valentine’s Day art.
You can hang them separately onto a Valentine’s Day tree (yes, that’s a thing). Or…
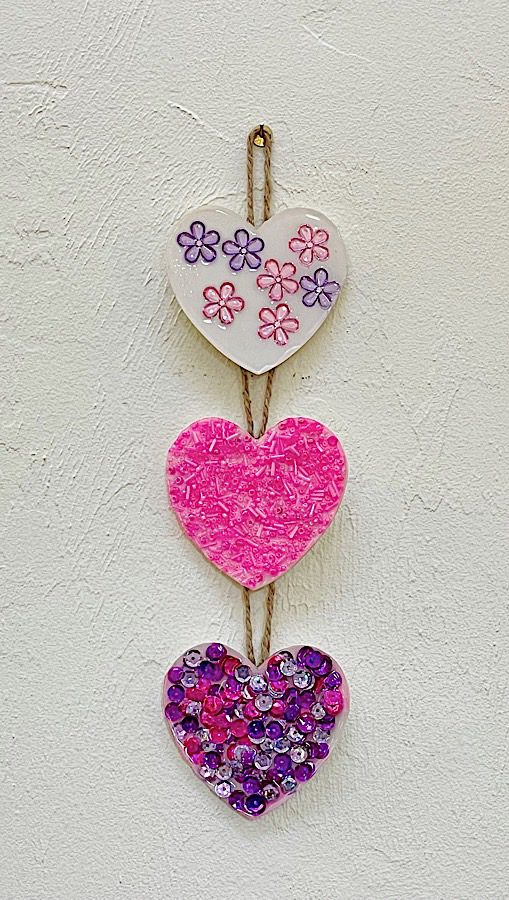
I hung mine together to put in my entryway. This would also be a quick way to decorate a wreath. This would look cute in a girl’s bedroom too.
Ready to learn even more about making epoxy crafts?
Then you’ll want the ebook, Ten Epoxy Crafts. You’ll get 10 creative ideas for crafts to make with resin when you’re looking for inspiration. Buy the PDF book now and get an email download link in minutes.
Unpublished Blog Posts of Resin Obsession, LLC © 2023 Resin Obsession, LLC