
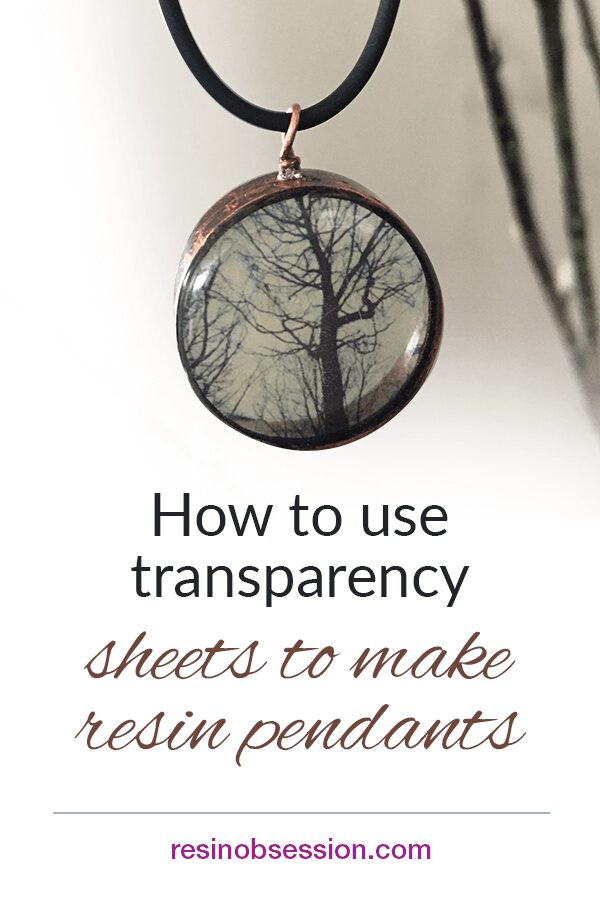
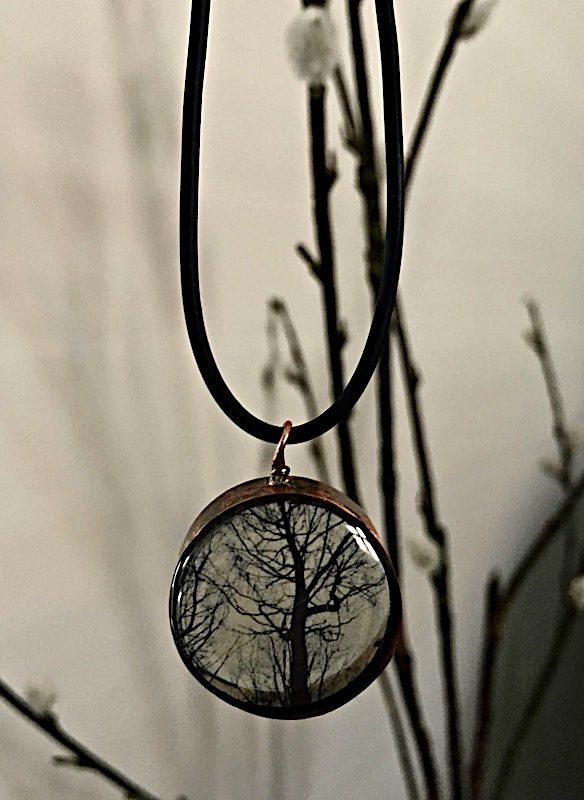
One of my favorite craft projects is creating transfers on different surfaces. Usually, this involves printing images on paper and then using a transfer gel such as Mod podge to transfer the image to a substrate such as wood, tile, or concrete. But, I discovered you could transfer an image to the resin with transparency film. I was surprised at how well embedding transparencies in resin worked! The final product is so much clearer.
💡 Pro tip: For the art, you don’t have to recreate the wheel. You can buy other artists’ work and use it when embedding transparencies in resin. Be sure, though, that you have the right to do that. If you’re unsure, ask.
RESIN SUPPLIES
• Resin Obsession Super Clear Resin
• Images laser printed on transparency film
• Open-backed bezels
• Masking tape
Step 1: Make your transparency image
Choose your images. You can use your own photos if you wish, but I bought these photos on Etsy. Then, I downloaded the pictures and took them to my local printer for laser printing on transparency film.
Note about printing for this project. I have an inkjet printer that I experimented with and found that the image did not transfer well. It’s best to use a high-quality laser printer to increase your chances of success with embedding transparencies in resin.
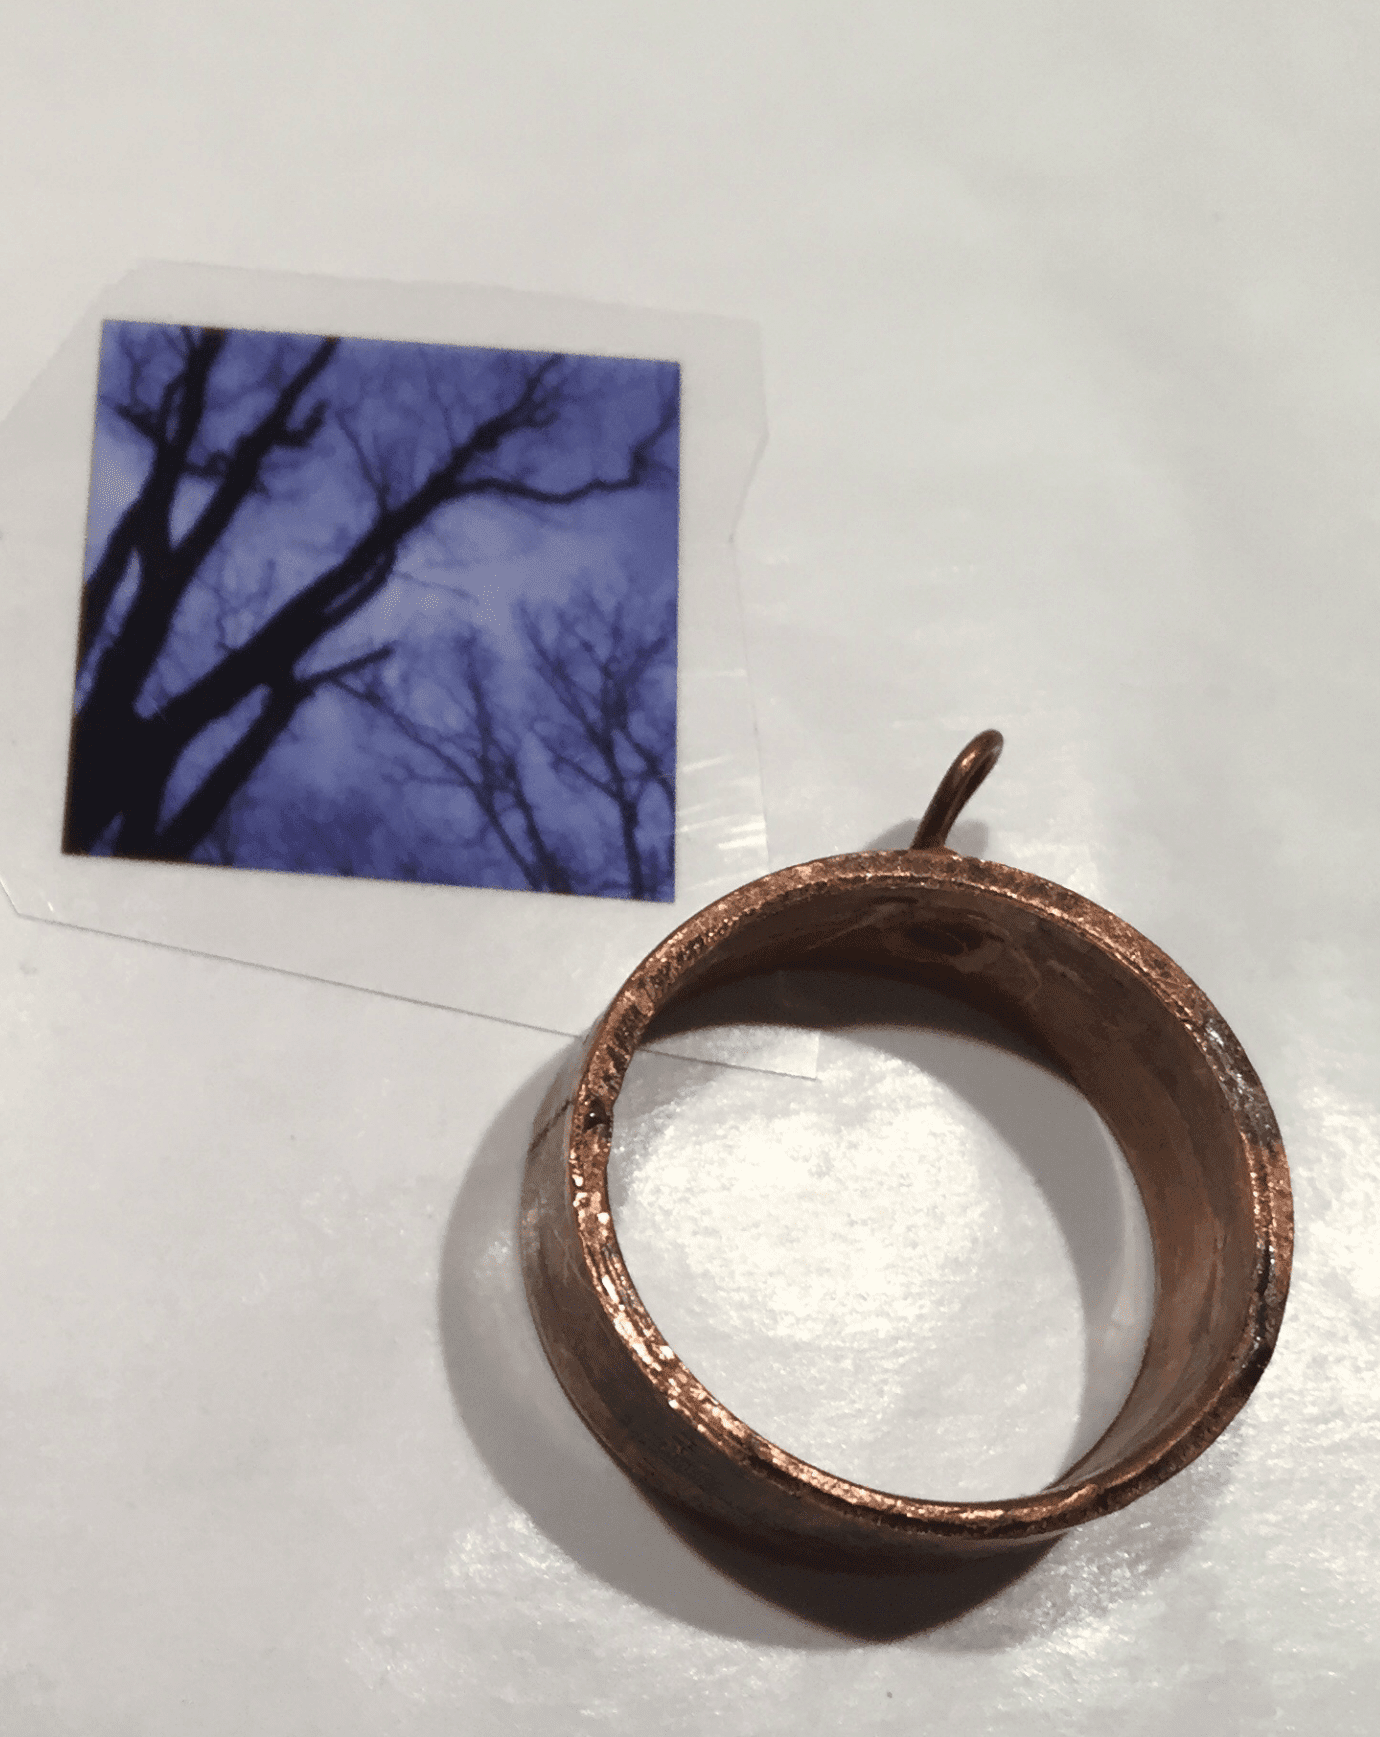
Cut out the image leaving lots of edges, do not cut out the exact size of the picture. You will need the extra bit around the edge of the image to peel off the transparency film later.
Step 2: Tape the bezel
I like using a deep bezel for this project, so I’ve got plenty of room to add resin. Tape up the sides and create a seal between the transparency film and your bezel.
Step 3: Add resin
Now for the fun part, pour your resin! I have had great success with the Resin Obsession super clear resin. I love how that jewelry resin doesn’t hold onto bubbles when I use it in tall bezels like this.
Fill the bezel to the top.

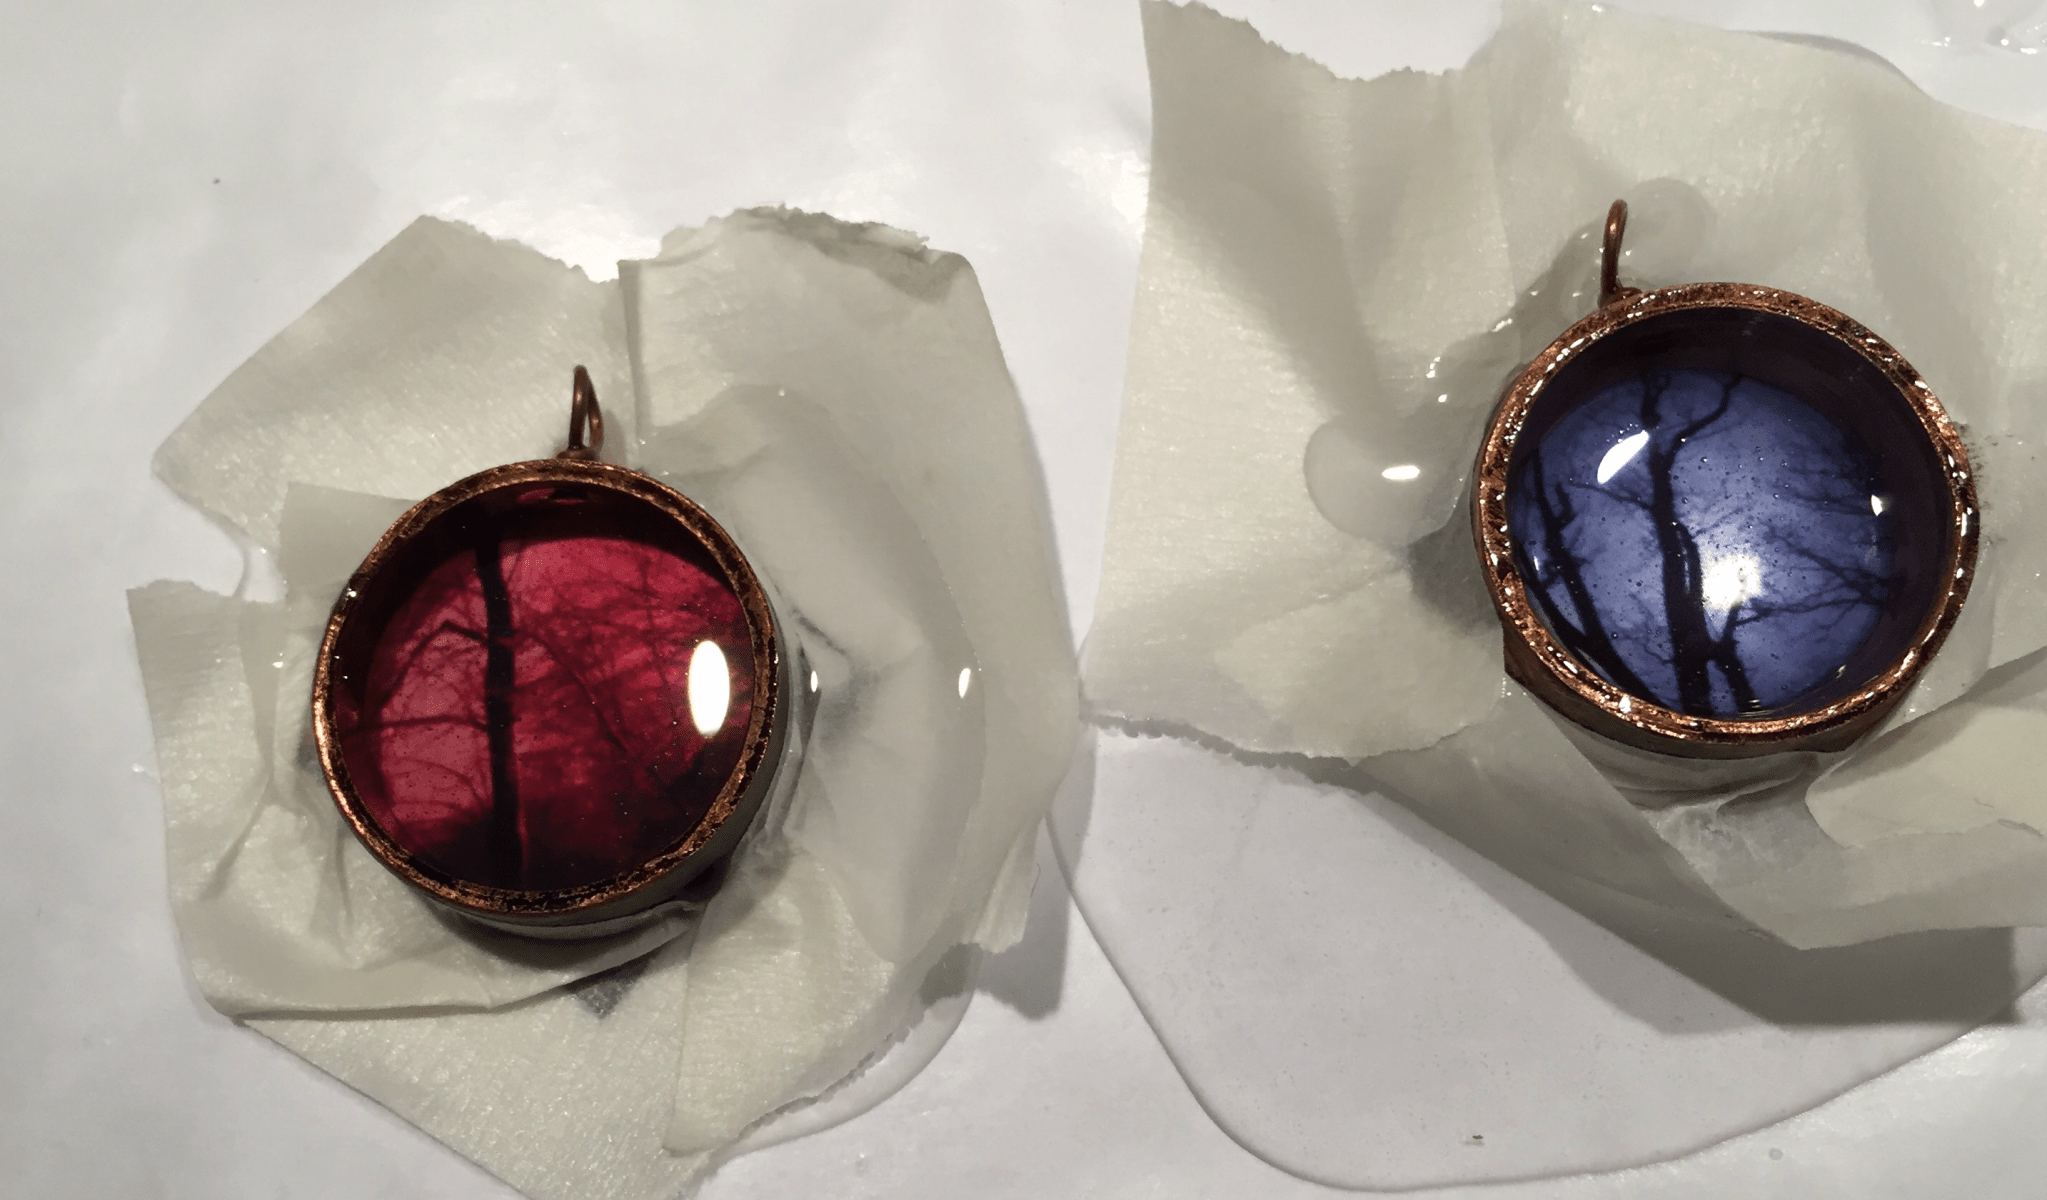
Step 4: Finish
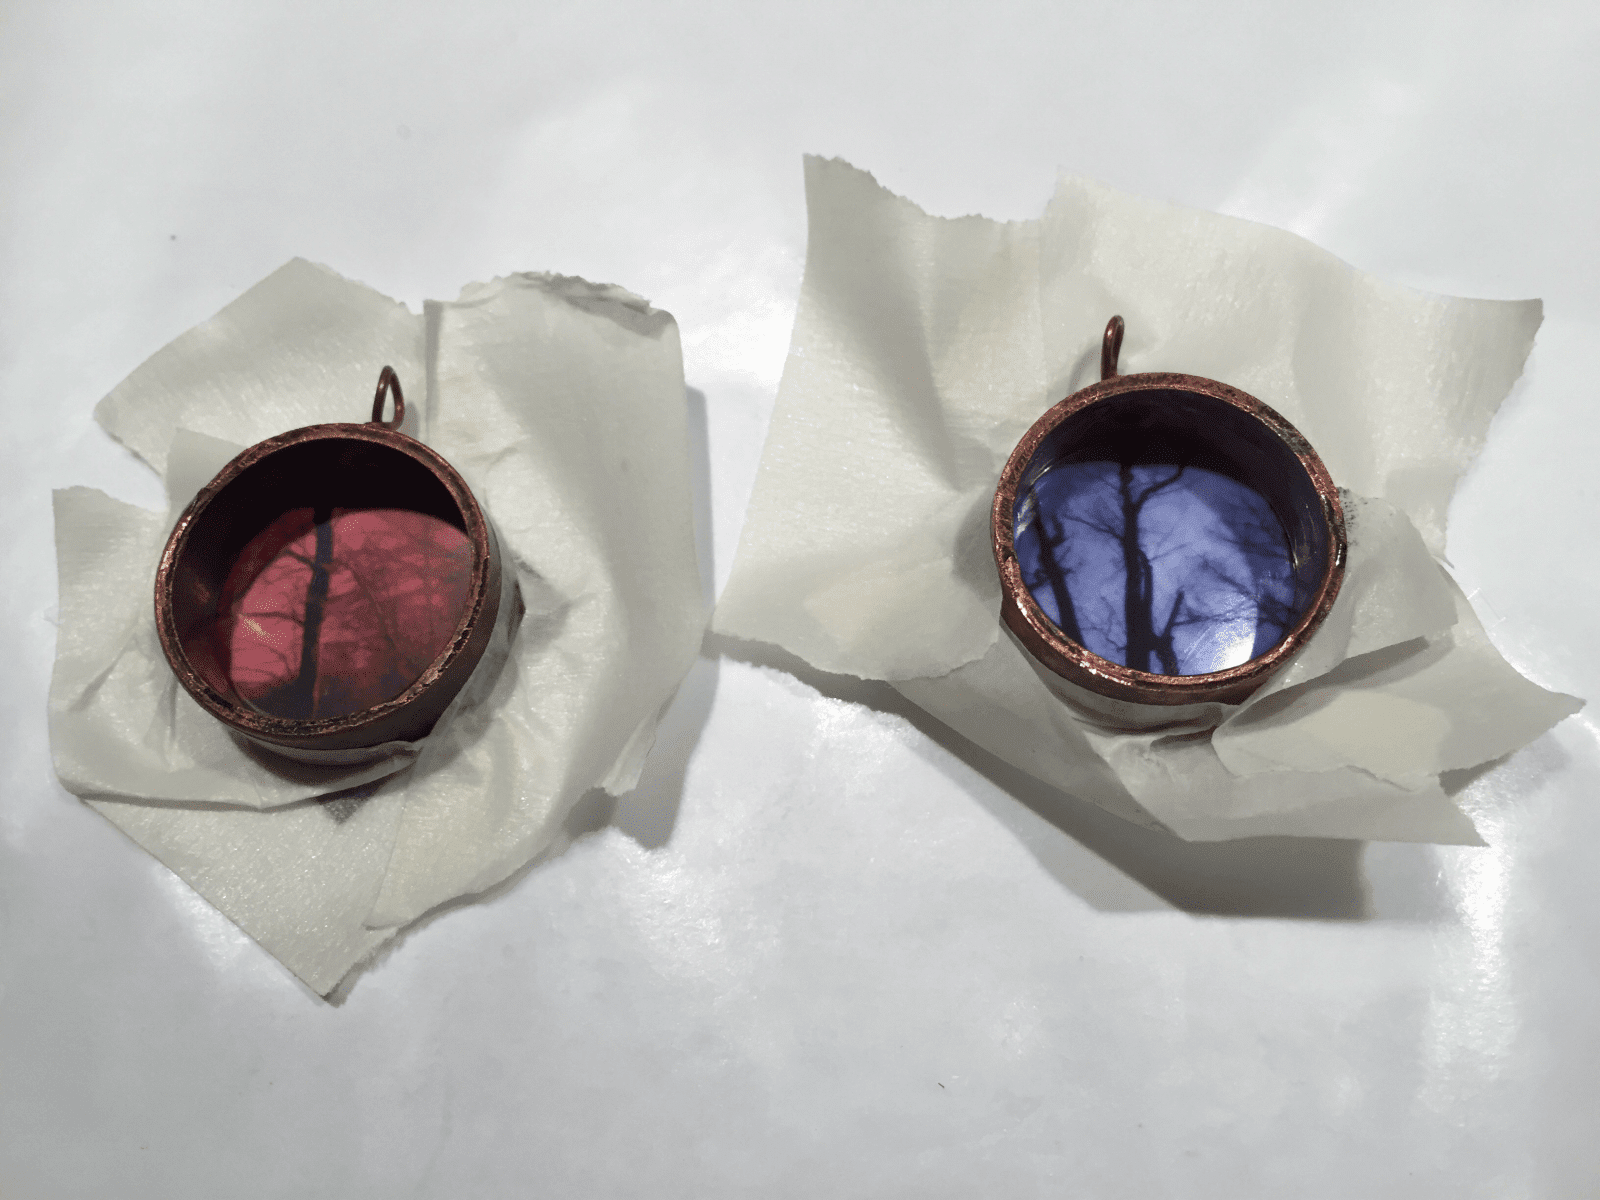
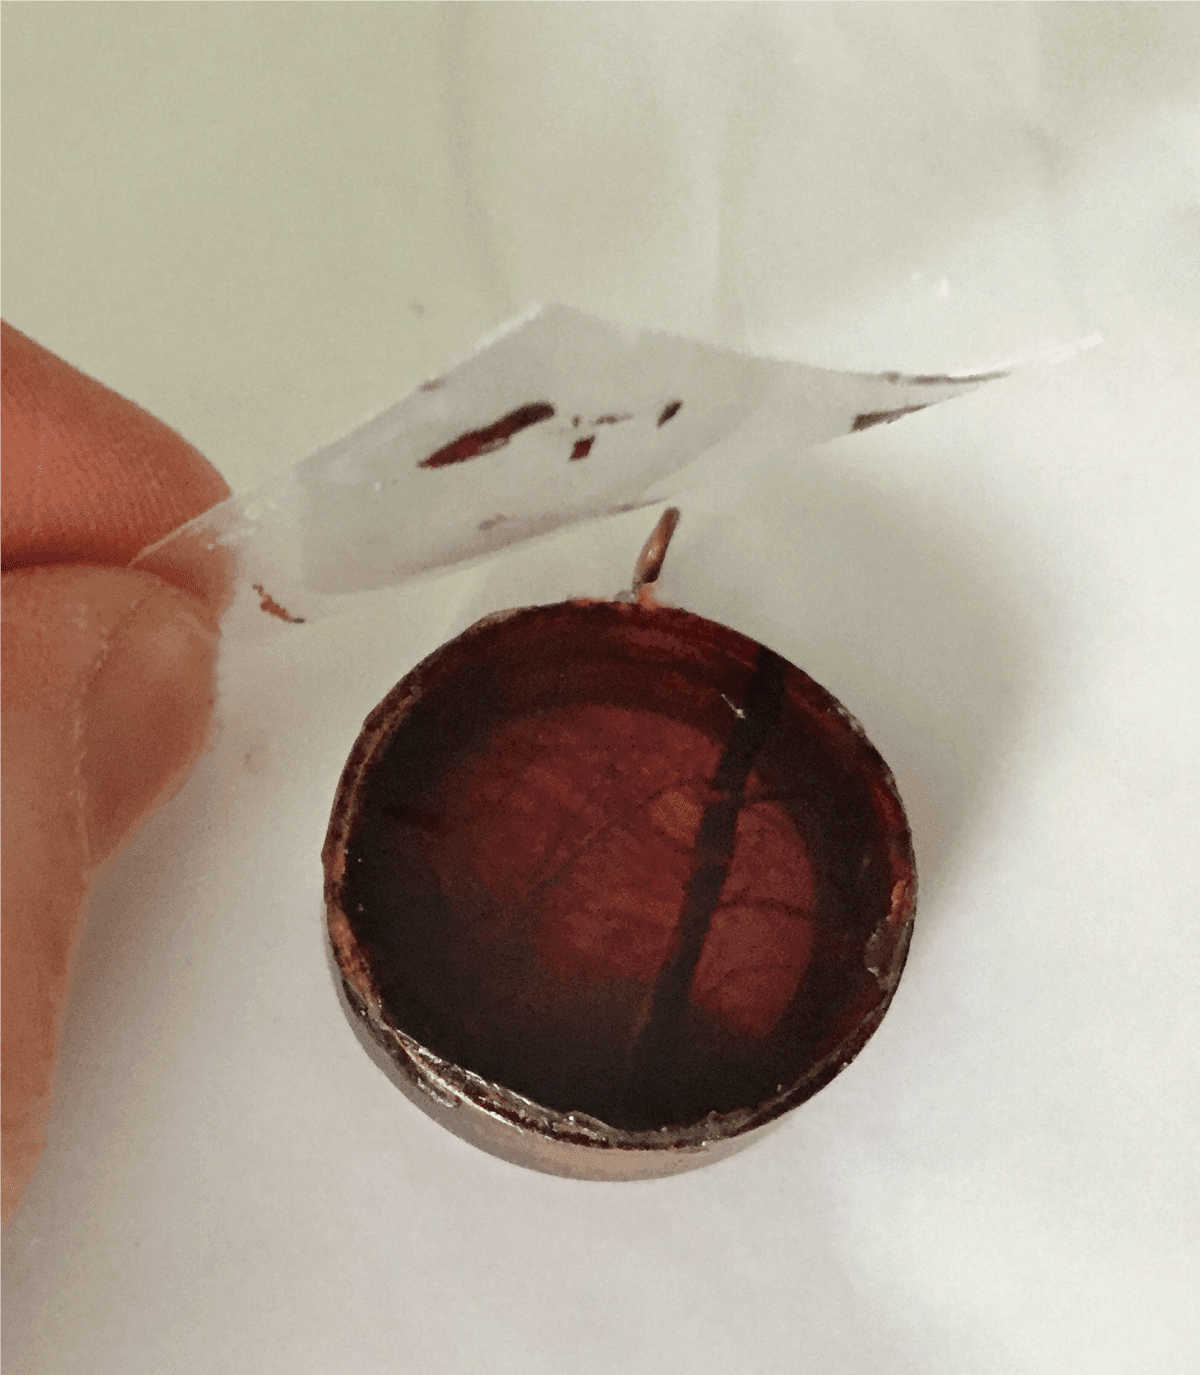
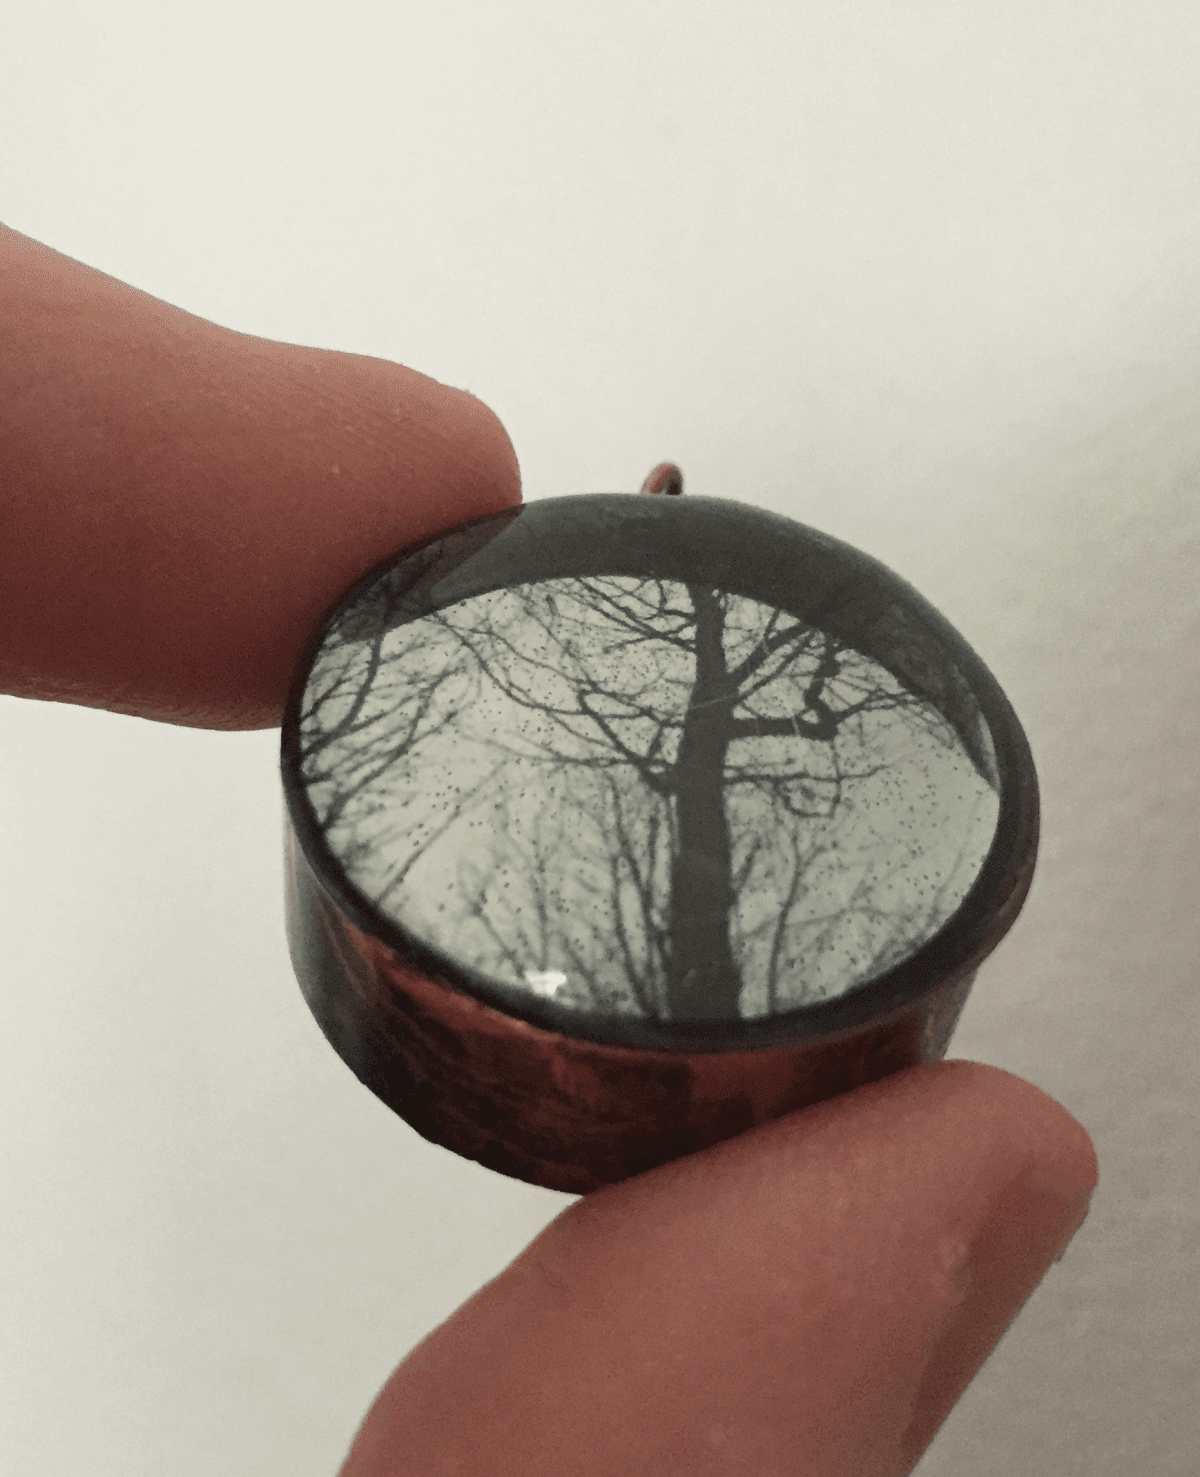
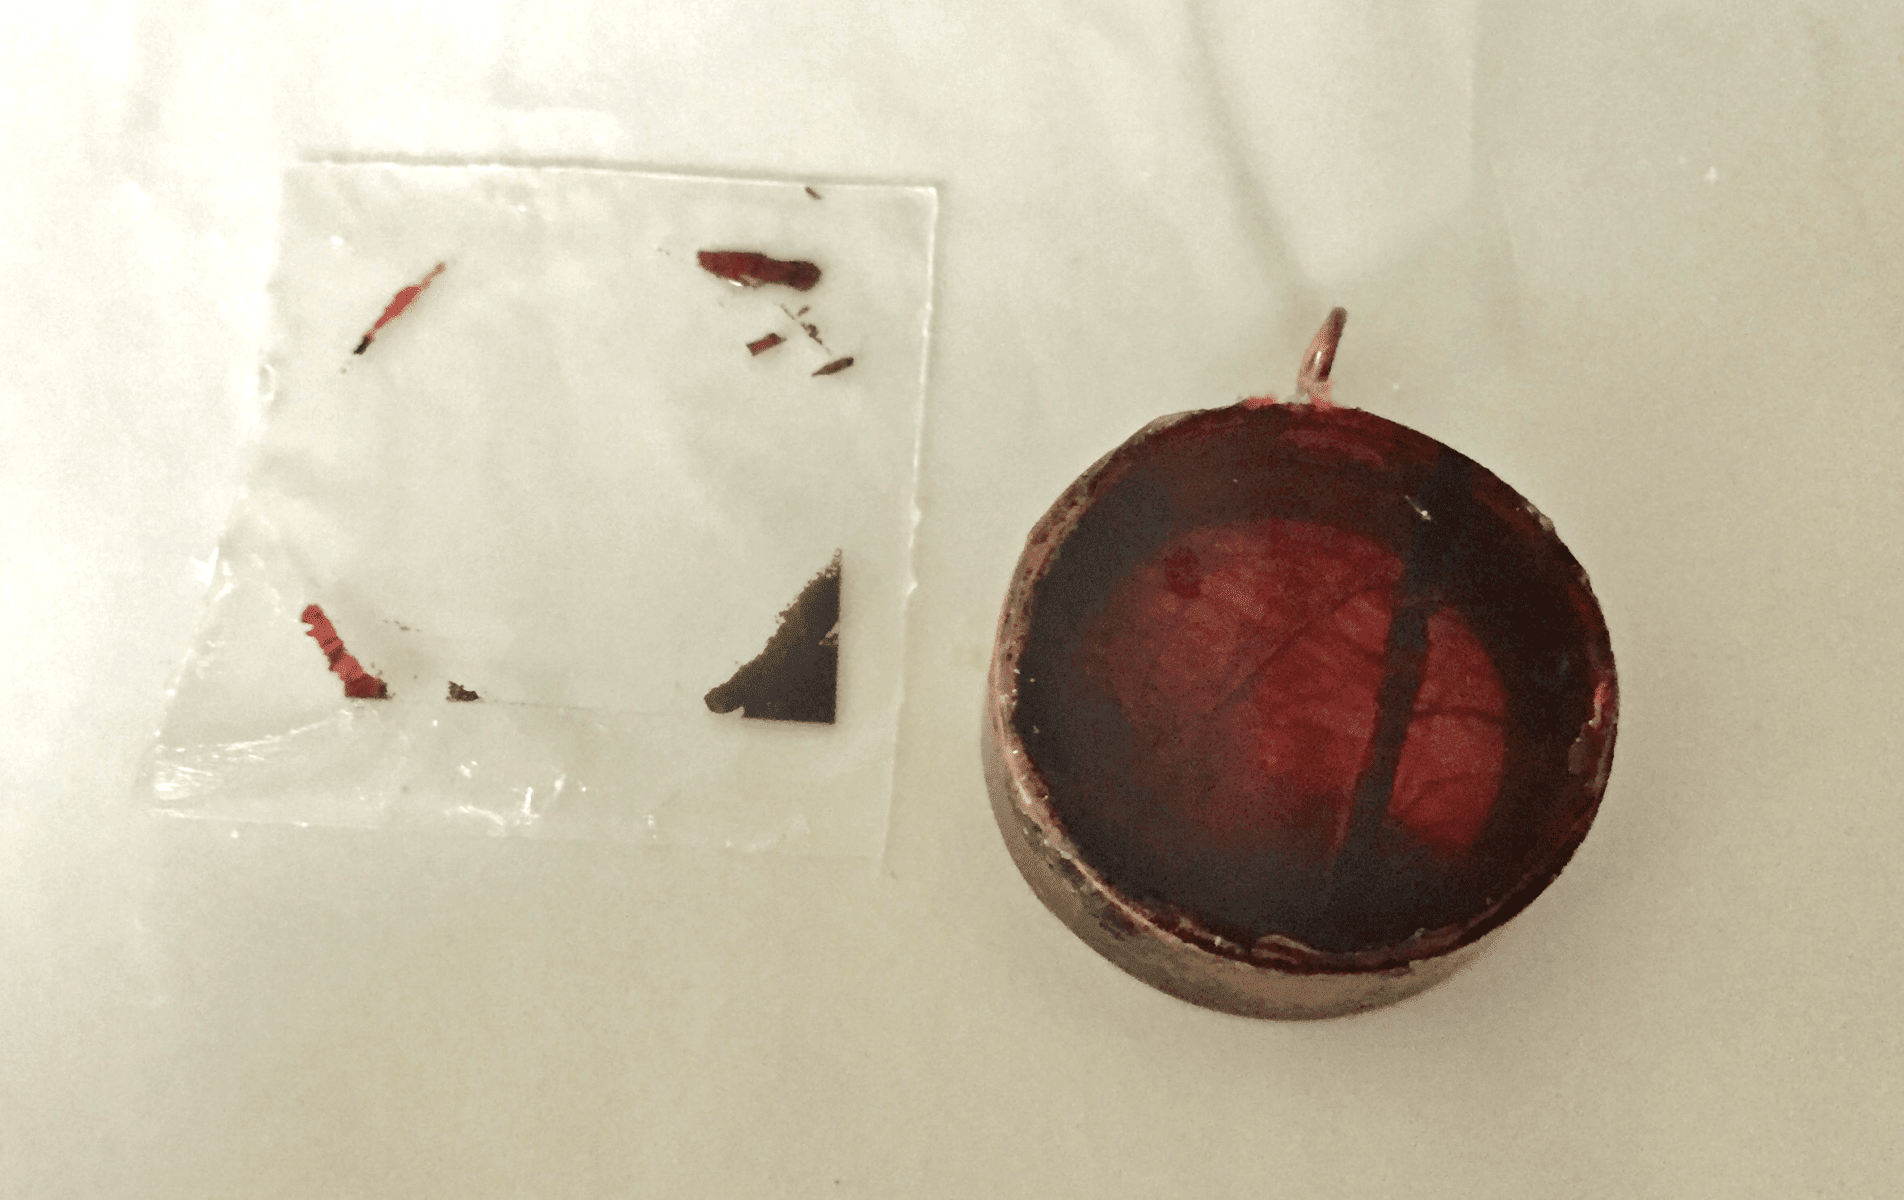
The next day I removed the tape and peeled off the transparency film. The image remained on the resin.

Flip it over and pour a little resin to seal the image where you just removed the transparency film. You can dome it if you want, as this will give it a bit of extra pop.
The black and white was my favorite!
Ready to try making resin jewelry but want more help?
Learn the same information I teach in my in-person classes, all from the comfort of home with a copy of my ebook, Resin Fundamentals. It’s helped thousands of aspiring artists worldwide make something that has people saying, ‘I can’t believe you made that!’ Buy the PDF book now, and you get a download link in minutes.
Originally written by Penny Reid
Unpublished Blog Posts of Resin Obsession, LLC © 2023 Resin Obsession, LLC
I tried this and it works. I had a few problems finding a laser copier; but then i’ m out in the sticks in Italy.
That is so pretty! Thank you for this, just fabulous.
My only complaint is that I would love to see more examples using different art.
Thank you again!
Amazing that you posted on this right now. I just bought a pack of transparency paper for the printer and was getting ready to experiment. Now I am so excited I cant wait!
Will this work with an ink jet printer?
Make sure you use transparency pages specifically for ink jet printers.
Thankyou! I have the transparency for ink jet. It has a film on the side that is printed on. Wonder if the film will make it look cloudy…
I don’t print these myself, but maybe the film is simply a paper to allow you to run it through the printer??
thanks a lot for the tutorial. please are your products only available in the US?
We ship products worldwide. You can learn more here: https://www.resinobsession.com/shipping-policy/
Hi Catherine,
Yes, we ship to Canada. Costs are dependent on the weight of items in your shopping cart and desired delivery time. A full explanation of our shipping policy, including an estimate of charges, can be found here: https://www.resinobsession.com/shipping-policy/ And don’t worry if you put items into your cart to get an idea of the shipping charges. You will be given delivery options (time and cost) before needing to make a payment.
You should know, however, that several of our products, including many of our resin products, cannot ship outside the continental U.S. or Canada.
I’m having someone on my team reach out to you as well to offer assistance with placing an order.
i heard that the resin won’t stick to the transparence film and so should have a lip of resin to seal front and back pour. But Im doing as a wall piece without the bezel. Perhaps I need to find a material to make it enclosed the same way the jewelry is.
Resin will stick to transparency film. If you are looking for something resin won’t stick to, use good quality tape or wax. Resin won’t stick to either.
ive done a couple of transparency photos this way and biult a wall around the edges of the image with mounting tape and sealed it with glue gun,and used a tiny bit of cooking oil on a q tip on the mounting tape wall as a mold release, then poured it onto the image as you would into a mold.
I don’t understand why you are transferring the image, when people set the cut film into the resin…and i think i saw you do a tutorial on a bracelet doing such, so what is the difference? Isn’t the transparency transparent? Couldn’t you cut it to fit and let it set inside?
Hello, I have the same question as Lisa H. Can we embed the transparency in the resin and leave it? Will that work just as well? Thank you.
Yes you can just cut the transparency to fit your piece and leave it in! I don’t do that unless I get a precise fit. You can see the edges of the transparency so I just do it this way, but both work really well
Would I be able to transfer handwriting which I have on a tranparancy to a piece that is already completed?
Did you write on on the transparency or did you print it?
I scanned the handwriting from a card and printed it onto a transparency.
It’s ready to go in the resin. No sealing necessary.
Ok but can I add the transparency to a piece that is already completed? I’m probably not explaining myself very well as I am fairly new to resin and am not sure what I am doing.
You want to add it to a piece that’s already cured?
Yes. Thank you. That’s exactly what I am trying to ask.👍
Where can I buy the already printed black and white transparency sheets of trees and birds? I’m not good on computers and cant print my own.
Hi Diane, you can try to look for them on Etsy.
I was looking for them on Etsy before. I couldn’t find them there or anywhere they were just listed as unknown and they don’t care yet. I checked all the places that I could find and from the non-site and I still couldn’t find them. I reread the ad for the resin and it said that the sheets I think it meant the sheets were with the resin when it comes to year and I’m not sure if I’m correct about that. Thank you have a good day but that could save some time right now thanks
How do you get the dome on it?
You have to be sure to use a doming resin. This is the one I like to use: https://shop.resinobsession.com/collections/resin/products/resin-obsession-crystal-doming-epoxy-resin-jewelry-grade
I was able to use injet transparency film to do this. I used inkjet printer and paper. It came out absolutely amazing. So it doesnt have to be laser paper.
I’m excited to learn this technique. I decoupage and will try using this technique with my decoupage projects, too.
I would like to “float” an image in the epoxy and not place it on the back and the pour epoxy.
Thinking of pouring an epoxy layer and before it sets laying the transparency film (ink down) on to the epoxy. Once epoxy cures..peel transparency film away to leave image. Then do a second pour to trap image floating between the two layers. Do you think this is possible?
Yes, Trace, that’s how you want to do it. This article shows the steps with buttons: https://www.resinobsession.com/resin-tutorials/how-to-suspend-objects-in-resin/