

So you want to learn how to make a resin bangle bracelet. And why wouldn’t you? Not only can you add funky colors and found items, but you can make several and stack them together.
Plus, there’s something about wearing art on your arm.
But before we get into how to make a resin bangle bracelet, there are two big things to know first:
Tip 1: Pick the right size bracelet mold
While resin bracelets are super fun to wear, they aren’t ‘one size fits all.’ To ensure it fits, size your wrist. Then, make sure the mold makes a bracelet that will fit you.
What if you’re making a resin bracelet for someone else?
It’s been my experience that a mold with a 2 5/8 inch inner diameter will fit most people.
Tip 2: Use a resin designed for molds
Sure, you can use any resin in any mold. But you might not be happy with the result.
Using the wrong resin can mean your resin cures with bubbles. Or worse yet, it gets soft and bendy when you wear it.
Yikes.
That’s why for small mold projects, the Resin Obsession super clear jewelry resin is the perfect choice. It releases bubbles easily, dries clear, and won’t deform on your wrist. Plus, you can demold it in 12 hours.
Now that we’ve got that out of the way, here’s how to make a bangle bracelet with resin.
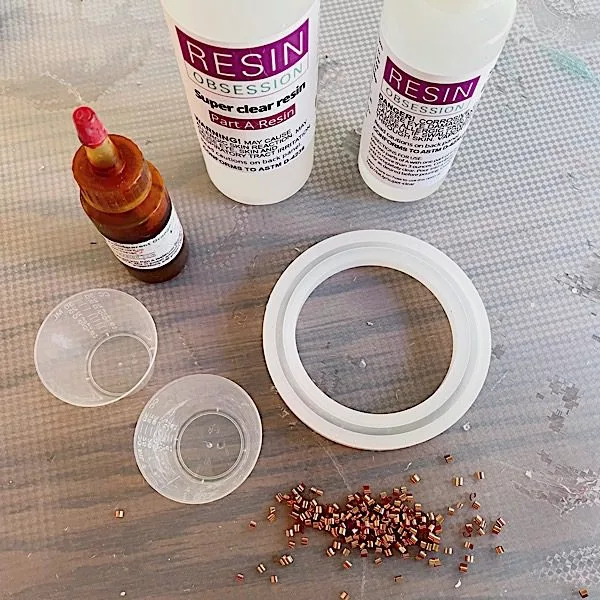
Supply list:
Bangle bracelet mold
Resin Obsession super clear resin
Resin Obsession transparent orange pigment
Chunky glitter
Mixing cups
Stirring sticks
Step 1: Protect your surface
Put down a silicone mat, trash bag, or wax paper to cover your table. That’s because you’ll probably drip resin on your table. Resin makes a great glue, so you want to keep it off your table.
If you don’t have any of these items, here are some other ideas of things resin won’t stick to.
Step 2: Calculate the amount of resin
HOLD on. If you’re like any artist I know, you’re thrifty. Which means you don’t want to waste resin. That’s why math is important here.
Measure the diameter of your mold. Then, put the number into this circumference calculator.
Next, go over the Resin Obsession resin calculator. Enter the height and width of your mold. Input the circumference as the length.
BOOM. You know how much resin to use.
Or… you could just mix two ounces of resin. I’ve never used a bracelet mold that’s needed more resin than that. Then, have some leftover resin projects ready to ride.
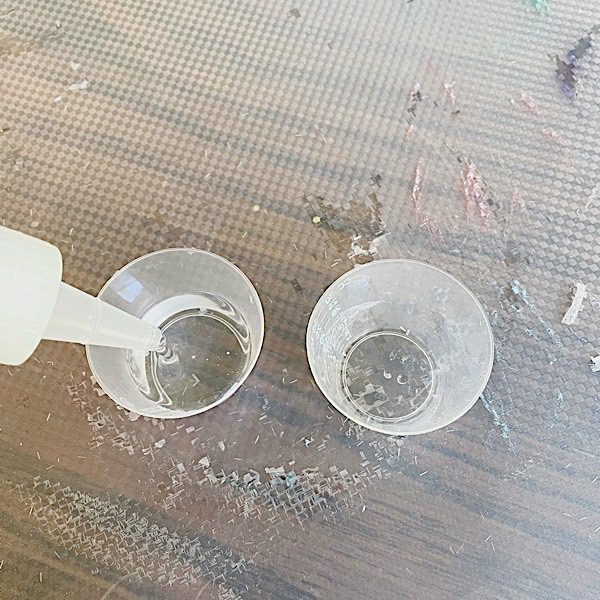
Step 3: Mix resin
Measure out the amount of Part A and Part B you need to get that number you figured out in step 2.
In the case of this bracelet and the super clear resin, you’ll need an ounce of resin. That works out to 2/3 ounces of Part A and 1/3 ounces of Part B since it mixes 2:1.
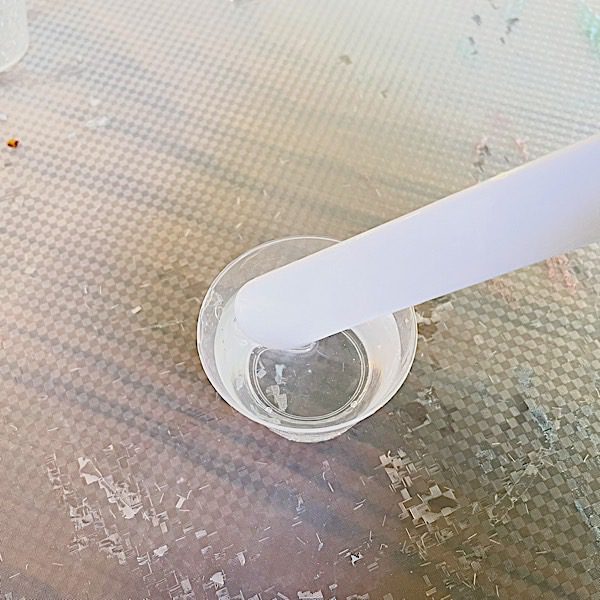
Next, mix the two parts together thoroughly.
If mixing resin is new to you. You’ll do great. You figured out the math, which is trickier than mixing the resin. Promise.
And we’ve got a detailed mixing resin article (with a video) to help you.
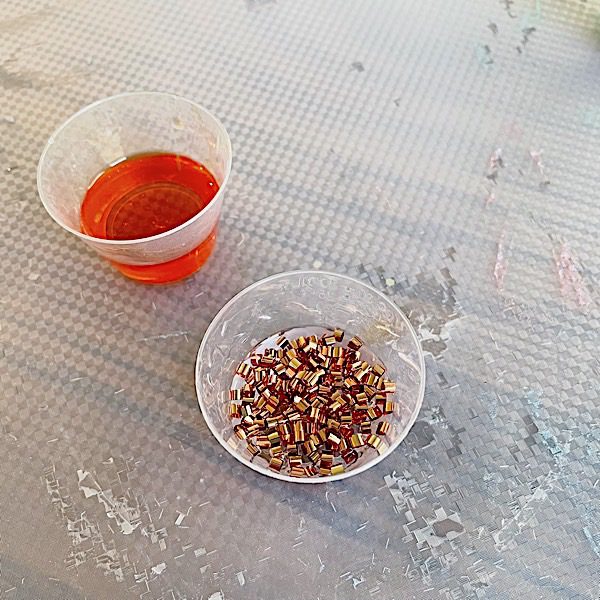
Step 4: Color the resin
Split the mixed resin into two cups. Color one with the transparent epoxy pigment and the other with the glitter.
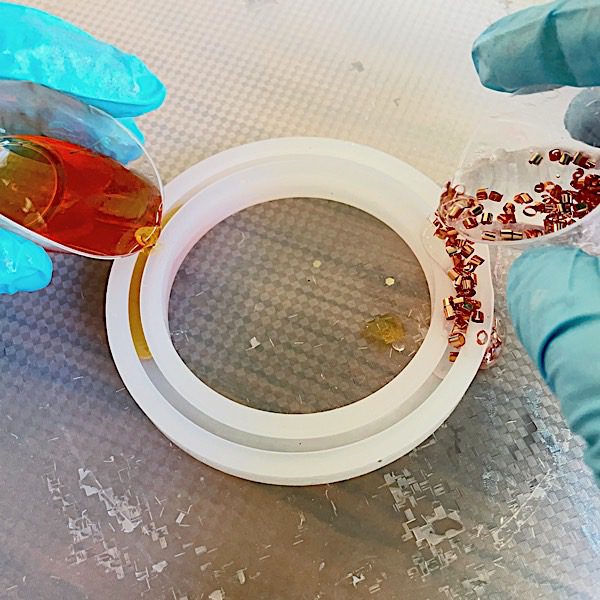
Step 5: Add to the mold
Add the resin to the mold at opposite ends of your bangle bracelet mold and let it blend in the middle. This can get a little messy, hence the need for the table covering.
Check your resin for bubbles, then set it aside to cure.
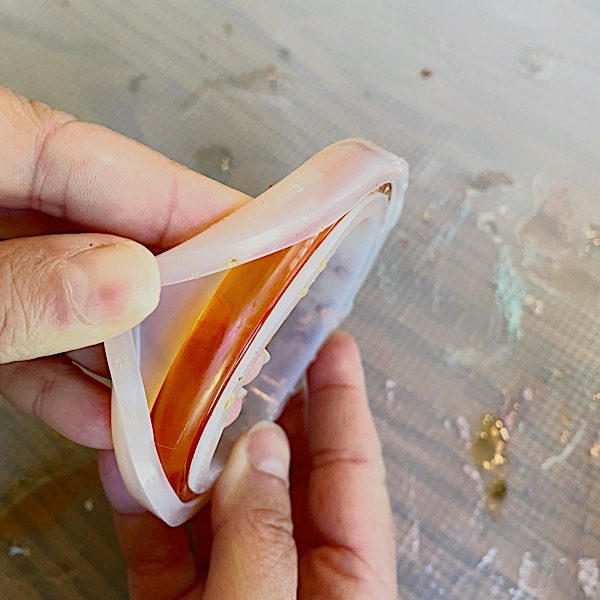
Step 6: Demold and finish
Peel the silicone away from the cured resin.
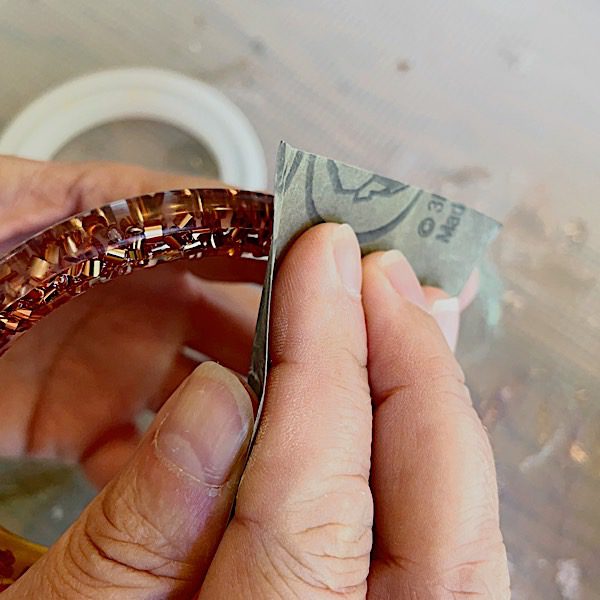
If you have sharp edges, sand them with wet/dry sandpaper.
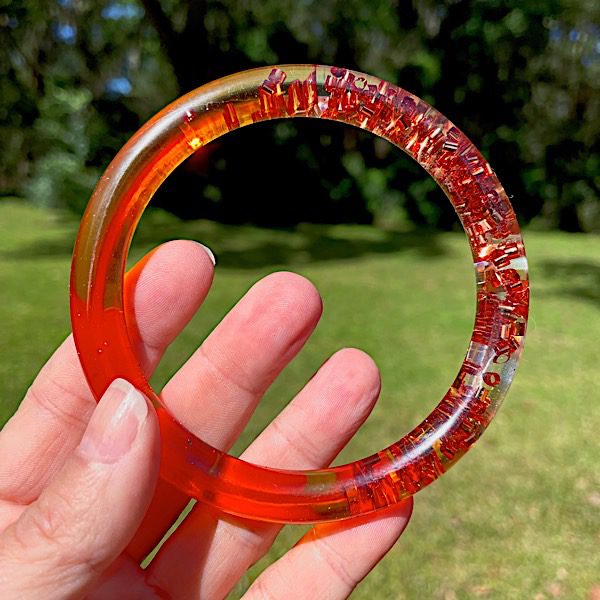
Ta-da! You just learned how to make a bangle bracelet with epoxy resin.
This is just the start. Other things that look great in resin bracelets are:
>Stickers
>Candy
>Glass beads
>Toy pieces
>Feathers
>Foil papers
>Shells
Want to give this project a try but want more help?
Then you’ll want a copy of my ebook, Resin Fundamentals. It’s the same resin basics I teach in my in-person classes. Learn about resin from the comfort of your home. Buy the PDF book now and get an email download link in minutes.
Unpublished Blog Posts of Resin Obsession, LLC © 2023 Resin Obsession, LLC
Your video is super informative! Thank you so much.
thank you for the project. however, am inquiring how do i make resin and the mold? Also how do I procure the resin?
thank you
We have resin and mold making materials in our store. You can find them here:
https://shop.resinobsession.com/collections/mold-making-materials
https://shop.resinobsession.com/collections/resin
When pouring in resin you pour 3/4 on the part inbetween the paper and gap the paper the rest later where it’s Shrunk? Also what about between the paper and the inner side . Otherwise when you de mold it and the other side of the paper is exposed would I brush that with resin
is the video still available to view? can’t find it
@Donna,
If you click on the play button above, it should play for you without you having to go to youtube.
I’ve done a few bangles now and I’m having an issue with them taking way too long to start to cure. Yesterday I was patiently waiting for the resin I’d poured into bangle molds to start curing so I could add elements without them sinking. The resin in the molds was still very gooey but the 2oz remaining I had in the mixing cup was red hot and curing! How is it possible that the same resin in the molds took about 90 minutes to start hardening while this resin cured so quickly?
@Kate,
The ironic part about resin curing is that the thinner the pour, the longer it will take to cure. It has to do with all the molecules bumping against each other to get the reaction going. Assuming there was less resin in the bangle mold (and it was a thinner layer) it will take longer to cure than the amount in your cup that was more in volume and thickness.
@Pamela, Yes.
I am not sure where you’re getting your info, but great topic. I needs to spend some time lnniareg more or understanding more. Thanks for excellent info I was looking for this info for my mission.
I have just started making bangles and keep having a problem with a gully/rut on the exposed edge of the bangle. The last one I did I made sure I put enough resin in the mold that at many locations it began to over flow. Any suggestions?
I’m not sure I understand what happened. You filled the mold with resin, and then it expanded and overflowed?
I filled the mold and tried to make sure I completely filled it as my first two were not and they ended up having a deep “gully” in the finished piece, so seeing that I tried to fill the recent one and in doing so in some areas the resin overflowed the mold and yet the finished piece still had a “gully”. Not as bad but still had a small one. Not sure I am filling the mold properly? Or is a bit of a “gully” common and you just have to sand it down?
Have an edge where the resin meets the mold occurs commonly. You will need to sand it down. I talk more about it in this video: https://youtu.be/S6xlrNQDp_0
OMG! So glad to know that! I thought I’d messed up. I did my pour on a cuff bracelet mold, and got the “gully”. Since I do metal jewelry, I had sanding material, but eow, what a relief!
I am just starting out with resin jewelry.I realy do not understanding what to do I keep looking at my project and trying to get the courage to dive in and make some jewelry. I am going to try today. I am not sure how to add things to the bange mold. I need to get small objects to dd to make it pop. Any advice?
Hi Mary, welcome to the world of resin! We’ve got some beginner articles to help you: https://www.resinobsession.com/tag/beginner/
I’m such a newb to the resin game but loving every minute of my trial and errors. Just got into bangles and it’s definitely different and more difficult because the molding space. I still haven’t perfected it but love all and any advice you might have!!