
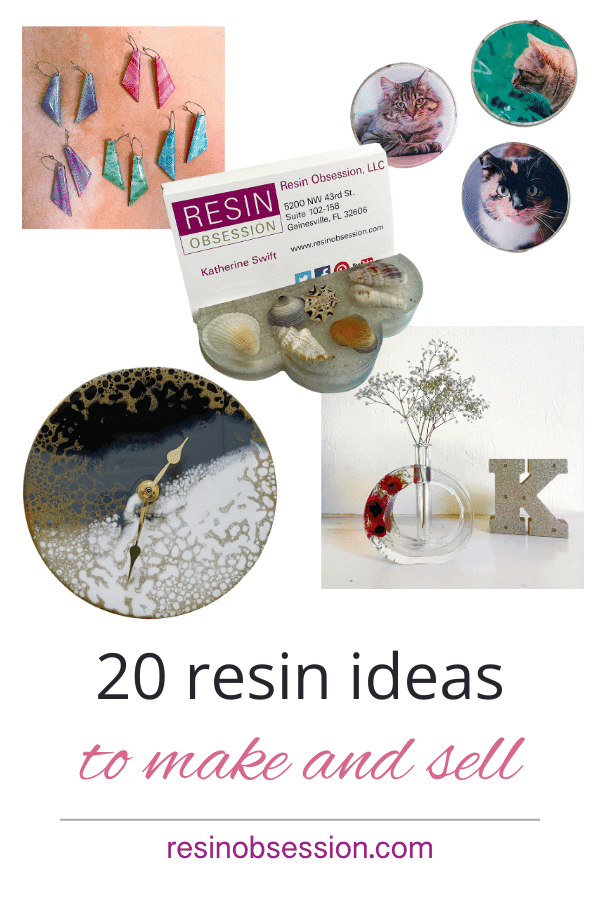
So you’ve taken up epoxy resin as a hobby. And you’re loving it. So now you’re looking for ideas for resin projects you can sell to pay for your obsession.
*Because you love making crafts that you can use yourself.
*Or maybe because you love making handmade gifts.
*Or perhaps you’re looking at selling some of your epoxy crafts to recoup your investment.
Whatever your reason, you’ll love this list of resin ideas you can sell.
Paperweight
Skill level: easy
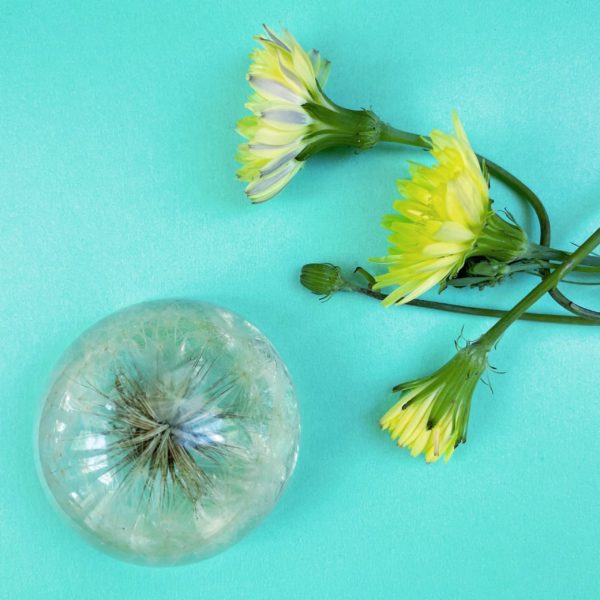
This is the classic resin gift, especially when you personalize it. You can add pictures, concert tickets, or other personal items. You can even add a dandelion to make a paperweight.
Business card holder
Skill level: easy
The new graduate needs something to hold their new business cards. Find out what their passion is and add that to the clear resin. Then, they’ll think of you every time they sit at their desk and admire their business card holder.
Flower vase
Skill level: intermediate
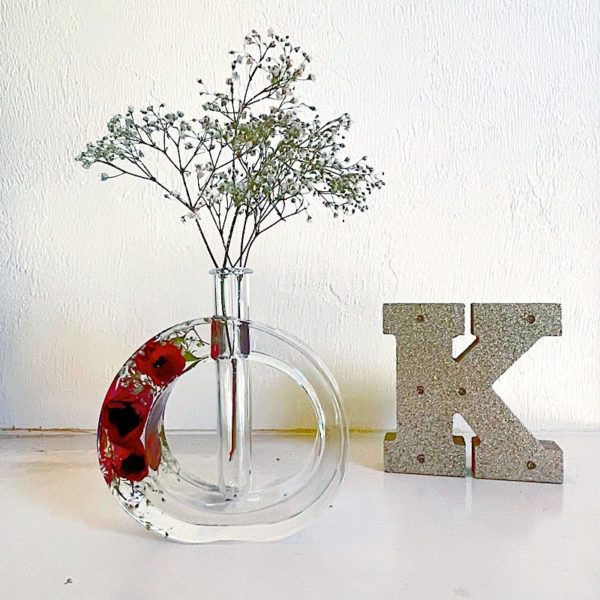
Preserve your favorite flowers in a vase for your future flowers. Of course, this project requires you to dry the flowers before you use them to craft with resin. This adds to your project time, but the results are so worth it.
Trinket box
Skill level: intermediate
Who doesn’t need a little box to hold onto the items that easily get lost? Resin trinket boxes can do just that. Use them on a desk with paper clips or on a kitchen windowsill to hold rings. They’re the cutest way to keep track of small items.
Entryway tray
Skill level: intermediate
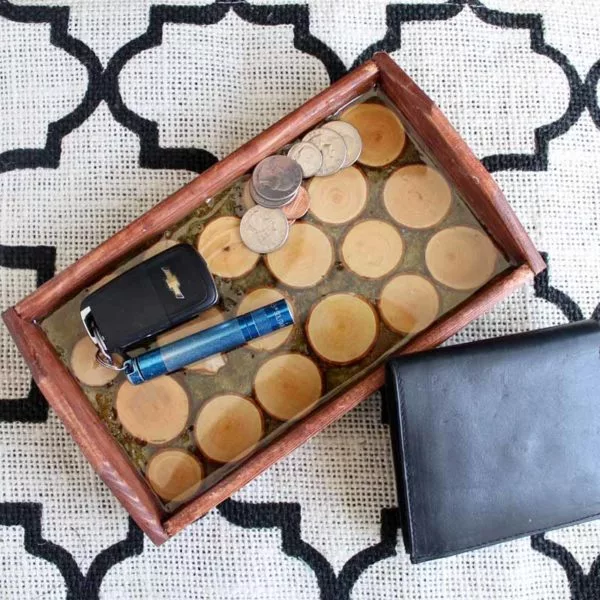
Speaking of corralling items, a trinket box might not be big enough. In that case, you can create a catch-all tray to catch more than small items. This can be the place for keys, phones, wallets, and more. Everyone will love having a spot to put down their pocket items as soon as they enter the door.
Coasters
Skill level: easy to intermediate
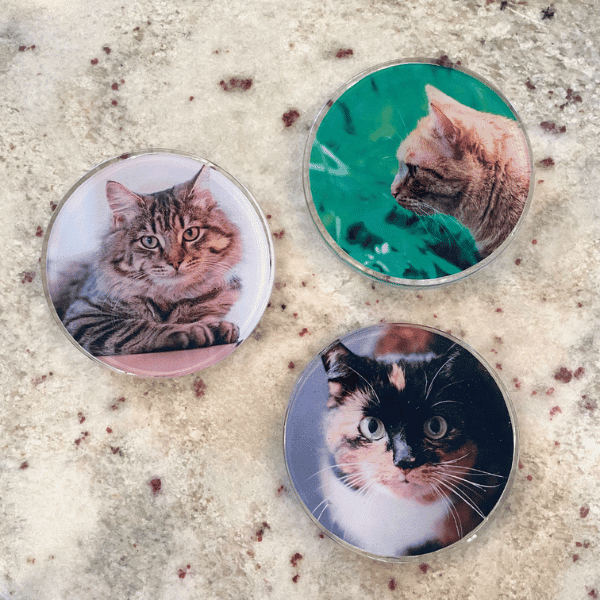
No list of resin ideas to sell would be complete without coasters. You can make resin coasters in so many designs and shapes. Start with a coaster mold, then decorate. You might decide you want to make geode coasters. Or perhaps something more kitschy like bottle cap coasters. You can personalize these with pictures too.
Tumbler
Skill level: intermediate
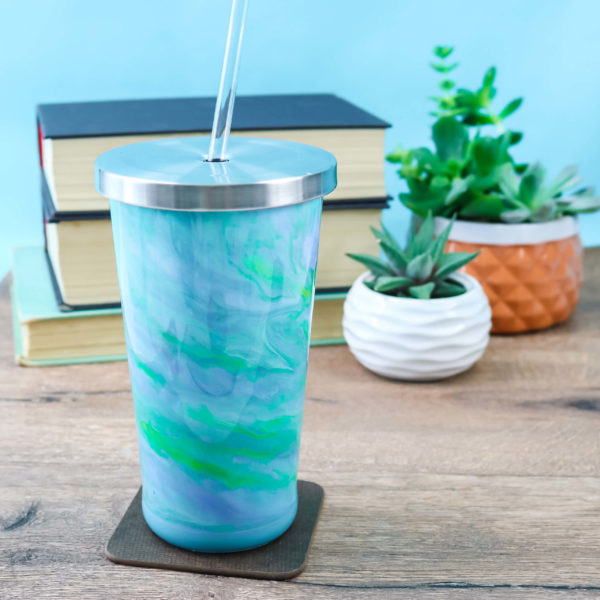
Did you know you can craft drink tumblers with resin? I wouldn’t kid you about something like that. Start with a metal tumbler, add a design, then coat with a resin for tumblers. You can add epoxy colors or make them one-of-a-kind by adding vinyl stickers. Your beverage will be so bougie.
Letters
Skill level: easy
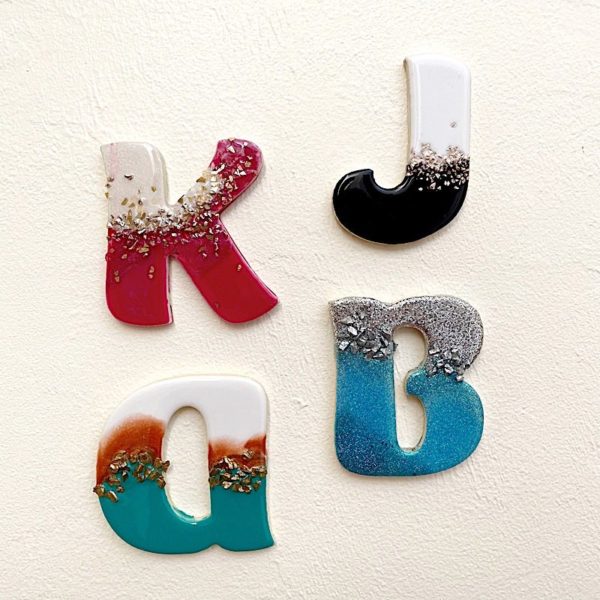
Did you know you can make resin letters without a mold? The trick is using wooden letter cutouts that you decorate with resin. Mix your epoxy, add resin colors, then pour onto the letters. Get abstract and crazy in this step. No two letters will look the same.
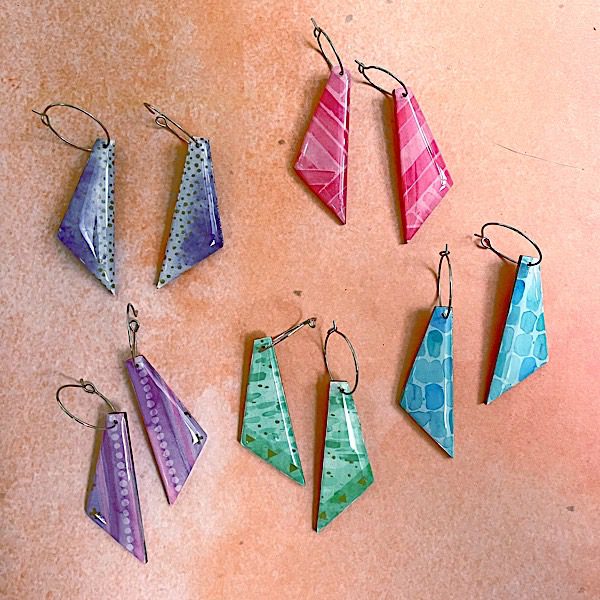
Shrink plastic earrings
Skill level: easy to intermediate
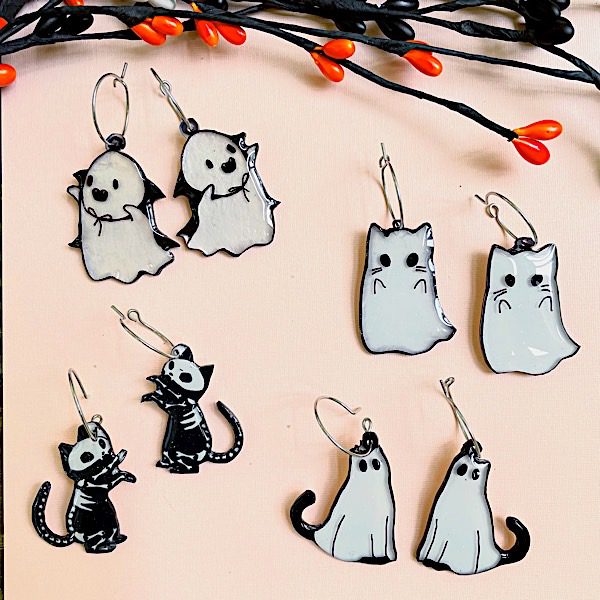
Do you have drawing skill? Even if you don’t, you can transfer designs to shrink plastic, then coat them with clear epoxy. Here’s how to make shrinky dink earrings (Halloween theme optional).
Charcuterie board
Skill level: advanced
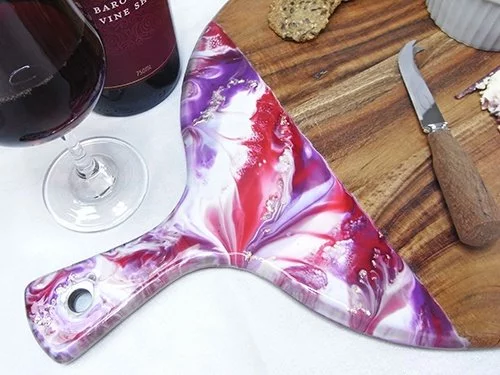
The next time someone asks you over for tapas, you can let them know you’ve got the perfect charcuterie board for the occasion. Of course, you’ll need good resin skills to take this one on. But once you do, you’ll love making these. They’re also perfect housewarming gifts in case this is one of those resin ideas that you choose to gift instead of sell.
Bowls
Skill level: advanced
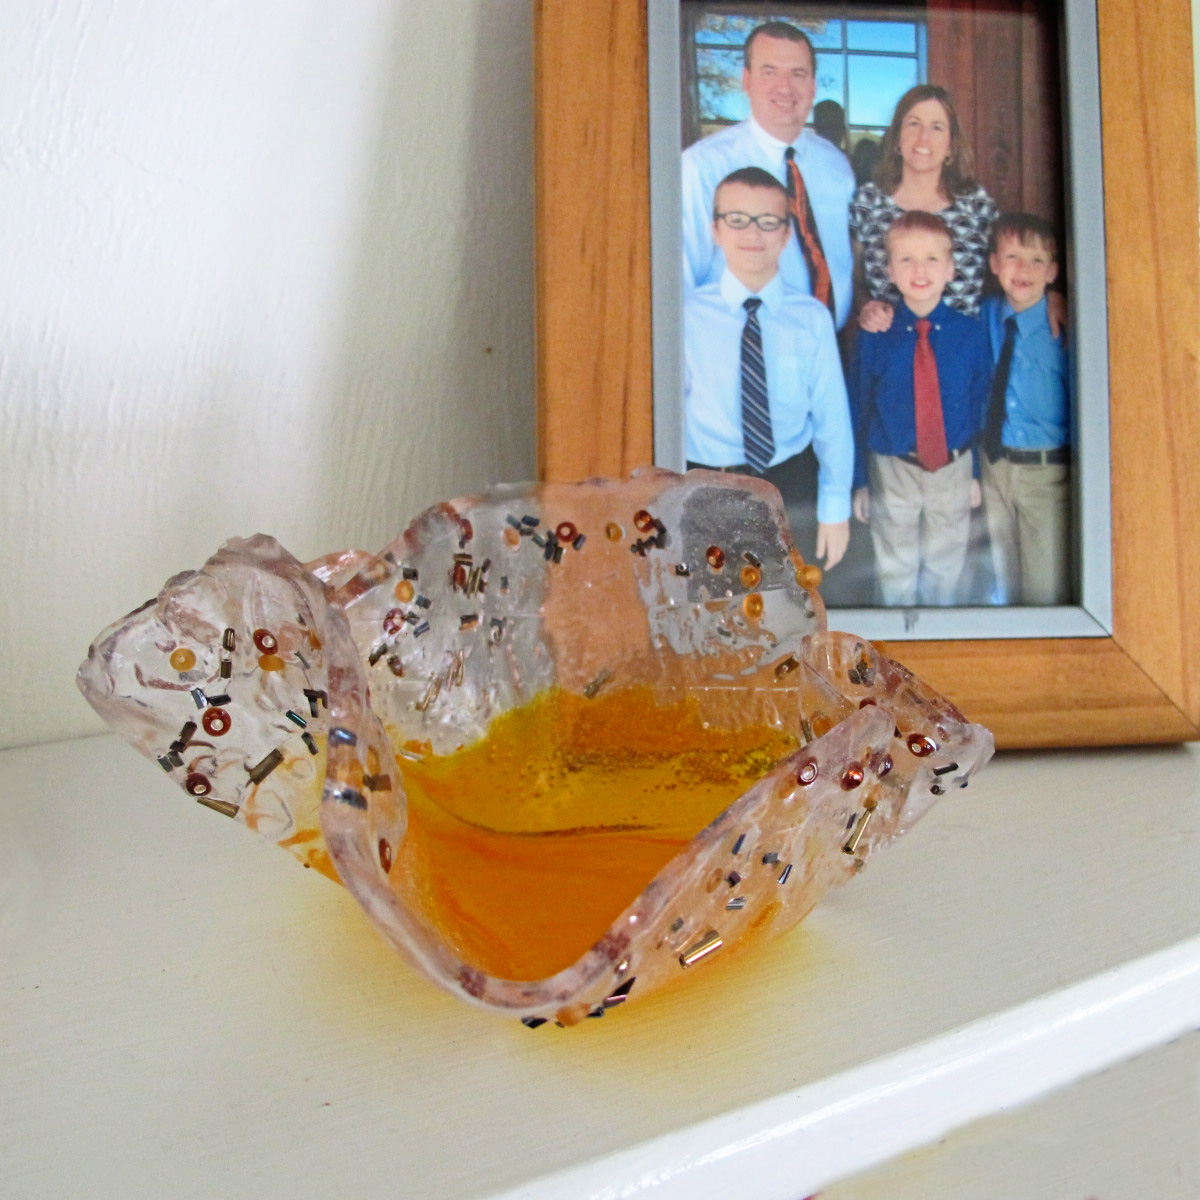
Here’s a fun leftover resin project. But you’ve got to know a little about your resin first. Once you do, you can craft with resin to make a bowl.
Dice
Skill level: advanced
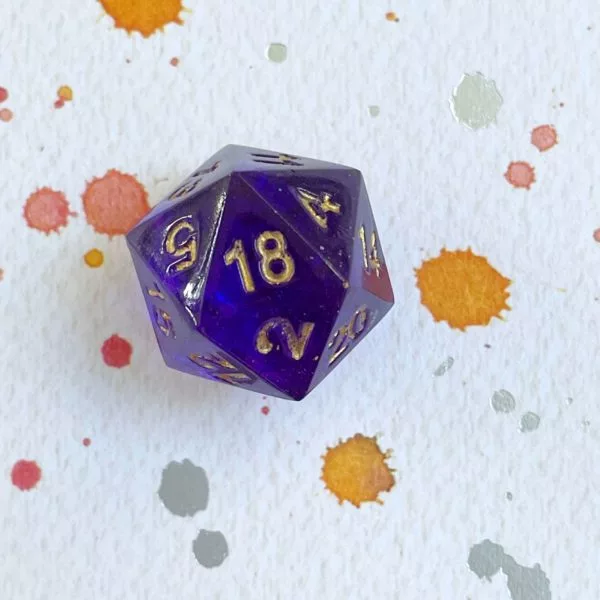
Ask any gamer if they want a custom dice set, and I bet you’ll hear a resounding YES. Making resin dice is almost as much fun as the game itself.
Resin clock
Skill level: intermediate to advanced
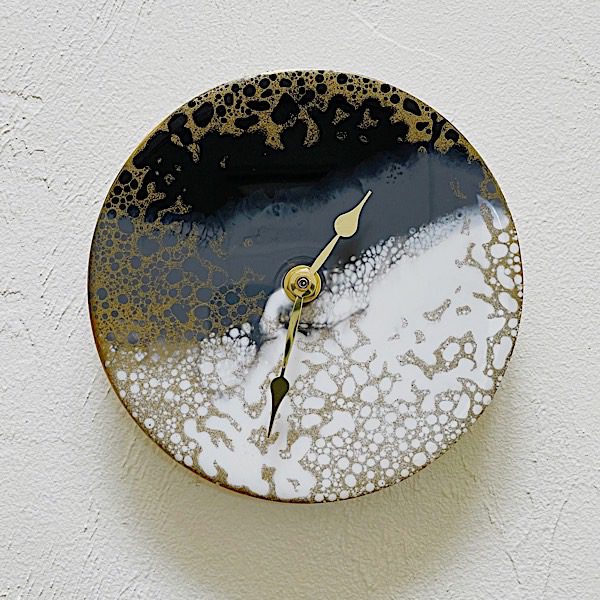
Imagine having wall art that serves a functional purpose. You don’t have to wonder—You can do it with resin. And no two will ever look alike. Learn how to bring it all together into a resin clock.
Washi tape jewelry
Skill level: easy to intermediate
Your colorful washi tape collection is the base for this jewelry set. A dome of clear epoxy brings it all home. Here’s how to make washi tape jewelry.
Phone grips
Skill level: easy
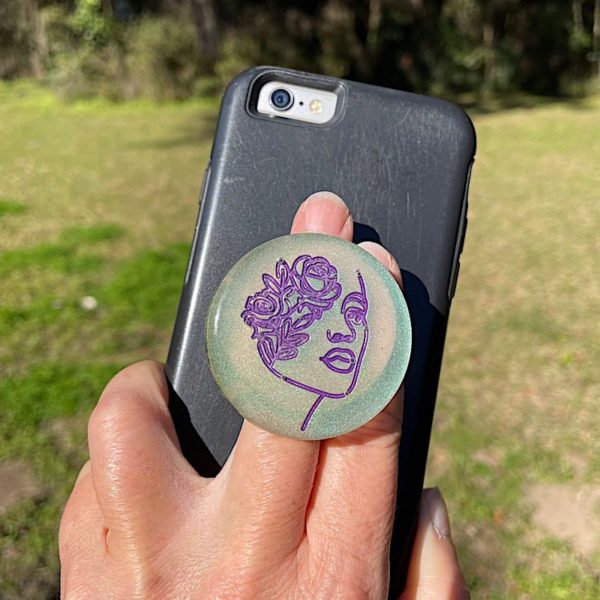
Your phone is an extension of you. Why not give it a custom phone grip? That way, you can give your phone case the glam it deserves.
And this is a favorite of the resin ideas to sell because so many people have smartphones!
Keychains
Skill level: easy
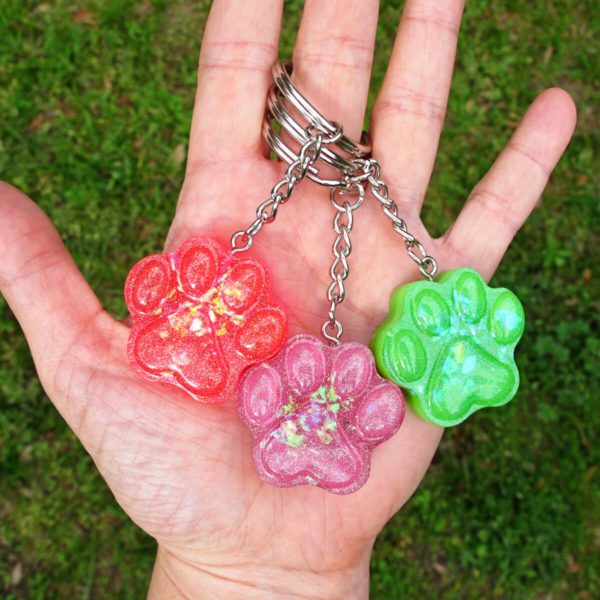
I can’t guarantee this will keep you from losing your keys, but making your own resin keychain can’t hurt. Start with a mold that includes the keychain hardware, then craft something amazing with your resin.
Mandala pendants
Skill level: easy to intermediate
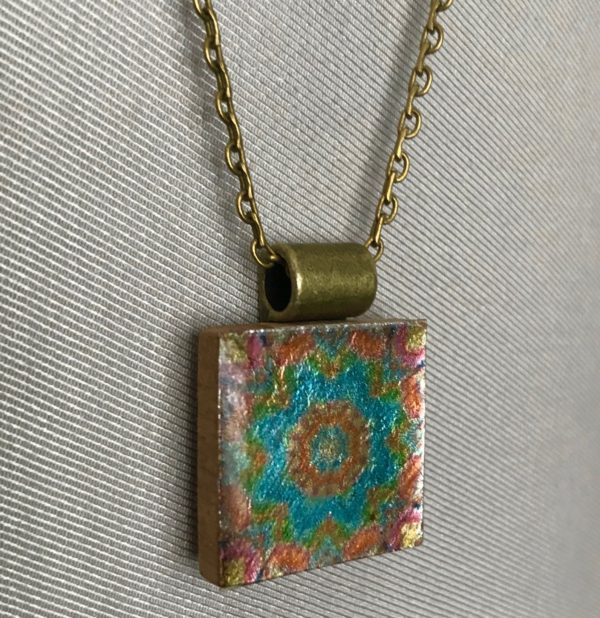
Choose pretty Mandala designs, then up them with a bit of metallic sparkle. All you need is to add a clear doming resin to finish your pendants with a glossy shine.
Christmas ornaments
Skill level: easy
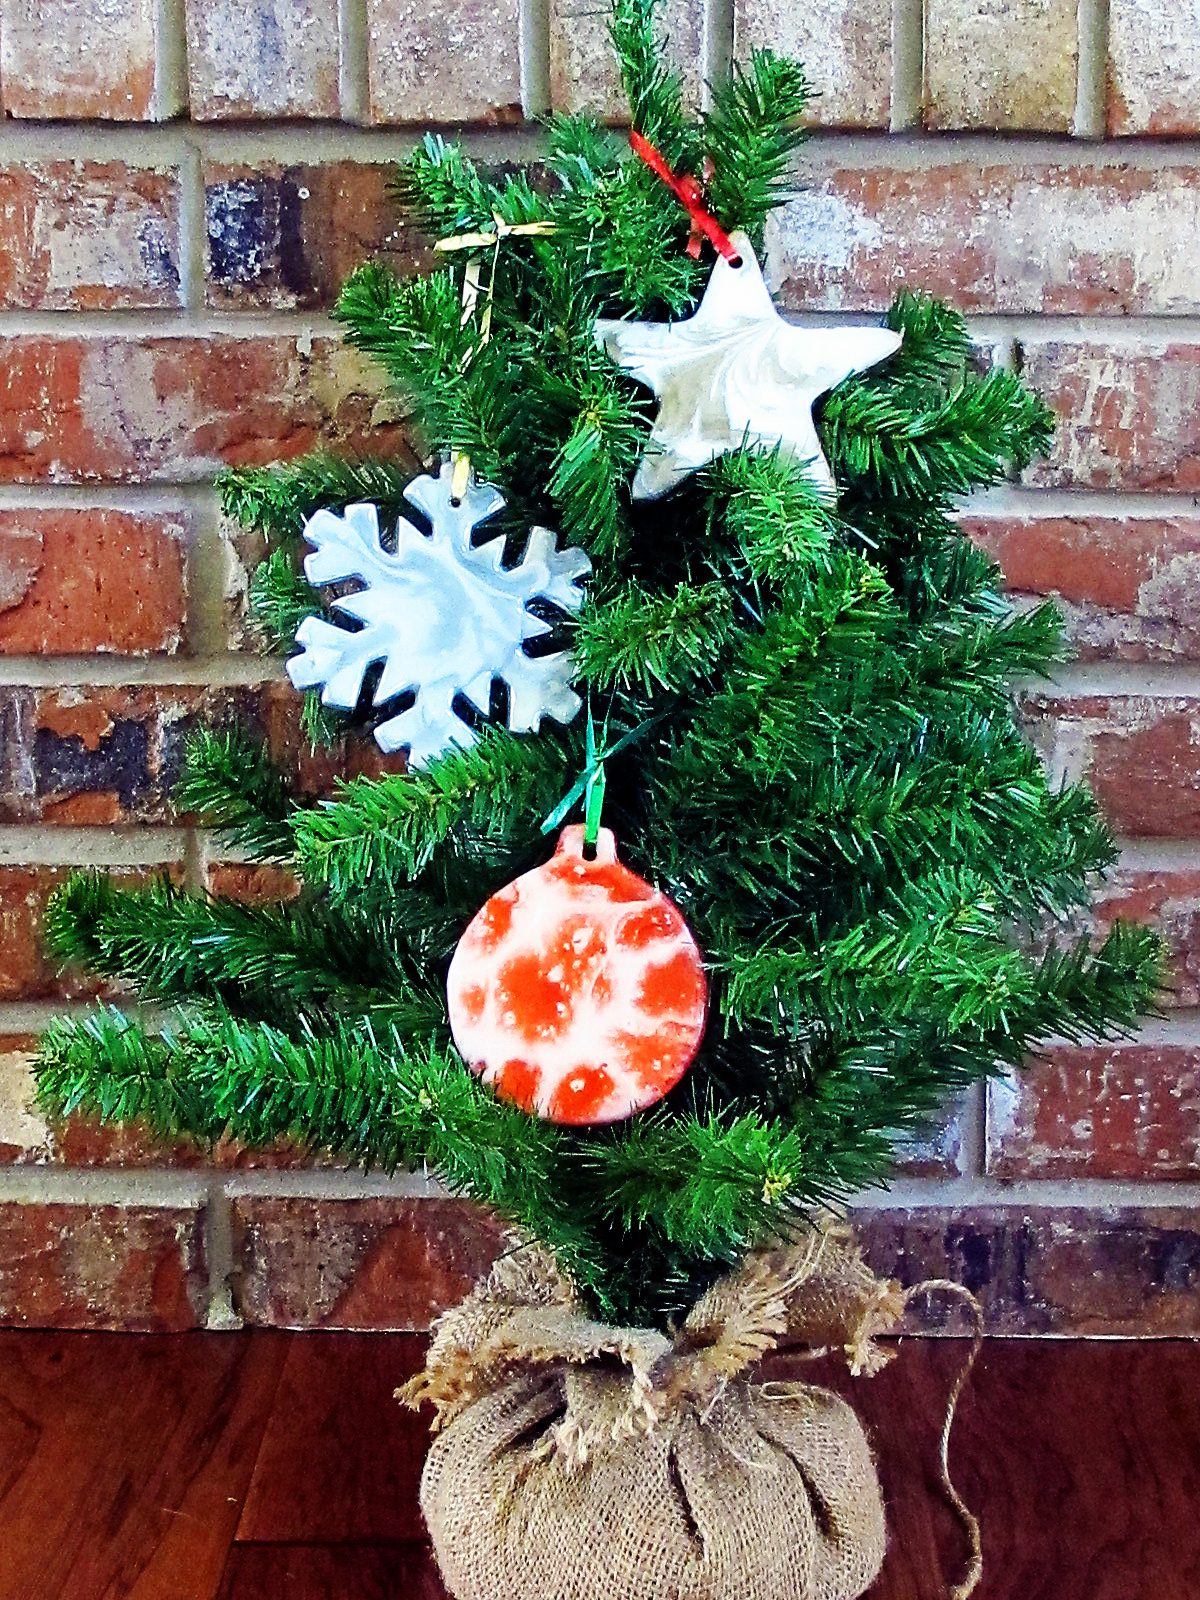
Resin can be the star on the Christmas tree. Literally! All you need is resin colors and ornament templates. Here’s how to use them to make resin Christmas ornaments.
Bookmarks
Skill level: easy
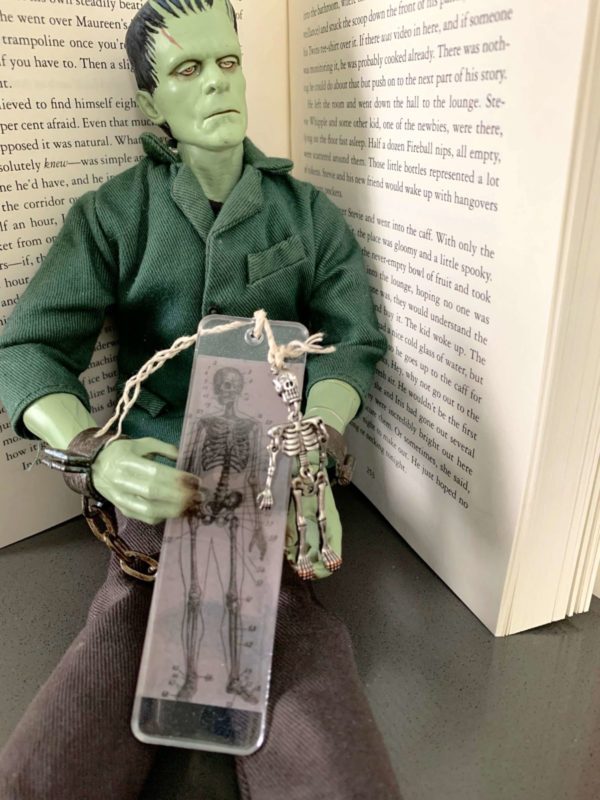
Bring old school paper books up to speed with a fancy resin bookmark. These are fun to make with a holiday theme too.
Journal covers
Skill level: intermediate
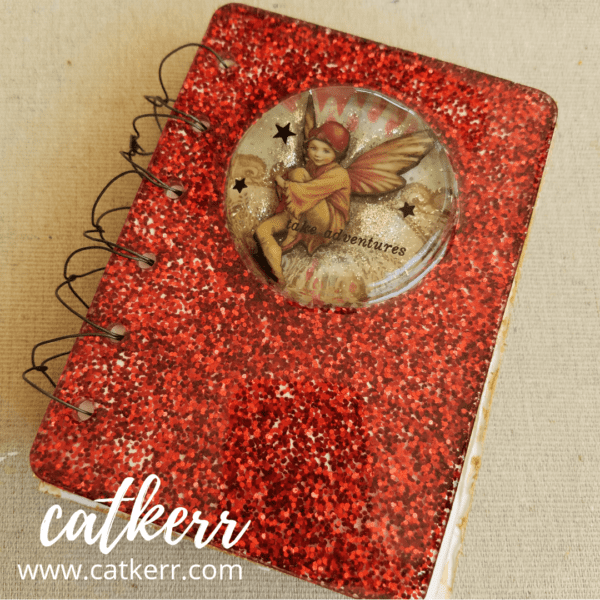
Old school pen and paper will love getting dressed up with a custom journal cover. This is a fun mixed media project that gives you a chance to craft with resin and turn it into a gift.
Want to get more resin ideas to sell?
Then you’ll love the ebook Ten Epoxy Crafts. It’s got more ideas for the intermediate to advanced resin artist to take your art to the next level. Buy the PDF book now and get a download link in minutes.
Unpublished Blog Posts of Resin Obsession, LLC © 2023 Resin Obsession, LLC