
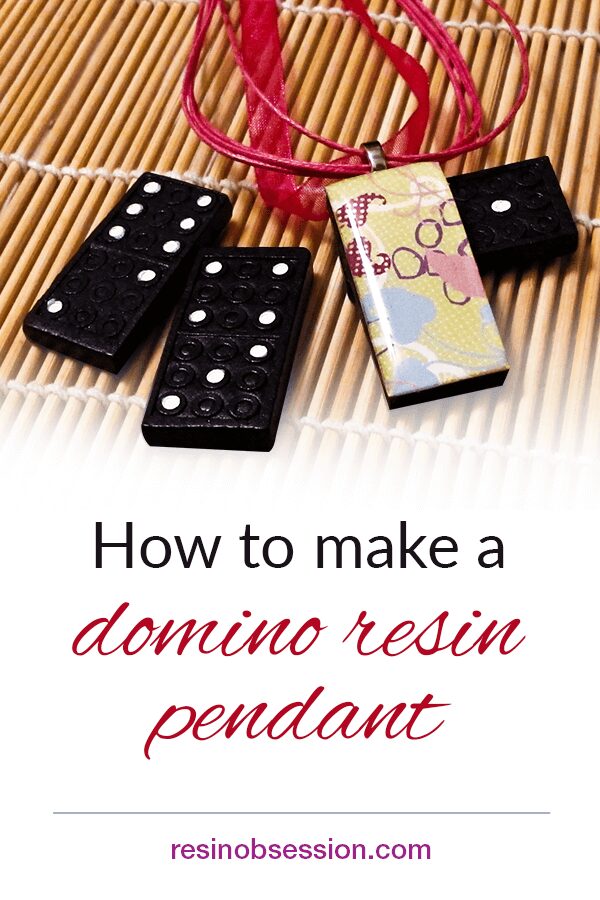
 Who’s into resin and recycling? Cool. I was hoping you would say that. Here’s how you can turn a domino into a pendant with resin.
💡 Pro tip: If you don’t have dominos, you can substitute Scrabble© tiles.
Resin supplies list:
- Resin Obsession crystal doming resin
- Mod podge glue
- Dominoes
- 1-ounce reusable plastic mixing cups
- Toothpicks
- Stirring sticks
- Safety gloves
- Clip art or scrapbooking paper
- Coarse grit sandpaper
- Straight-edge blade knife
- Glue on bails
- E6000 adhesive
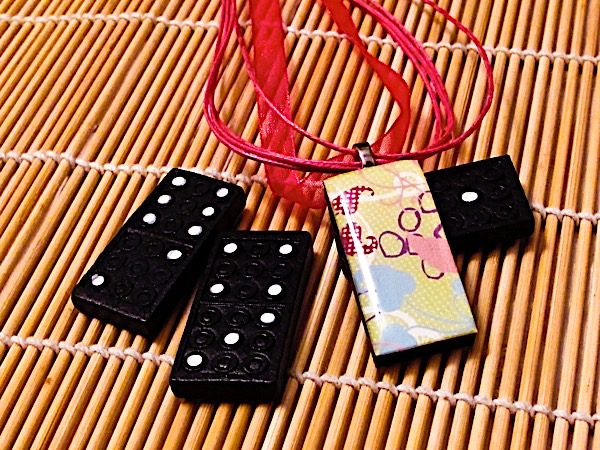
Step 1: Prep the domino
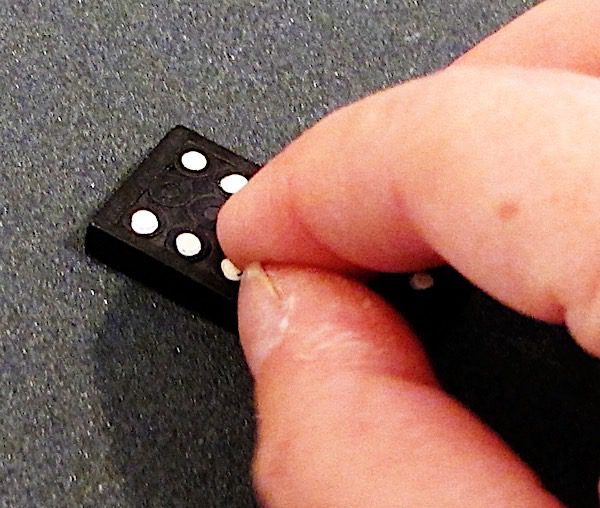
You’ll use non ‘dot’ side of the domino for your resin pendant surface. Cool fact — those dots are called pips.
Sand the side down to even it out if necessary. You’ll need to sand off any ridges or bumps so your paper glues on without divots.
💡 Pro tip: While it’s tempting to cover up the dots on the domino, the paper will push down into the indentations. Your paper will have a ‘punched’ look. Besides, it’s fun to show you made your resin pendant with a wooden domino.
Step 2: Seal the paper

Seal your paper on both sides with the Mod Podge. It needs to dry for several hours or overnight. If you’re in Florida, like I am, drying can take an entire day because of the humidity.
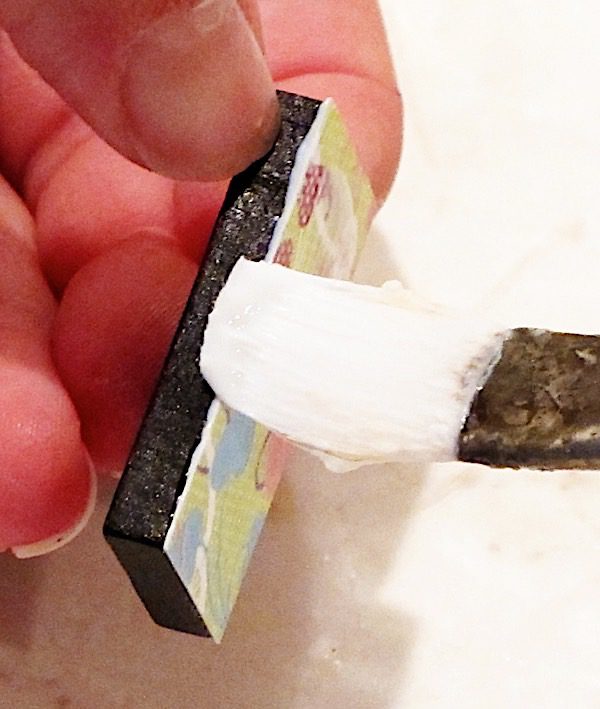
Step 3: Glue the paper to the domino
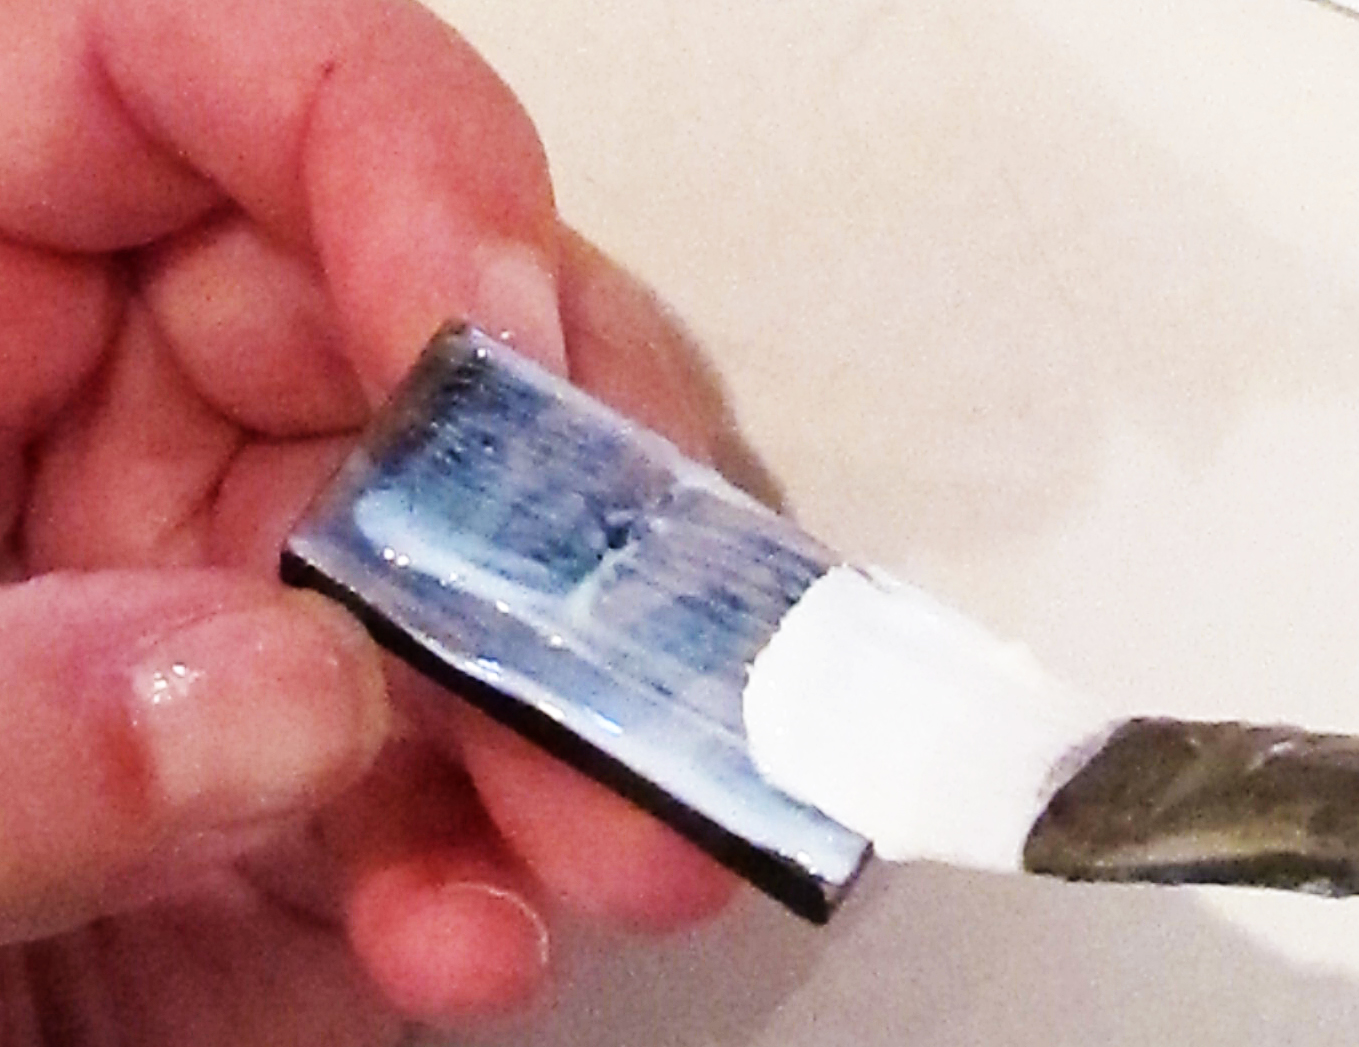
Once your paper is dry, prepare it for your domino pendant.
First, apply a thick layer of glue to the flat side of your domino.

Then, place the glue applied side of the domino to the back of your paper.
Let your paper dry.
Step 4: Trim away excess paper
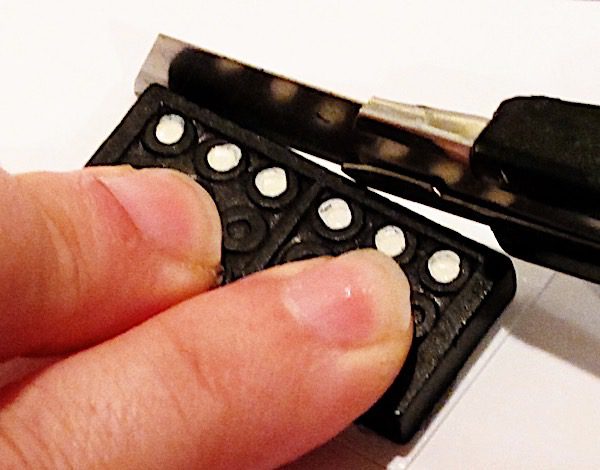
Once your glue is dry, trim the edge with a straight-edge blade. Get as close as you can to the edge without cutting the piece. You can use scissors if you don’t have a blade knife.
Step 5: Apply more glue
Brush the second layer of glue on your paper, including the edge. Gluing the edge will keep your piece from soaking up stains.
⭐️ BONUS: Here are more details on sealing papers for resin.
Step 6: Add resin
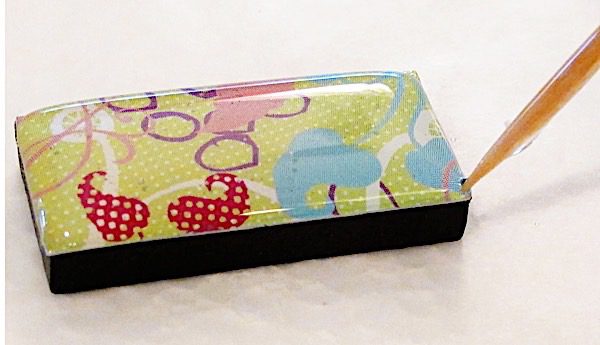
Here comes the fun part. It’s time to add the resin to your domino pendant surface.
You’ll want to use the crystal doming resin for this project for a few reasons. It
*cures with a high-dome
*finishes extra glossy
*evenly levels all by itself
It mixes 1 part resin to 1 part hardener by volume. You’ll need about two ccs of mixed resin per pendant. That means if you mix an ounce of resin, it will cover 15 pendants.
⭐️ BONUS: If you have never mixed epoxy resin before, this shows you how to mix resin and hardener.
Drip your resin onto the pendant, a few drops at a time. Then, use a toothpick to draw the resin to the edge. Drip on a few more at a time until you get the high dome you like.
💡 Pro tip: When adding resin to the surface, add a little bit, then let it spread. This will keep you from adding too much and the resin running over the edge.
Cover your domino pendants with a plastic dome while waiting for the resin to cure.
⭐️ BONUS: How long does it take for resin to dry?
Step 7: Glue on the bail
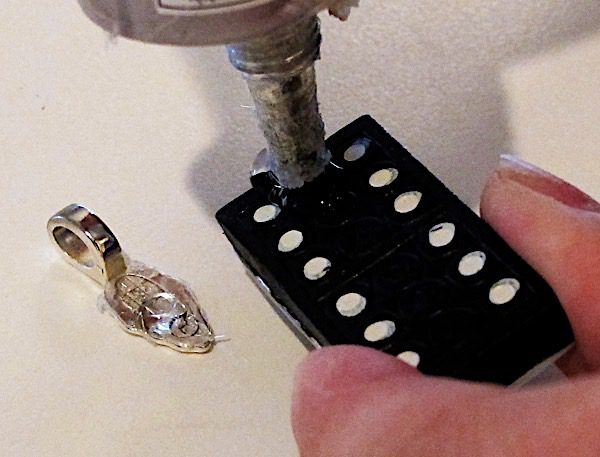
Apply a small dot of e6000 glue to the inside of the bail and the back of your domino pendant.
Allow the glue to sit for 2 to 3 minutes.
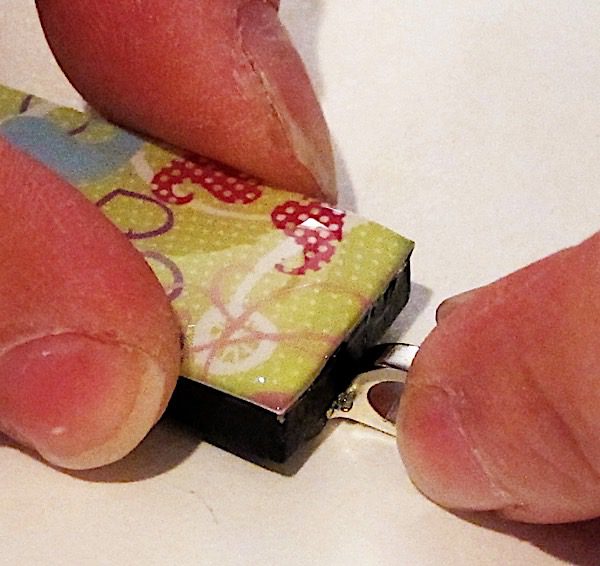
Then, press both surfaces together. Remove any extra glue with a fingernail or other small scraper. Allow the e6000 to cure for at least 24 hours before wearing.
💡 Pro tip: Don’t worry about scraping off every last bit of glue. Once the e6000 cures, you can trim away any extra with your blade.
Enjoy your domino resin pendant!
Looking for more resin jewelry making ideas?
Join thousands of creators worldwide who’ve gotten a copy of How to Make Resin Jewelry in Bezels. It shares 15 jewelry projects that you can make, even if you’re a resin beginner. Plus, you’ll get my pro tips to help you make something you can’t wait to show off. Buy the PDF ebook now and get a download link in minutes.
Unpublished Blog Posts of Resin Obsession, LLC © 2023 Resin Obsession, LLC
Thanks for the nice tutorial! I’ve seen these for sale on Etsy and elsewhere, and it’s nice to see I can pretty easily make my own. I’ll definitely give it a try!
I love this Thanks for sharing.
Can you do this with scrabble tiles as well?
Yes, Jennifer, you can use this concept for scrabble tiles as well.
I bought Amazing casting resin to start my domino and tile jewelry-but I am concerned this is not the right kind because the pics on back show molds coming out solid white? I do have Diamond glaze but was told this wouldn’t harden correctly? Advice please?
@Chloe, to make domino pendants like what is shown above, you will need a doming epoxy resin. There is a link above (in the materials list) to the Easy Cast Castin’ Craft epoxy resin that I used.
You answered so many questions…even question I didn’t know I had! Endless thanks!
What size r the dominoes and where can they be purchased?
Hi Rozellia, dominoes are usually 1 inch wide by 2 inches long. You can purchase them at any store that sells toys.
Thanks. I have 1×2 dominoes , but the 1×2 digital images are a bit too small, any suggestions
Why not try putting a rim of glitter glue around the edge of your image to bring it to the edge?
I size them myself. I have a template of the domino and I actually hold that up to my screen to make sure the size is correct. Experiment with the way you like your edges to appear. I copy and paste any image I like and if it looks clear and correct, that’s what I use. May sound technically primitive, but it works for me. I love Word, but have done it in Google Docs, too. I have printed out actual domino-sized sheets and sometimes they are a bit off for me as well. I like using my own images. There are millions of beauties out there and when I see something I really like, then I copy and paste, select and size. I have multiple shapes I use as well. Tiles, scrabble letters, bottle caps, a number of wooden shapes/sizes I’ve ordered online as well. Fun stuff!
Yes Linda, you can.