
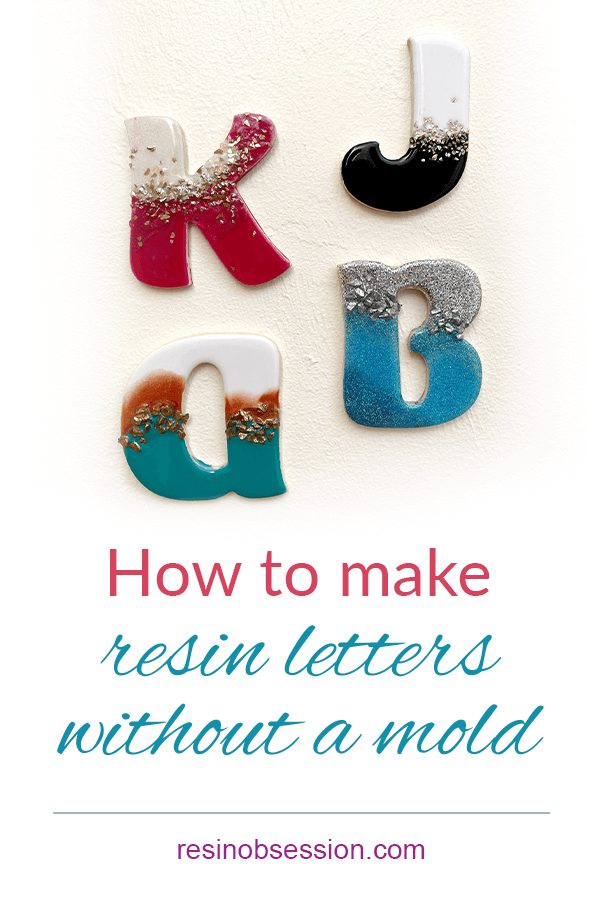
 So you want to learn how to make resin letters. But you want those resin letters to be a piece of epoxy art. Something that’s an attention grabber. And reflects your style. And they need to be fun to make.
Resin can do all that. And you don’t even need a mold.
How do you make resin letters without a mold?
You’ll use wooden letter cutouts and decorate them with epoxy resin.
Resin supply list:
Wooden letter cutouts
Paint and primer combo
Painter’s tape
Resin Obsession crystal doming resin
Resin Obsession epoxy pigments
Metallic powders for resin
Glass chips, glitter, or beads
Acrylic paint
Mixing cups
Stirring sticks
Protective gloves
Step 1: Paint the letters
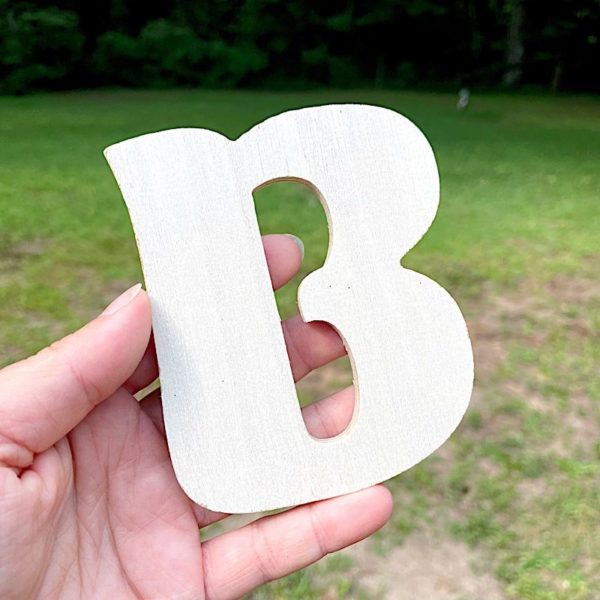
Paint the wooden letters with a paint and primer combo. You can brush the paint on, but you’ll get it done quicker with spray paint. Choose a color primer that matches the resin color you’re using on your letters.
💡 Pro tip: Go with white if you don’t know what resin color you’re using.
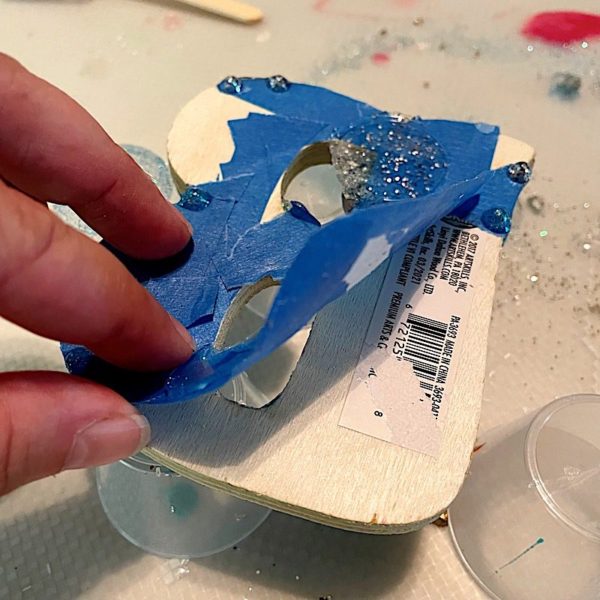
Step 2: Add tape
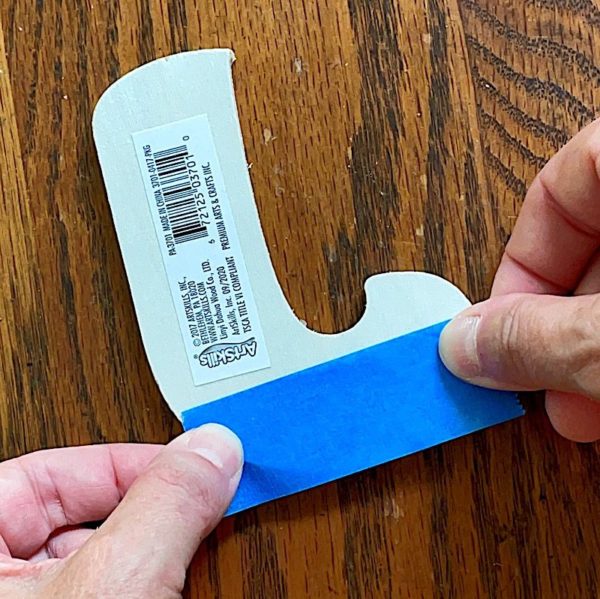
Place painter’s tape on the back of the letters.
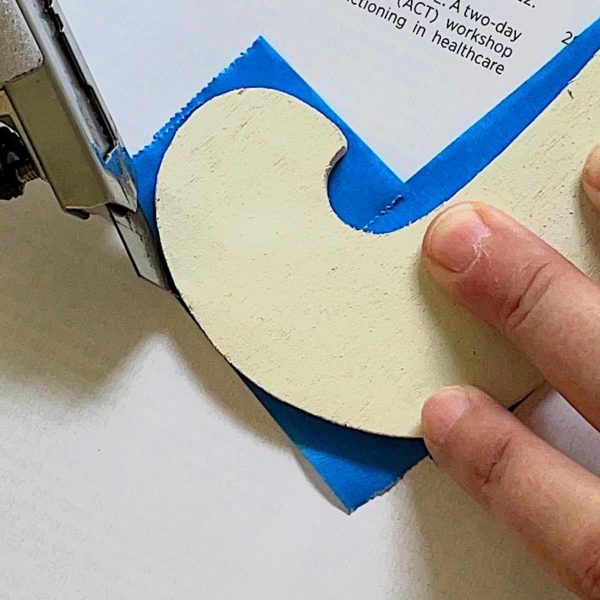
Trim the tape so it fits the edge.
Step 3: Prop up the letters
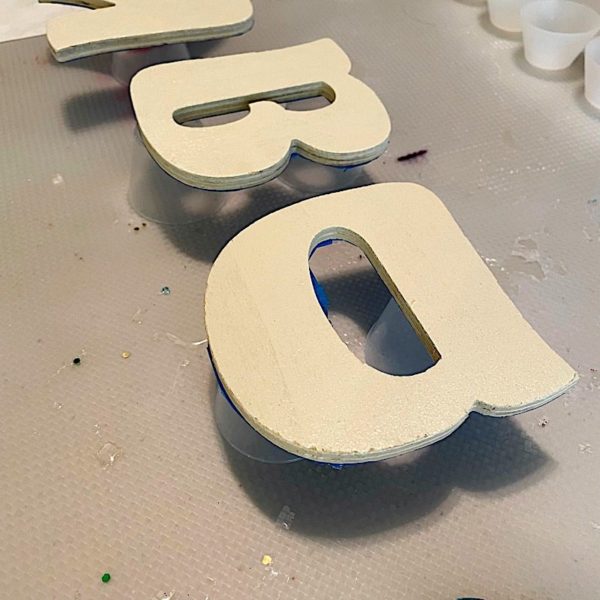
Since you’re using wooden cutouts to make these resin letters, you need to lift them off your table. That lets the resin flow over the edge.
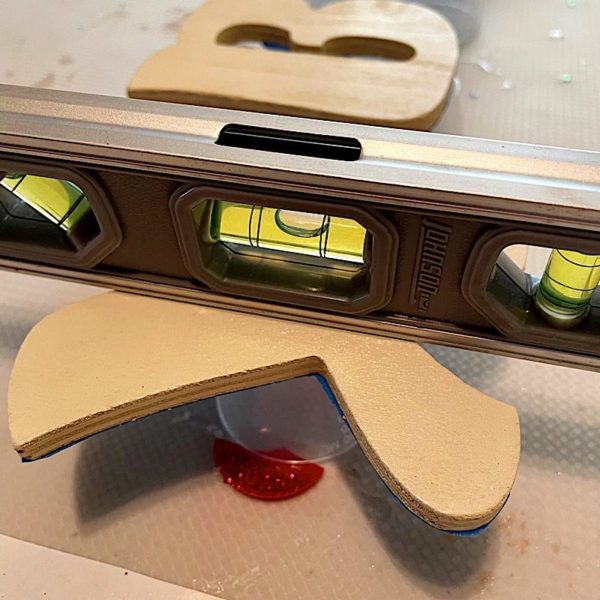
You also need to make sure your letters are level. If they aren’t, you might have bare spots on your resin surface.
💡 Pro tip: Put down a silicone mat first. Your resin can drip onto the mat. Once cured, you can peel it off, and it won’t ruin your table.
Step 4: Mix resin
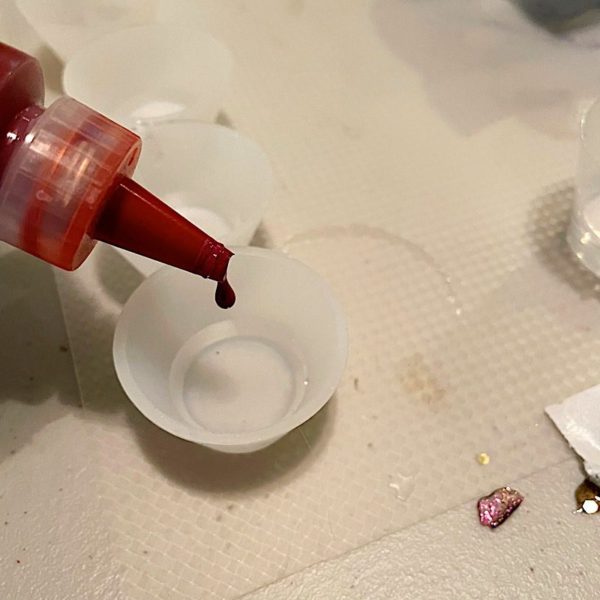
Use the Resin Obsession crystal doming resin to coat these letters. It cures glossy, self-levels, and takes colors most excellently. (Yes, that’s an actual phrase. I checked.)
Then, split your resin into several cups and color the colors you like for your resin letters.
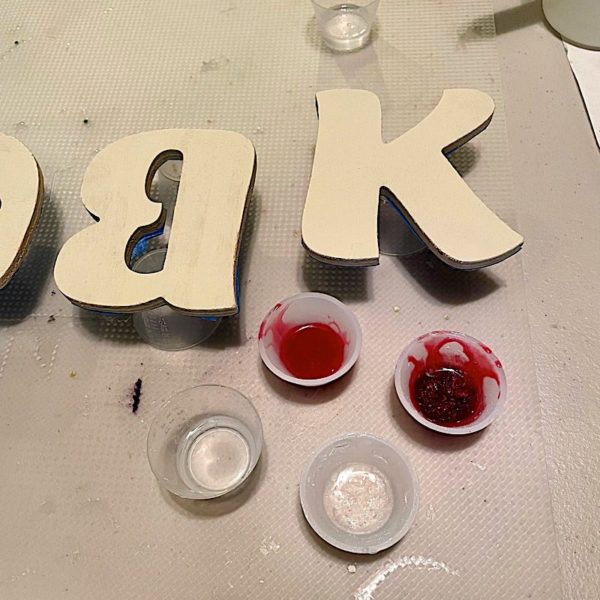
💡 Pro tip: If you’re struggling with choosing colors for your resin letters, here are a few tips:
1. White goes with everything.
2. Don’t add more than three colors to a letter
3. When in doubt, go with the tint, tone, shade rule. It lets you pick one color you really like, then vary it slightly, so they go together.
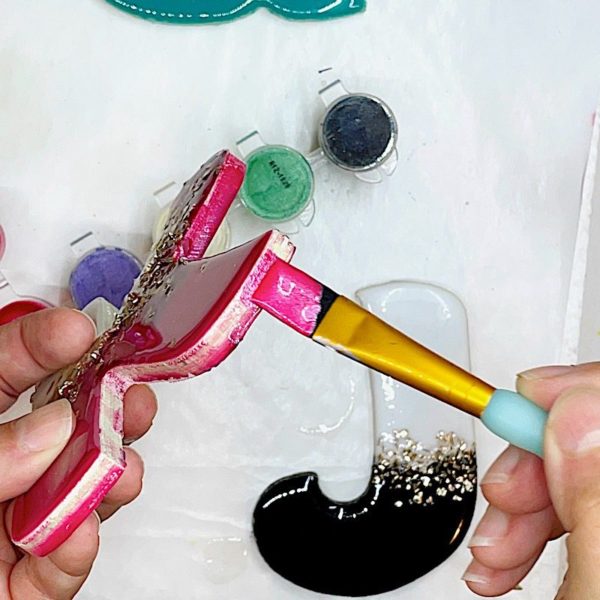
Step 5: Add your epoxy
Here’s the part you’ve been patiently waiting for with making resin letters. Finally, it’s time to pour your resin onto the wooden letters.
Pour ribbons of colors onto the letters. Don’t pour the colors over each other, but do let the colors merge on their own.
This step of how to make these resin letters is a little hard to explain in pictures. That’s why there’s a video:
View this post on Instagram
[OPTIONAL] Step 6: Add chips
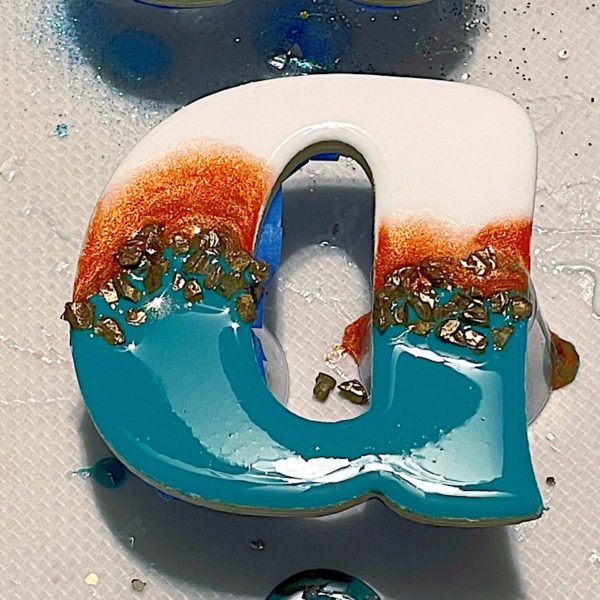
If you don’t want your resin art to look flat, you can add coarse glitter and glass chips where your resin colors meet. It adds visual interest and gives you a chance to add another hue to go with the colors you’ve already poured.
Step 7: Pop bubbles
Go over the resin surface with a heat gun to pop bubbles.
💡 Pro tip: The crystal doming resin has a long working time. If you’re a newbie, time will get away from you sooooo quickly. You’ll be happy to have the extra minutes to finish your resin letters. (It’s what also makes this resin an excellent epoxy for tumblers.)
Once your bubbles are gone, let your resin letters cure.
Step 8: Finish
Take off your painter’s tape and remove the drips.
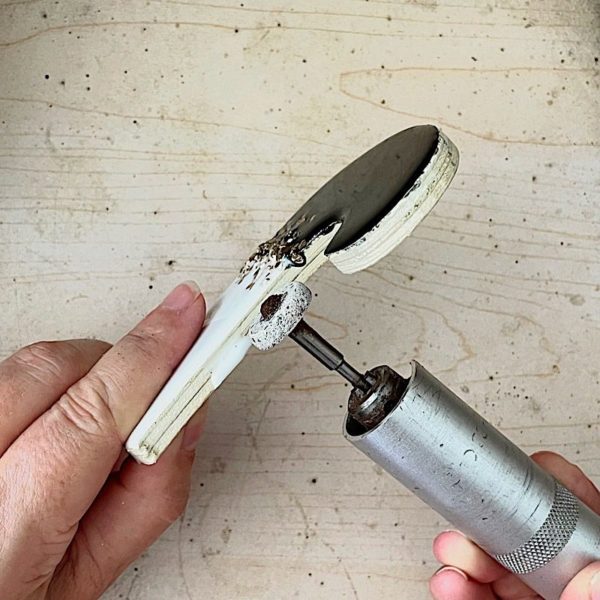
You can use a rotary tool for sanding the resin if you’ve got big drips. You don’t need to sand off all the resin. Simply get close to the wooden edge.
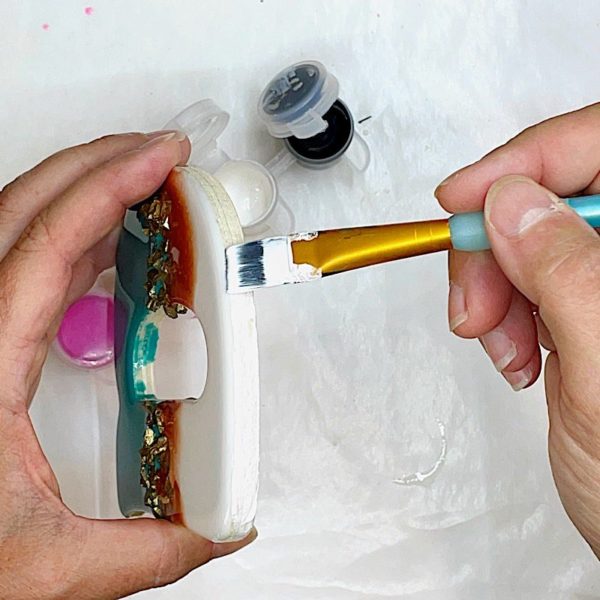
Then, paint over the edges with a complementary color of acrylic paint. Or go crazy and use something contrasting. They’re your resin letters, after all.
💡 Pro tip: You can paint on resin. That means you don’t have to sand off every bit of your resin drips. Just paint over them.
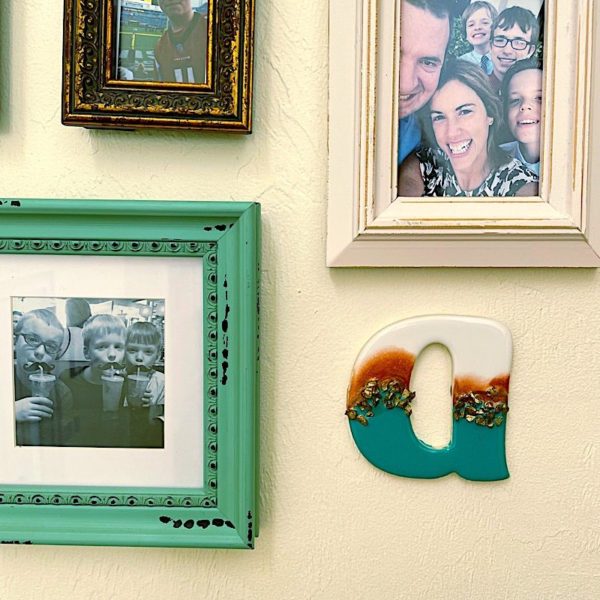
Step 9: Hang
Hang your letters where you want. The easiest way to do this is to use the adhesive ‘Command’ strips.
⭐️ BONUS: Here are other ideas for hanging your letters without using nails.
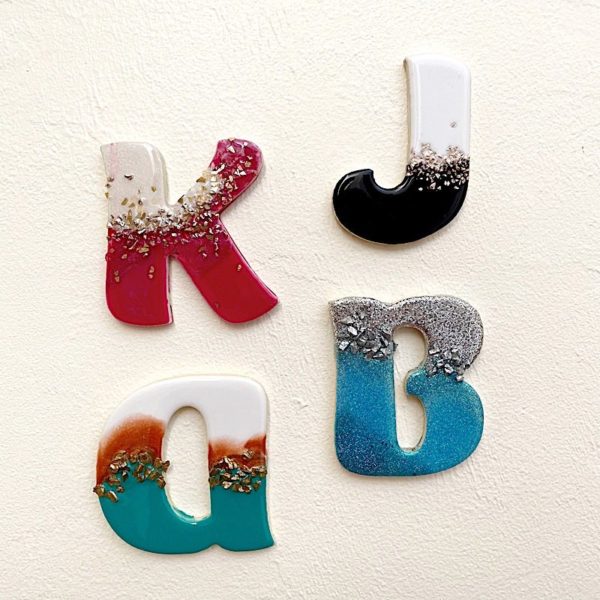
I love the subtle craftiness the resin letters add without looking kitschy.
Which of these resin letters is your favorite?
Want to take on a resin project but want more help?
Let me be your resin Yoda, young padawan. I wrote the beginner resin book, Resin Fundamentals. Stop spending hours reading and watching videos only to feel even more confused. Instead, you can buy this ebook and be ready to take on a resin project in only a couple of hours.
Buy the PDF book now and get an email download link in minutes.
Unpublished Blog Posts of Resin Obsession, LLC © 2023 Resin Obsession, LLC