
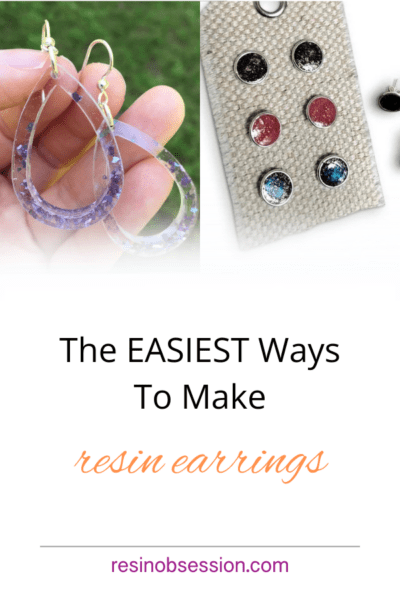
Hey there, crafty people! Are you ready to create something easy and fun? Today, I’m going to guide you through the delightfully simple process of creating your own easy resin earrings.
Earrings are like small paintings on your ears, showing off your creativity. Let’s explore the world of epoxy earrings and unleash your inner artist in this exciting adventure!
First you have to decide on what type of earrings you want to make: dangles or studs?
I know decisions, decisions!
If you’re set on studs (like myself😉) follow the tutorial below. If its dangles you prefer jump down to follow the dangles guide that follows.
Easiest Way to Make Stud Resin Earrings
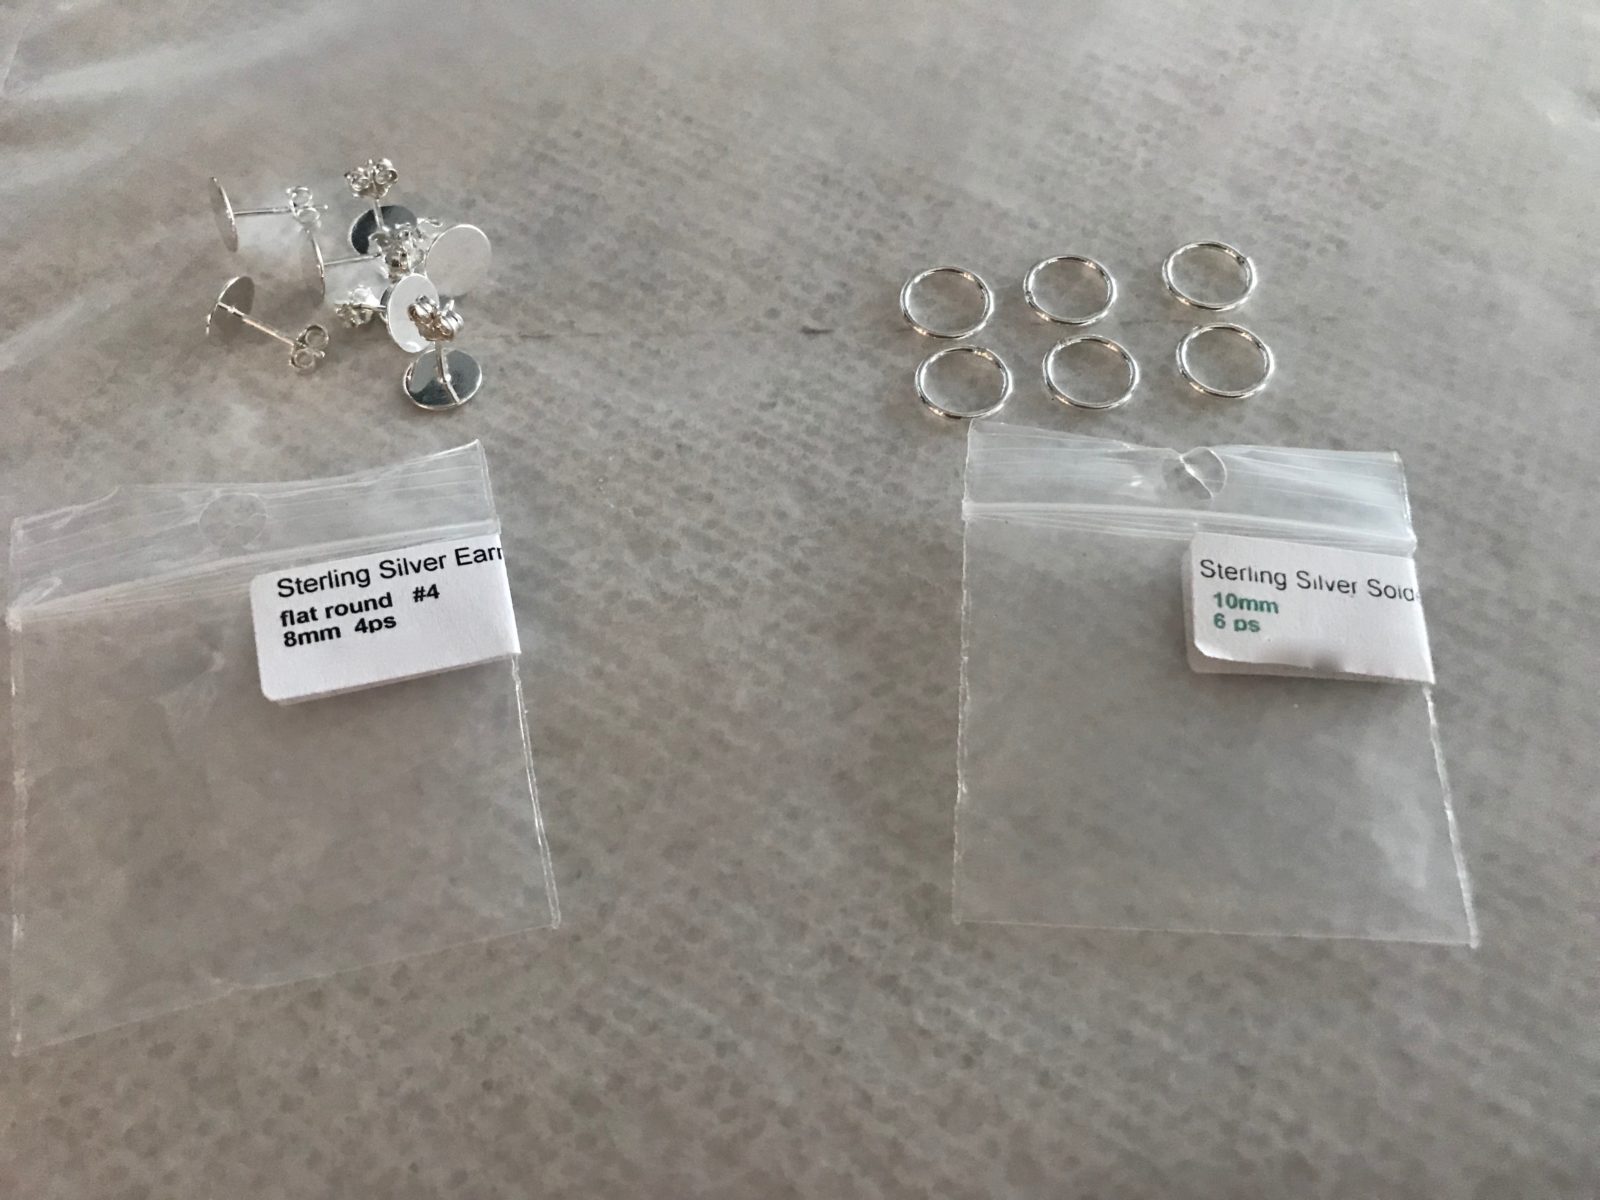
What You’ll Need:
- Epoxy Resin
- Resin Dye or Glitter
- Closed Jump Rings
- Earring Post Pads
- Earring Clutch Backs
- Clear Packing Tape or Epoxy Tape
- Mixing Cups and Sticks
- Multi-purpose adhesive
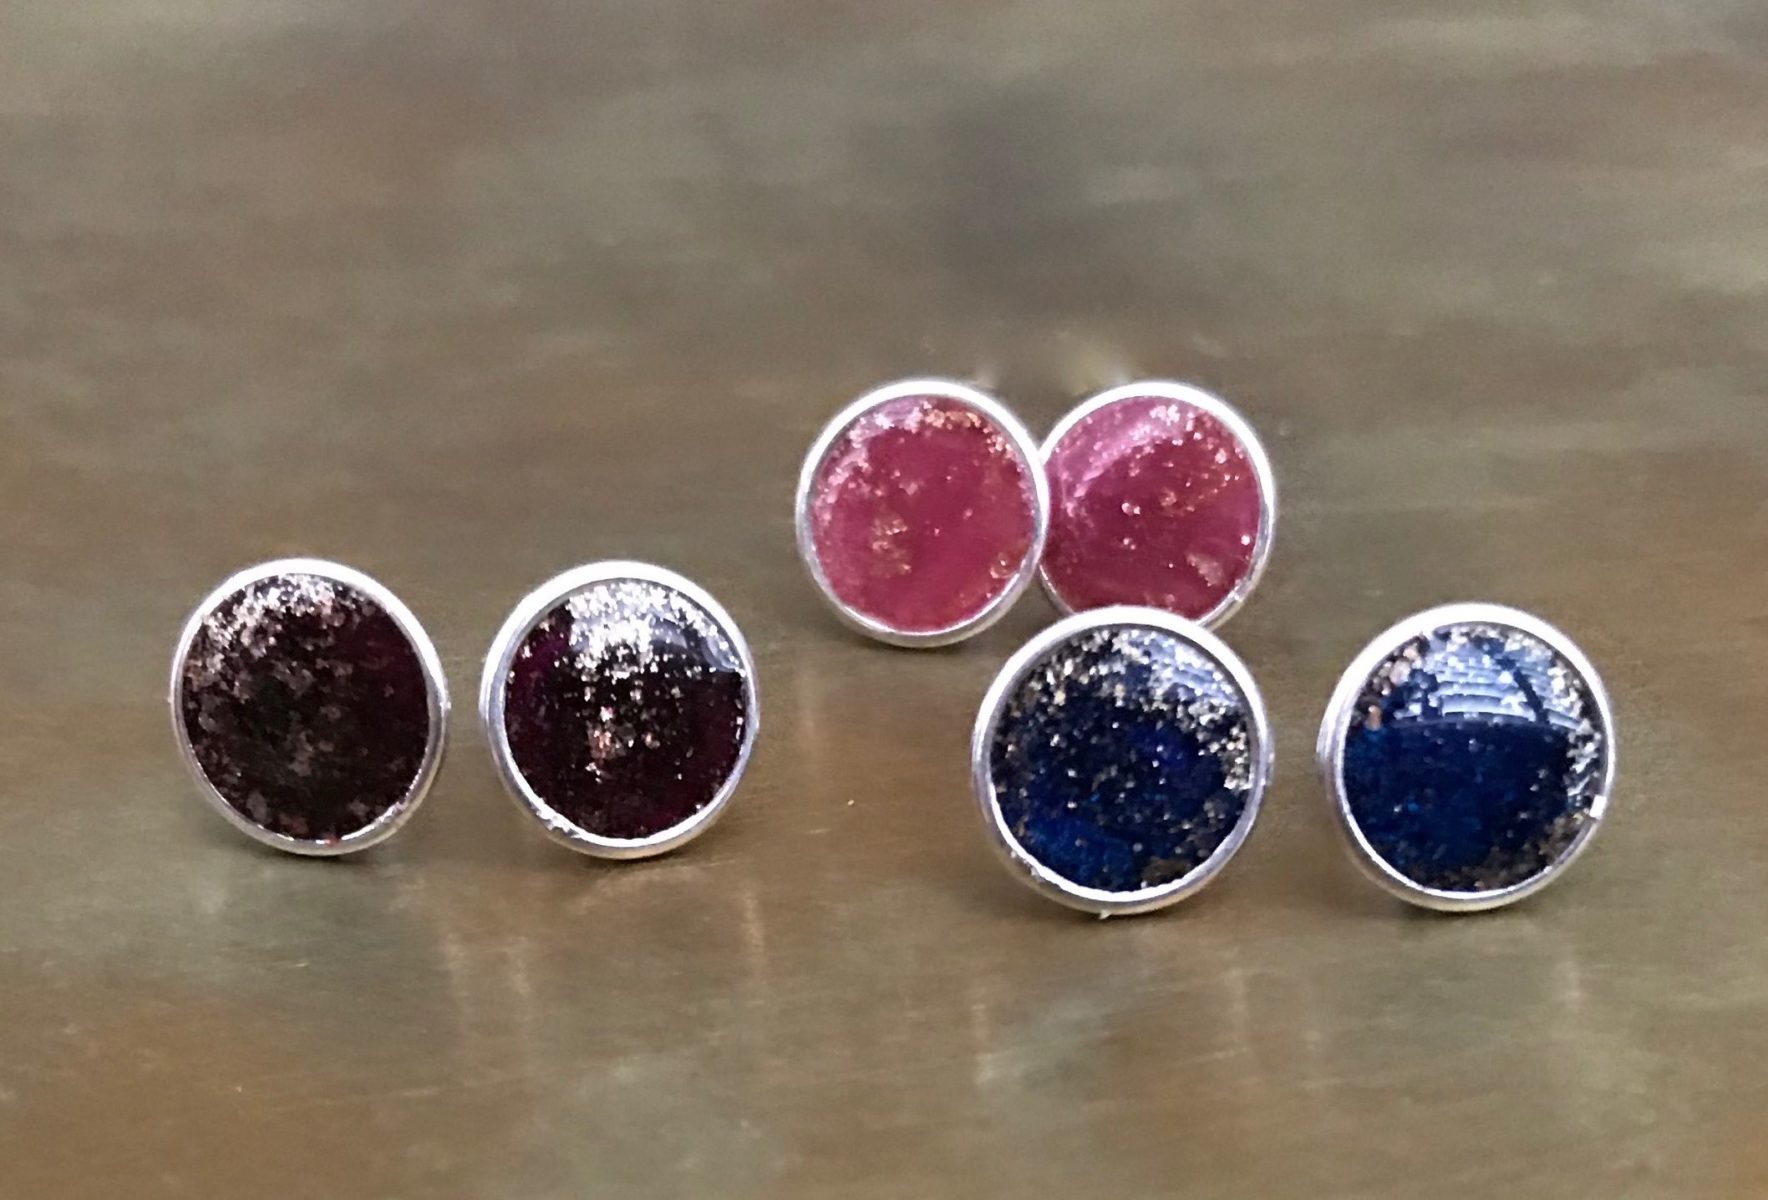
Step 1: Gather jewelry findings.
Gather silver posts and closed silver jump rings (also known as soldered jump rings). To be sure you cannot see the base of the posts from the front, use posts with pads smaller than the rings.
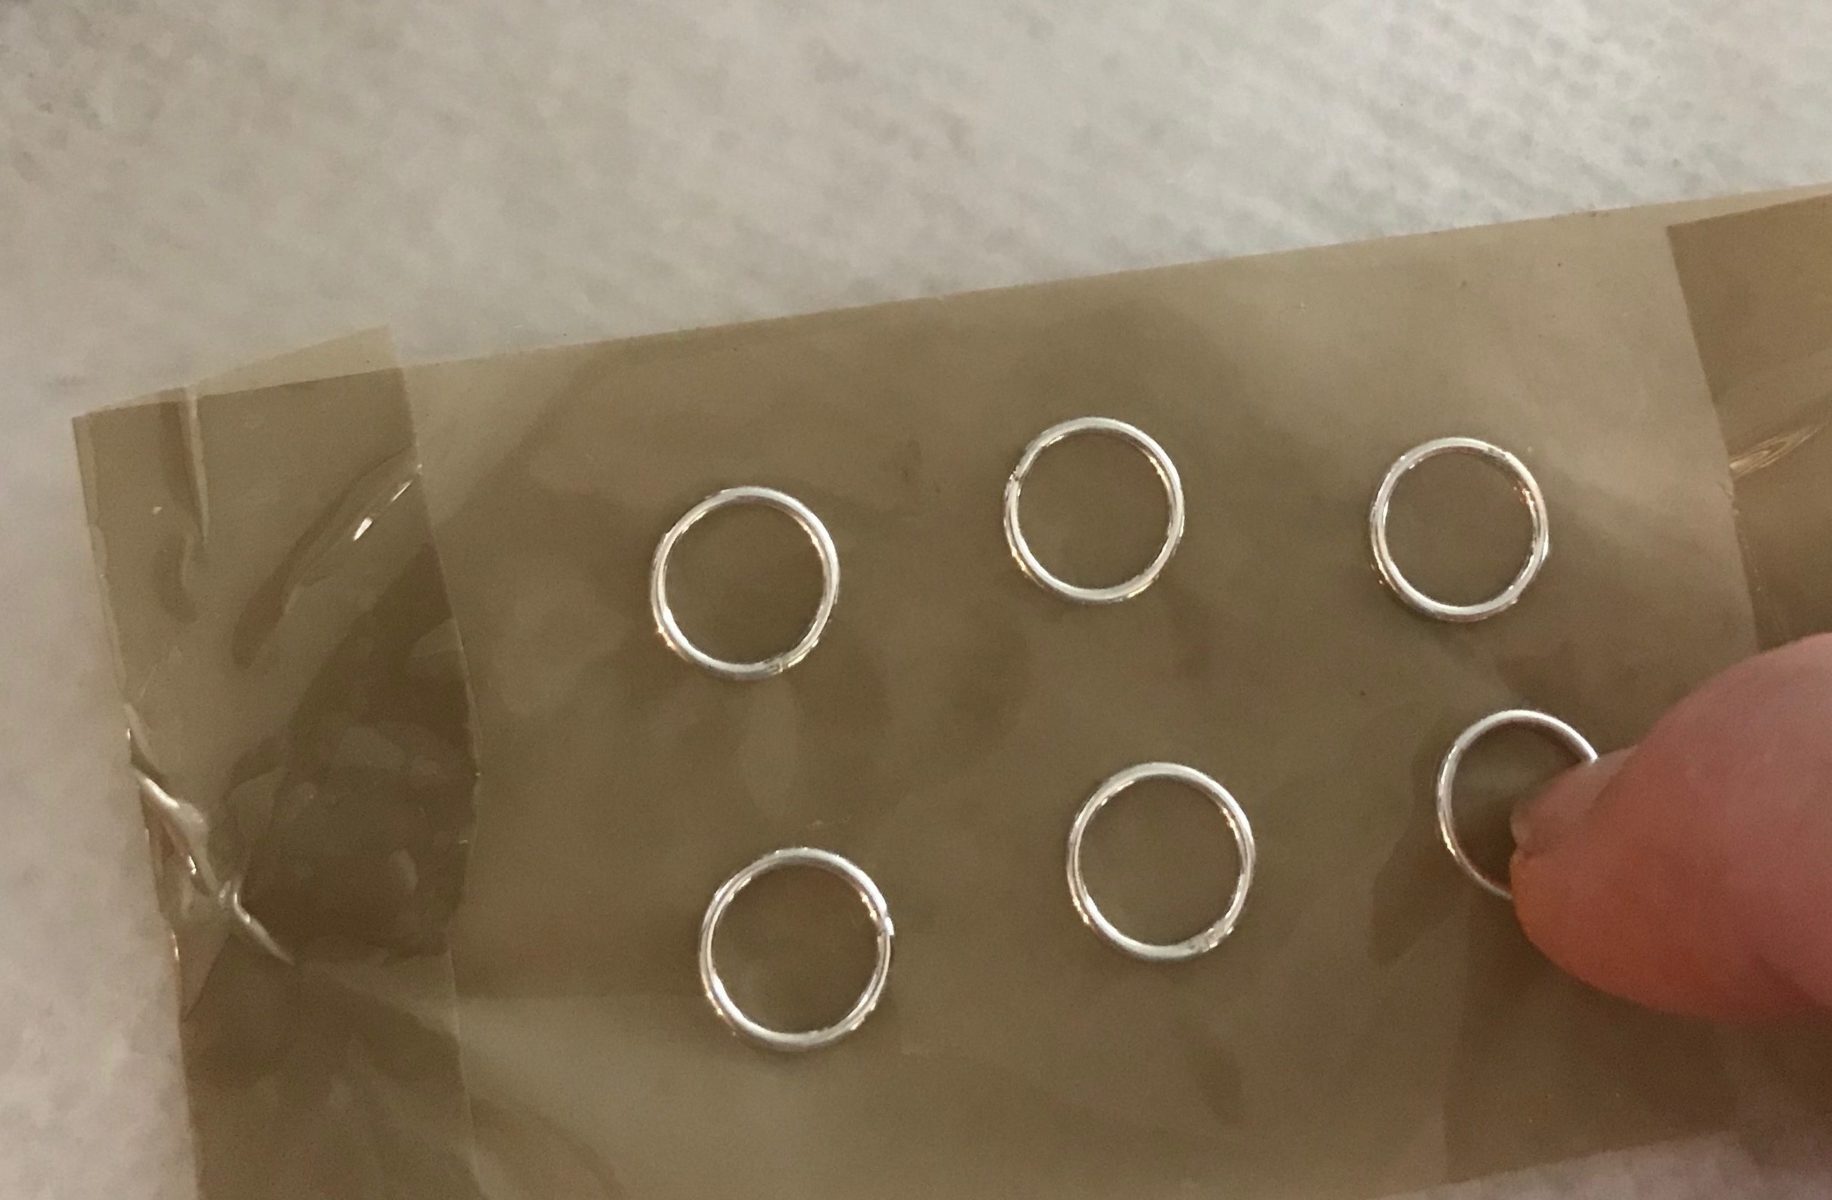
Step 2: Add rings to the tape.
Cut off a long enough piece of tape so that you can stick your rings on them giving each ring enough space to breathe. Epoxy can be such a diva! Stick those rings to the tape like little ducks in a row and we should be ready to go.
Pro Tip: Push the rings down firmly to ensure the seal is tight. This will ensure the resin does not leak out when you make these earrings. The last thing we need is a fashion disaster.
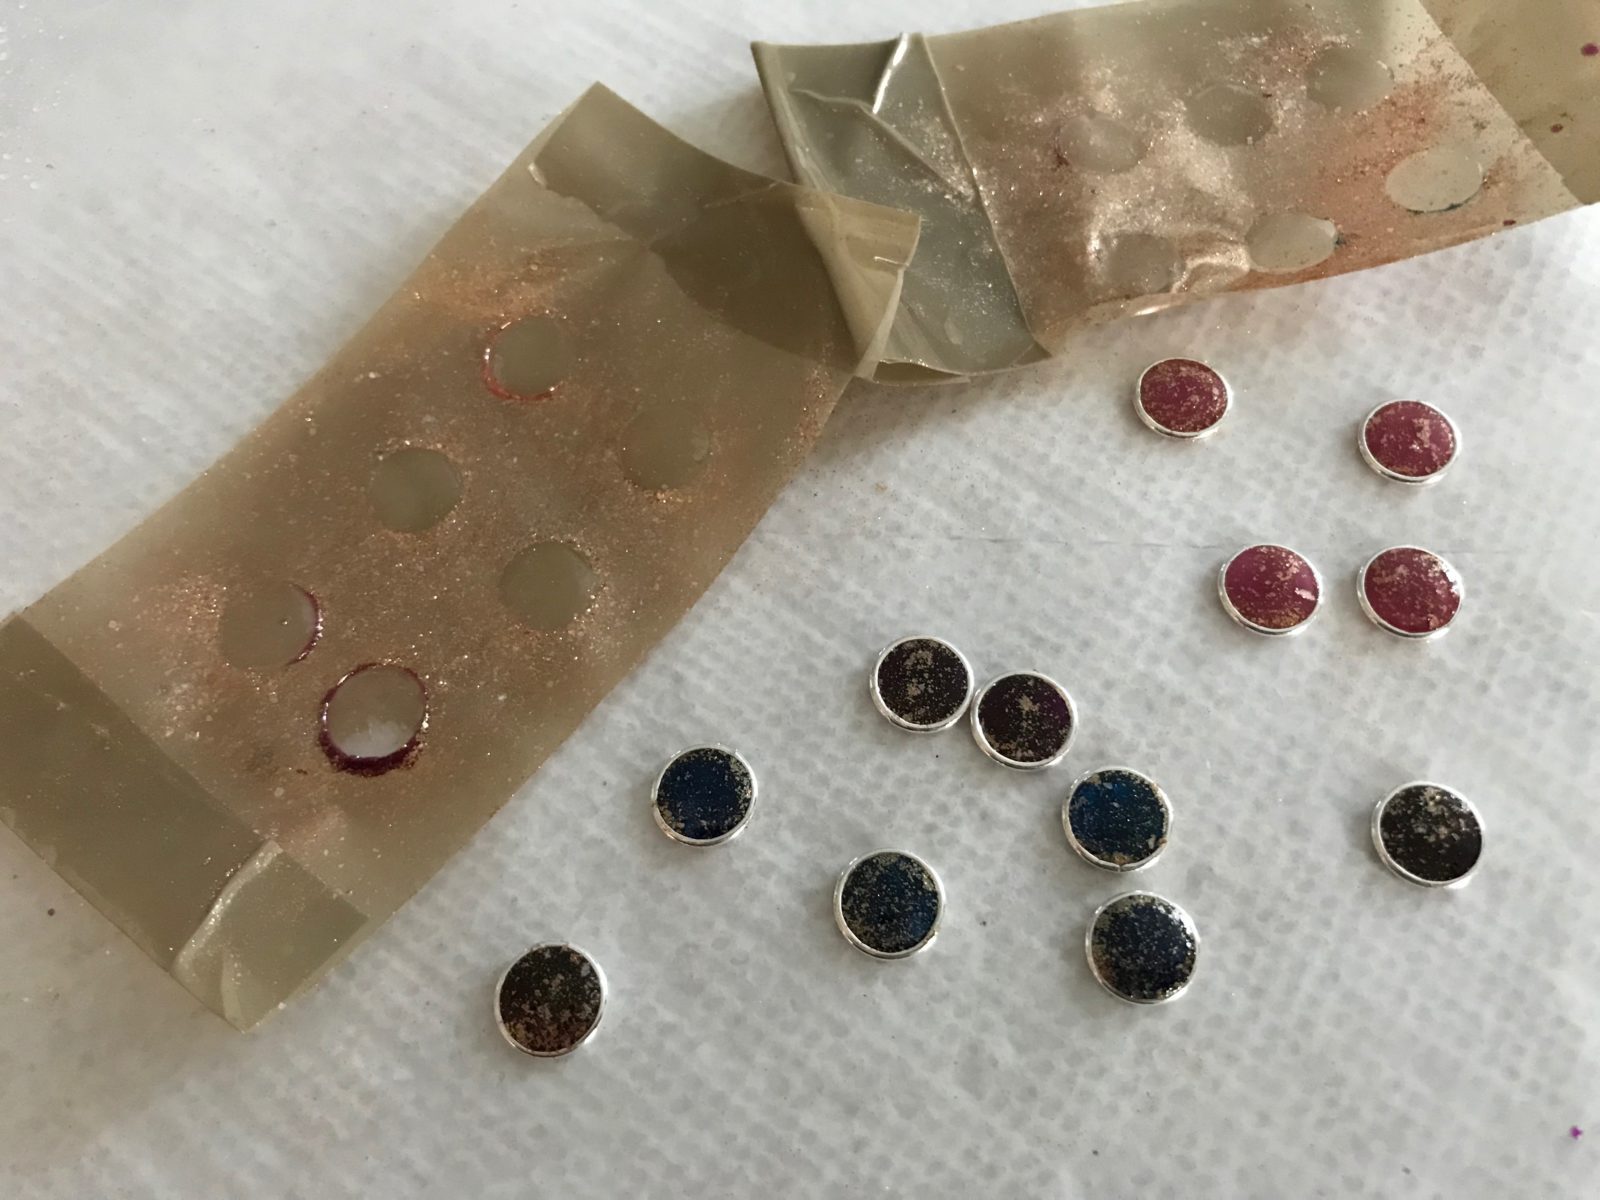
Step 3: Add your Glitter.
Sprinkle colored powder over the rings, then gently wipe the metal edges to remove excess powder. Using metallic powder gives it that extra sparkle!

Step 4: Mix up your Epoxy.
Time to mix up your clear epoxy resin. If UV is the route you choose just pour it straight from the bottle!
Step 5: Add your Colorants.
Time to choose your favorite color. I know decisions again!
Mix your chosen color into your epoxy resin until it is completely incorporated. If you are hesitant, try adding a small portion of each color with a toothpick. It’s all trial and error here!
Step 6: Add Resin to Rings
Use a toothpick or your resin tools to add colored resin to each ring. These are small and require a lot of patience! You must resist the urge to pour in too much resin at a time. RESIST IT!
Pro Tip: Use a plastic straw to blow over the surface of the resin. This pops any resin bubbles that might be hanging out on the earrings. But be careful! We don’t want to blow the whole house down!

Step 6: The Home Stretch
Let your earrings cure for a full 24 hours, patience is key!
Finally, after you’ve waited up all night you can then peel off each resin-filled ring.
Step 7: The Grand Finale
Glue on the posts using E-6000 jewelry glue and a toothpick.
Viola, you have finished and are ready for a night out on the town!
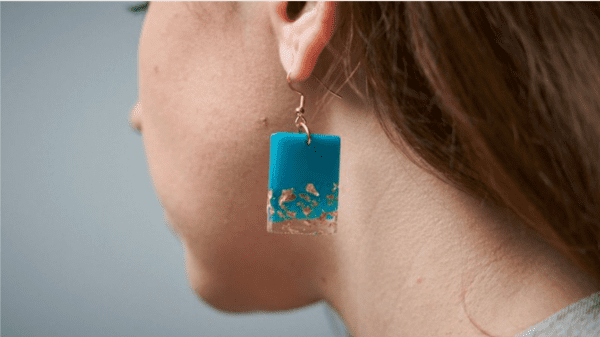
Easiest Way to Make Dangle Resin Earrings
What You’ll Need:
- Epoxy Resin
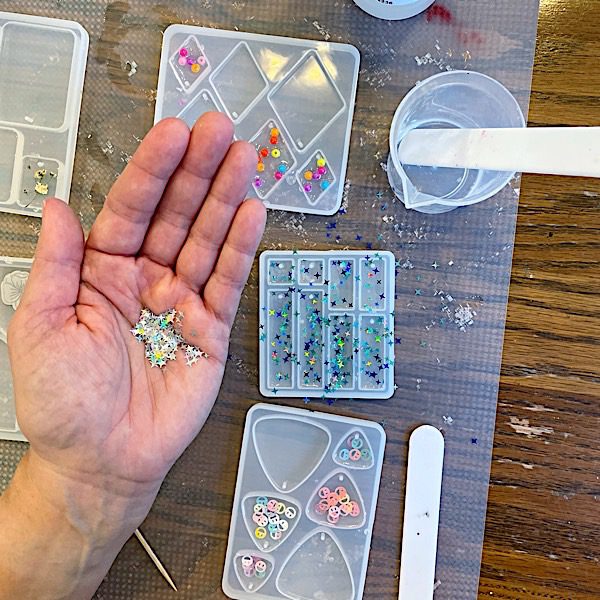
- Silicone Molds: Think fun shapes—stars, moons, or even avocado shapes because why not?
- Resin Dye or Glitter: Sparkle is always an option!
- Earring Hooks
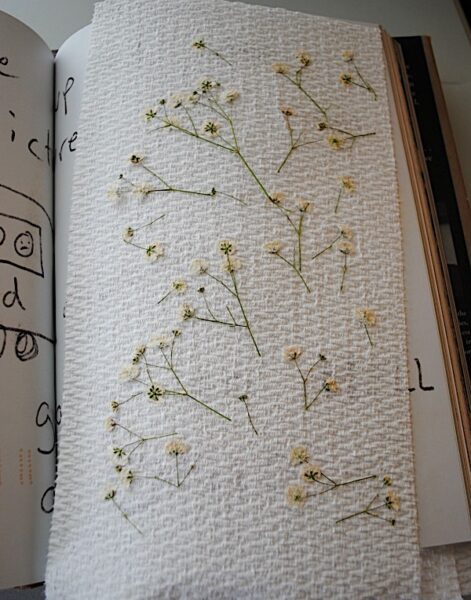
- Decorative Flakes or Flowers: For that “Oh, wow!” factor.
- Mixing Cups and Sticks
- A UV Lamp or Time: Depending on whether you’re using UV resin or regular epoxy.
Step 1: Prep Your Space
Cover your surface for easy cleanup, pick out your desired molds and have your blueprints ready!
Step 2: Mix It Up
Mix your resin and hardener according to the package’s instructions. Stir slowly to minimize bubbles—think lazy river, not whitewater rafting.

Step 3: Add Some Flair
Here’s where you can let your personality shine! Add a few drops of dye for color, sprinkle in some glitter, or gently place flakes or tiny flowers into the mix. The world is your oyster!
Need some help on how to preserve flowers for resin? Check out my article here!
Step 4: Pour and Play
Gently pour your resin into the molds. If you’re feeling extra, use a toothpick to swirl in some more glitter or precisely place your decorations. The key here is gentle; we’re crafting earrings, not mixing a salad!
Step 5: Cure the Curiosity
For UV resin, simply place your project under a UV lamp for a quick cure. If you’re using epoxy resin, allow it to cure overnight for best results.
Step 6: Assemble Your Art
Once cured, pop your creations out of the molds. Attach jump rings and earring hooks with the finesse of a ninja. Voilà! Your earrings are ready to make their debut.
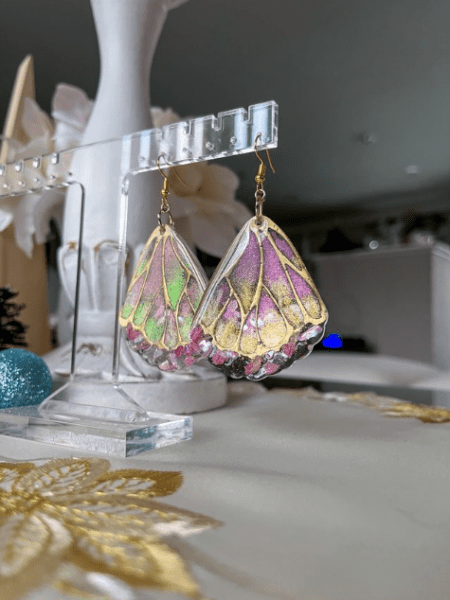
Step 7: Strut Your Stuff
Put those beauties on and strut around your house. Snap a selfie (or three) and prepare for the compliments that will surely come flooding in when you debut your creations!
Tips and Tricks:
Try experimenting with different colors and inclusions to see what you love most. The beauty of resin is in its versatility!
Remember, making your own resin earrings isn’t just crafting; it’s creating joy that you can wear! So go forth, spread creativity, and let your ears do the talking! Happy crafting! 🌟💖✨
We want to see your creative creations! Create your own earrings and tag us on Instagram @resinobsession
Want to try making resin earrings but feel like you need more help?
Then grab your copy of the resin beginner’s favorite books, Resin Jewelry Making and Resin Fundamentals. I wrote it with the beginner in mind to take you from confused to confident when creating with resin — in only an afternoon. Buy the PDF ebook now and receive a download link in minutes.
Originally written by Penny Reid
Unpublished Blog Posts of Resin Obsession, LLC © 2023 Resin Obsession, LLC
Being a metal artist, the only thing different that I do is to solder a back to the jump ring and then solder the post to the back. I realize that not everyone is set up to do the soldering that I do, but it makes for a finer piece that I would sell for $35 – $45/pair
Great suggestion using the rings. I was wanting to make some earrings but didn’t want to go out to buy more supplies today. I have lots of rings so not I can produce some. Thanks for the wonderful suggestion. Live your newsletter.
What gauge of jump ring did you use?
17 gauge
Oh my goodness, this is a great idea! Thank you for sharing – I can’t wait to make some of these for Christmas gifts. 🙂
Oh how pretty!! Thanks for the great tut!
The rings I used were to small. Less than your little finger. Out of 8, 7 ran out but were easy to clean up with an exacto knife. I put tape under and up the side, and glitter on the bottoms.
such a clever idea! I am really impressed, this is thinking out of the box! I will give this a shot!
I tried making these but no matter what I did I ended up with more resin leaking out than staying in the ring and they all came out very inconsistently. Made an 8mm half-sphere bead mold and glued the findings straight to the back, no more issue with leaking jump rings. Thanks for the idea!
I love the way you displayed them. Can you describe the material? Did you put the grommet in yourself?
So my question is about your business. Do you sell your jewelry? Or do you only do tutorials? Do you have success selling your resin jewelry? I been using etsy with next to no luck.
Hi Terri, I’m sorry it’s been challenging for you to get your business going. We have some articles here to help: https://www.resinobsession.com/category/resin-jewelry-making-business/
Love it!! Just how much resin do you pour into the rings?
Do you put in enough so that the liquid domes due to surface tension?
It only takes a few drops. Yes, add enough doming resin so it keeps the dome on top.
Great tutorial.
Just wondering if before you put the ring on the tape, if you took the post, pushed it through the tape and then put the ring on top, then add the resin? Just thought it would eliminate the need to clue the posts.
Thank you
Hmm. That’s an interesting idea Julie. I’d worry that the resin would seep through and glue the tape to the earring. But I think it’s worth a try. 😉