
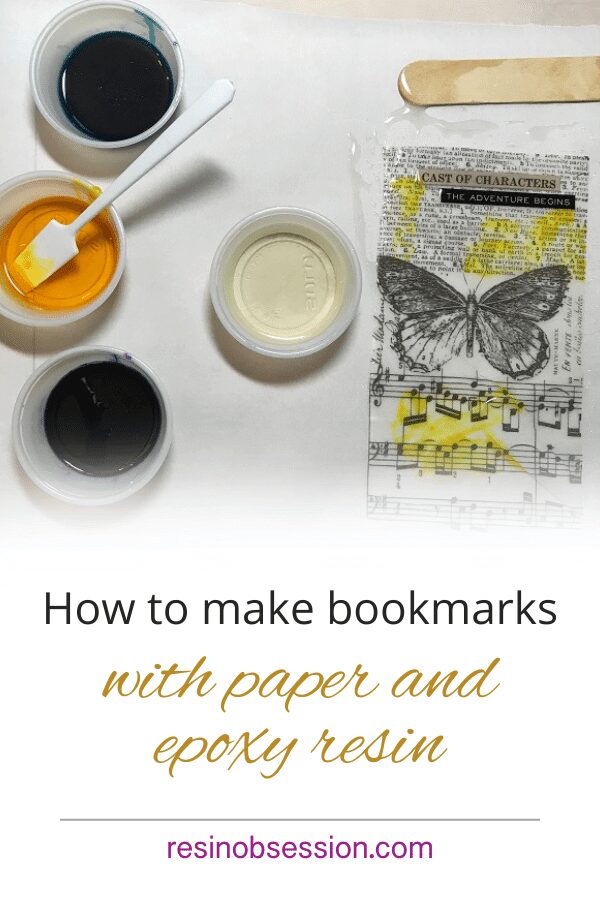
Hello Resin Lovers! I’m showing you how to DIY bookmarks with resin and paper. We’ll also experiment with resin colors. You’re going to learn several options to DIY your bookmarks.
I’m still a diehard book reader who loves the feel of paper, turning the pages as I read. Even if you’ve gone techie for your books, you might want to DIY bookmarks for planners, journal books, or for an add-on to your scrapbook. Also, these make great gifts for teachers.

When you DIY bookmarks, you want to be sure to use a doming resin. Doming resins mix thick and adhere to papers beautifully.
Resin paper bookmarks supply list:
• Doming resin: The Resin Obsession crystal doming resin works perfect for this
• Resin Obsession Transparent Color Pigments: Teal, Yellow, Purple
• Ranger- Distress Inks, Archival Inks
• Stamps by IndigoBlu- Shine Bright Set.
• Tim Holtz Tissue Wrap- Mélange, Ephemera, Clipping Stickers, Metallic Quotation stickers.
• Deli Wrap, Parchment Paper.
• Americana Decoupage Glue
• Cropodile by WeR to punch holes.
• Book Paper, paper napkins
• Gloves, stir stick, measure cups, timer.
• Random Washi tape, charms, beads, ribbon & colored cord.
DIY Bookmarks Project 1:
Step 1: Apply colors
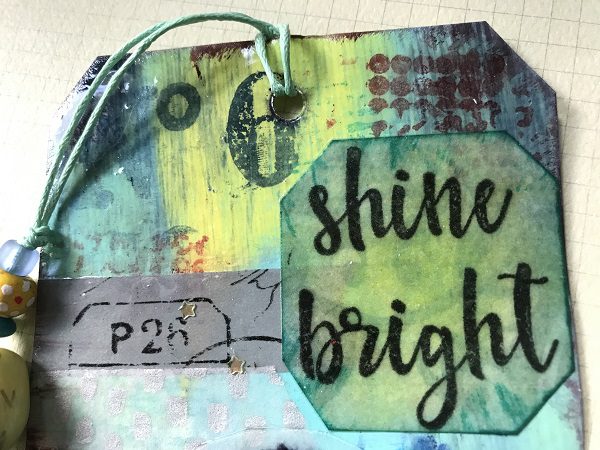
First, dry brush acrylic paints onto lightweight paper. Then, cut the piece into the shape of a tag. Next, do random background stamping with Distress Ink.
I was unsure if this ink would stay fixed when applying the resin because of the painted background. Acrylic paint is plastic-based. Usually, water-based ink does not adhere well if you add other layers, especially wet ones. However, I was very pleasantly surprised at my results.
 Step 2: Apply washi tape and glue
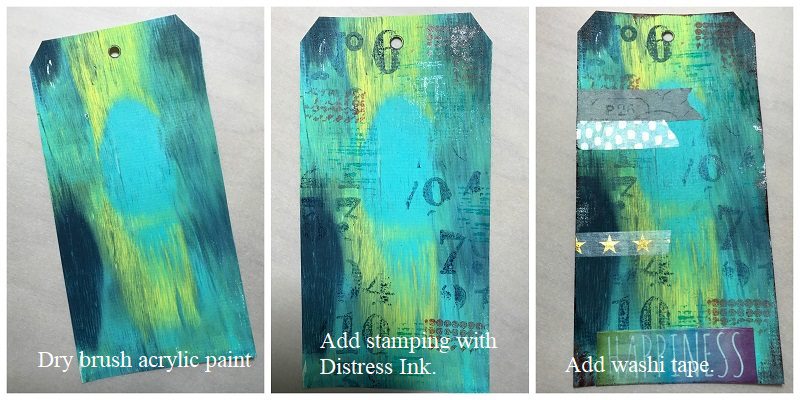
Once those layers are dry, add washi tape. I usually use glue with washi, as it doesn’t always stick well. Some washi tapes also have a coating that repels the resin, which can cause beading on the paper bookmarks. Resin sticks to (dry) glue without any problems.
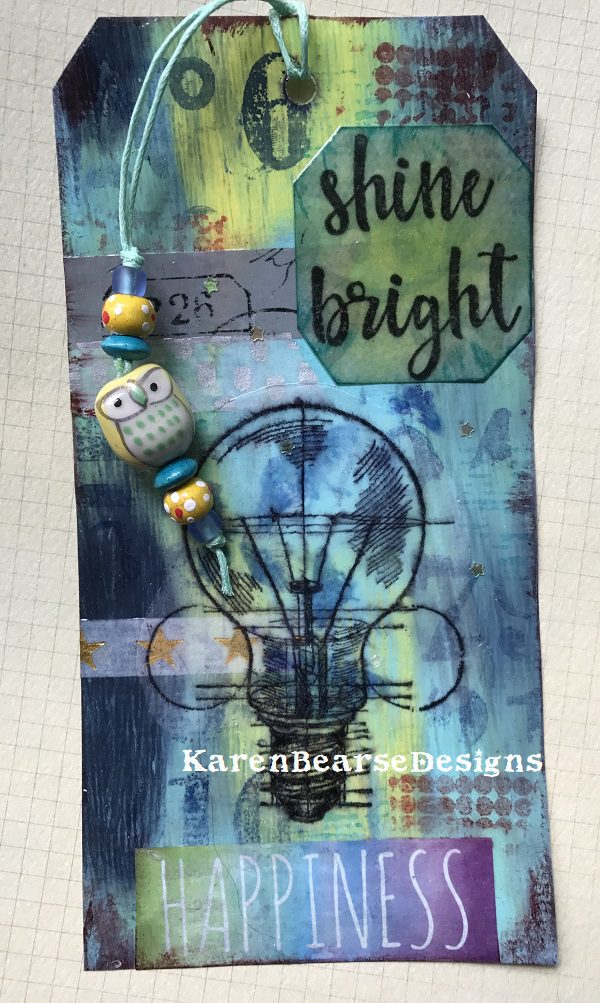
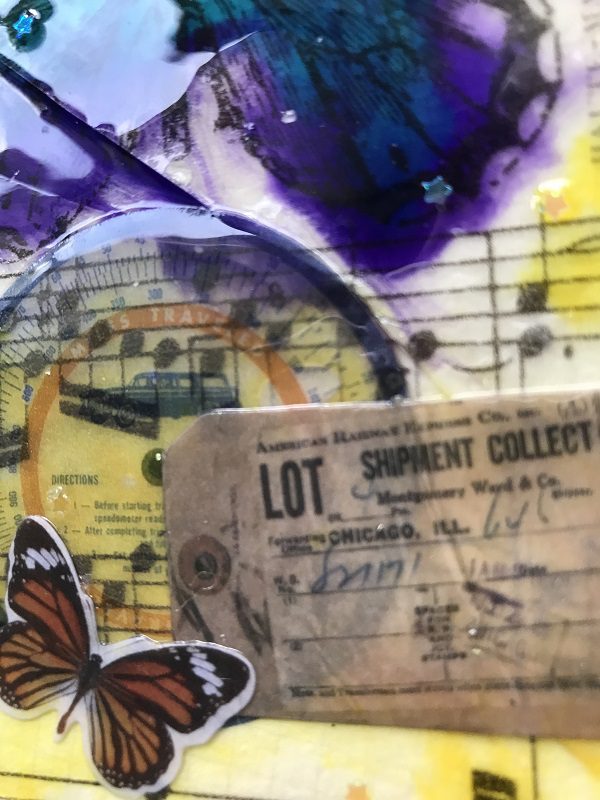
Step 3: Add stamped images
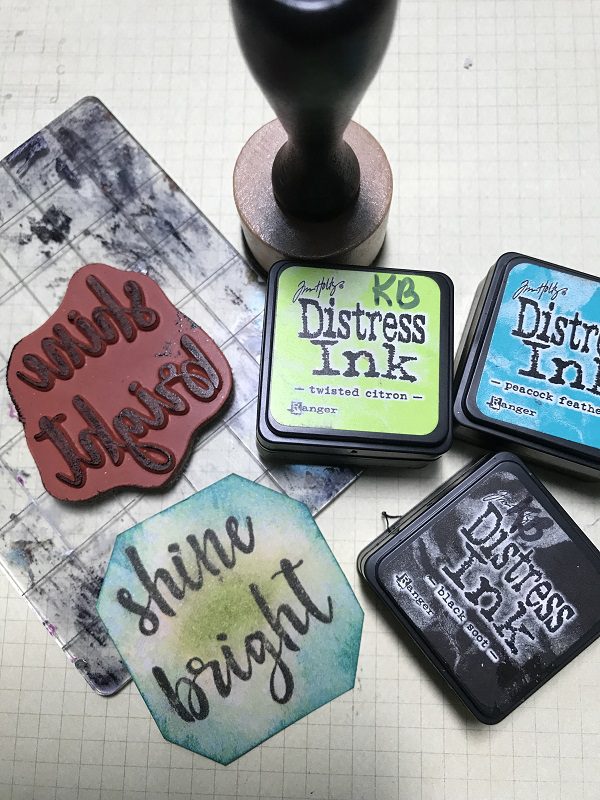
I stamped ‘Shine Bright’ with Black Soot Distress Ink on a scrap piece of scrapbook paper. Then the edges were distressed with the color Peacock Feathers, and a bit of Twisted Citrus was rubbed in the middle. Next, I stamped a light bulb on deli paper with Black Soot. Then, I cut it out, leaving a bit of an edge but ready to add to the tag.
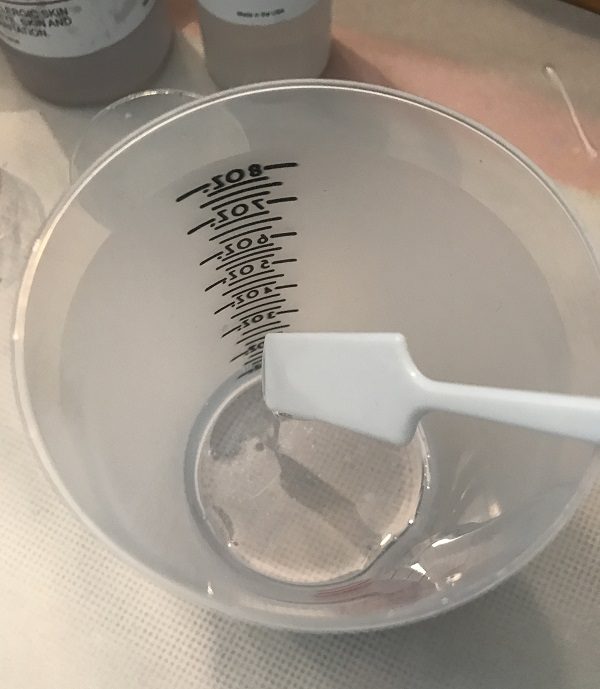
Step 4: Mix resin
The crystal doming resin mixes equal parts of A and B. Stir both parts together for three minutes. Don’t use it until it’s streak-free. That means it’s thoroughly mixed and won’t leave any sticky spots.
If you’ve never mixed resin before, check this article out first: how to mix epoxy resin.
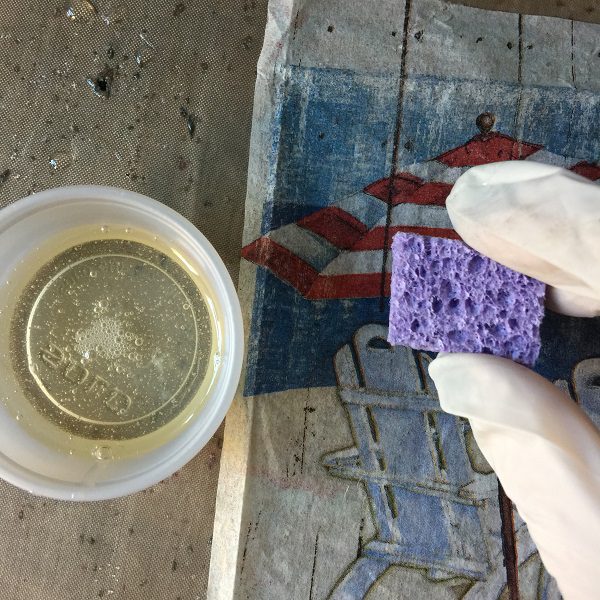
Step 5: Sponge resin on top
Place the tag on a non-stick surface that can stay undisturbed for at least twenty-four hours. Pour a quarter-size dollop of resin on the backside of your DIY bookmarks and spread using a foam brush or piece of kitchen sponge. I find using the sponge creates a nice thin layer that is great for making resin paper.
Once the backside is covered, peel it up and flip it over. Do a coat on the front side the same way. The idea is to get a thin layer that completely covers the paper. Don’t worry if you have resin spilling over the edges a bit.
Always wear safety gloves to protect your hands.

Step 6: {OPTIONAL} Add embellishments
If you have charms or other three-dimensional items, you can add them here. Put a thin coat of resin on the back side of the item before you push it onto the background piece. It will adhere securely this way.
Step 7: Add a resin topcoat
Once all your embellishments are placed, add another coat of resin across the paper bookmarks. Cover your project with a container or box to keep dust from settling on top. Let this sit on a flat surface for 24 hours to set.
Once the resin is dry, simply lift your tag off the surface. It should come up easily. You can trim any excess resin from the edges with scissors. Finally, punch a hole and add cording and beads.
Your resin paper bookmark is ready to use!
DIY Bookmarks Project 2:
For this bookmark, I made it like steps 1 through 3 above in the first DIY bookmarks project.
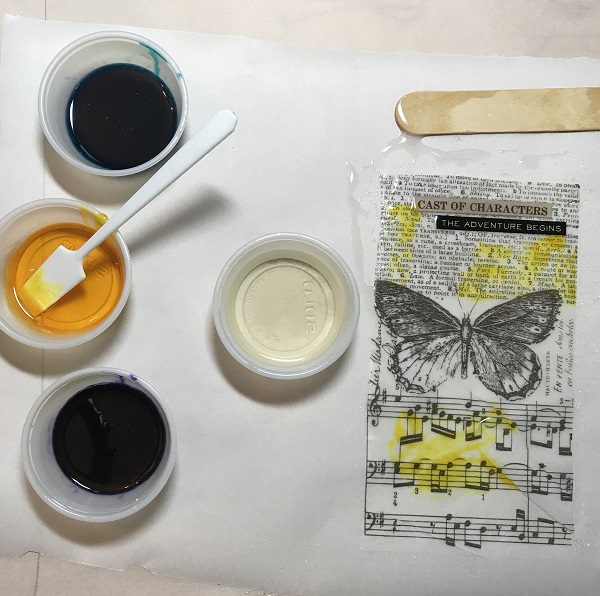
Step 4: Mix and color resin
After mixing my resin, I poured it into four separate cups and added one drop of transparent color to each of the three cups (teal, yellow, purple), leaving one cup with uncolored resin. Next, using the stir stick, spread the resin one color at a time randomly on your tissue background. Wipe the stick with a paper towel in between applying colors so you don’t mix your colors.
The colors are transparent, so the background images still show through. I colored the butterfly more carefully so the purple would match the wing outline.
Step 6: {OPTIONAL} Add embellishments
Swipe resin on the back of the paper bookmarks first and add them to your background. Then, carefully add more resin on top. Try not to disturb the color too much. As you see on the top butterfly, the teal blended onto it and looks really interesting. You can also drop some sequin stars or shapes and use a toothpick to push them into the resin.
Set this bookmark aside to cure as above. When the resin is set, attach a folded piece of fabric with the Tiny Attacher or stapler at the top.
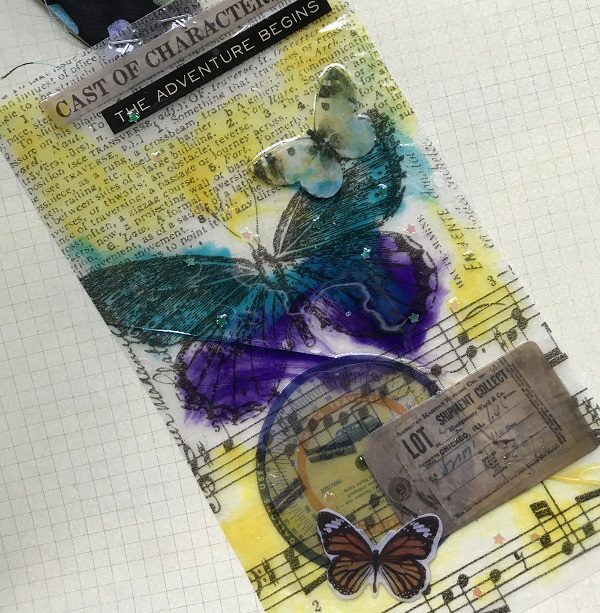
Next, I collected fun quote stickers figuring out where they would go before I poured my resin. Once I was pleased with the layout, I adhered to the sticker quotes on the tissue wrap.
Step 7: Finish
I added another layer of clear epoxy on top to give my bookmark a glossy finish.
I hope you’re inspired to DIY bookmarks. Thanks for joining me today.
Wondering what else you can do with resin?
It’s easy once you know the rules. I share my seventeen years of resin experience in an easy-to-follow ebook that details what you need to know to craft something unique with resin. Buy the PDF book, Resin Fundamentals, now, and you can read it in minutes.
Originally written by Karen Bearse
Unpublished Blog Posts of Resin Obsession, LLC © 2023 Resin Obsession, LLC
So, I’m confused. Do you paint the backside of the scrapbook paper and then immediately flip face down onto the deli or parchment paper? Then immediately coat the top side (working in the various stages)? You can peel the dried bookmark easily off of the deli or parchment paper? The rectangular etc., shape is easy to peel, even though you place the wet backside down on the parchment or deli paper? Thank you for clearing this up for me!
Resin won’t stick to wax paper, freezer paper, etc. You can place it on the surface, allow it to cure, then peel it away. (Same thing happens with tape.)
Thank you. I do use resin, but I use a plastic tray or silicon mats to set it on. I didn’t know deli paper or parchment paper would work, too!
I also made a few bookmarks. They turned out solid but very flexible. Is that normal or should they be more like a hard plastic.
Some resins, even when fully cured, can be flexible if poured thin. What brand of resin did you use?