
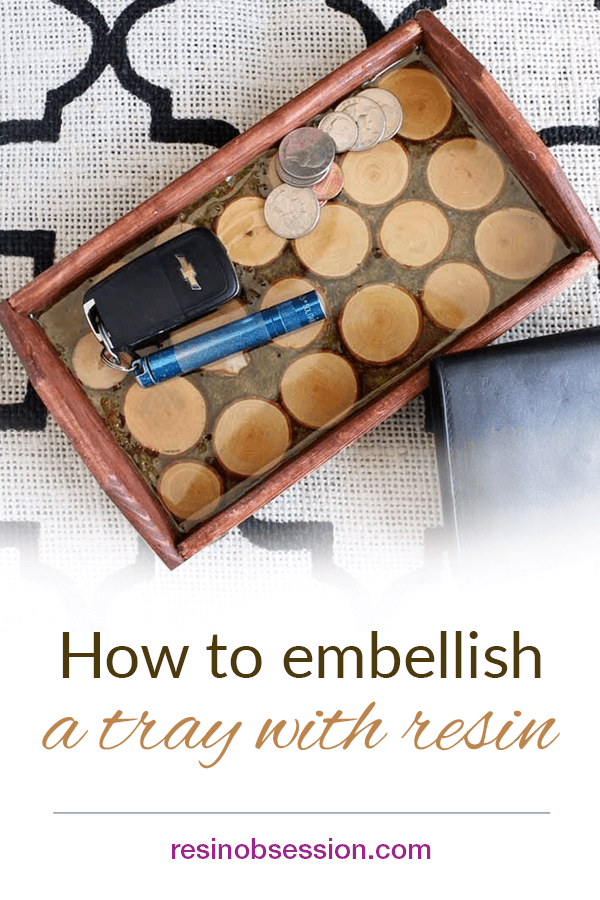
 What’s the easiest way to DIY a resin tray? Add moss and wood slices into a wooden tray that you fill with clear epoxy resin. This tray will come in handy in so many places around your house.
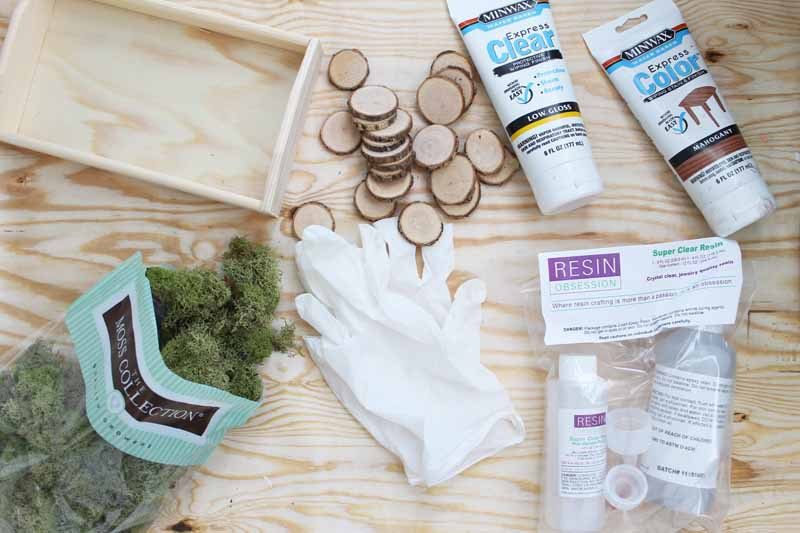
Supplies needed for this resin tray DIY:
• Wood tray
• Thin Wood slices
• Stain
• Clearcoat
• Resin Obsession Super Clear Resin
• Moss
• Rag
• Gloves
• Measuring cups
• Stir stick

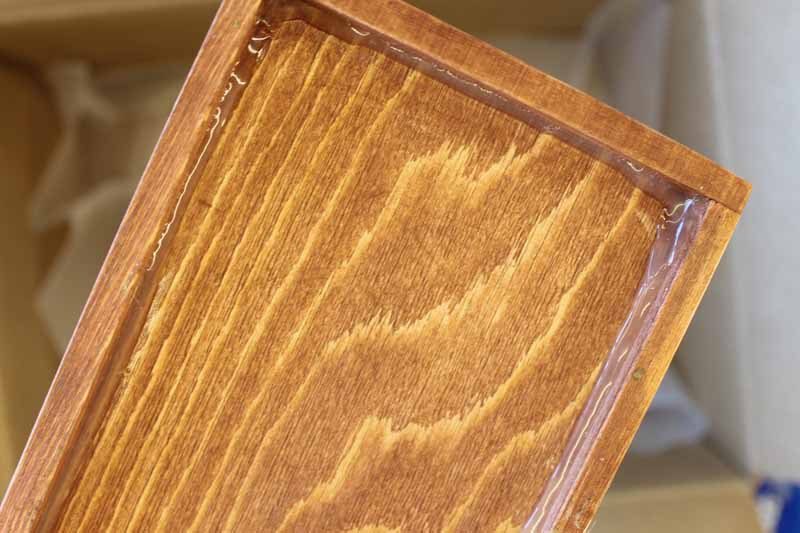
Step 1: Color the wood
Stain the wood tray with the color of your choice. I stain the top and bottom to make the finished project more finished. Allow to dry completely.
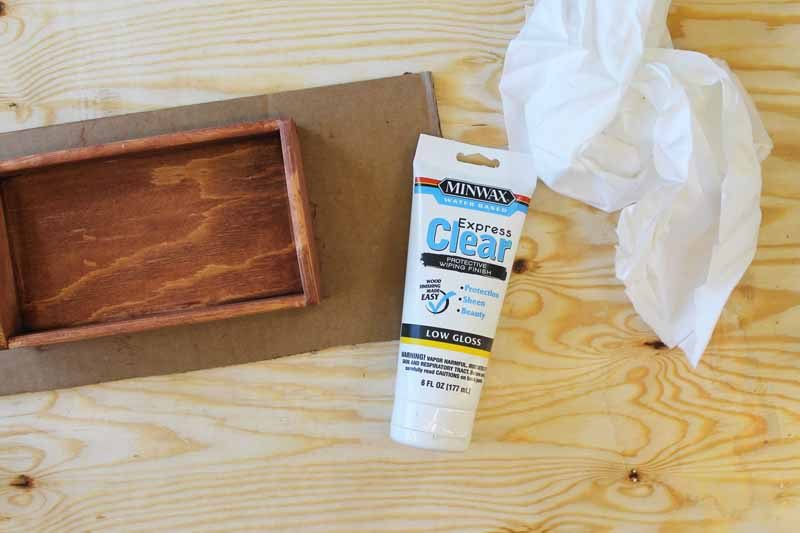
Step 2: Seal the wood
Apply a clearcoat and let it dry.
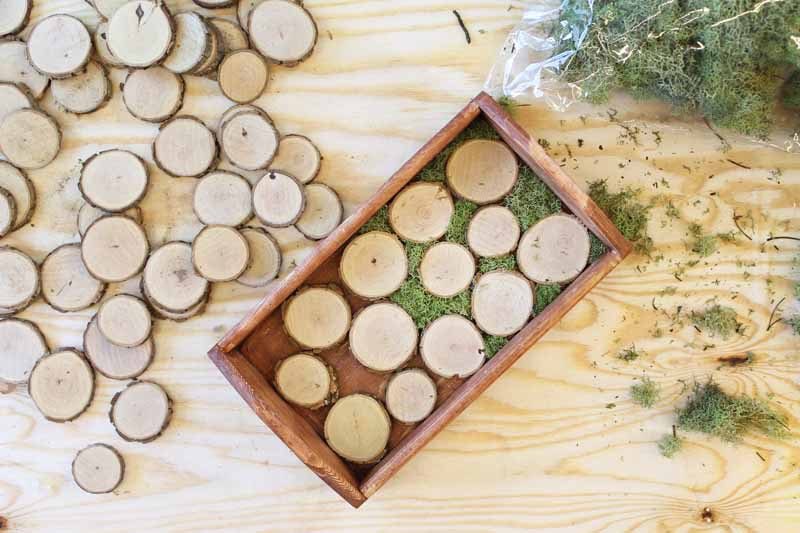
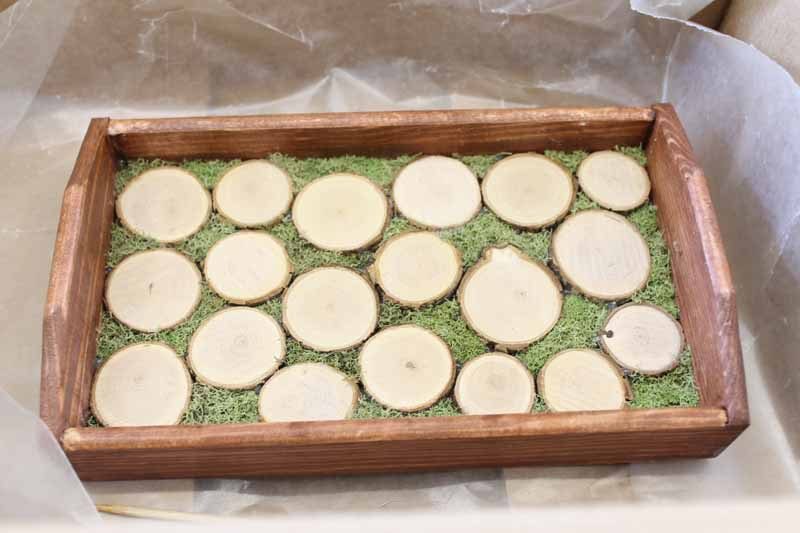
Step 3: Secure wood slices
Use hot glue to add wood slices and moss to the bottom of the tray. Make sure the moss does not stick up over the wood slices. I did not seal the wood slices in any way before beginning.
Also, add a bead of hot glue around the back of the tray. This will make sure that the resin does not leak out when poured.
 Step 4: Cover your crafting space
Add the wood tray to the bottom of a cardboard box lined with wax paper. This will catch any resin you spill or leak out of the tray.
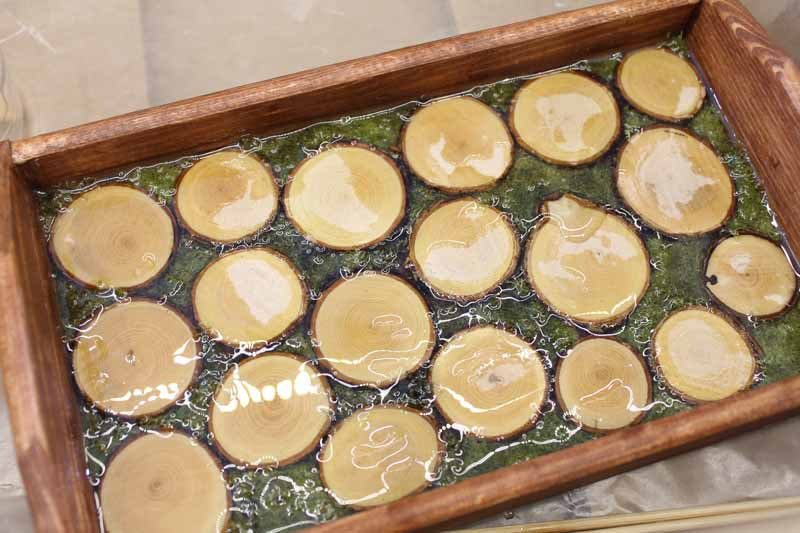
Step 5: Mix and pour epoxy
You will need to DIY the resin in two pours for this tray. If you only do one pour, you’ll have horrible issues with tons of bubbles. So, the first pour should just come to the top of the wood slices and cover as much of the moss as possible. Then, mix and pour resin to add to the tray.
I used three tablespoons of resin mixture for the first pour. Mix the resin as two parts A and one part B, then pour over the top of the tray. Be sure to wear gloves when working with resin. Remove any bubbles and allow to set at least overnight.
Step 6: Add a second layer
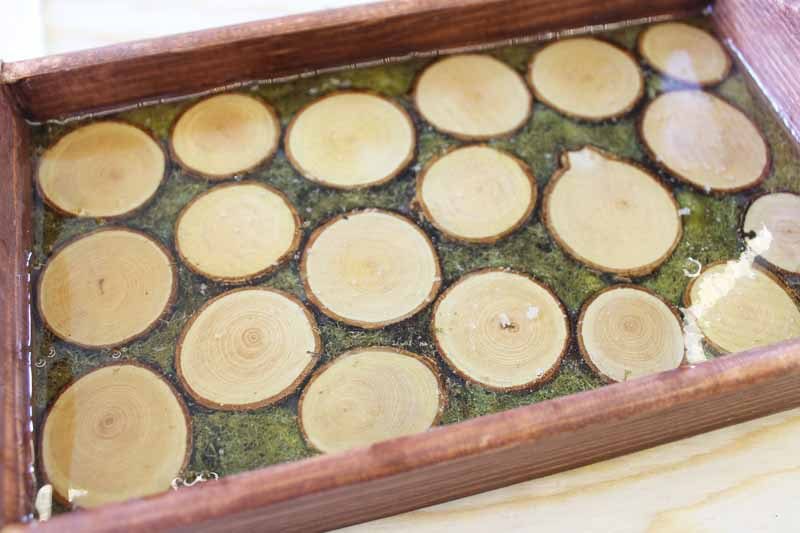
Do a second pour covering everything. Again, be sure that everything is enclosed in the resin with this pour. I used four tablespoons of resin mixture for this second pour.
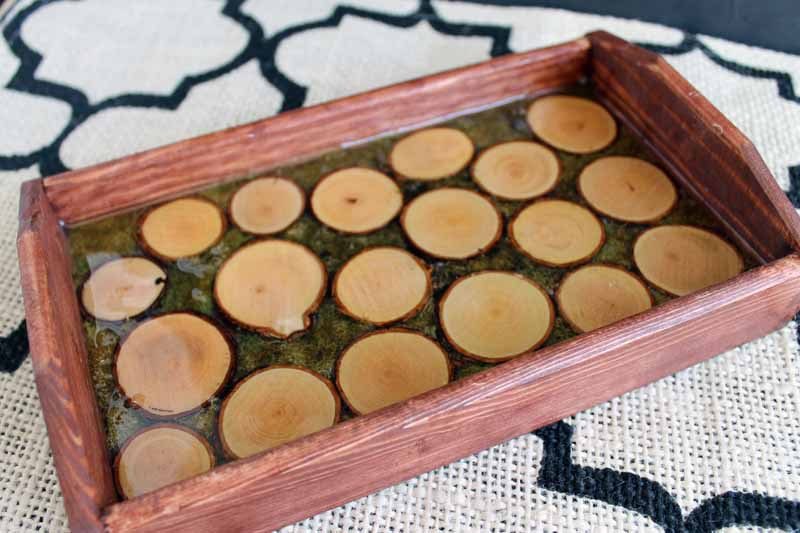
Again remove bubbles and allow the resin to dry.
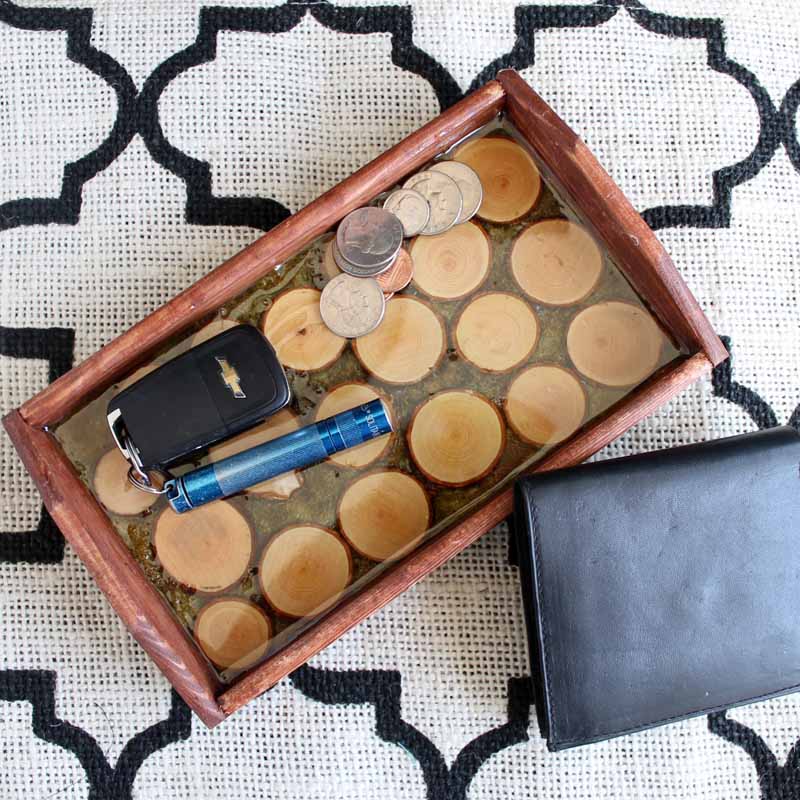
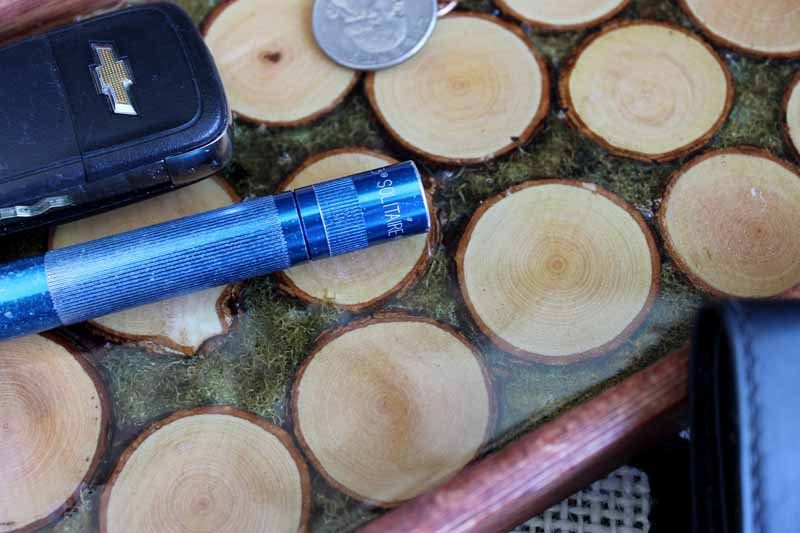
Your DIY resin tray is perfect for being a drop zone for keys, change, and more.
Plus, you get to look at this gorgeous tray every day.
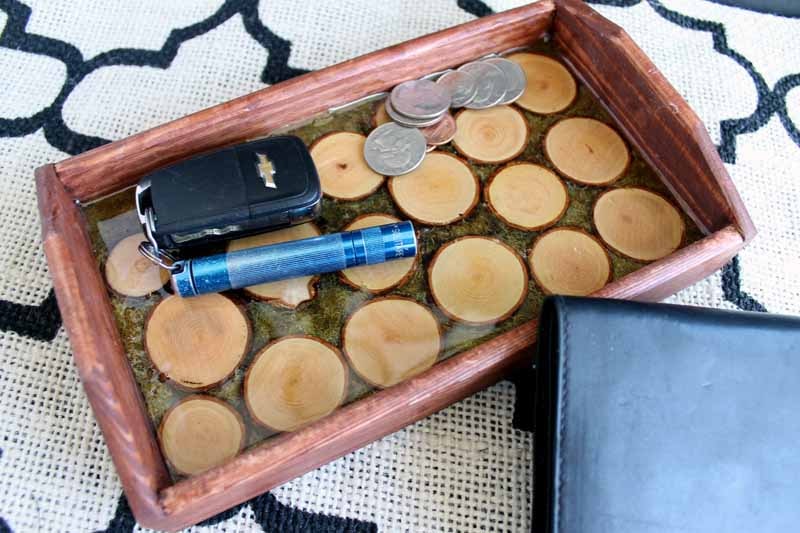
I love the woodland trend and this fits in perfectly. Add this to your farmhouse décor as an organizer.
Want to jump into resin but are overwhelmed by all the information?
Tried making a few things to resin only to find they were sticky and bubble-filled? Don’t give up! Instead, get your copy of Resin Fundamentals. It takes my seventeen years of resin experience and condenses it into the essential details you need to know to create something incredible with resin. Buy the PDF book now and get an email download link in minutes.
Originally written by Angie Holden
Unpublished Blog Posts of Resin Obsession, LLC © 2024 Resin Obsession, LLC
I’m going to make this tray for my hubby’s birthday this month. Love the idea. Thank you.
Very cool! Lots one could do with resin. Thanks for the tutorial. Visiting from Tutorials and Tips party.
Great resin project! Thanks for sharing with us. Pinned
I’ve never heard of resin obsession before. Thanks for explaining it in your tutorial. The tray looks very nice, especially for a Father’s Day gift.
What a cool project; I love the look of the wood pieces!
I’m visiting today from Friday Favorites Link Party; it’s nice to meet you!
~ Megin of VMG206
Thanks for stopping by!
I love how it turned out! I recently made a tray for a mini coffee station, and now I want to make all the trays.
Your tray turned out nice. Thanks for joining us at the Inspiration Spotlight party. Shared
Very cool! It came out terrific! Thanks for sharing at Dishing It & Digging It! 🙂
This is great for my collection of my kitchen.
Awesome post