
There’s a reason why making an epoxy coaster is one of the most popular resin projects. It’s because they check all these boxes:
✅ They’re fun to make.
✅ They’re fun to use.
✅ They’re fun to gift.
I’ll get you started with the first part — making your epoxy coaster. And if you need some help using it, it goes great with this sauv blanc.
Resin supply list:
Resin Obsession super clear resin for crafts
Mixing cups
Stir sticks
Safety gloves
Resin Obsession opaque epoxy color pigments in white and black
Tree of Life coaster mold
Pearl ex solar gold
💡 Pro tip: If you get our resin beginner kit, it’s got everything to make this epoxy coaster except the resin colors.
Step 1: Mix resin
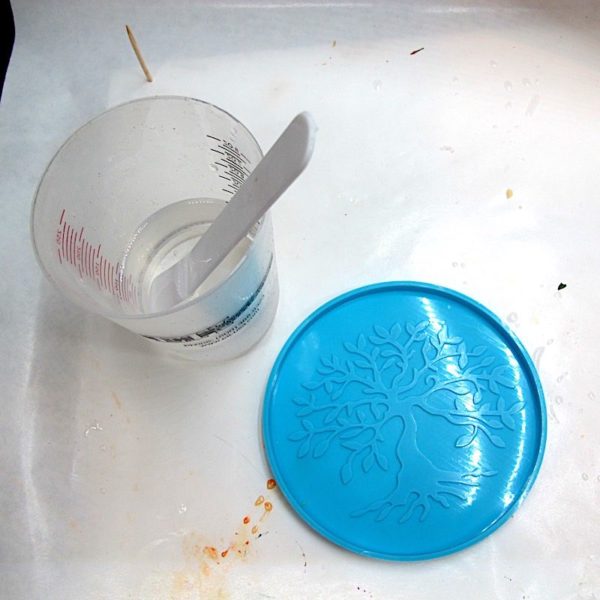
Mix an ounce and a half of the super clear resin. (That breaks down into 1 ounce of Part A and 1/2 ounce of Part B). Combine both parts together until they’re clear and streak-free.
⭐️ BONUS: If you’re new to resin, get all the steps to mixing resin like an expert.
Step 2: Add color
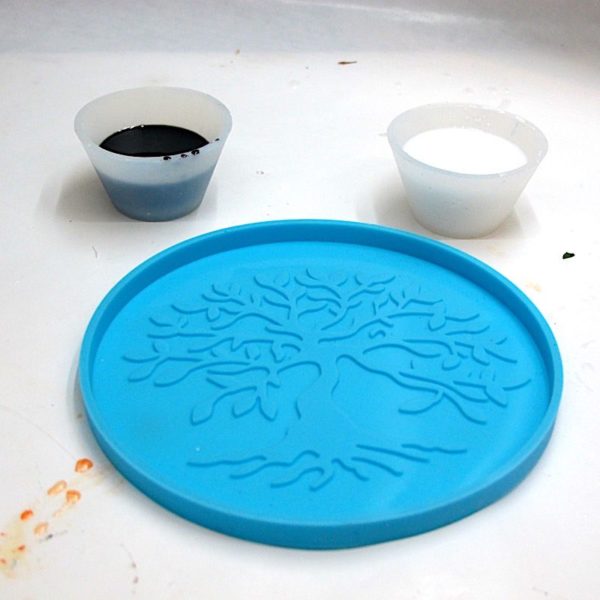
Divide the resin into two cups. Color one cup black and the other white.
💡 Pro tip: White resin gets gobbled up by other colors easily. Mix more white resin than you think you need.
Step 3: Pour
Add a ribbon of black to each side of the epoxy coaster mold, then add white to the middle. The resin will blend at the edges.
You can add clear resin to the coaster, too, if you want clear, glass-like effects.
Check for bubbles before letting the resin cure.
Step 4: Demold
Peel the formed epoxy away from the coaster mold.
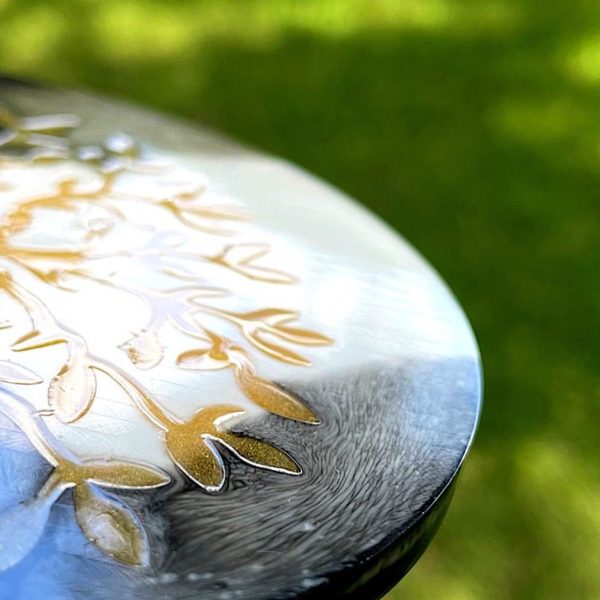
Step 5: Highlight the design
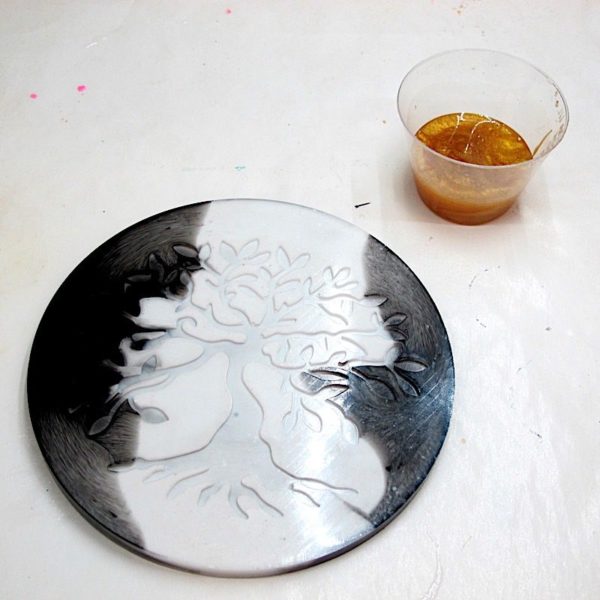
To bring the tree to life, you’re going to add gold-colored epoxy to the coaster.
You’ll mix resin like you did previously, but this time use the colored powder to make it gold.
💡 Pro tip: You don’t need much resin for this part. So that you don’t waste any resin, have some leftover resin projects ready, so you can use all your mixed resin.
Drip the resin into the open space with a toothpick. Go slowly and maybe lay off the caffeine that day.
Let the resin cure and…
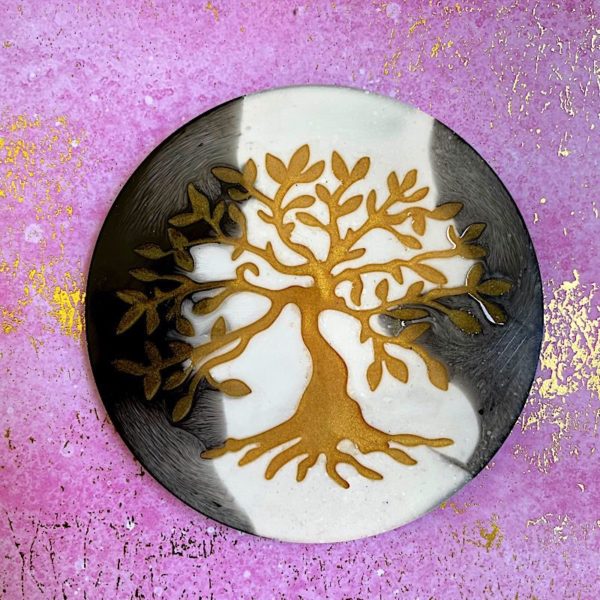
TA-DA! You just made an epoxy coaster that will make any beverage look bougie.
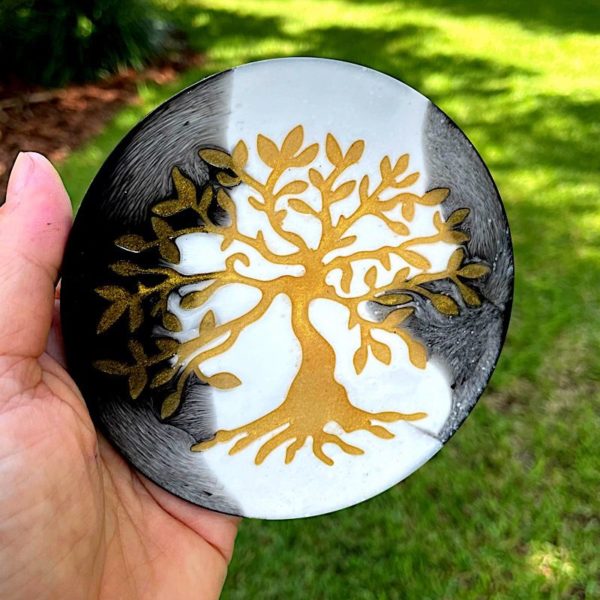
I love the size of this epoxy coaster. It can fit glasses or mugs. And the colors let it go with everything. You can make a silver tree, too if gold isn’t your thing.
Why use resin to highlight the tree?
The resin fills in the space evenly and make the coaster more level. Otherwise, you can use acrylic paint, but you’ll still see the indentation of design. Which might be what you want.
How else can you color the coaster?
If you wait until the epoxy resin starts to thicken, then add it to your coaster mold. The colors won’t blend as much. You won’t see as many color swirls as you do in this coaster.
Want more help on making this epoxy coaster?
Awesome. That’s why I’ve got this video showing exactly how to make it.
View this post on Instagram
Feeling hesitant to make crafts with resin?
It’s why I wrote the beginner ebook, Resin Fundamentals. I’ve concentrated my 17 years of experience into the need-to-know details for resin novices. In only an afternoon, you’ll learn everything you need to know to make something beautiful with epoxy starting on day one. Buy the book now and get an email download link in minutes.
Unpublished Blog Posts of Resin Obsession, LLC © 2023 Resin Obsession, LLC
Made his yesterday dried nice but was very brittle ?????
Hi John, what’s going on that has you wondering if your resin cured brittle?
Hi Broke apart ike potato chips ..not sure what happen .makin anoher as i type
Hi John, I see your pictures in my email. I’m replying there.