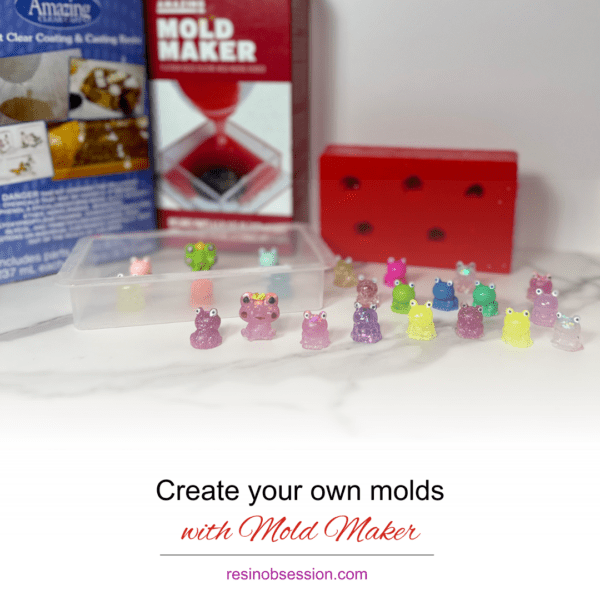
Mold Maker allows you to create custom molds for a variety of applications, from craft projects to prototyping.
These molds can be used repeatedly and are the perfect solution when you can’t find the mold you need.The process involves creating a master object (the item you want to replicate), mixing a silicone molding compound, and then casting the silicone around the master object to create a mold. Mold Maker is easy to use, FDA compliant and extremely versatile.
Here’s a step-by-step guide to using Mold Maker:
Materials Needed
- Alumilite Mold Maker
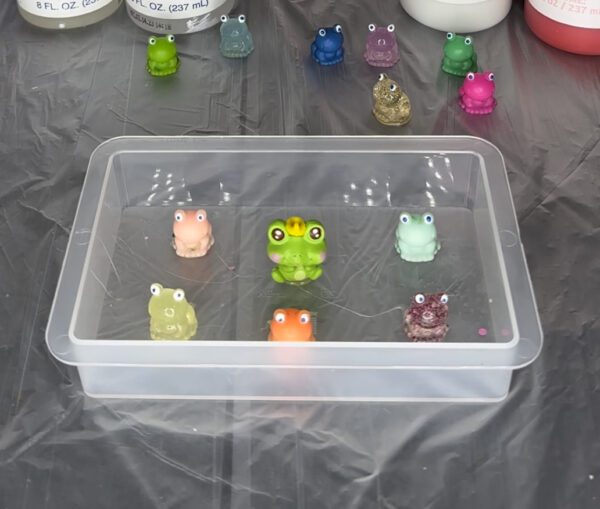
- Master object (find our FROGS HERE)
- Mixing cup or container
- Mixing sticks
- Protective gloves
- Safety Glasses
- A flat surface or a frame to contain the silicone around the master object or Molding Trays.
Step 1: Prepare the Master Object
First, ensure your master object is clean and dry. If it has undercuts or complex details, apply a mold release to make demolding easier.
Step 2: Create a Containment Area
If your master object doesn’t have a flat side to lay down, or if you’re making a mold that encapsulates the entire object, you’ll need to create a containment area to hold the silicone around your master object. This can be made from cardboard, plastic, or even a cut-open plastic container, depending on the shape and size of your master object. I used a container from a set of Molding & Casting Trays.
Step 3: Measure and Mix the Silicone
This next step is crucial; improper mixing can result in a mold that doesn’t cure correctly. Mold Maker comes in a two-part system that needs to be mixed in a precise ratio, typically 1:1. Wear gloves, and in a mixing cup, measure out the parts accurately. Mix thoroughly until the two parts are completely blended, you do not have to time this step, but rather just want the color of the mold maker to be uniform.
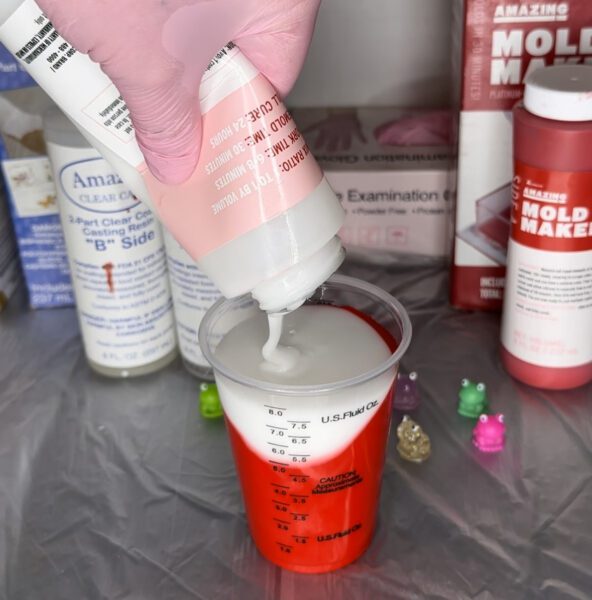
Step 4: Pour the Silicone
Once you’ve mixed both parts thoroughly the next step is to slowly pour the mixed silicone over your master object, starting from the lowest point, letting the silicone naturally flow over the object to avoid air bubbles. If you’re covering a contained master object, fill the container until the object is completely submerged, or to the desired level if making a one-sided mold.

Step 5: Remove Air Bubbles
Gently tap the sides of your container or use a vibrating table to bring any air bubbles to the surface. Some silicone mixtures are self-degassing, but removing as many air bubbles as possible ensures a clearer mold.
Step 6: Cure
The next step is to let the mold maker cure according to the manufacturer’s instructions. I love that Alumilite Mold Maker cures in about 30 minutes, which works well for my impatient self.
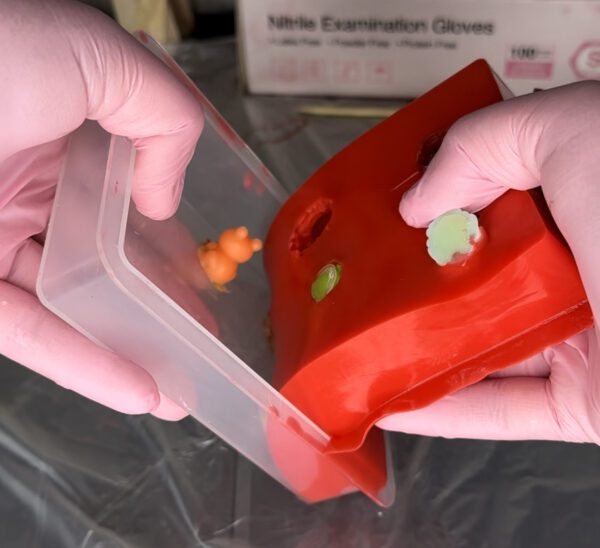
Step 7: Demold
Once cured, carefully remove the silicone mold from the containment area if used. Then, gently flex and pull the silicone away from the master object to release it. If you applied a release agent, this process should be relatively easy.
Step 8: Clean and Store the Mold
Lastly, once you’ve pulled your mold free and removed your master objects it is now ready to use! I used my mold to create the cutest little Leap Frogs for Leap year or anytime you want play a fun hide and seek activity with kids.
Tips for Success
- Practice with small, simple objects before moving on to more complex shapes.
- For intricate master objects, consider making a two-part mold to capture all the details and facilitate easier demolding.
Now that you have a mold. What’s next?
See how we used Mold Maker to create our own resin Leap Frogs with a FREE printable.
Want to learn more about the basics of epoxy resin?
Then you’ll want to grab the ebook written especially for resin beginners. In a couple of hours, you’ll go from confused to confident with resin. It’s the PDF book we wish we had when I started. Buy now and get a download link in minutes.
If you have any questions always email us at info@resinobsession.com or DM us on Instagram.