
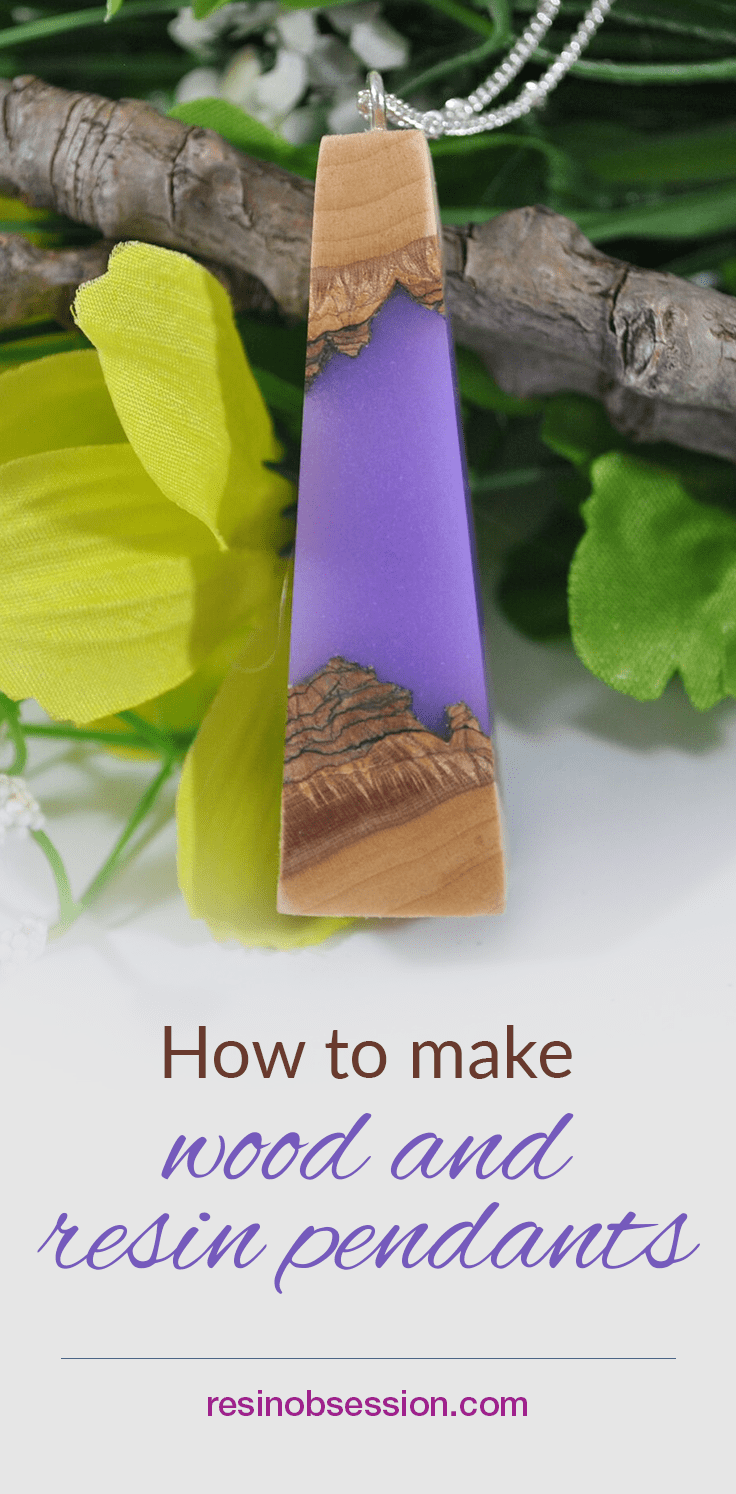
Hello again! So today, I’ll be showing you all how I create wood and resin jewelry. These resin pendants are easily my most talked about items at craft shows. They require power tools and a lot of elbow grease, but the result is something people are always in awe of. This tutorial has much to cover, so let’s dive right in!
Resin Supplies Needed
-Large mold at least 1/4 inch deeper than your wood slices
-Mold Release
–Clear craft resin
-Mixing Cups
-Tree Wood Slice
–Resin colors
– Sandpaper in grits 80, 150, 250, 800, 1000, 1500, and 2000
-Table Saw
-Belt Sander
-Eye Hook
-Necklace Chain
-Power Drill
–Jewelry adhesive
–Resin Polishing kit
Step 1: Prep the mold
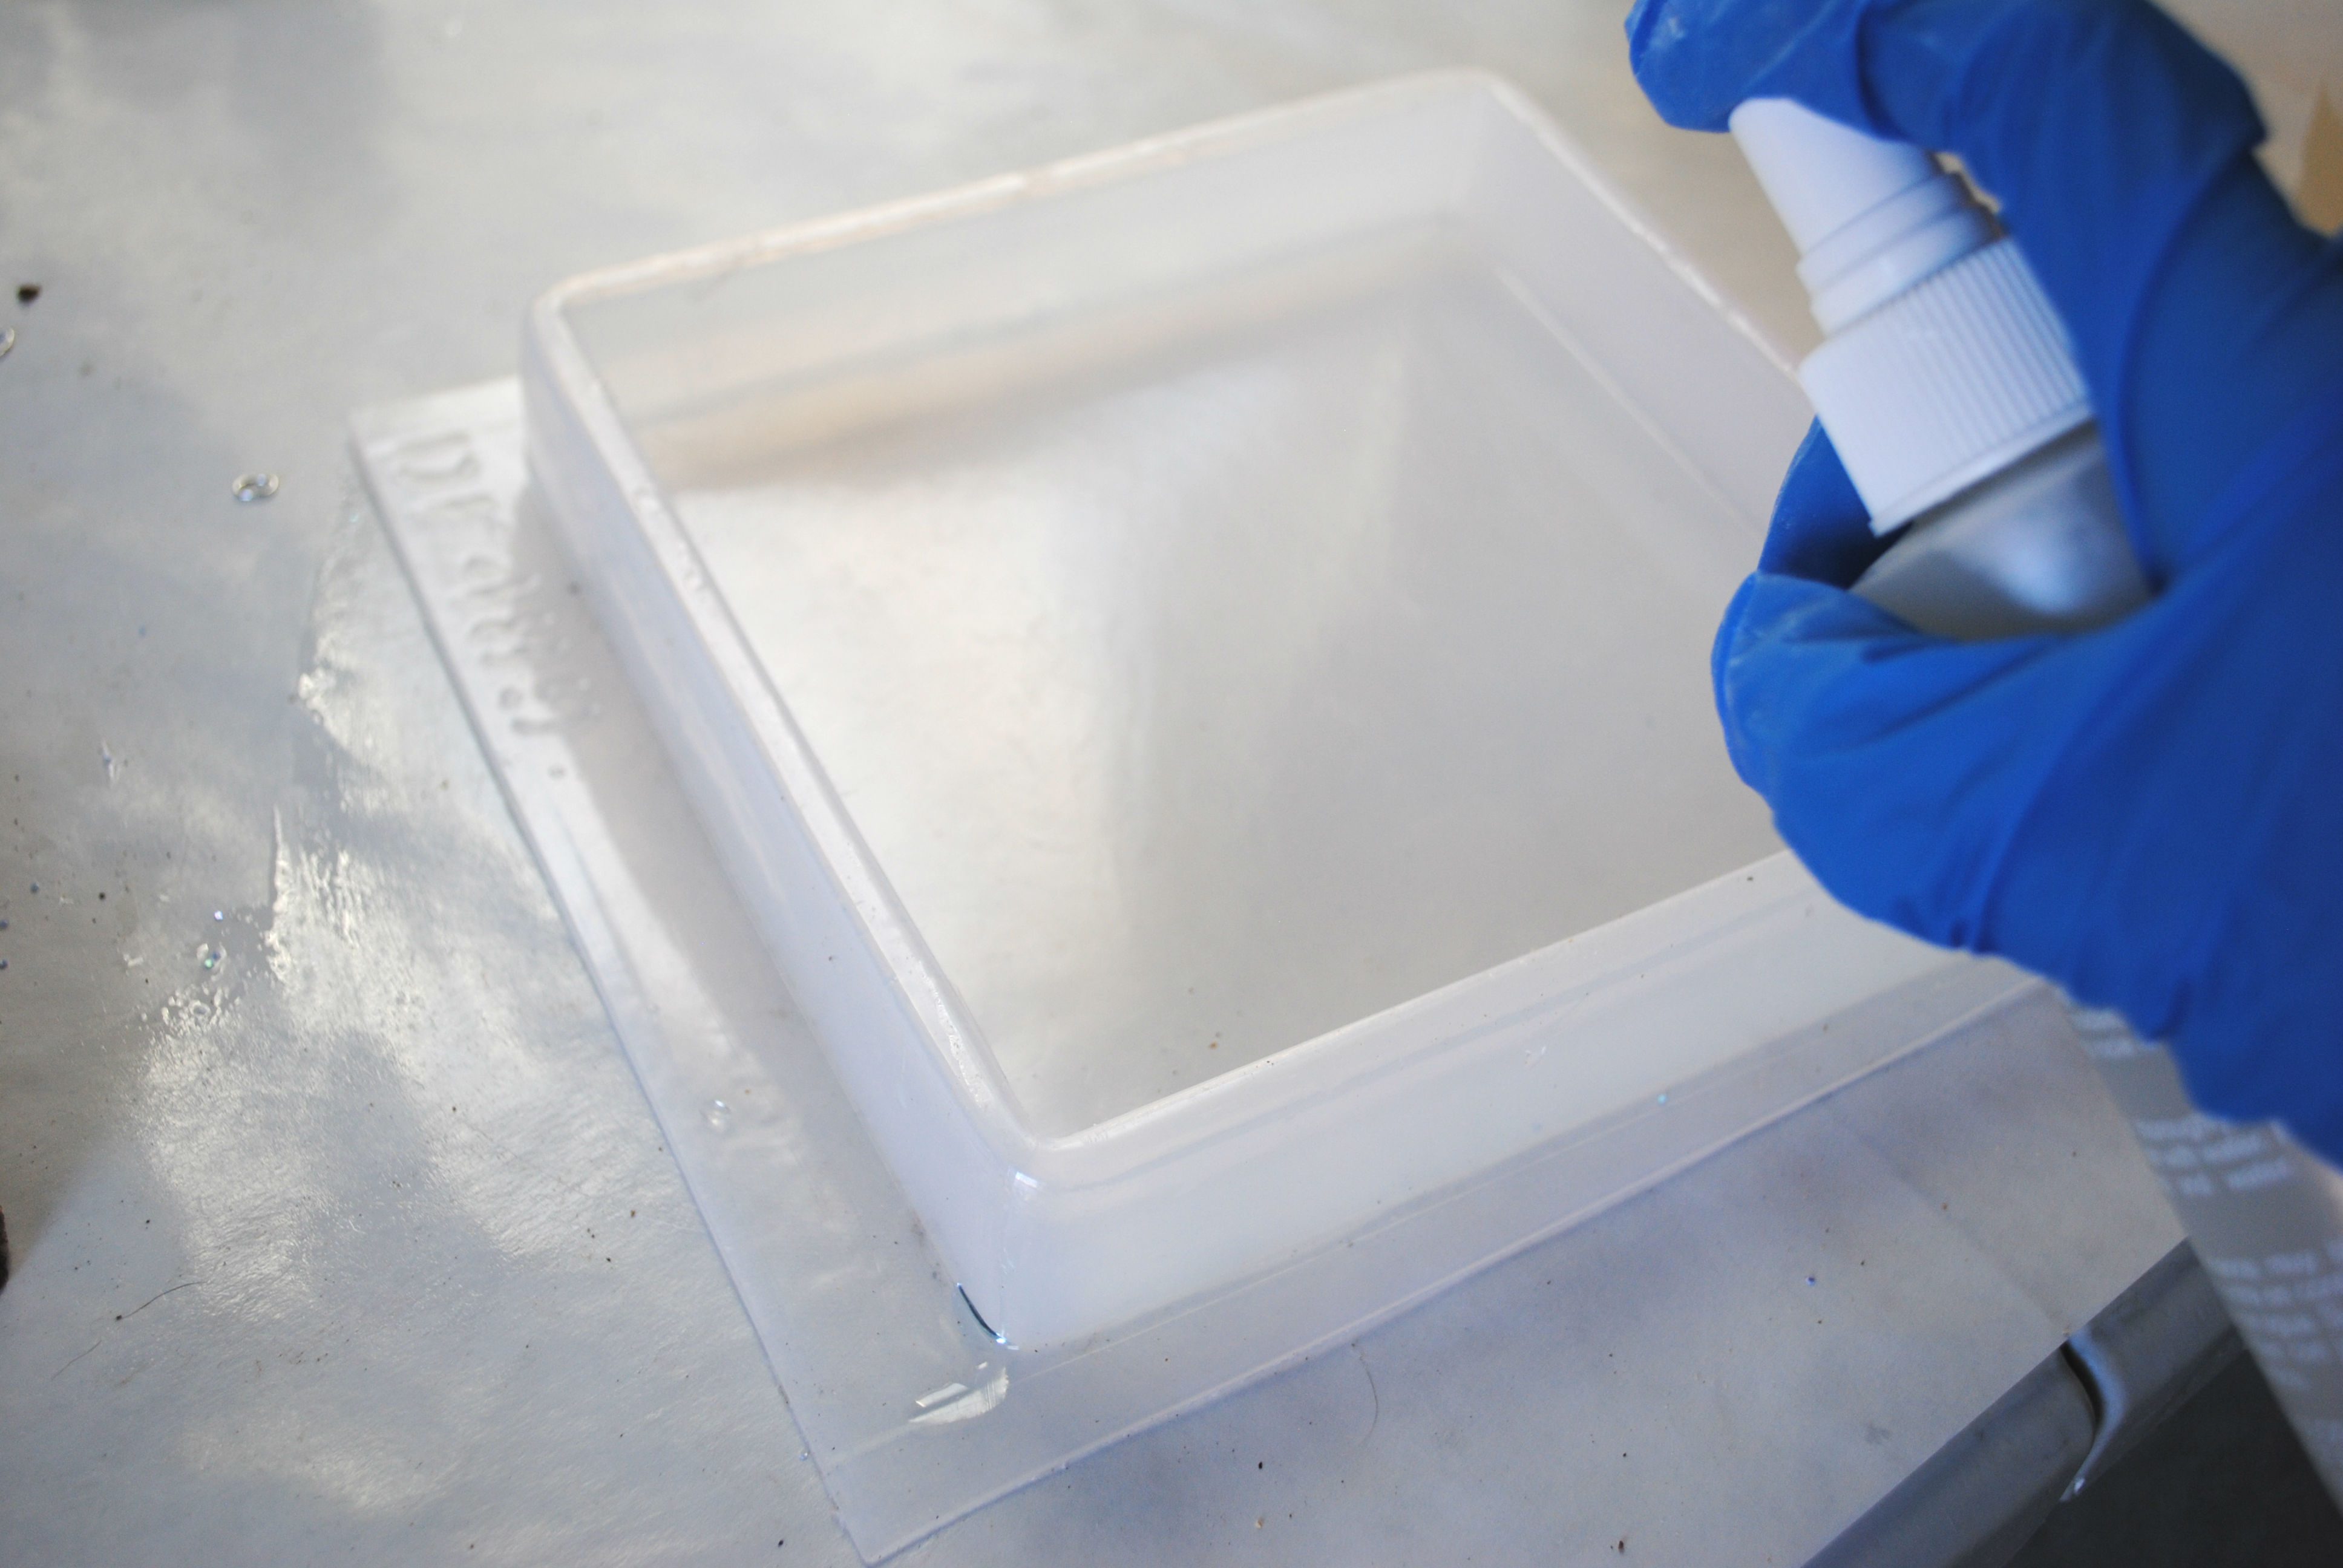
This mold is a 7-inch square mold but feel free to use what you have. Before starting, I pre-condition my mold with mold release being sure to cover the whole surface area. Let this dry before pouring resin into the mold.
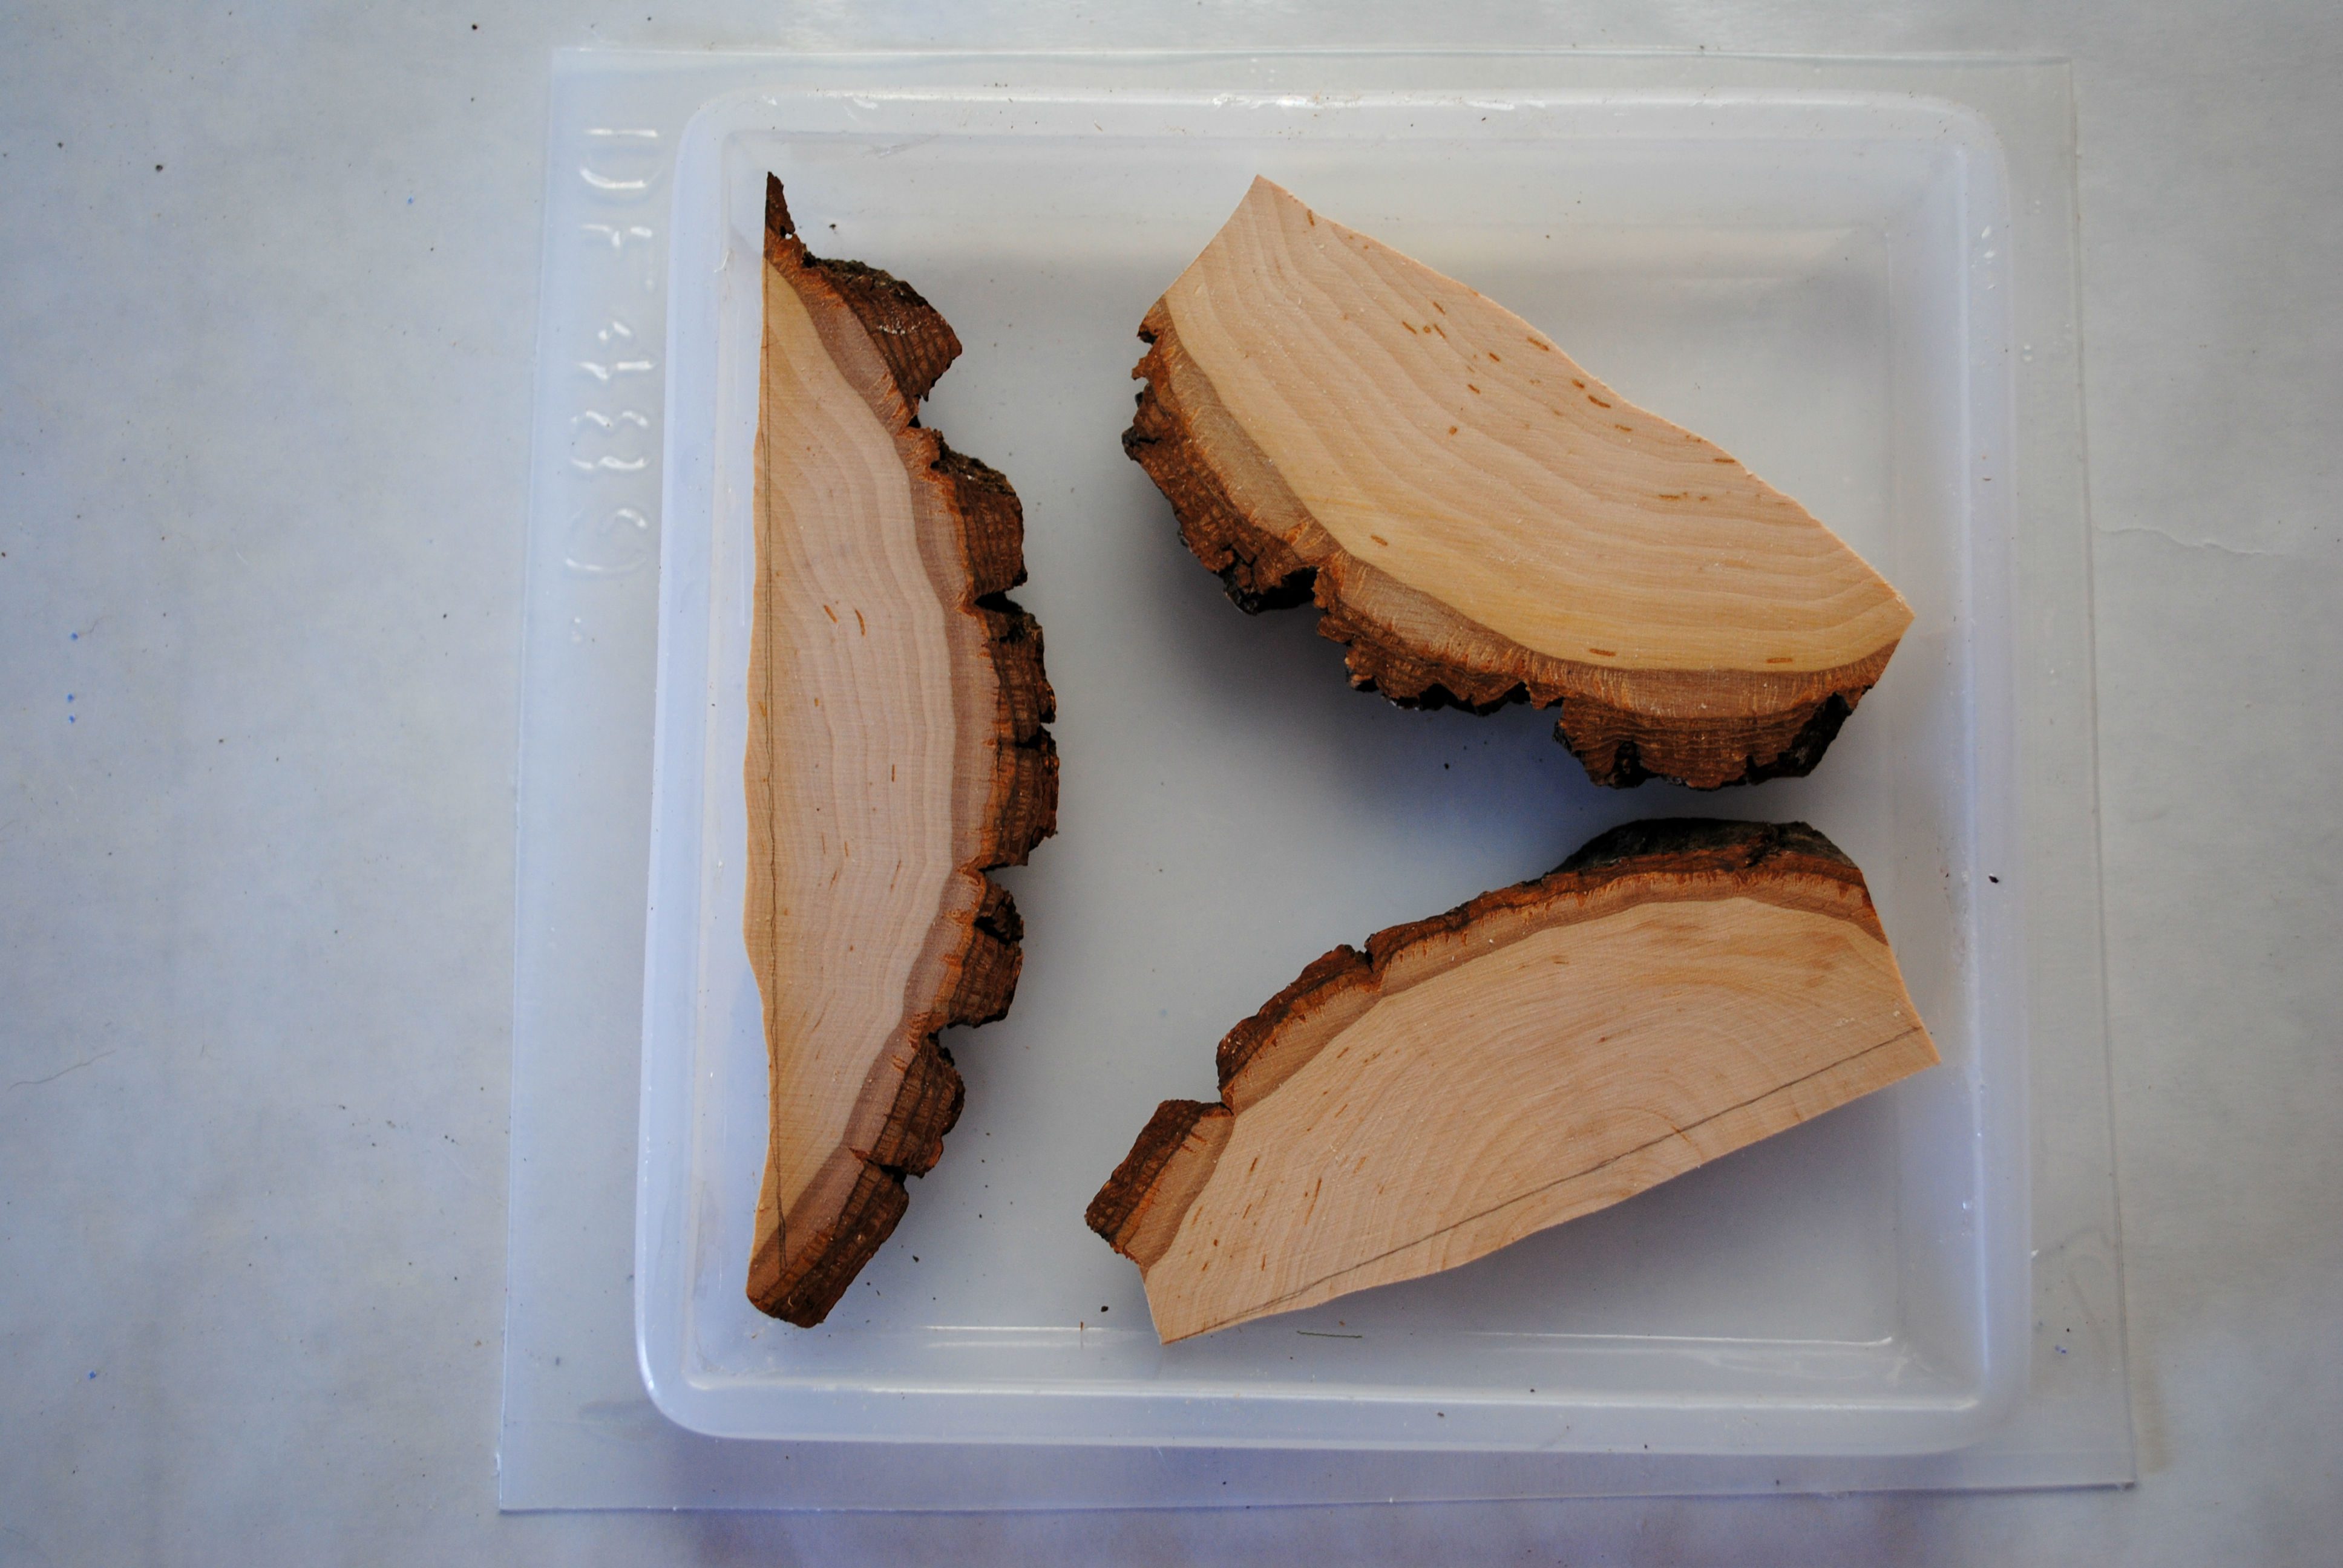
Step 2: Select a wood slice
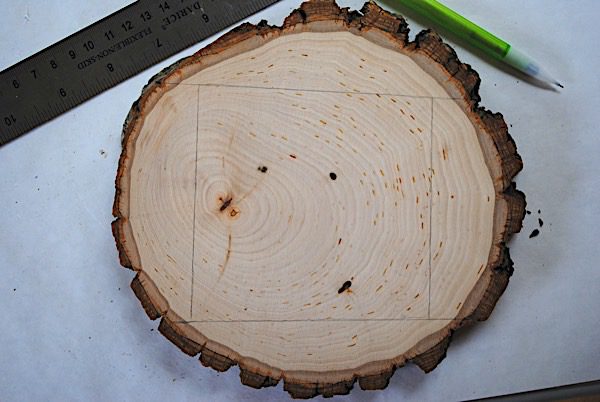
If you’re buying your wood, here are some tips on picking a good slice:
-Look for a piece with noticeable age lines (some are too bleached).
-The more ridges in the bark, the better!
-Pick a piece that isn’t too thick. About 1″ thick will be the easiest to work with.
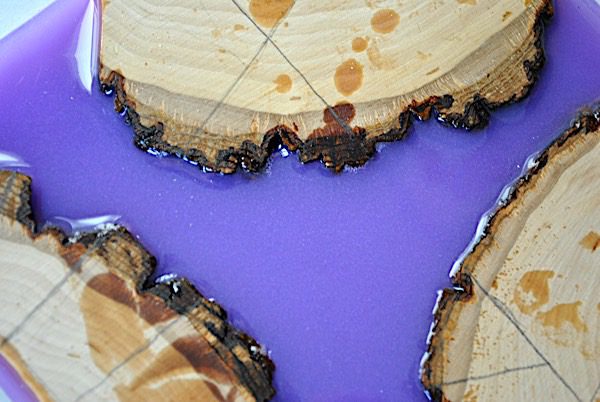
After picking the perfect slice, it’s time to measure your cuts. If your mold is 7″ square, then you want the woodcuts to be equal to or less than 7″ wide so that it fits into the mold. You’ll notice that I divided mine into four cuts, leaving a square in the middle. I want to get as much use out of the bark as possible. The bark adds unique details to wood and epoxy resin jewelry.
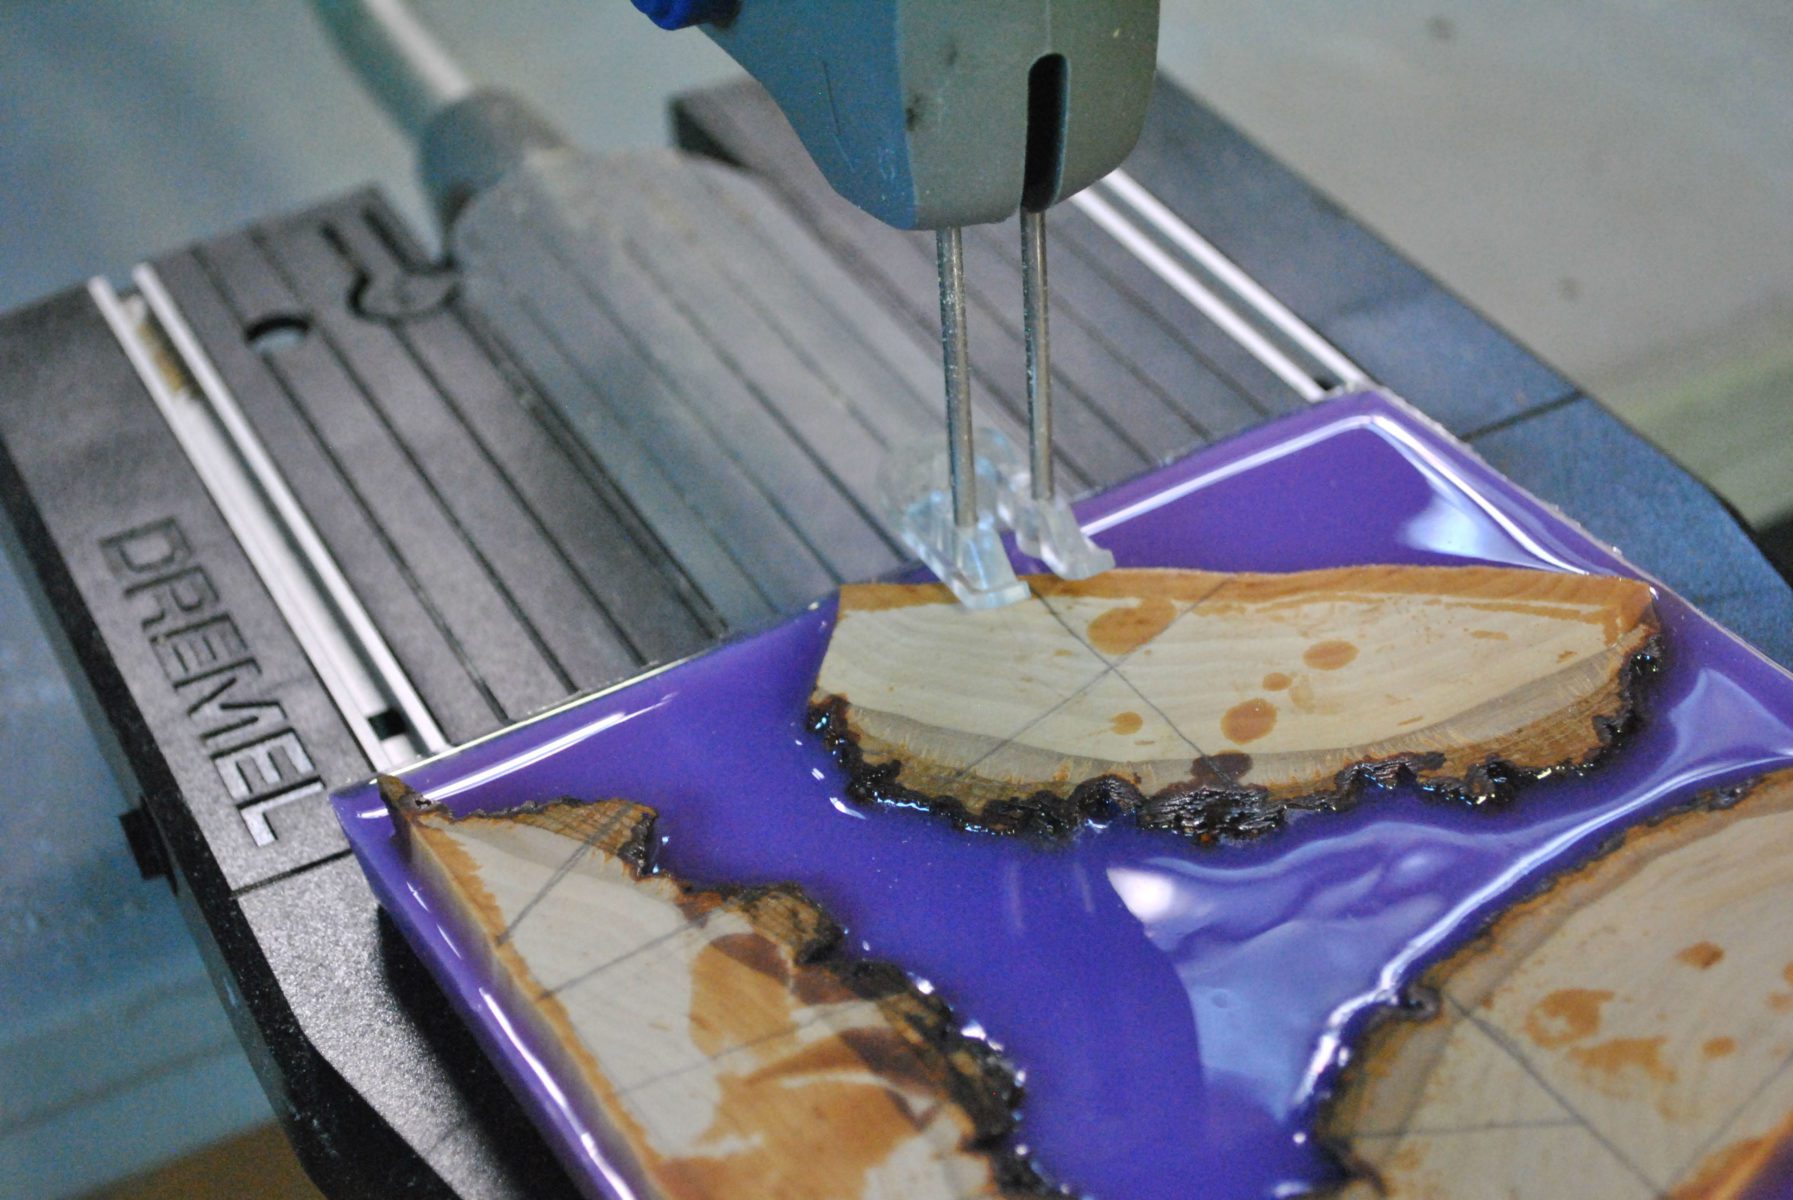
͛Step 3: Cut the wood
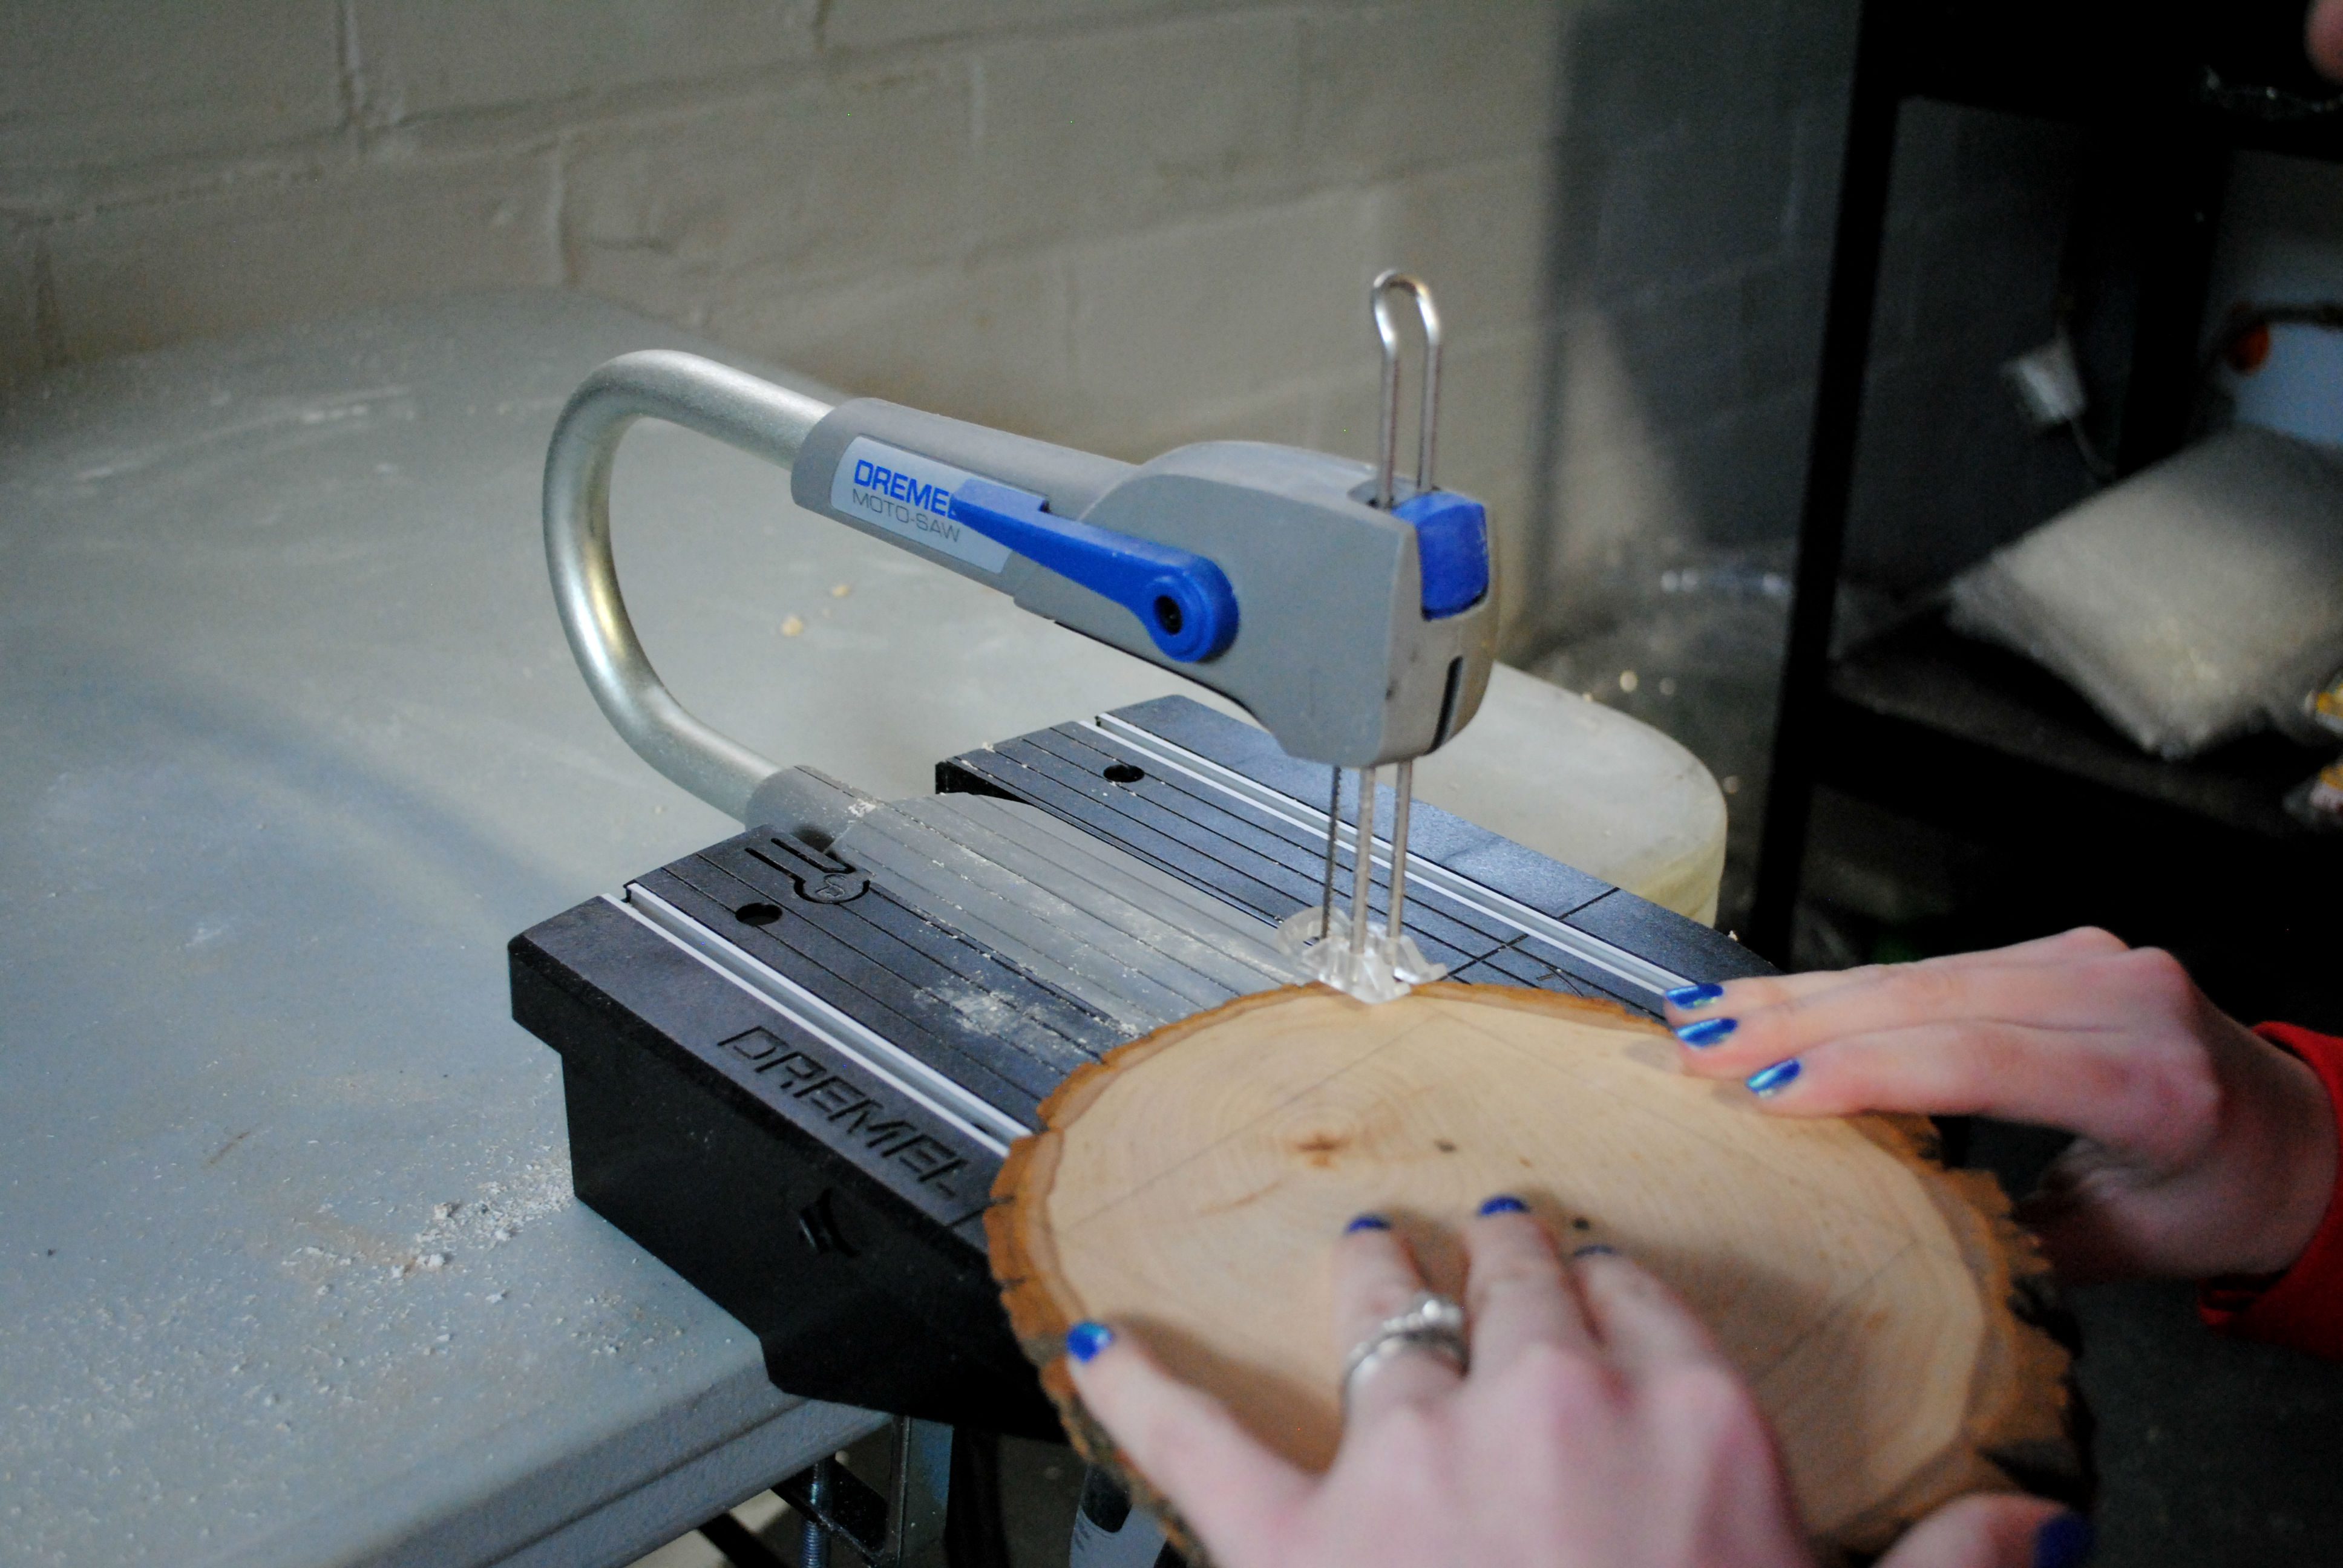
Now that your cuts are drawn out, it’s time to take your wood to the table saw. I’m using a Dremel Moto-Saw. Hold the wood firmly to the tabletop and go very slow to get straight cuts.
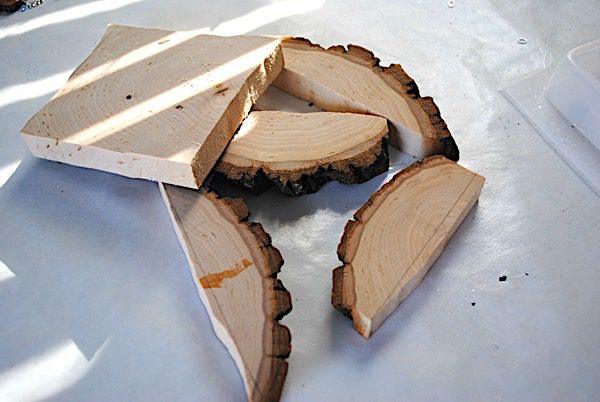
My cuts are always wavy and curved, but in the end, it does not make a difference because it will all be sanded down.
Step 4: Add to the mold
There are three things to keep in mind when placing the wood:
*How big do you want your wood and resin jewelry pendants?
*Do you want wood on both ends of the pendant?
*What shapes do you want to get out of the pendants?
There is no right and wrong way to place the wood. But you ALWAYS place the bark side of the wood toward the inside of your resin mold.
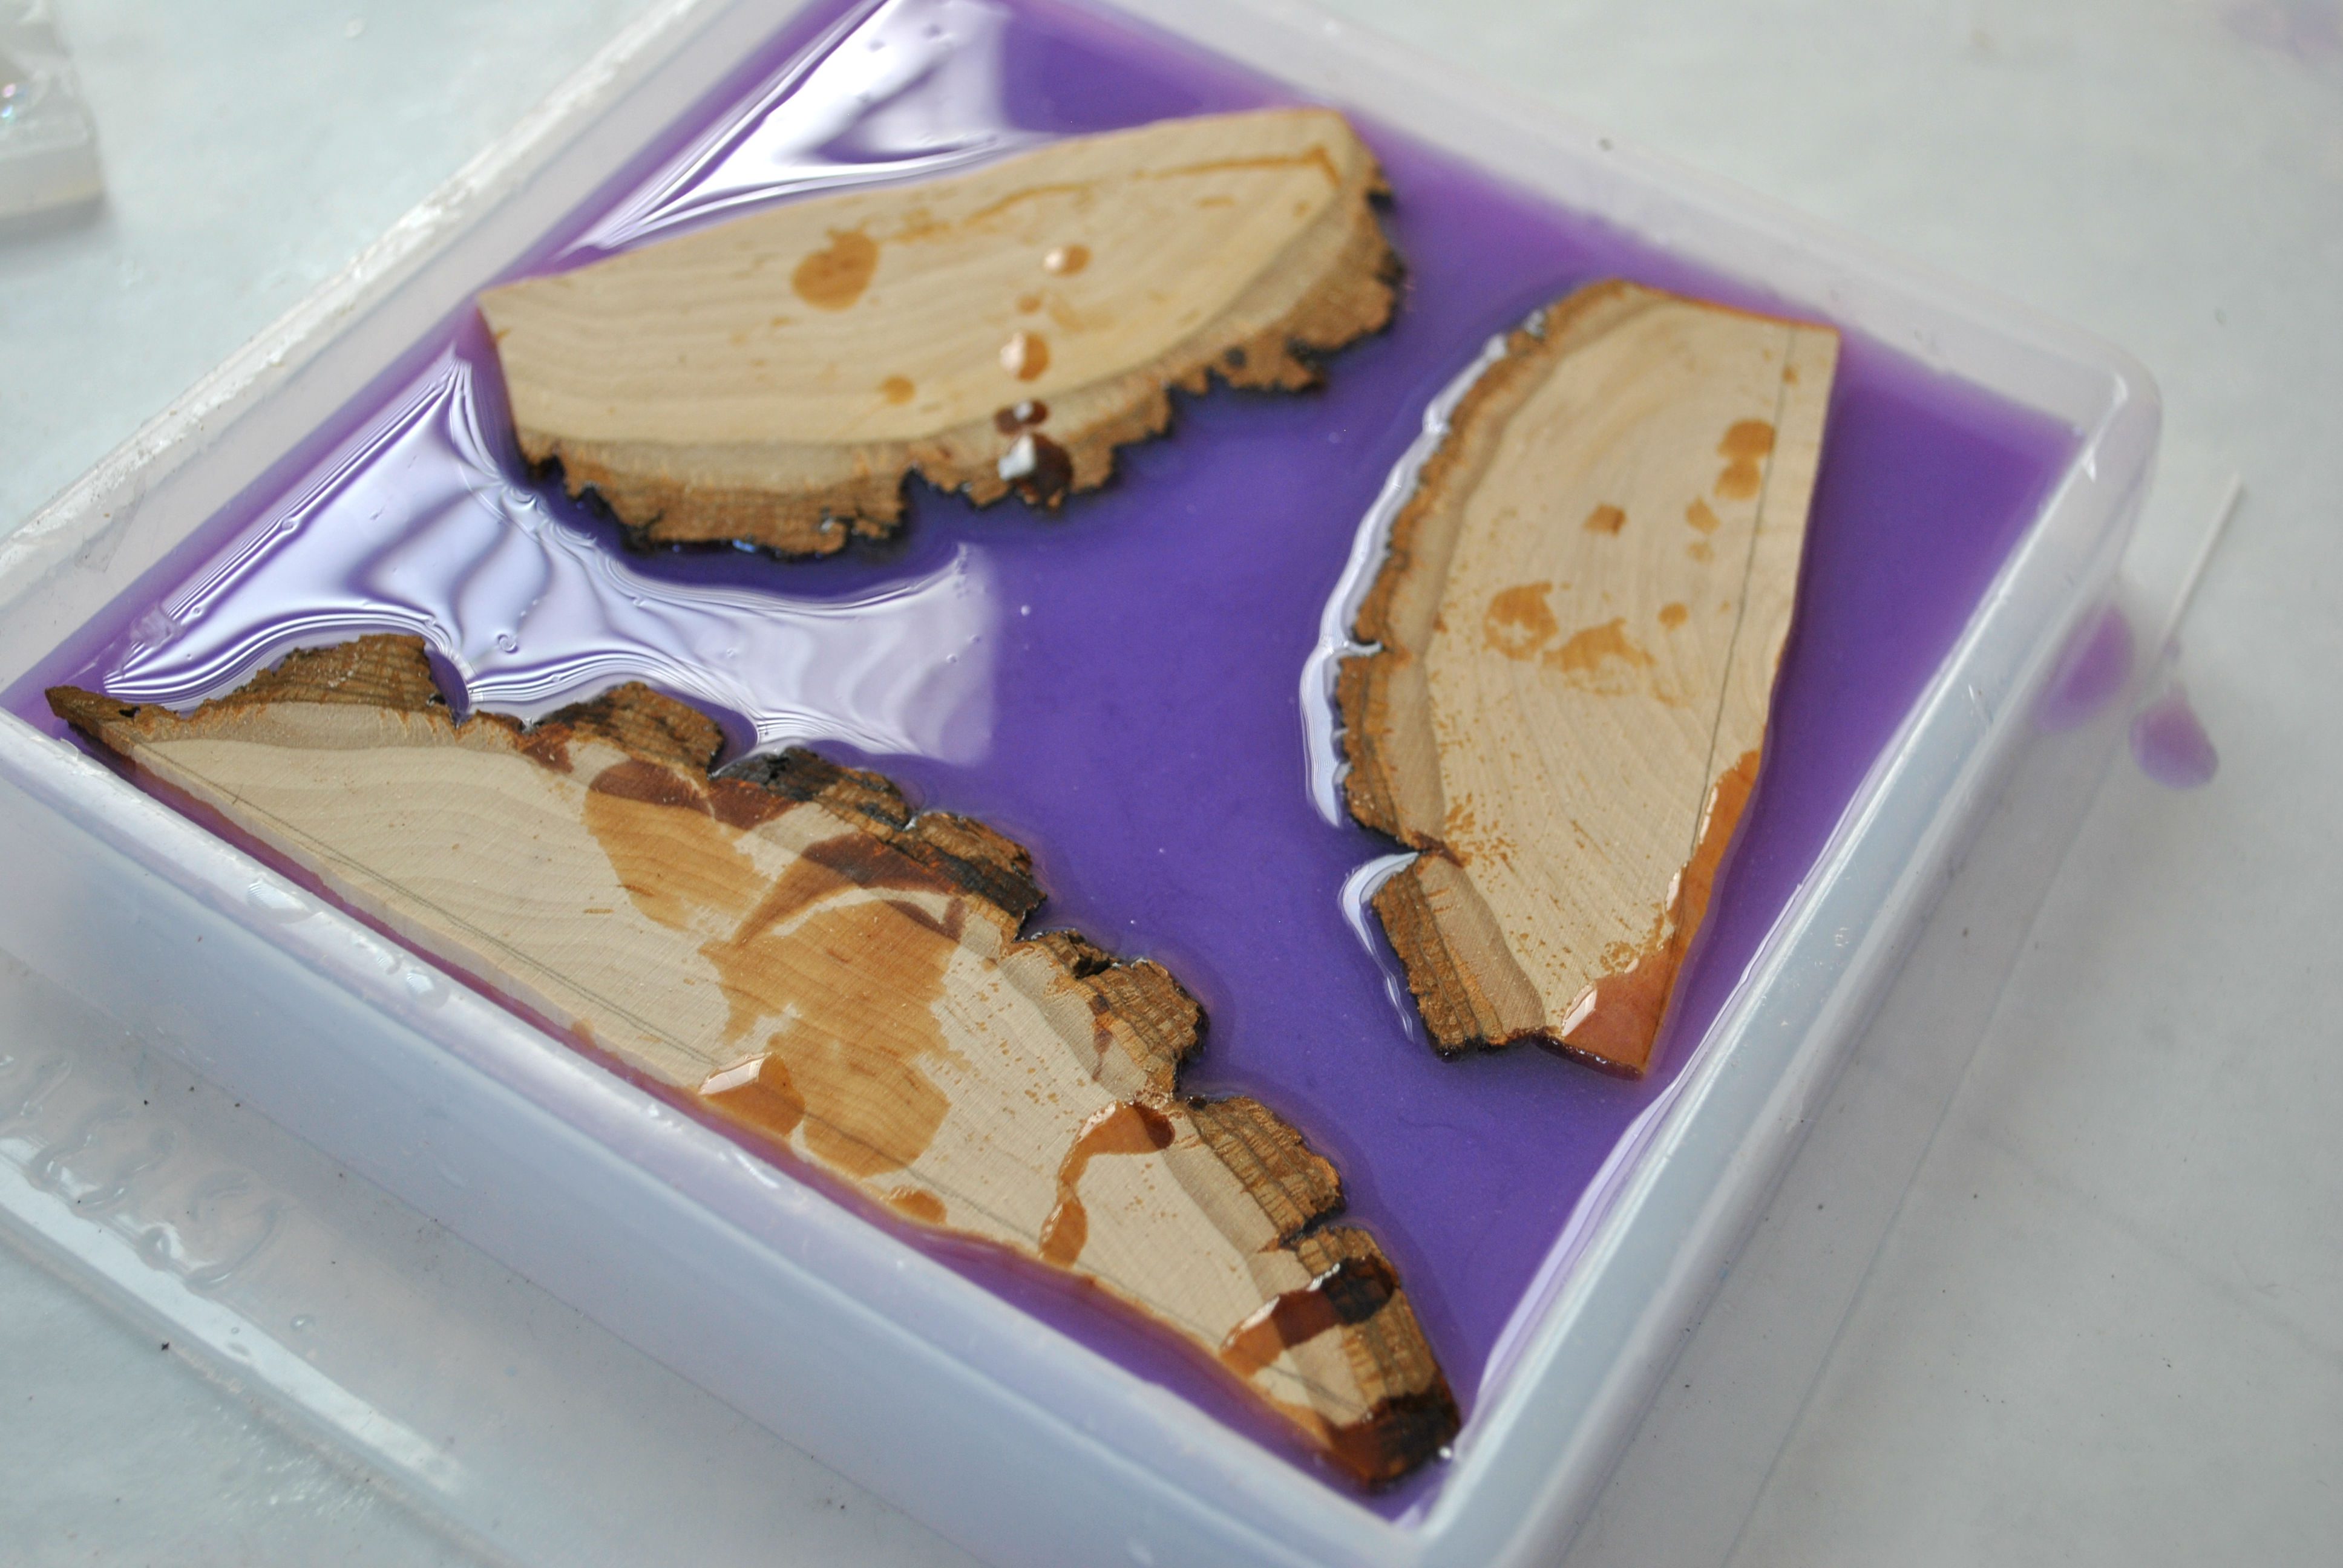
Step 5: First resin layer
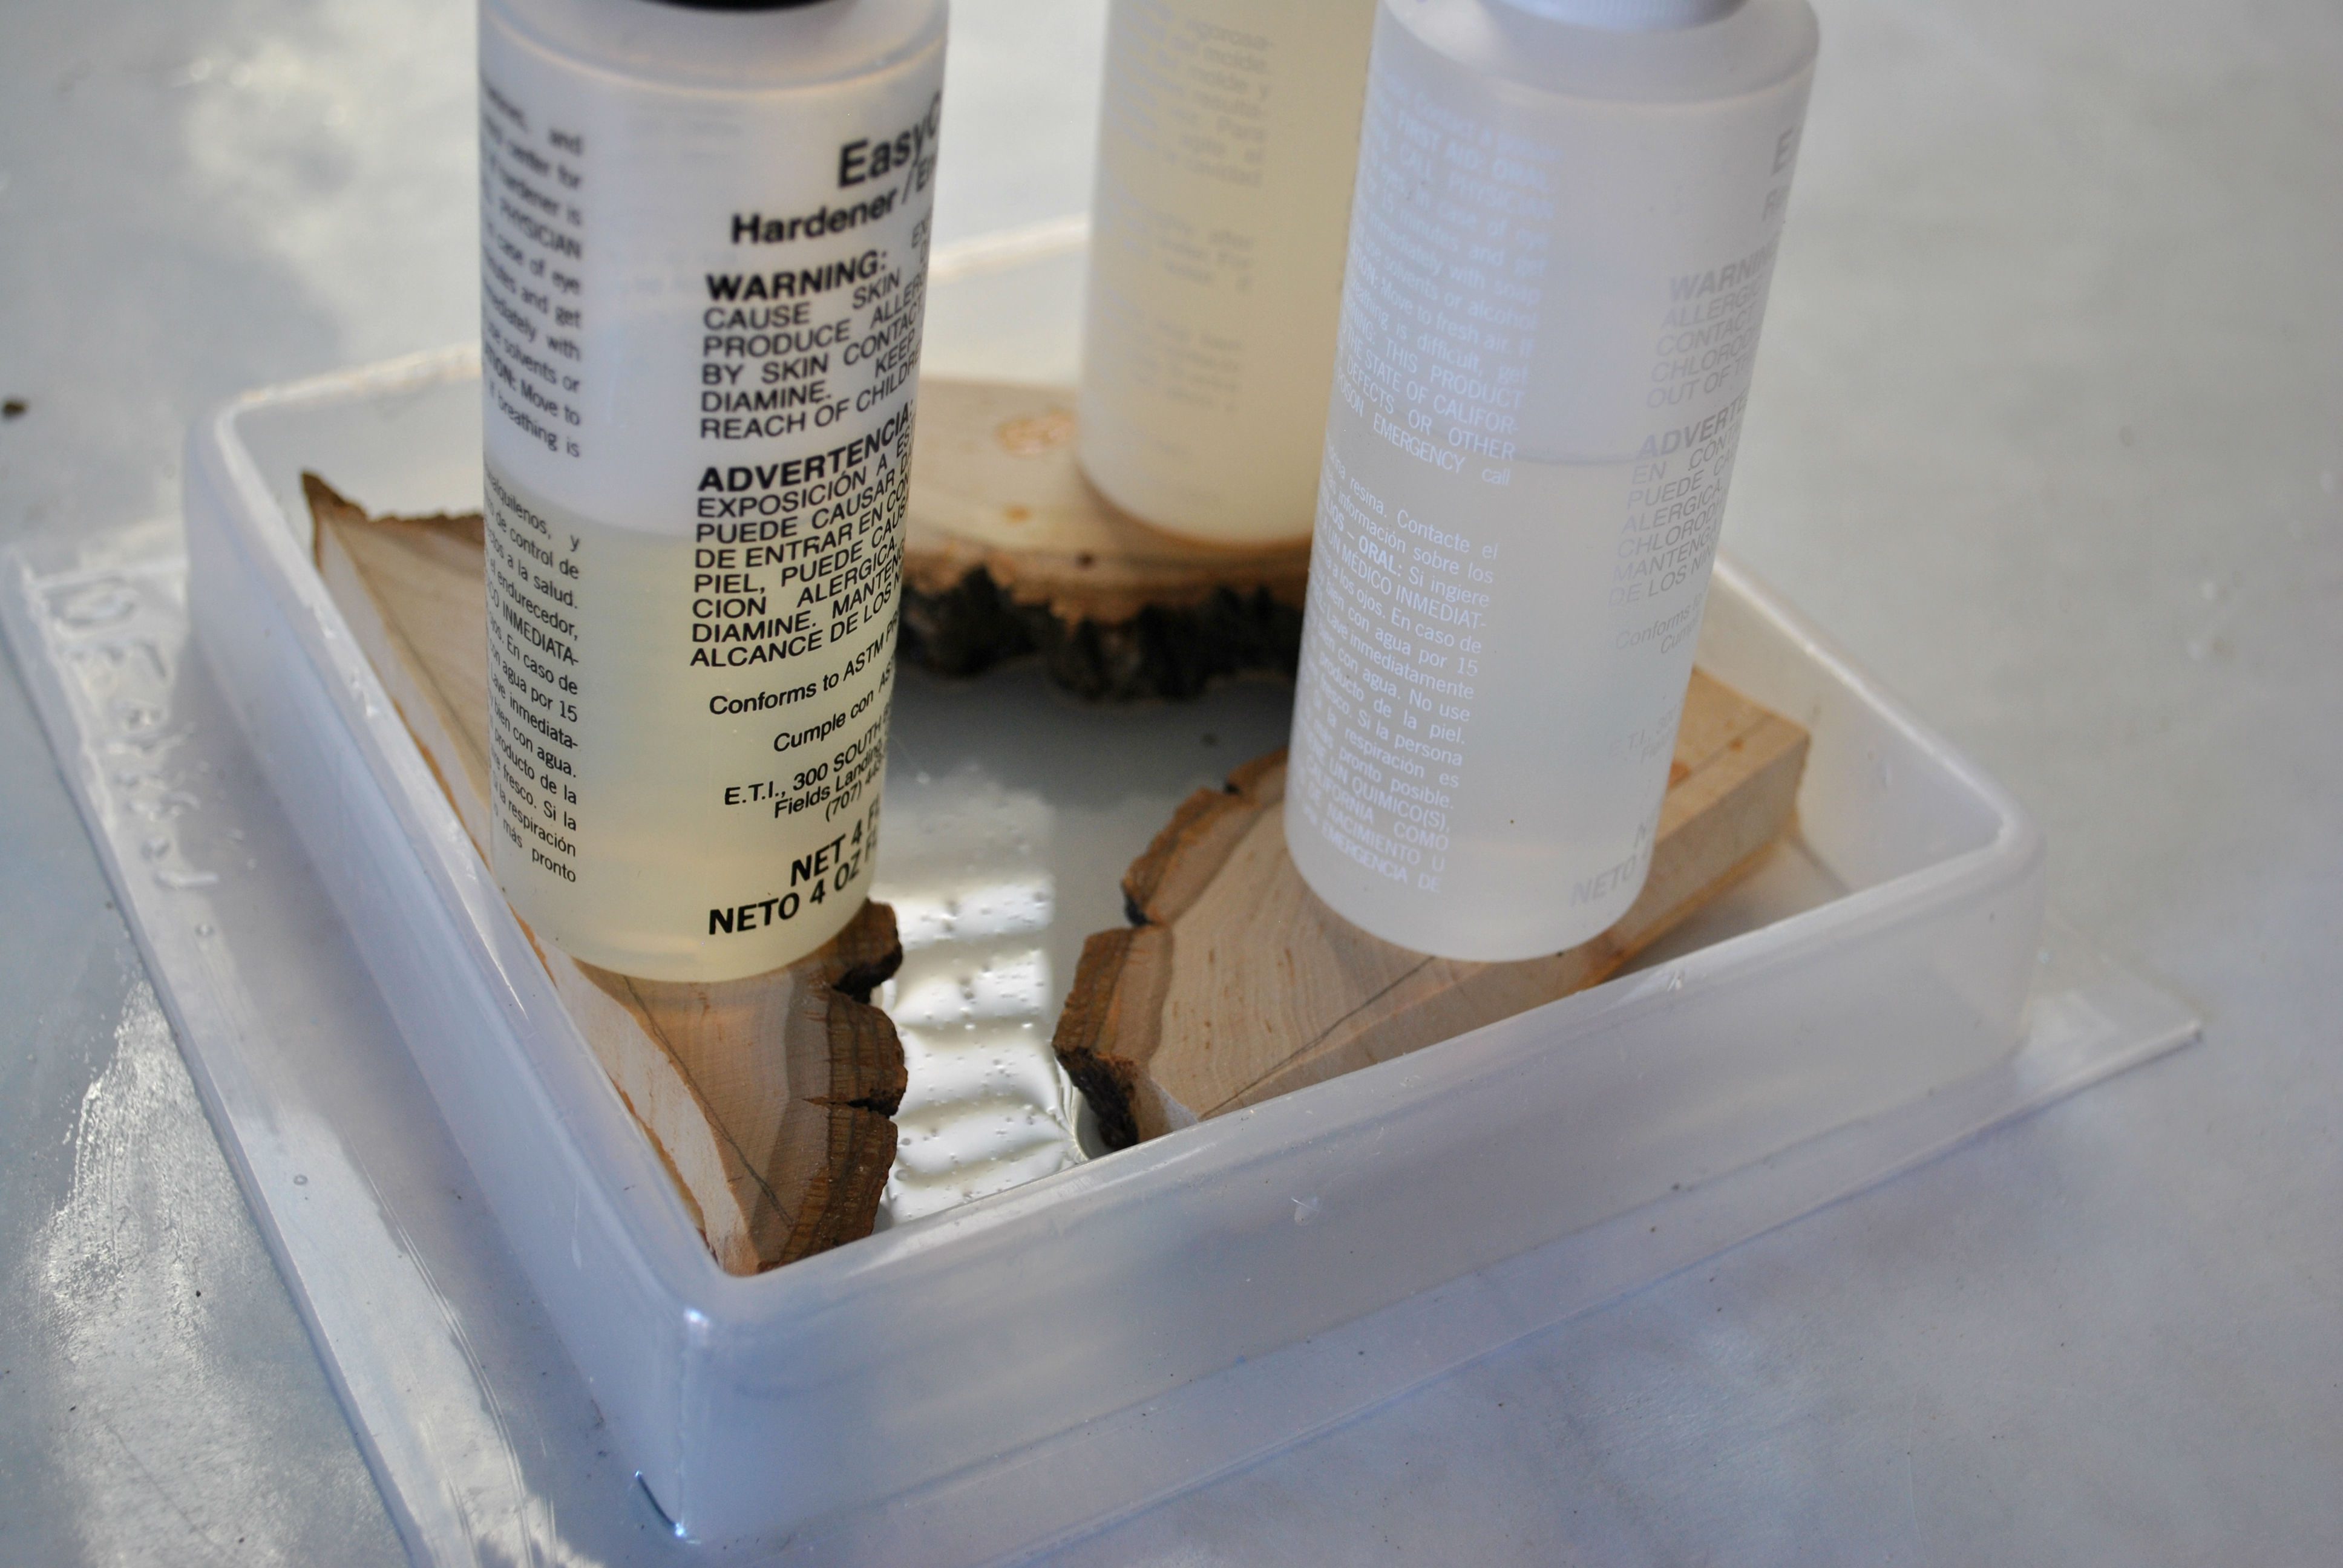
Once you know where to place the wood, remove it from the mold and mix up approximately 1 1/2 ounces of resin (based upon this size mold and the amount of wood I used). The Resin Obsession super clear resin is perfect for this project. Not only does it cure bubble-free in molds, but it also cures hard. Your resin won’t get bendy when you cut it with the table saw. Pour it into the bottom of the mold and make sure it covers the whole surface.
Then, place the wood back into the mold where you had planned. This is a step I initially did not do when I first started making these pendants. But, I noticed that I would do a thick pour of resin, and the wood would float to the top and change positions. I set some weights onto the wood and let it cure for twenty-four hours.
Step 6: Second resin layer
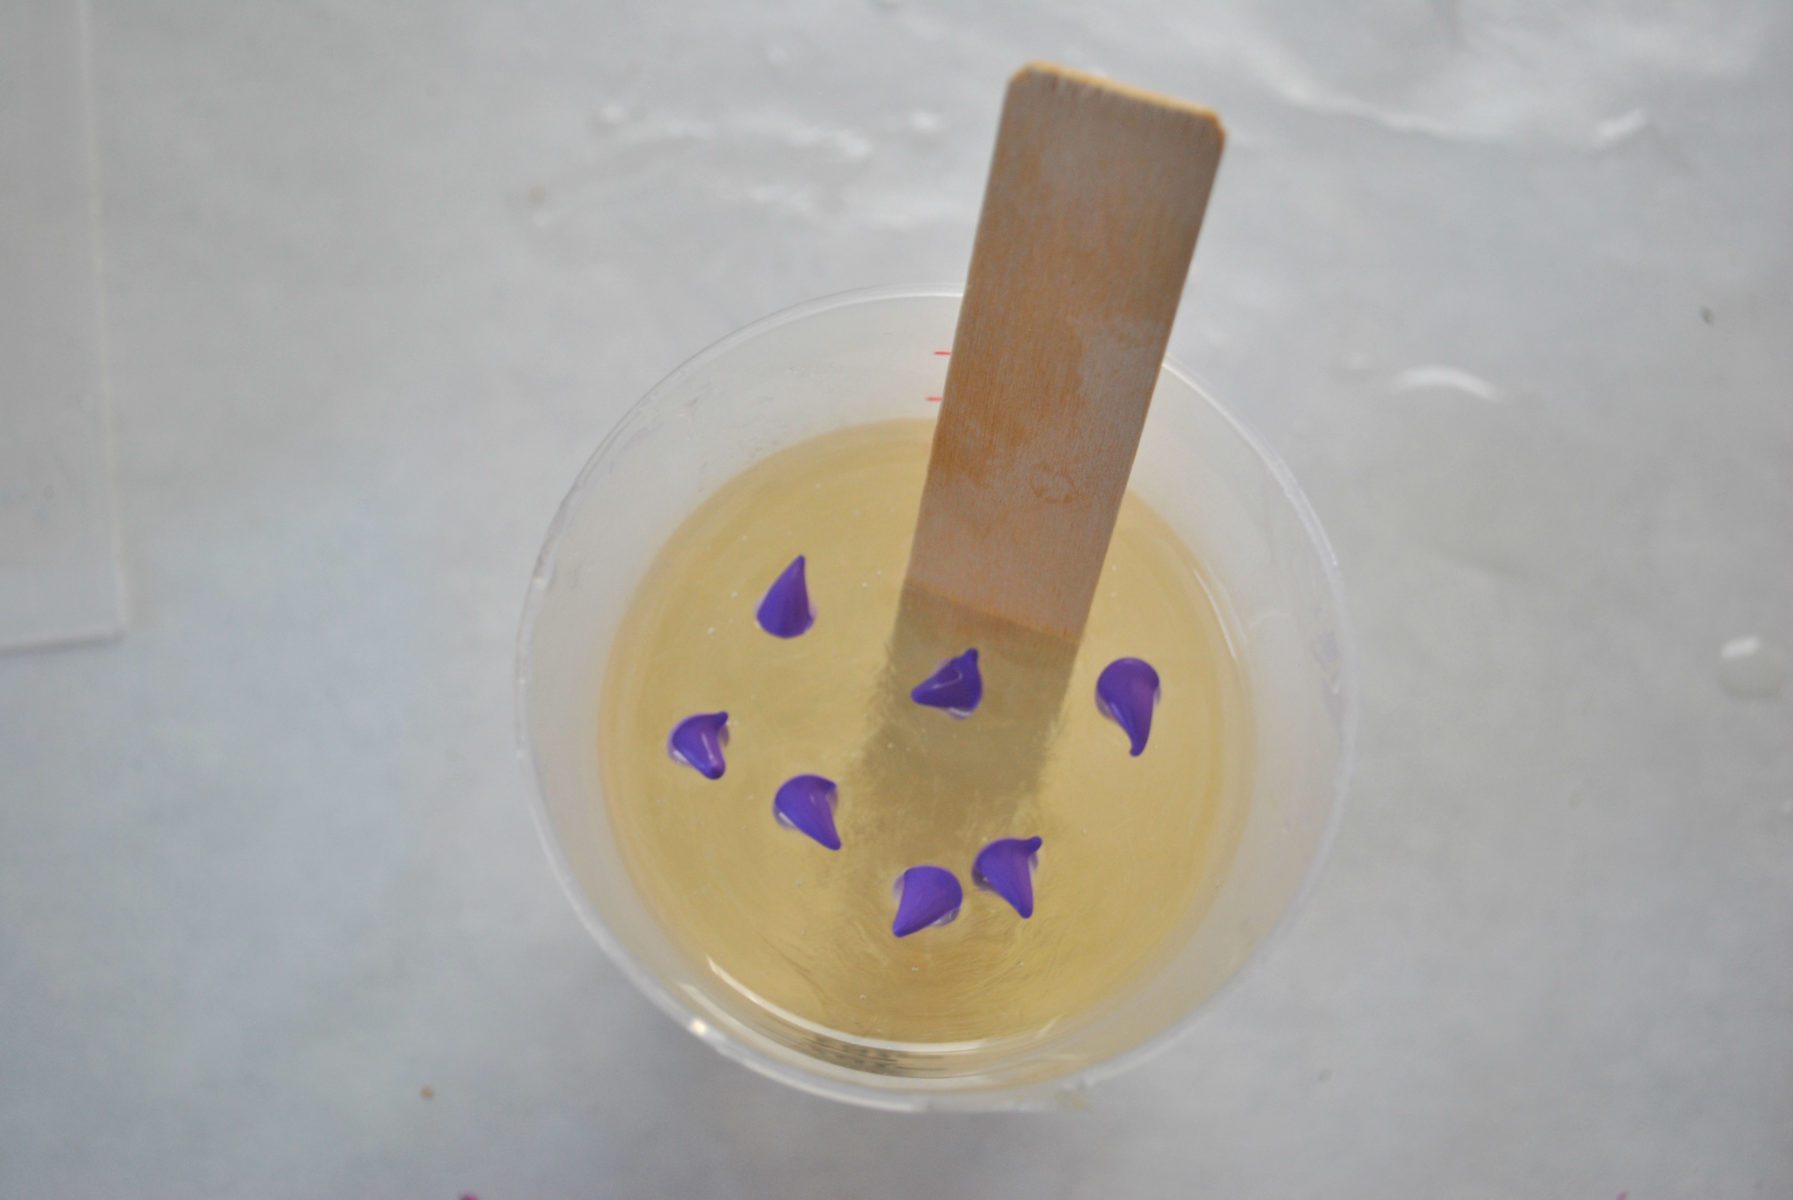
Once you let the wood slice layer cure, it’s time to mix up a batch of colored epoxy resin. This amount will vary based on how much wood you are using and the size and depth of your mold. The easy way to know how much resin you need is to use the Resin Obsession resin calculator.
Add your coloring. You can use opaque or transparent resin colors when you make your jewelry.
Add the resin into your mold. Be sure to flow resin into all the crevices to distribute it evenly across the mold. Let it cure for at least 24 hours.
You might notice that I don’t fully fill the mold with resin. I leave some of the wood exposed for a few reasons:
-It leaves a place to anchor down the wood to ensure it doesn’t float.
-I can save resin by not fully covering the wood.
-It ensures my pendant isn’t extremely thick and heavy.
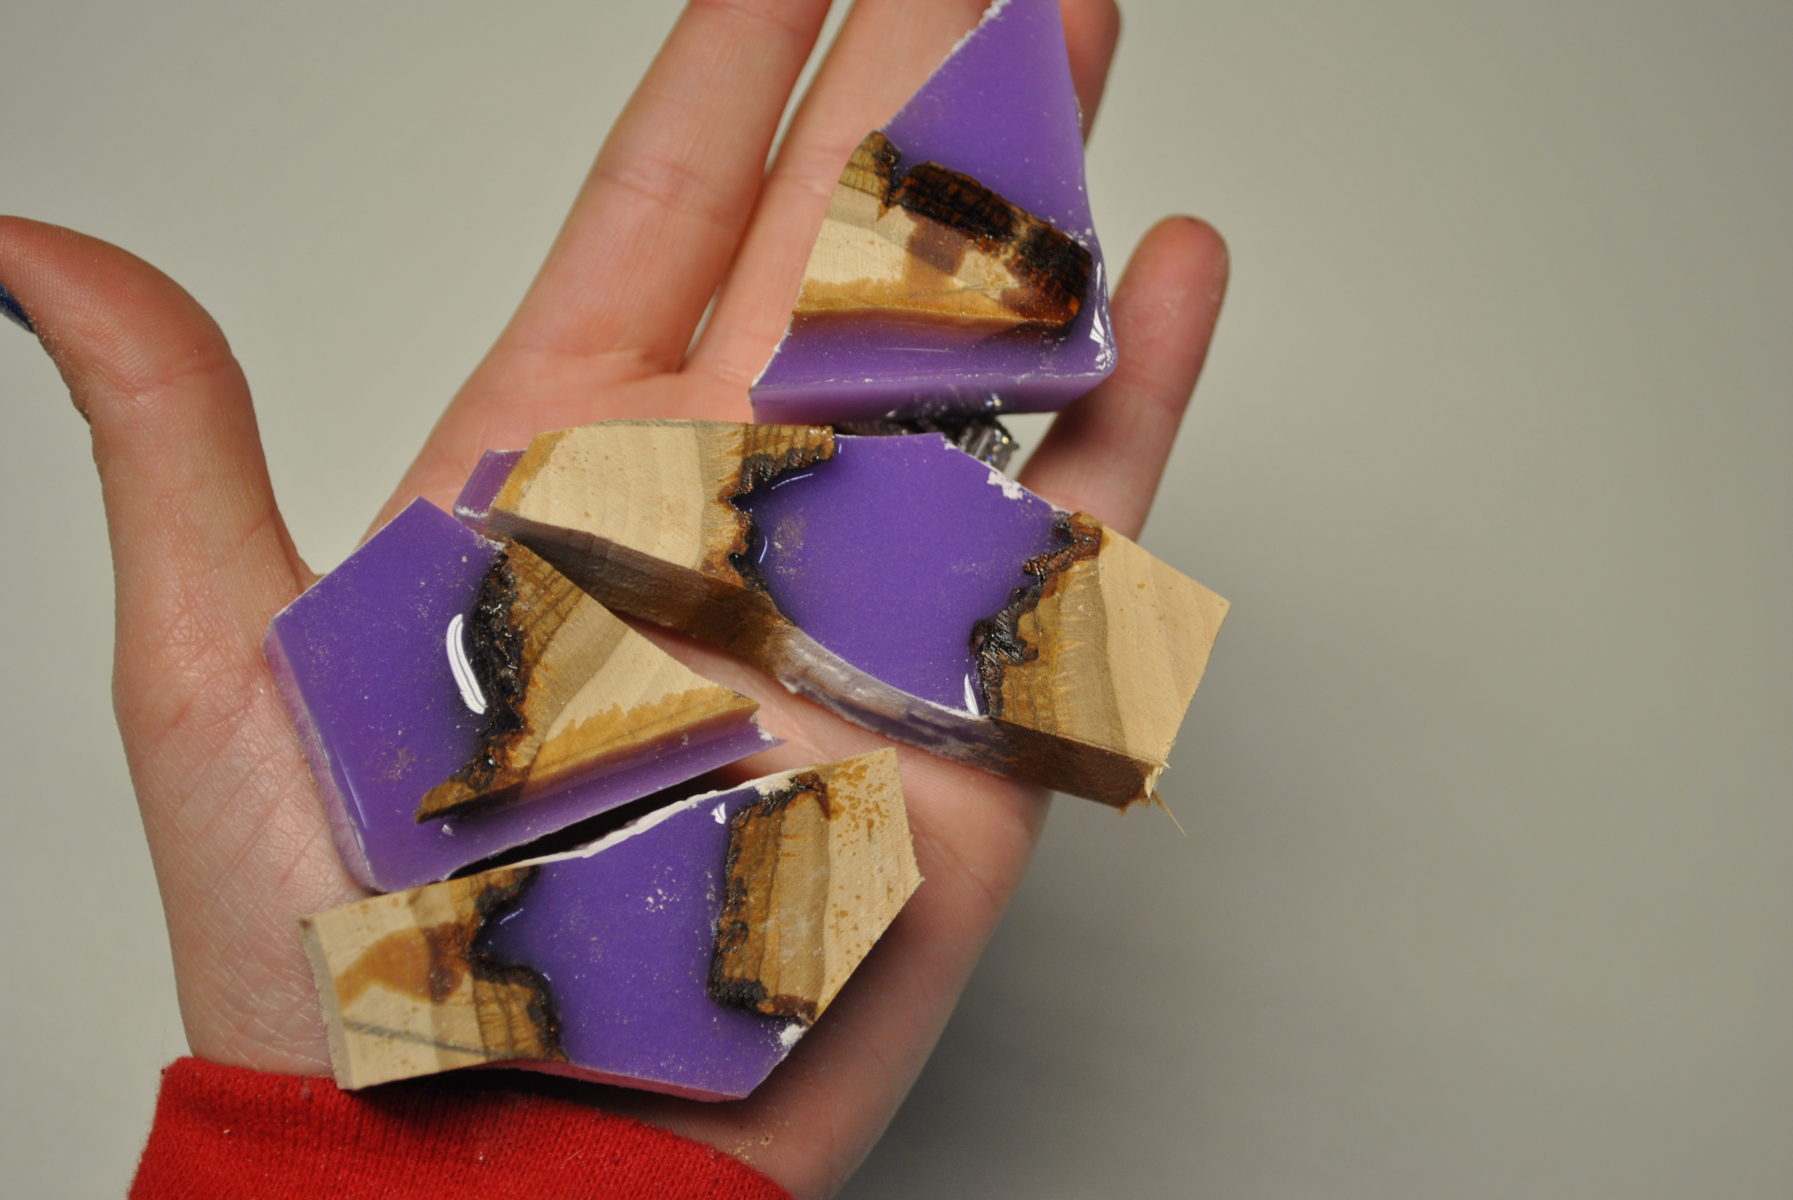
Step 7: Demold
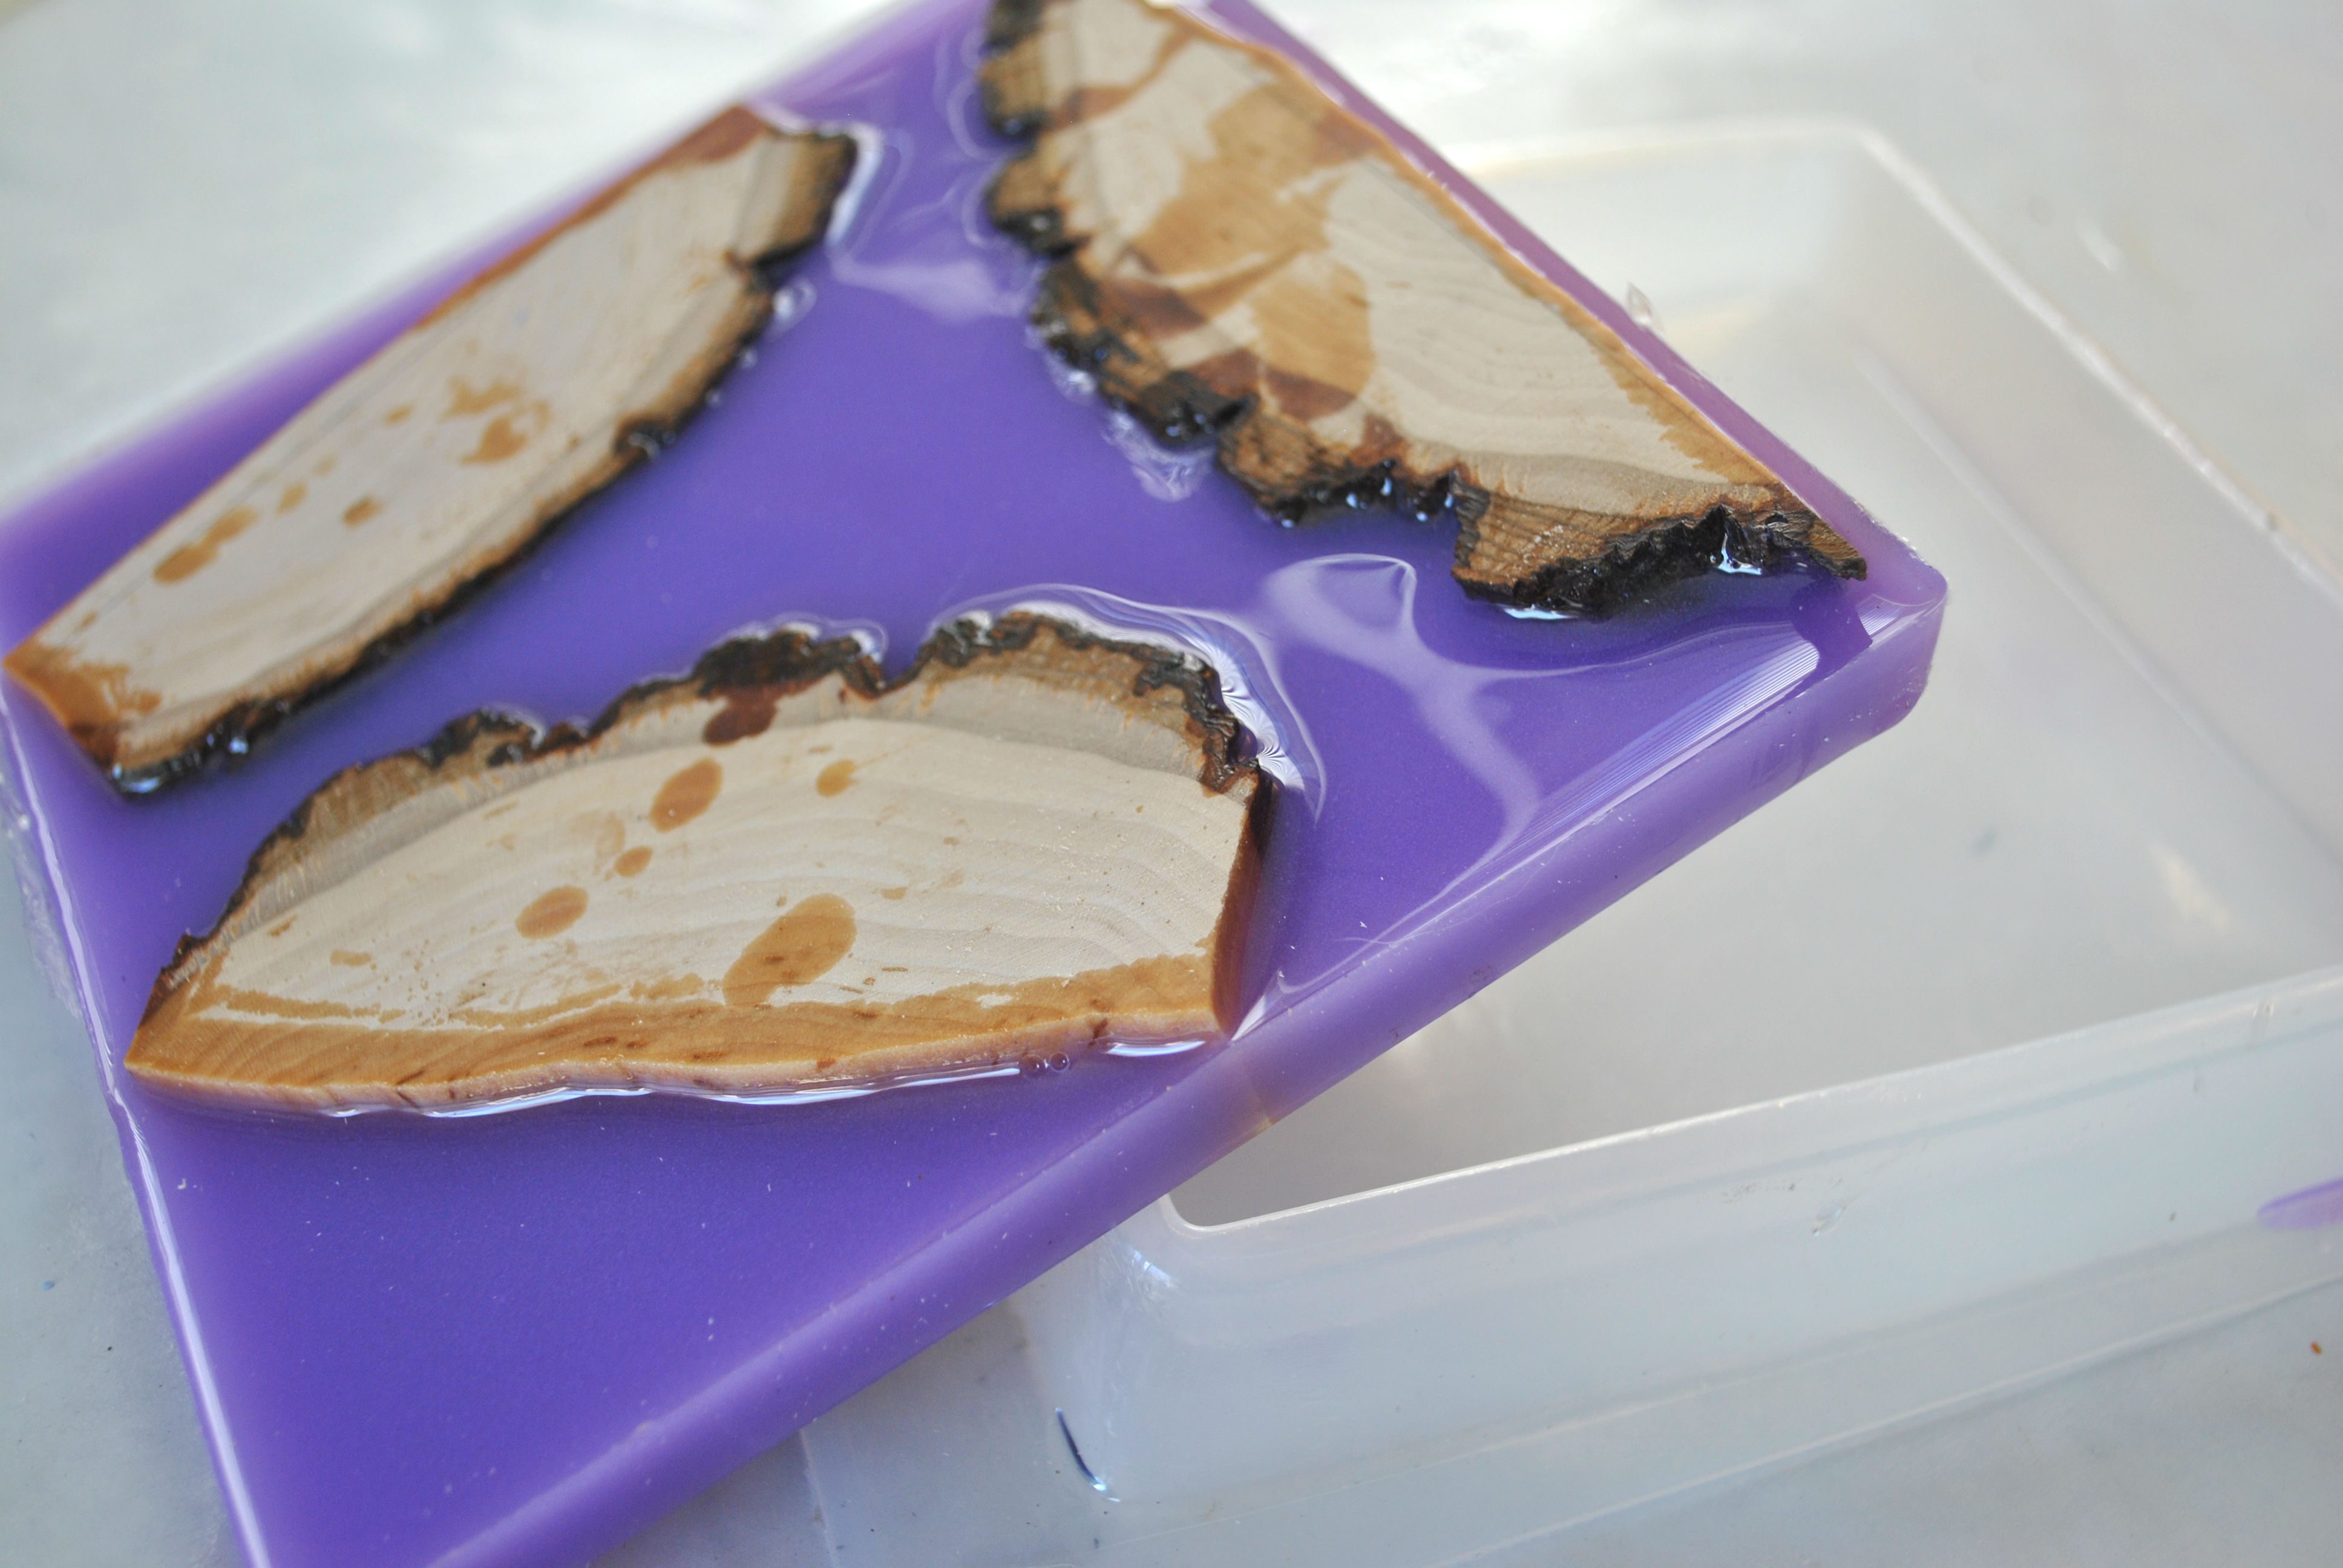
Releasing the resin from the mold is pretty easy. I pick up the entire mold and give it a little twist like I would an ice cube tray and then flip it over to push up on the bottom corner until I can grab it with my fingers to pull it the rest of the way out.
YIPPIE! You have a block of wood and resin for jewelry!
Step 8: Plan your cuts
Draw lines on your wood that you want to use to approximate what you want your pendant to look like. There are no right or wrong cuts.The belt sander will transform everything.
I’m using the same technique as before when using the table saw, slow and steady.
I will get about 10-12 pendants of varying shapes and sizes from the whole block.
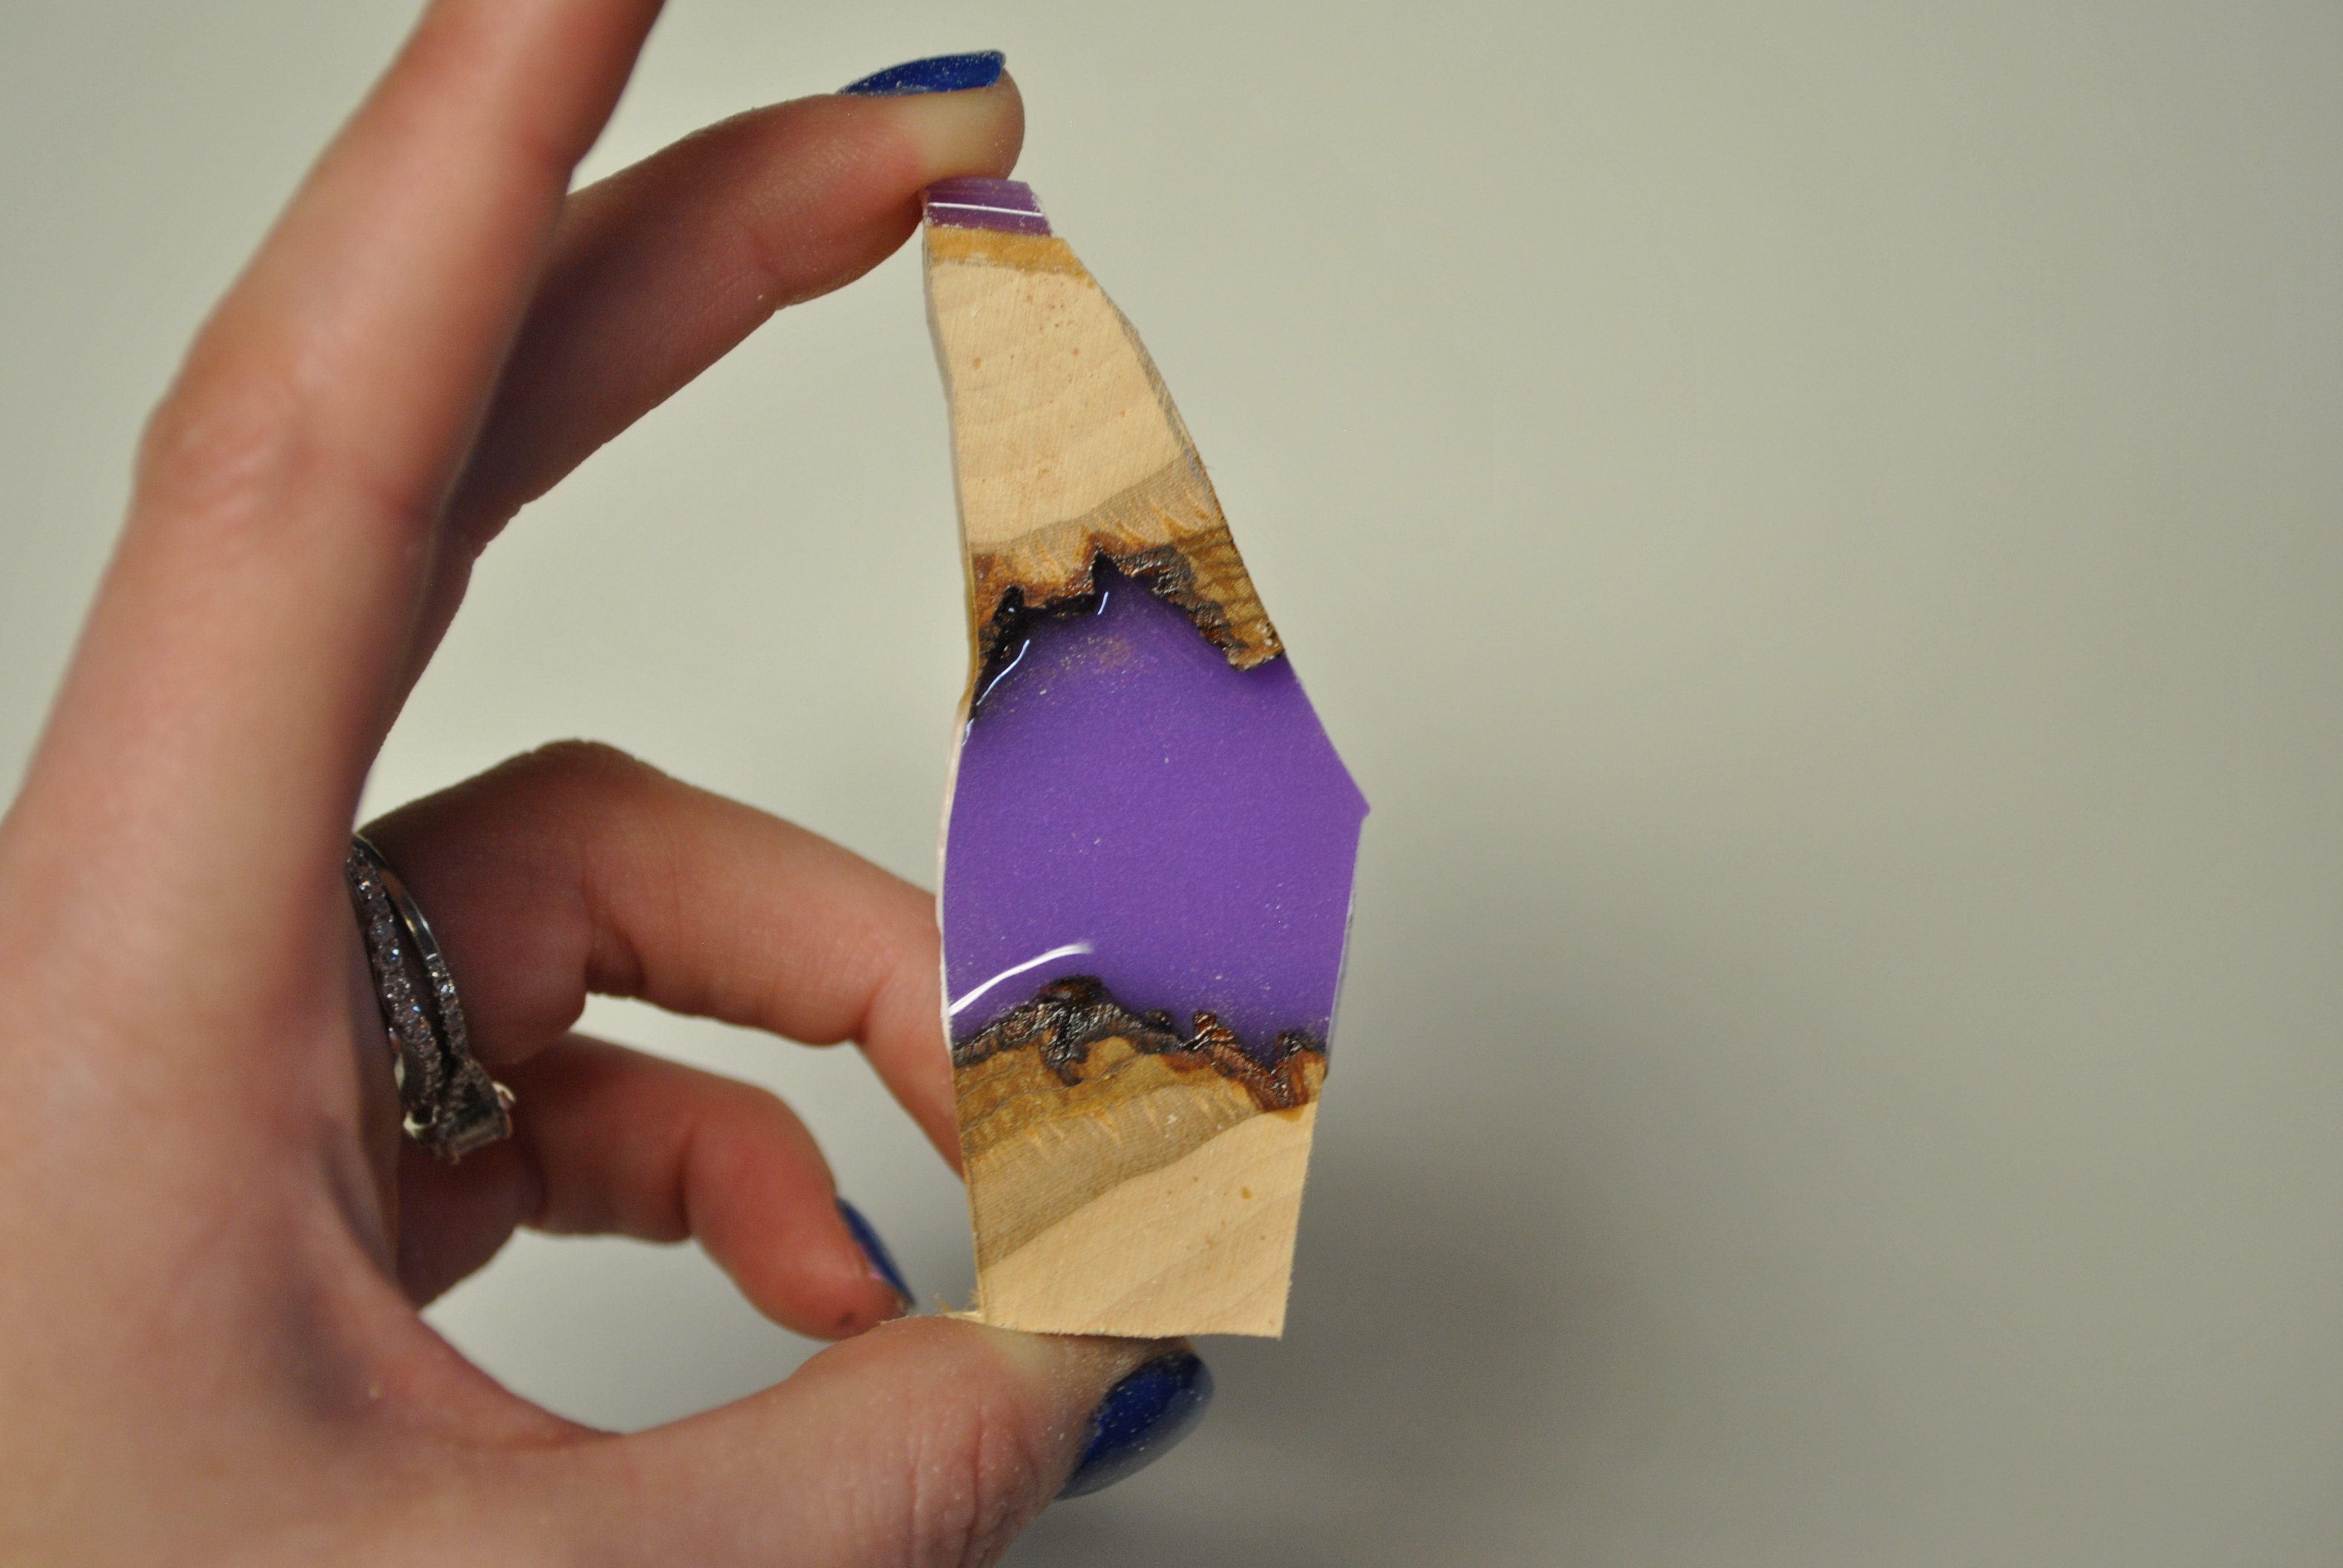
As you can see, these are VERY rough cuts, but pick your favorite, and we will shape it into something beautiful using the belt sander.
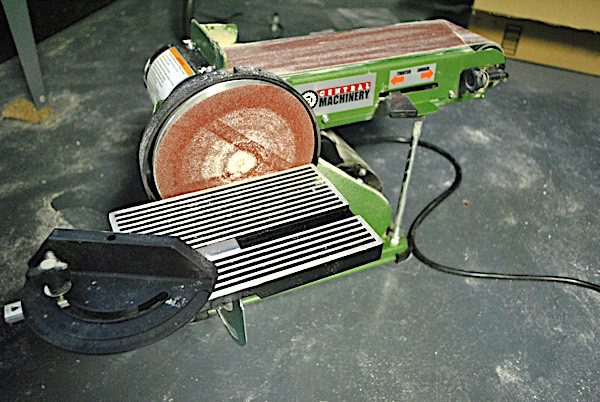
BELT SANDER TIPS:
⚠️ Before you tackle this step, I need to review a few safety things about the belt sander. This thing is very intimidating and can potentially be very dangerous. I have it set on my basement floor because I have more control sitting. But a sturdy workbench will work too.
-Wear short sleeves and do not wear gloves! Lose clothes like sleeves and gloves can get caught and jammed into the belt sander, which, as you can imagine, would be extremely painful.
-Trim your nails. Yes, I have broken a nail by it scraping against the sandpaper, and yes, it hurts.
-Wear goggles or glasses and a dust mask. Dust will be flying all over the place.
-Read the safety instructions of your belt sander for further precautions.
PS: My belt sander is from Harbor Freight, and I’m using 80-grit sandpaper.
Step 9: Shaping
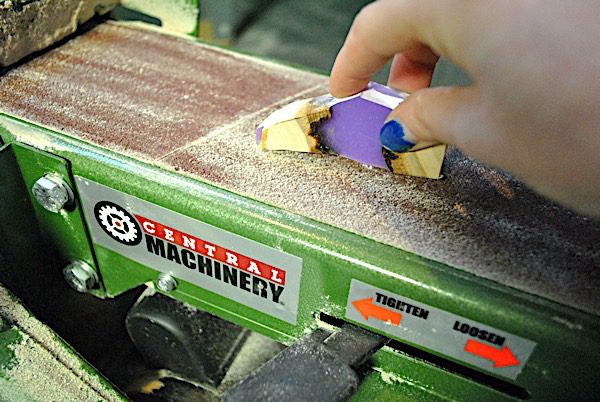
My machine was off for the photos, but I wanted to show my hand placement when shaping. I always start by sanding the face of the pendant first so that the wood and resin are flush.
Hold the piece against the running belt, being sure to have a firm grip, with your fingertips as far from the belt as possible. Once you have a flush pendant, you can start shaping. Like before, have a strong grip with your fingers safely placed. Always start with one edge and slowly lower the rest of the pendant towards the sander. You don’t want the belt to catch a corner and send your pendant flying across the room (yes, it happens). Try to make your pendant as symmetrical as possible, but don’t worry about slight mistakes. Hand sanding can fix that.
Notes about using the belt sander for these wood and resin jewelry pendants:
I use the belt sander dry. I have had no issues with the resin melting or getting soft on these larger pieces, but when I shape and sand the face of the pendant, I do lift the part off the sander often so that it doesn’t overheat. Some resins will get soft and crumbly when you do this, but the super clear resin stays hard. It’s why I love it for wood and resin jewelry.
But, if you can use water with your sander, do it. Not only does it keep your piece cool, but it keeps everything from getting so dusty.
Step 10: Finishing
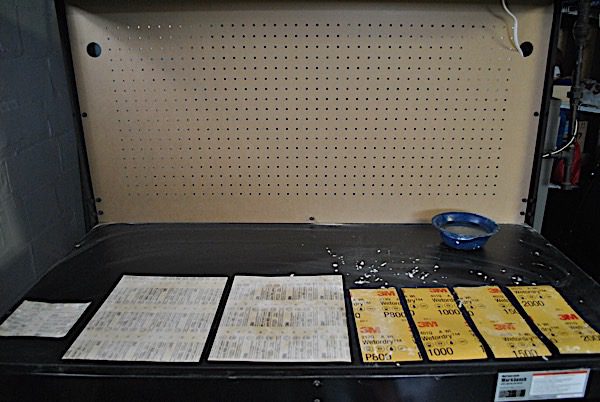
Grab your sandpapers — grits 80, 150, 250, 800, 1000, 1500, and 2000.
Lay them out on your table in numerical order from coarsest to finest. This will be your assembly line. The goal is to buff out all the scratches from the belt sander to return the resin to a shiny clear finish. Using sandpaper grit 800-2000 should be done wet.
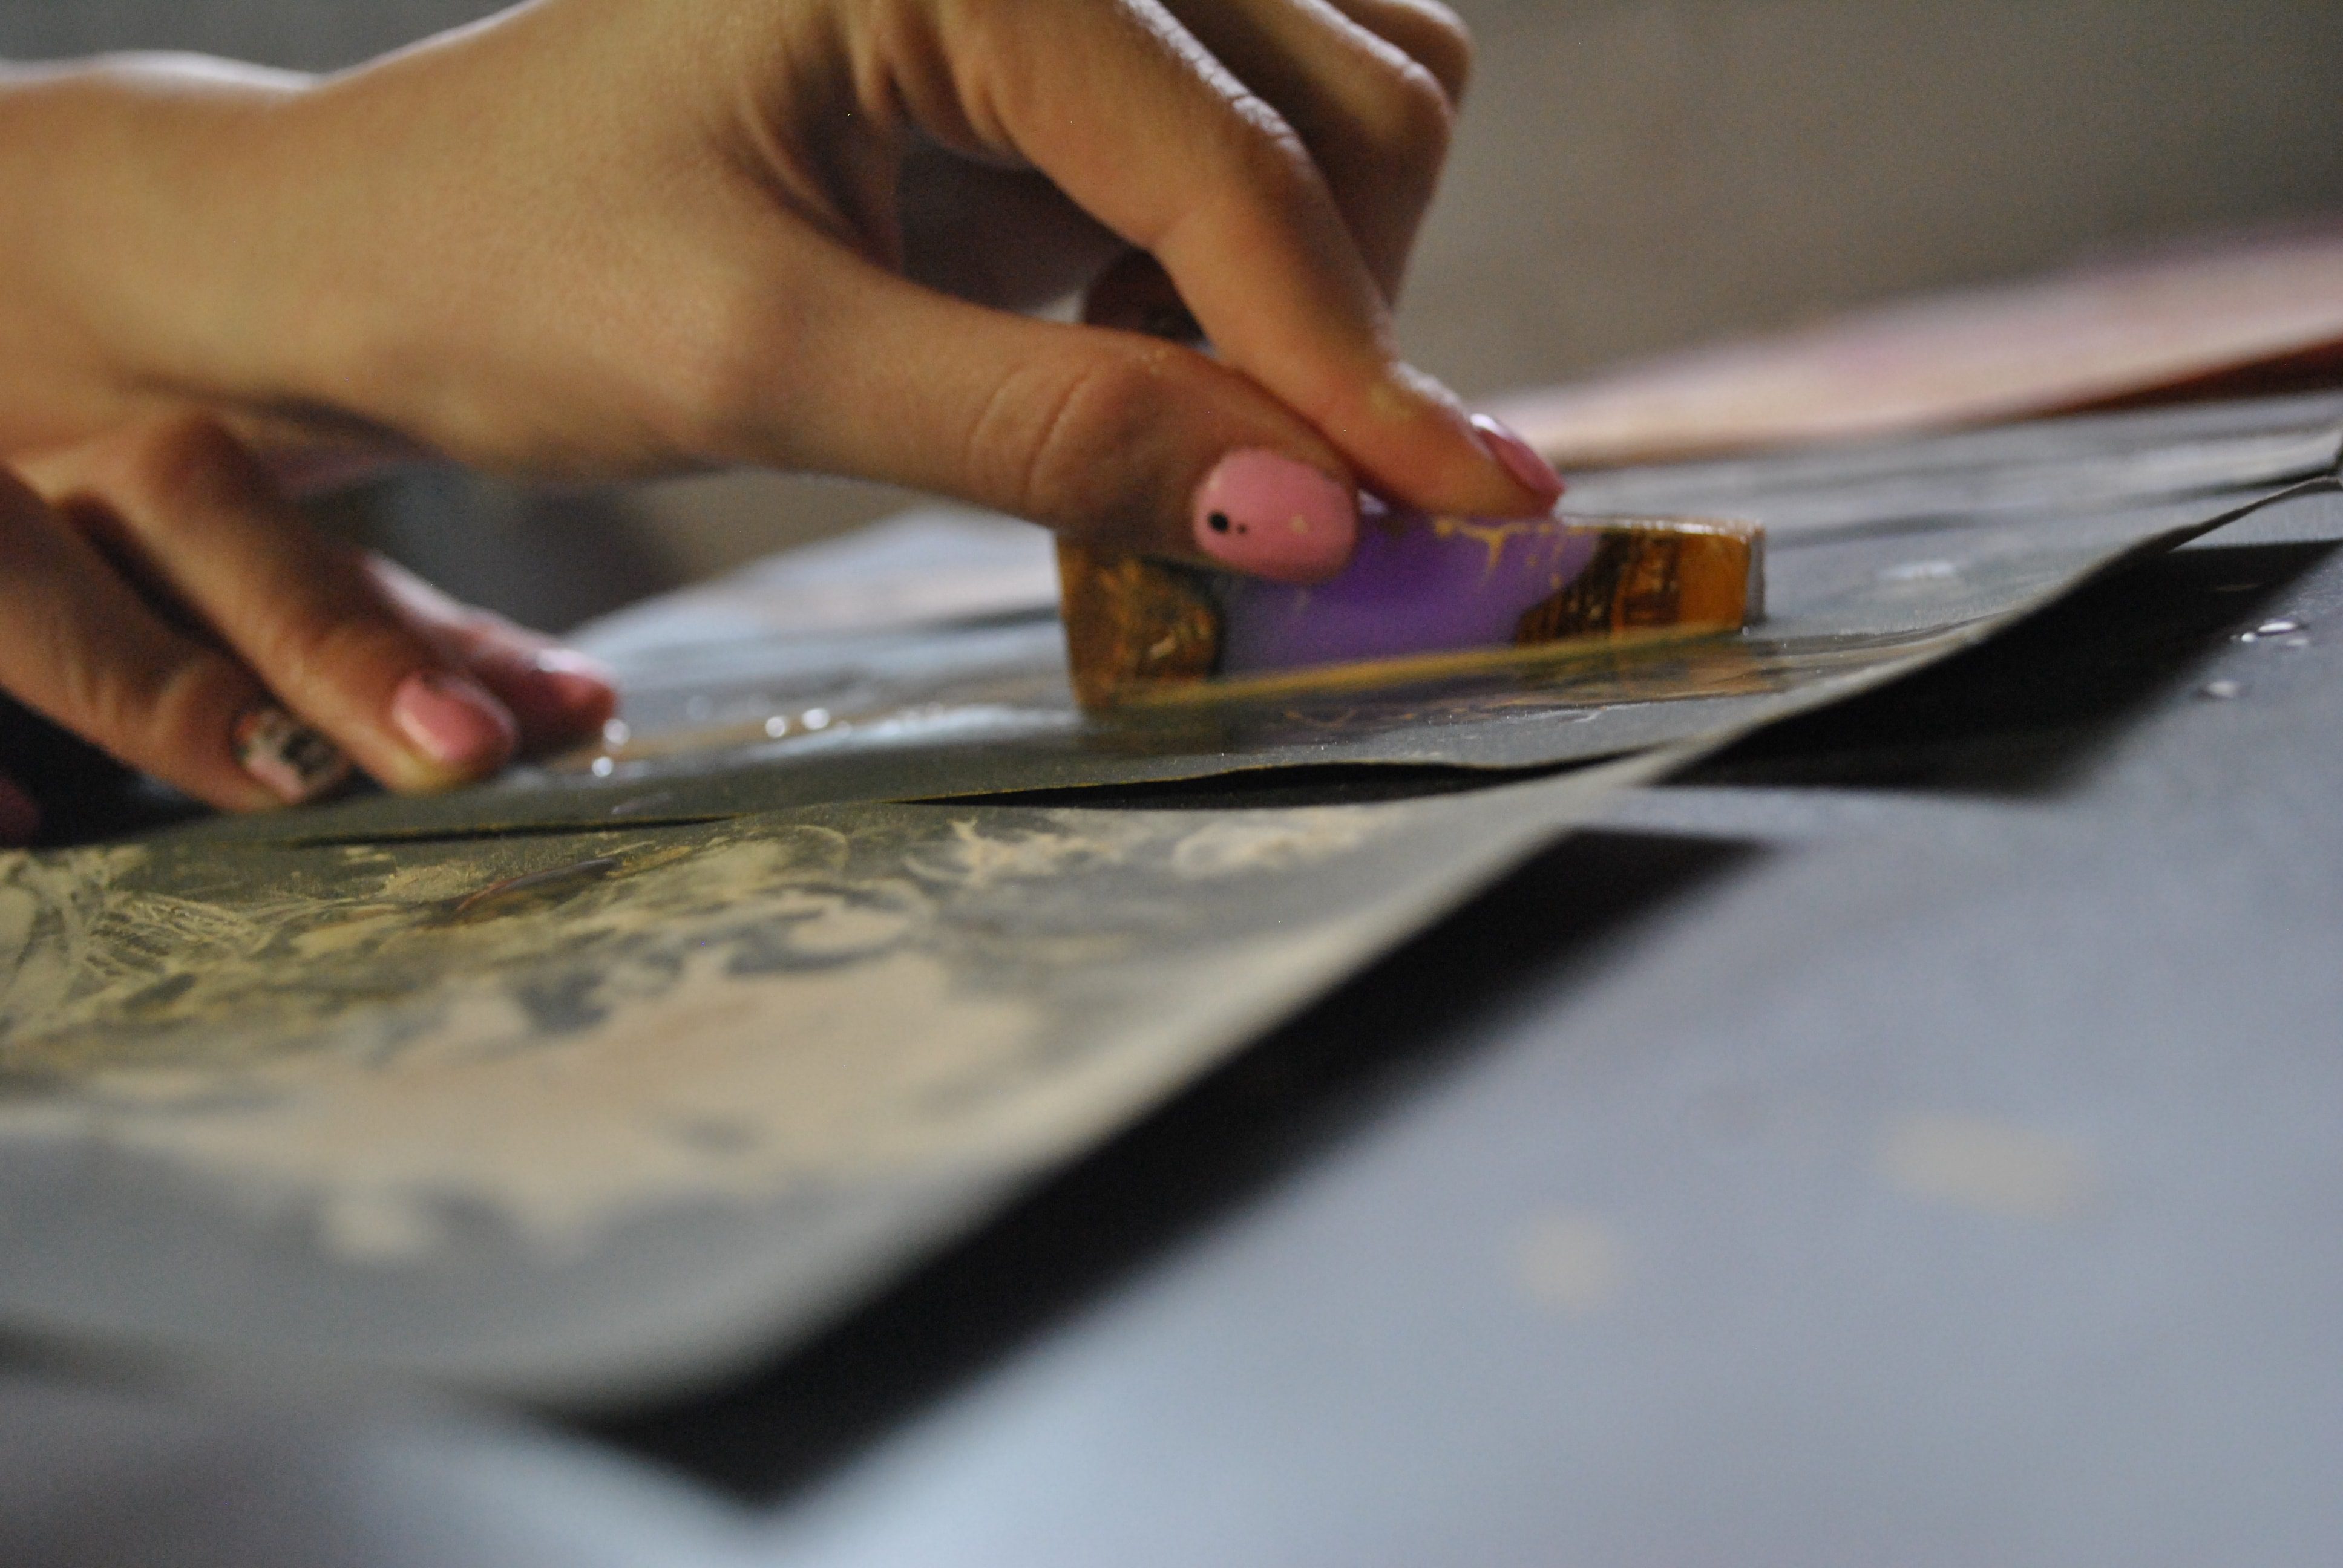
This step is pretty exhausting and takes at least 40 minutes to get through, but this is the final step before you make your pendant into a necklace.
Typically I will spend about 2-3 minutes sanding per side at each sandpaper station. I have no specific technique, just quick back-and-forth movements. If you notice tiny white scratches going through your pendant in certain spots at the end, it just means you didn’t sand enough. When this happens, start at grit 250 and go back through the rest of the papers.
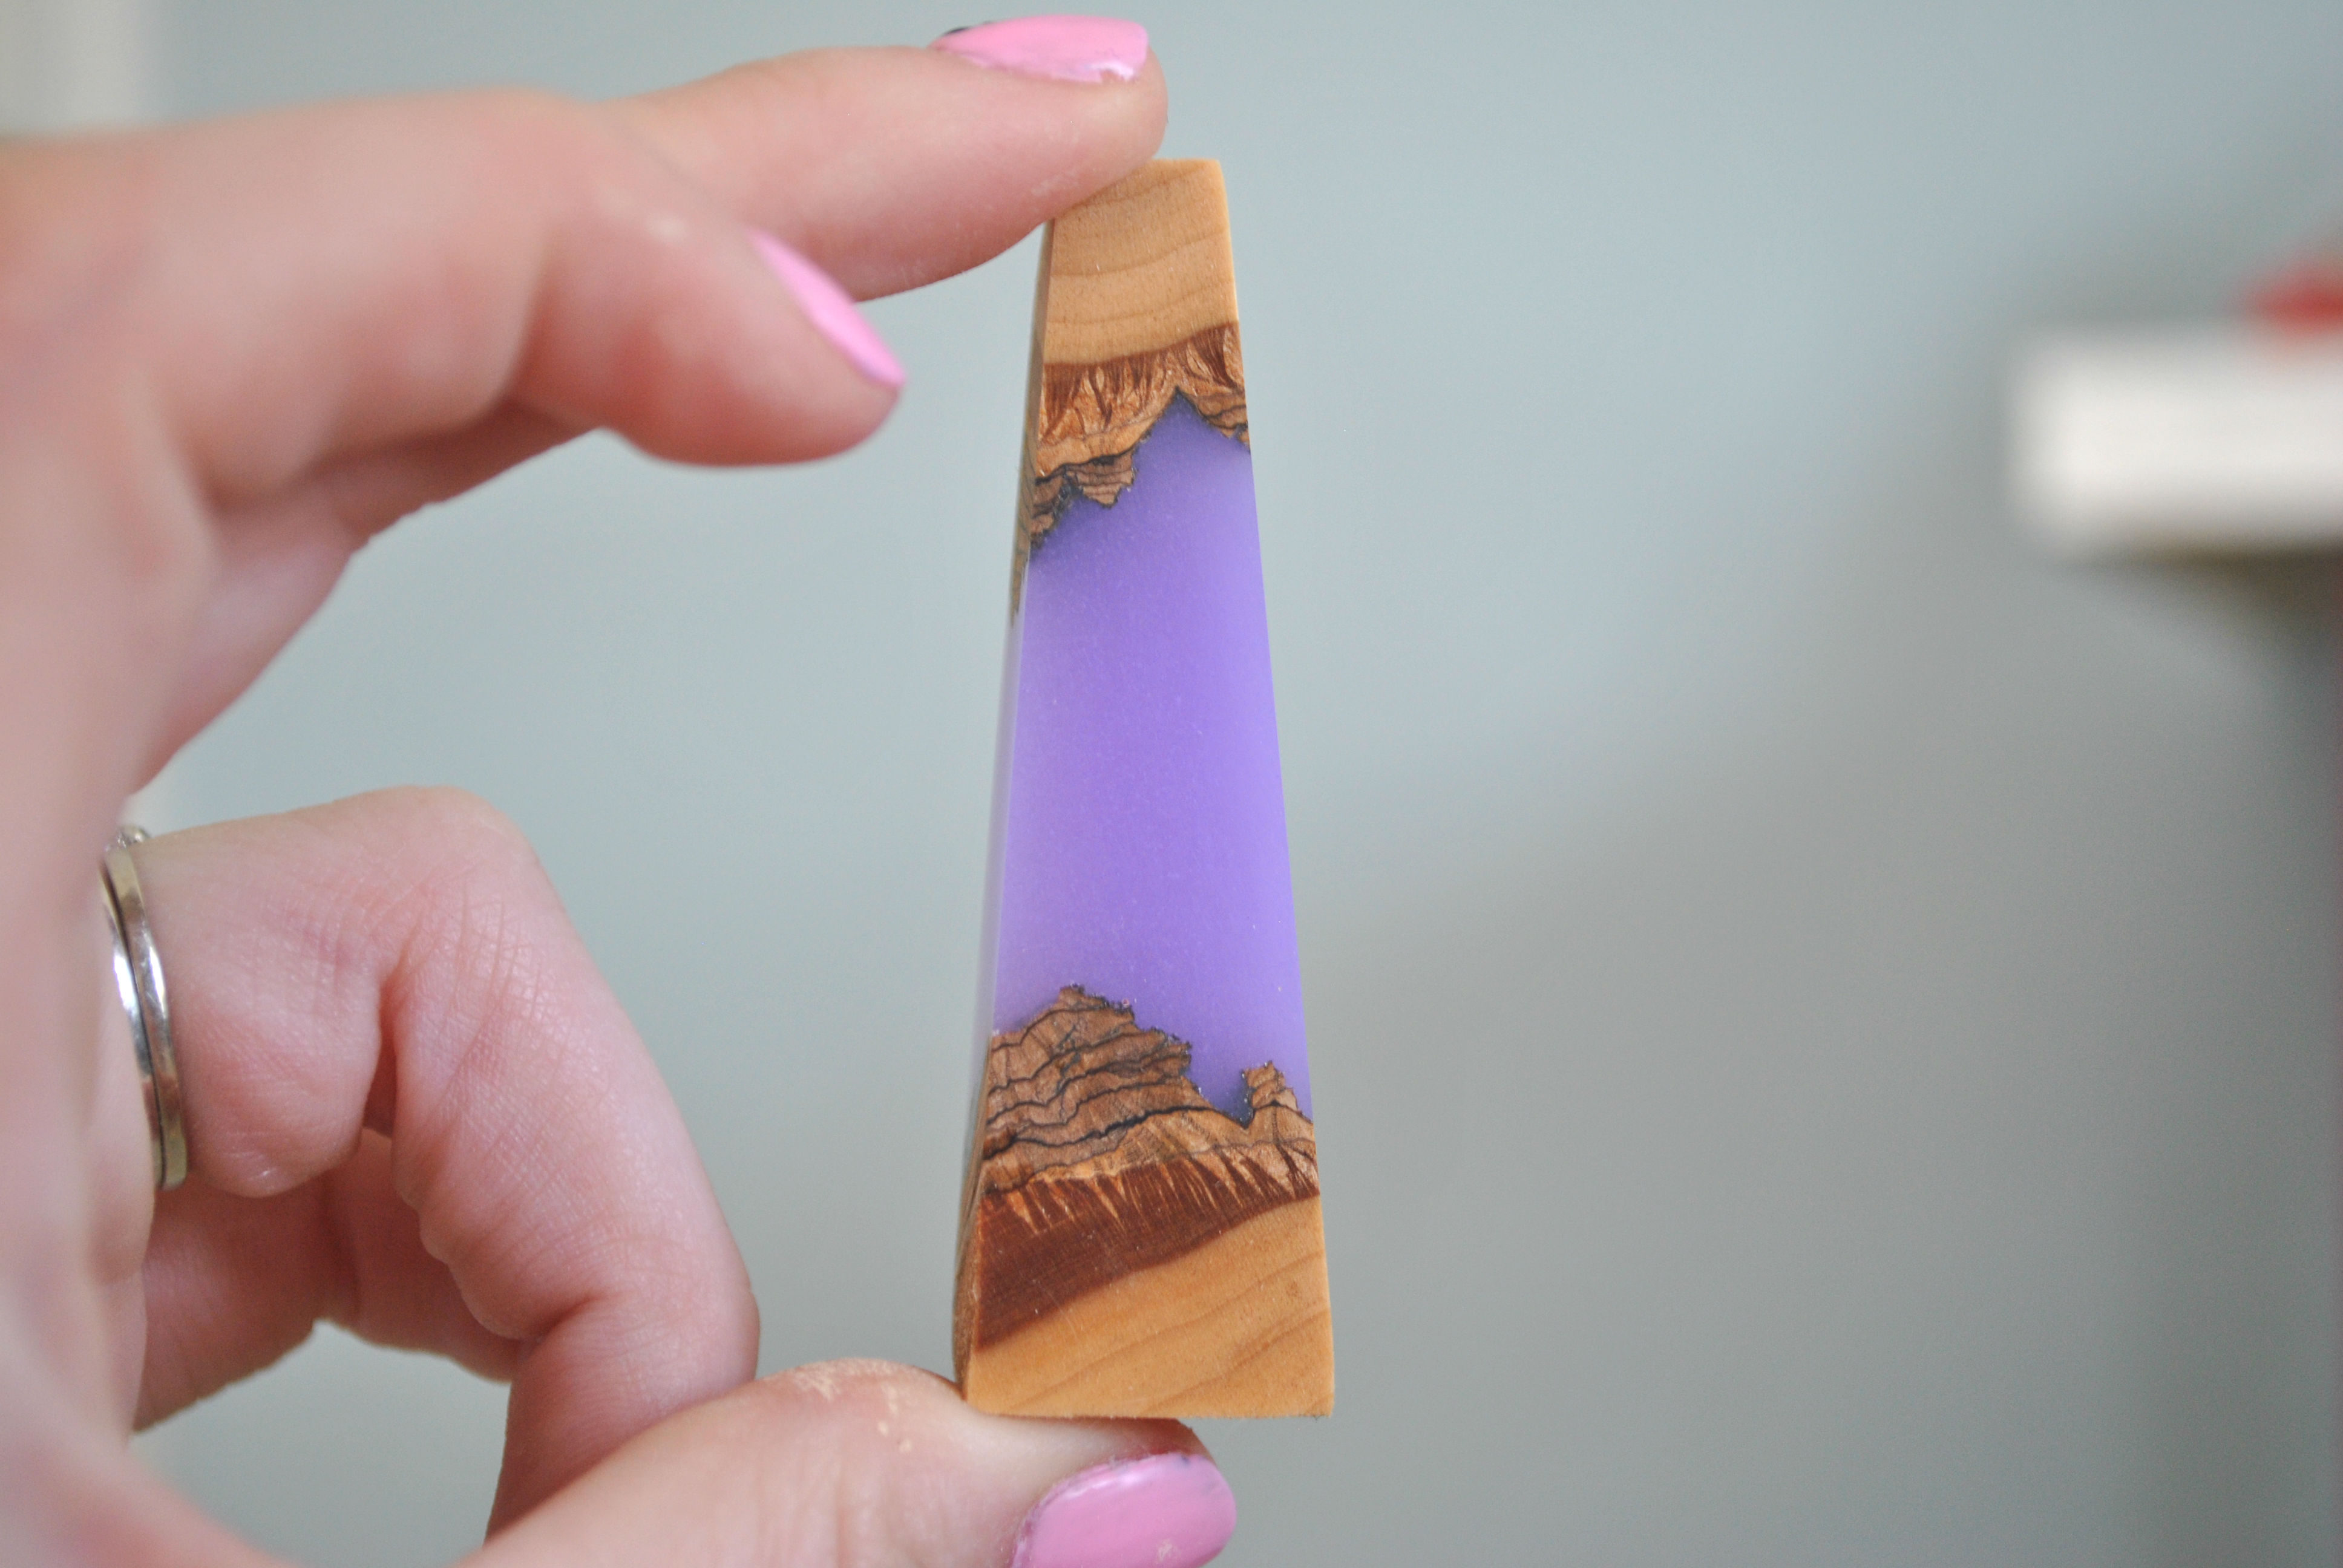
Step 11: Final polish
You can skip this step if you want a more opaque color like mine. But if you choose to have some translucency to your piece, you’ll need to polish it. Buff polish onto the resin in circular motions. Avoid using it on the wood parts; sometimes, it can slightly discolor it. Also, polish will not hide or remove any of the scratches left behind from the sanding but will make the resin shinier and more see-through.
I do not polish or seal the wood. I have tried many times with different products to get a glossy look over the wood, but my jewelry always comes out streaky, or the wood absorbs the liquid. So in my process, for now, the wood stays unfinished after the sanding process.
Step 12: Add findings
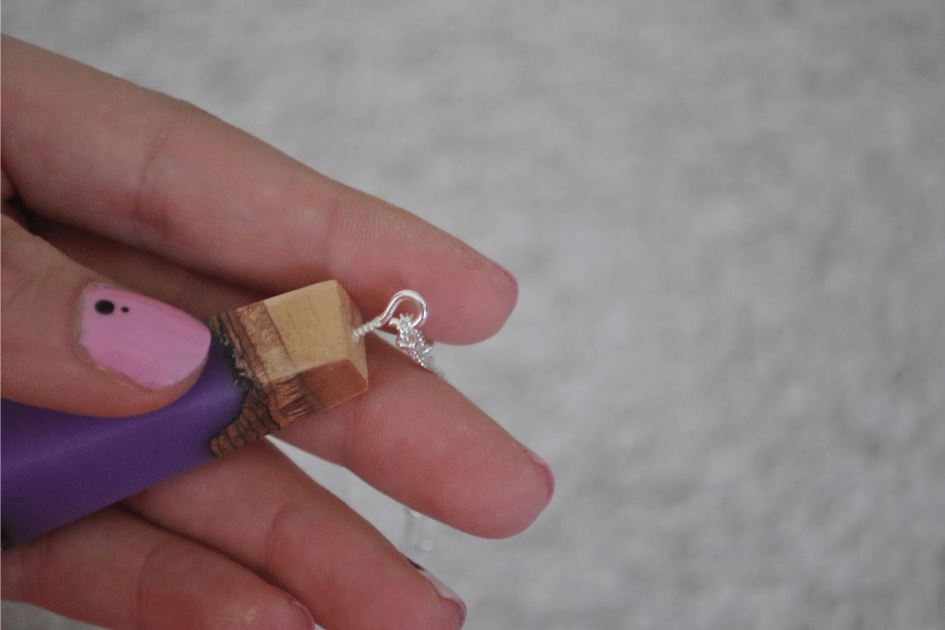
You can do this step in two ways:
If you have wood at the top of your pendant where you want the necklace to dangle from, then it’s easy to screw in the eyehook. Just keep twisting until it is flush with the wood.
But if the top of your pendant has resin instead of wood, you will need to use a power drill to drill a small hole at the top. I will then use a little bit of jewelry adhesive on the screw portion of the eyehook and place it in the spot you created with the power drill.
Enjoy your new wood and resin jewelry!
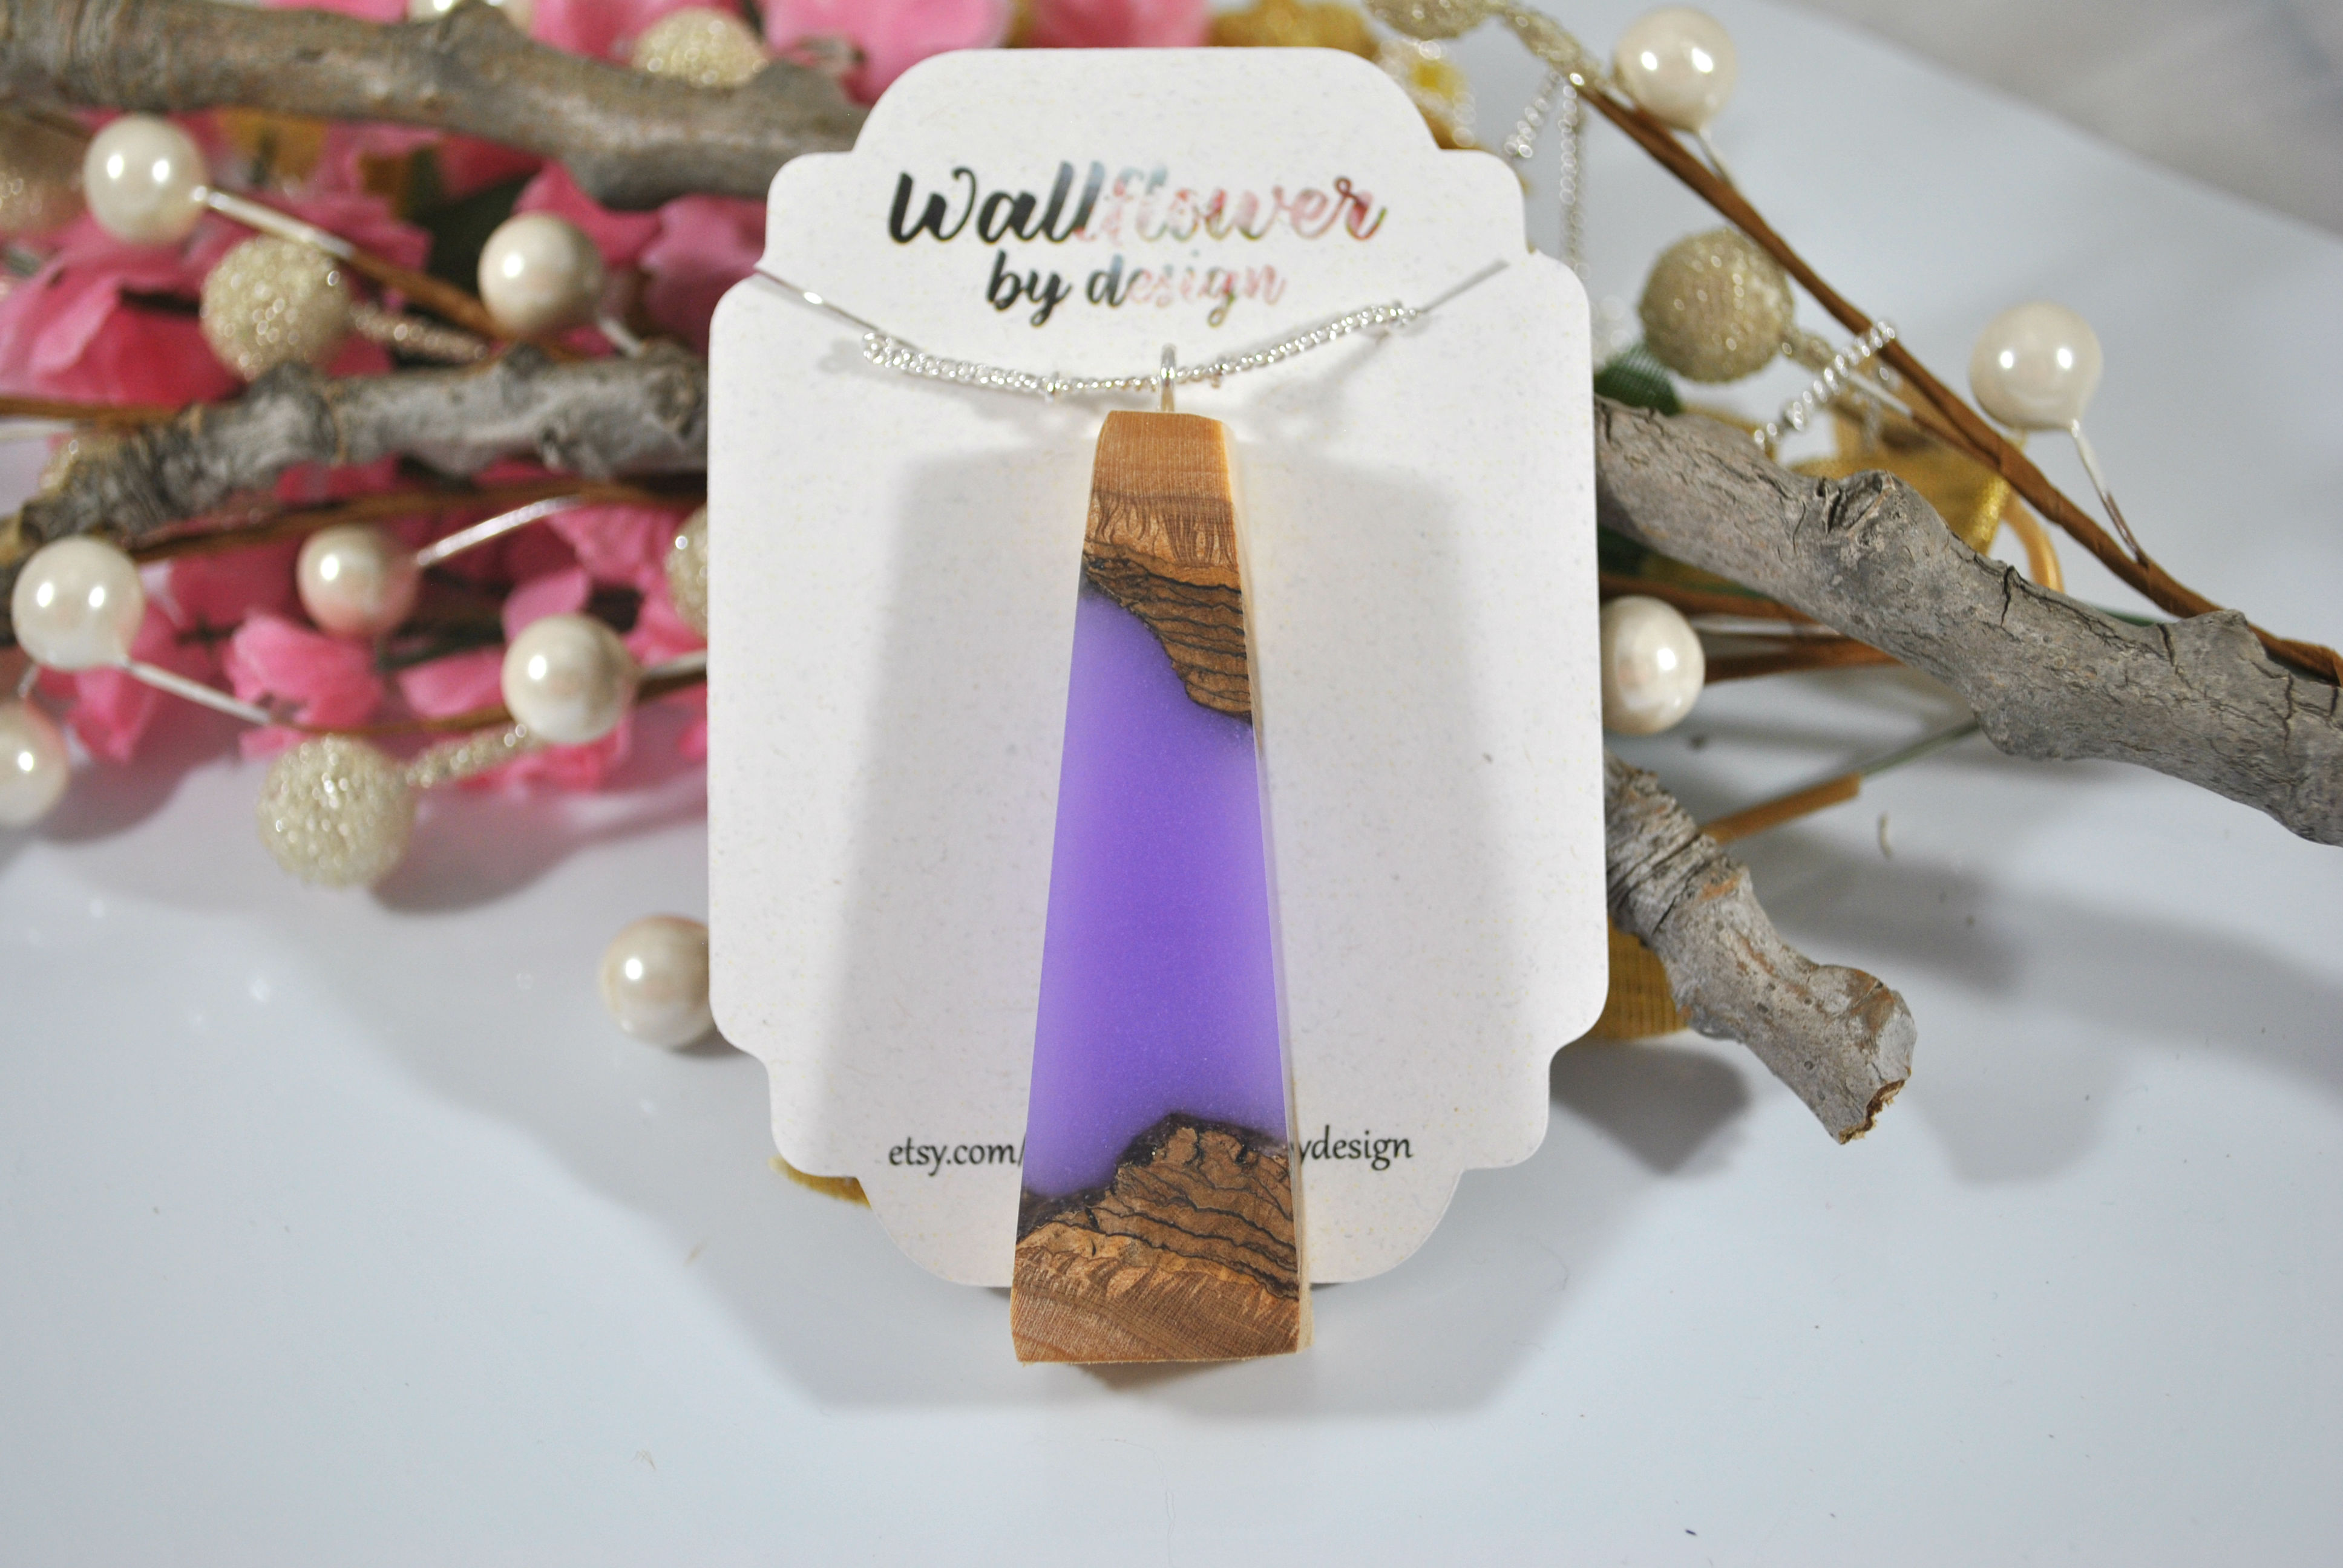
I love bringing two different elements together to make a beautiful piece of jewelry.
Eager to learn more about making resin jewelry but overwhelmed with where to start?
It’s okay. I felt the same way as a resin beginner. It’s why I wrote the ebook Resin Fundamentals. It gives beginners the vital details to make beautiful resin jewelry from the comfort of home. It’s the PDF book I wish I had when I started creating with resin!
Originally written by Michele Rober
Unpublished Blog Posts of Resin Obsession, LLC © 2023 Resin Obsession, LLC
Thank you for doing this tutorial. I’ve been wondering how it’s done after seeing some similar ones on Pinterest. Really cool!
Have you ever tried beeswax for the wood? It wouldn’t make it glossy but it would help condition and protect it.
That is a great idea! I will give it a try!
Thank you for the tip,
Michele
Do you sand down both the face and back of the pendant or both?
This is just gorgeous! That purple gives it a mystical look. Thank you for such a great tutorial.
Wow that is gorgeous. My husband has some ironwood, I better try this.
WOW how impressive. While looking thru the steps I thought that some of us who don’t have a saw could use some sawdust or smallish bits of timber and put it straight into jewellery resin molds. Must admit I do want to try the large slices of timber.
Hello!
Great idea! I have tried using cuts from thicker tree branches and while the look it different, it still makes for a unique pendant without the need for power tool investments.
Thank you for reading!
Michele
Thankyou for showing this , often wondered how it was done, hopefully I will get around to trying, the colours are
beautiful Cheers Sandra
Thank you for the tutorial! It’ll be fun to try this technique. One note: the saw you are using is a scroll saw, not a table saw. #toolnerd 🙂
Tehehe, good catch!
I’m new to the power tool world.
-Michele
Hi, I would have assumed that the wood in the resin would need to be sealed with something like other items put in resin. But it sounds like you didn’t seal the wood at all? So you didn’t have issues with bubbles coming out of the wood or bark area into the resin? PS – Wow these are beautiful!! Thanks for sharing! c-
Hello!
I did not need to seal the wood before hand and I have had little issue with bubbles. This may be because I am using store bought wood, so it is possibly sealed with something already? Not quite sure.
Thank you,
Michele
merci beaucoup pour ce super tutto le rendu est magnifique
it may also be because you’re not fully coating the wood in the resin- if you poured resin over the top of all the wood, the bubbles would float up to the resin covering it. …at least that’s my hypothesis. 🙂
So creative and beautiful! Thank you for sharing your secrets.
Fabulous tutorial. This may give me the courage to give this a try!
Great tutorial, thank you so much. I have 16 acres of woods surely I’ll find something out there to resin. Again thanks, great instructions.
These pendants are so beautiful! Thank you for sharing!
Your work is just beautiful and your instructions are clear and concise. After seeing this, I’m sure I can do it 🙂 You have taken the fear out of the process. Paula
Perfect.
Thank you very much.
It’s very simple and interesting.
Great idea love the color! Have you tried using the mini wood slices? Just curious. I’m wondering if that would save a few steps? Can’t wait to try this. I have some gold flakes to add as well! Thank you!
Thank you for taking the time to show us how you do your beautiful work.ive wanted to do this for so long but couldnt find any tutorials on it.
Thanks for this informative tutorial…I had to laugh at the belt sander instructions. Yes! that thing is intimidating. I had a piece “go flying” and tore my basement apart looking for it, only to find it wedged under the disc sander later. Your pendants are beautiful. (I still have a lot of practice to do!)
HA! The exact same thing happened to me..spend a good hour looking for that thing.
When you’re creating the base to hold the wood in place before pouring the rest of the resin mixture, are you doing just 1 1/2 ounce of the resin by itself or the full mixture of resin and gardener. I am just now becoming interested and wanting to try my first project.
Btw these are beautiful and so easy to follow the instructions on what you’re doing. I was beginning to think this would be too difficult to try until i stumbled onto your tutorial!!
It is resin with hardener mixed to hold the wood in place. It only takes a very thin layer. Be sure to weight the wood down in it until dry.
Thanks for this, Michele. I have a burning desire to make wood and resin jewelry. I found this video showing how you can use your scroll saw as a sander as well! https://www.youtube.com/watch?v=OHU_KZH0bdo
My only question – does the wood age or turn grey over time?
love this!
Beautiful. Great tutorial..it was very clear and pictures were excellent too. Thanku 😊
Beautiful! Can UV resin be used or is a 2 part resin better?
It is wonderful that you would share your expertise with other crafters. The clarity of your instructions is commendable. Thanks for sharing.
Great tuto.
Merci beaucoup
Can you do resin with sand, glass and shell window designs? Thanks.
Yes, you can.
Beautiful. Your tutorial is so clear. I appreciate your helpful hints. I never imagined I could be using my power tools to make gorgeous jewelry!
I get my wood for free. I have gotten some very nice pieces from companies cutting down trees. So far, each tree service has been kind enough to give me the wood once I explained why I wanted it. One tree service even gave me their card and said I could have more wood slices when I need them. It never hurts to ask.
How wonderful!
Have tons on trees that were taken down at my house ! So do u soak the branch slices in borax? I would think you would have to because of bugs ? for Kathy P or whoever knows answer
Hi,
I ‘m new to resin and i wondered how these pieces were made
Thank you for sharing!
Before rushing out to buy new machines, would it be possible to do it all by hand?
Do you sand down the side of the wood that touched the resin in the bottom?
Thanks!
Yes, you can, but it’s going to take you a lot longer.
Thank you so much for this great set of instructions. Can you use a band or table saw to cut the resin? Will cutting resin
dull the blade? Can you use a stop saw table saw to cut this resin? Again many thanks for this tutorial.
This is awesome, thank you so much for sharing.
MICHEL
depuis un an je confectionne des pendentifs en bois précieux
ébène,palissandre,racine de thuya etc (une centaine) je viens d’y incorporer de la résine crystal gédéo proportion
1/3 durcisseur et 2/3 résine . dans votre tuto très bien détailllé vous écrivez proportion 11/2 mesure que je ne
saisi pas ? pour l’équipement machines pas de problème
j’ai tout ce que vous recommendez y compris un scie à chantourner Hegner . encore merci pour cette bonne marche à suivre
Muchas gracias por tu tutorial y las explicaciones tán específicas en forma y tiempos, además de tús consejos. Realmente has hecho un gran trabajo 😊
Hi Kathryn! I hope the world finds you doing well and healthy. This is so terrifying, living in this world has be one a world we can’t live in!
Enough gloom. I love your work, totes & blog of all you share! The wood resin pieces are the main reason I’ve been interested in resin. They are just Gorgeous!
Do you know of anywhere to buy pre fab wood pieces? Since downsizing all the big tools are gone!
If you think of anyone, please holler back ♡
Thanks for everything! Katy
Hi Katy, I hope you are healthy and well too! I’m afraid I don’t know of any places to get premade wood pieces, but perhaps this is a good time to connect with another woodworker you may know of? S/he may be able to get you some small custom pieces to include in your resin project.
I love this! I’m looking at buying a 2.3 amp belt Sander, do you think that will be enough to sand this project?
I have recently become obsessed I
with this process, using store bought wood slices to create wood and resin pendants. They are turning out beautiful (thanks to this amazing tutorial) but there is one problem I’m running into. Some of my pieces are breaking in the bark areas. I guess because the bark is so fragile. I don’t really want to coat them with anything because I like the natural wood look.
Does anyone have advice on how to stop this from happening?
Do you sand down both the face and back of the pendant or both?
Hi Mary, I like to do both.
Such unique designs of wood jewelry, especially the rings are very beautiful and unique. People who are looking for wood jewelry designs should consider this blog.
I love the idea and the result, it is a great idea for special holiday gift. thanks for sharing your work with us.
I wondered how people got wood the same shape as the intended mold. I would never have guessed this method. Brilliant. So many questions answered and done in an easy to understand tutorial. I love working with power tools so this is going to be a blast. And I have access to all the free wood I can ever want. Can’t wait to get started. Thank you so very much.
That’s fantastic to hear Melissa!
Hi I’m trying to start a resin pendant business and was just wondering if the water when sanding caused any swelling with the wood, I have done wood and resin pendants and it seems to separate the join (though I do go from 240 grit to 10,000) Was there an issue like this or not really
Hi Stewart, what kind of resin did you use?
I believe it was an epoxy resin slow setting.
Hmm. I wouldn’t expect that to separate from wood. It sounds like something in your wood might be acting as a resist and keeping the epoxy from fully bonding.
Is there a PDF for this? To print is takes 23 pages!
Hi Diana, I’m afraid there isn’t a PDF version of this tutorial.
Thankyou for a great comprehensive list of needs, you are so detailed in all your instructions. I have watched a lot of tutorials over many years of different types of crafts.
I have not seen the opaque resin, I really like it. I haven’t made anything with resin yet. Have done lots of research and raringto start.
I have been looking for wood or bamboo that I can use for hair bun sticks. Would you have any ideas, where I mind find an outlet, it was the bun stick with a resin top part which got me looking into resin. I would appreciate any input. Once again thankyou for a great tutorial…⭐🥰💜
Hi Lindi, I’m afraid I don’t have any idea of sources for hair bun sticks made with bamboo.