
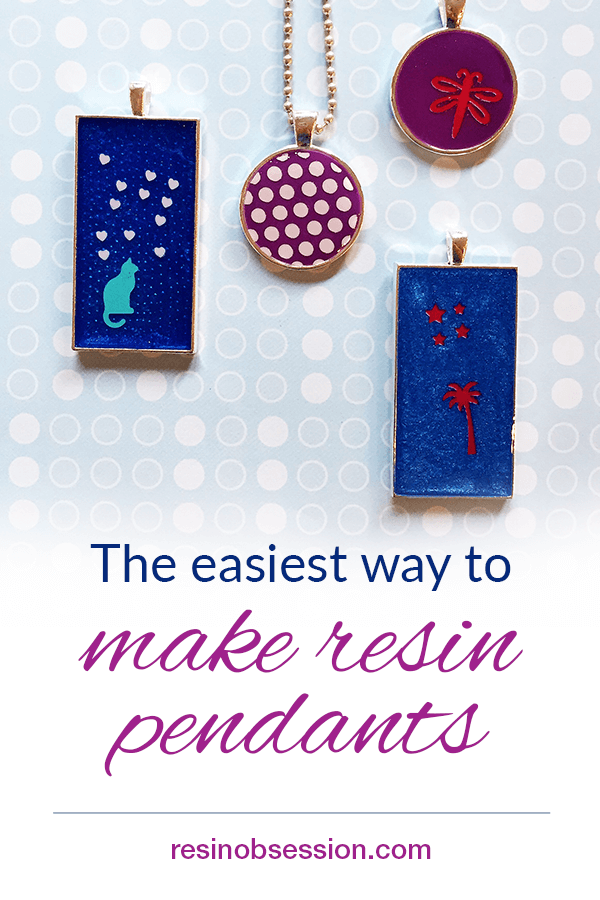
If you’ve been stuck on where to get started with resin, this one is for you. This is a super easy DIY pendants project that any resin skill level can make.
Resin Supplies list:
Mixing cups
Nitrile gloves
Resin Obsession super clear jewelry resin
Resin Obsession crystal jewelry doming resin
Resin Obsession color pigments
Pendant blanks
Rub-on stickers
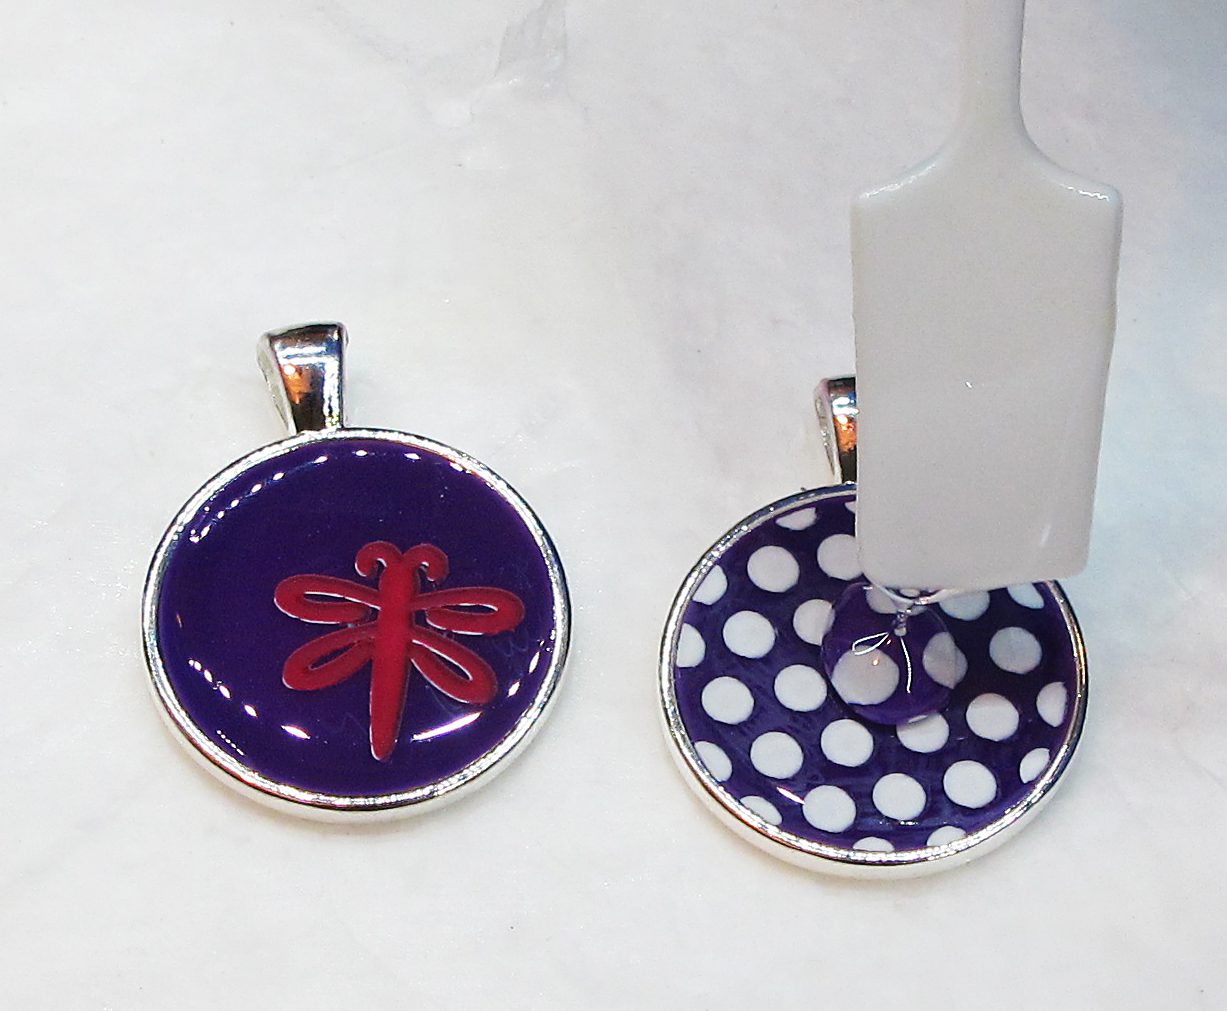
Purple resin pendant projects
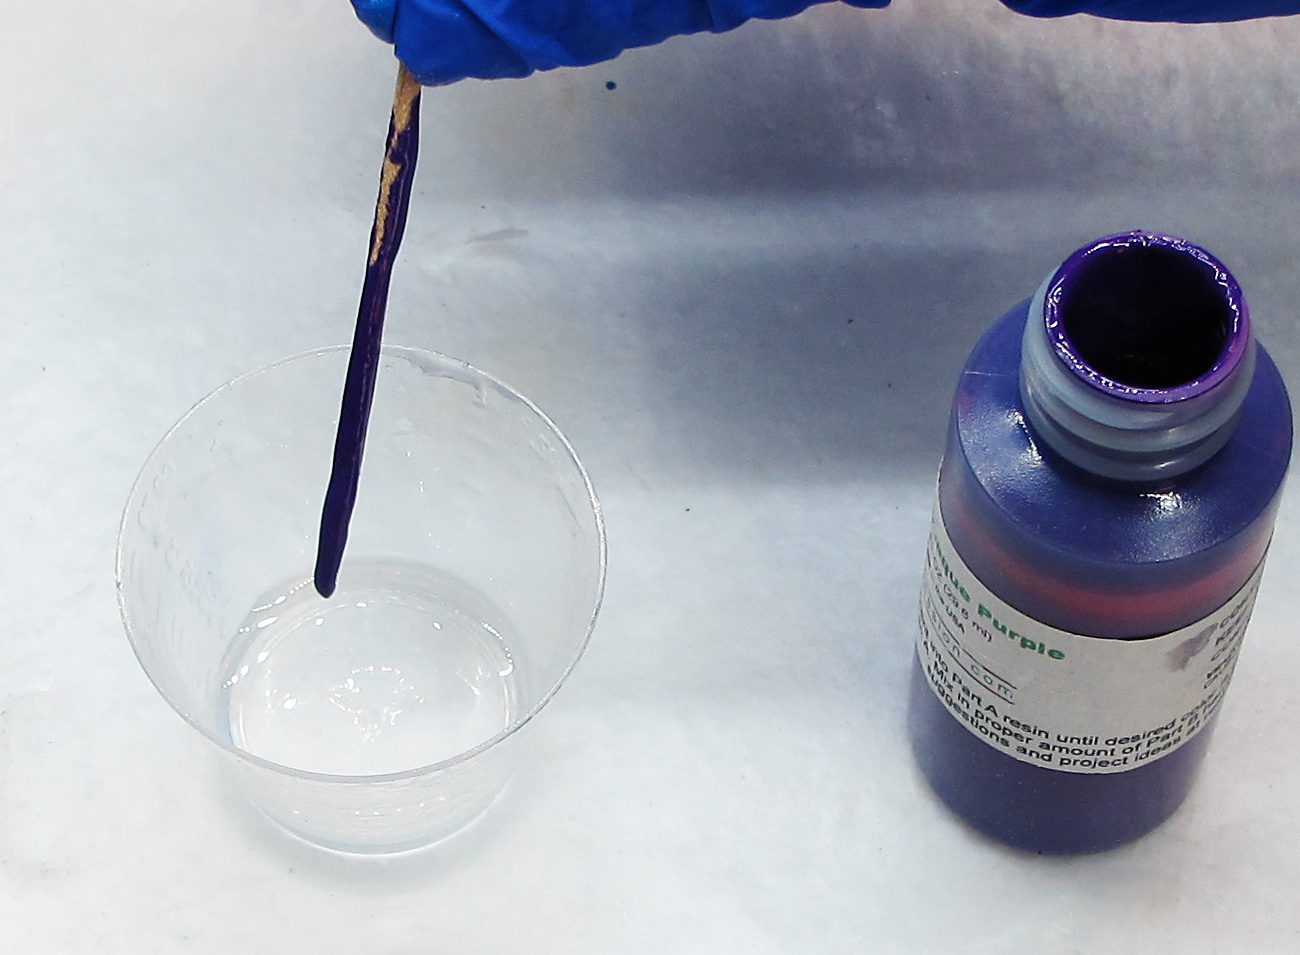
Step 1: Mix and color resin
Start by mixing 1/2 ounce (total) of Resin Obsession super clear resin. Then, add a tiny bit of Resin Obsession opaque purple to color the resin. The dot at the end of a toothpick will be plenty of color.
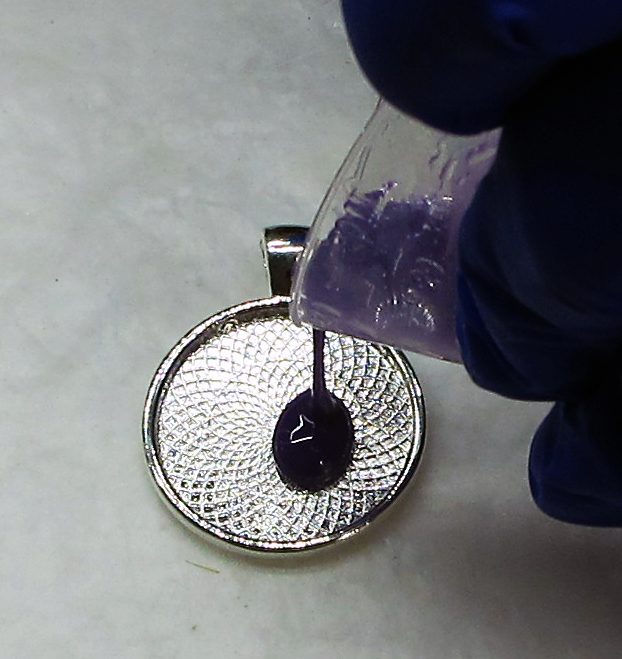
Step 2: Add to the jewelry blank
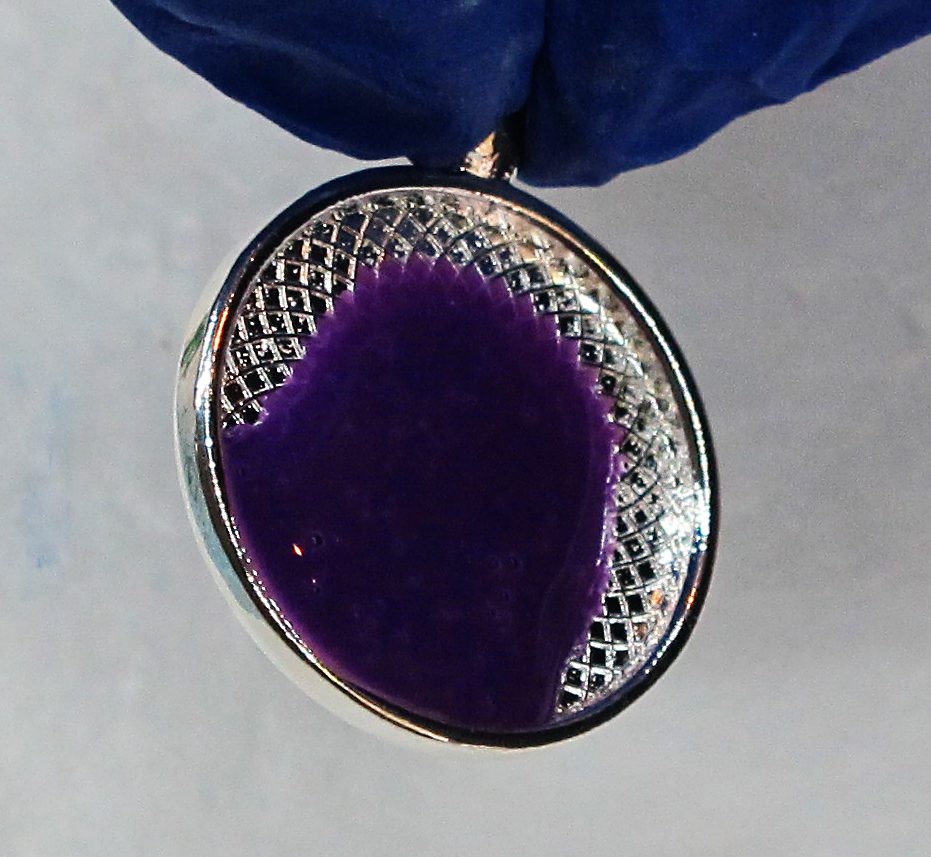
Pour a little bit of the colored resin into a pendant blank. (This is a 1 inch round bezel blank.) Don’t overfill the bezel, as you need to leave yourself some room for what we are doing later.
Step 3: Add a design
Roll the resin around inside the bezel. You want to coat it so it’s thick enough to cover the bottom, but you still have enough room to pour another layer. Once you have your pendant covered, allow the resin to cure before moving on to the next step.
![]()
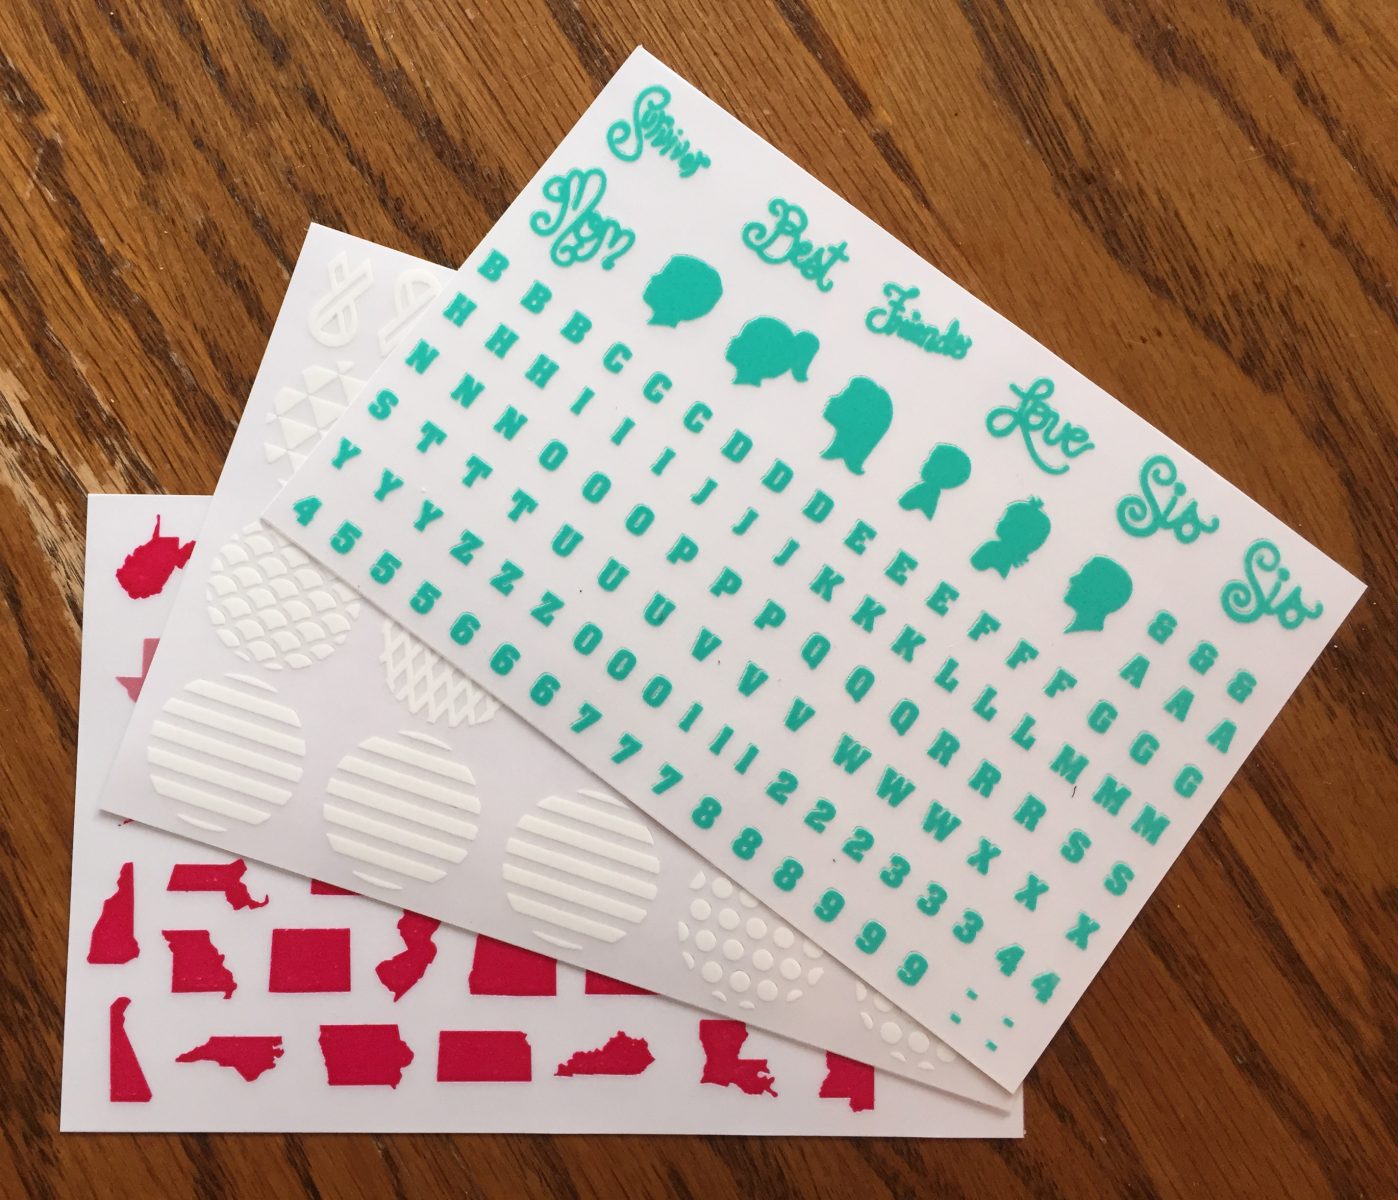
You can find many cute designs on transfer sheets. Pick one, and trim the paper away from the others.
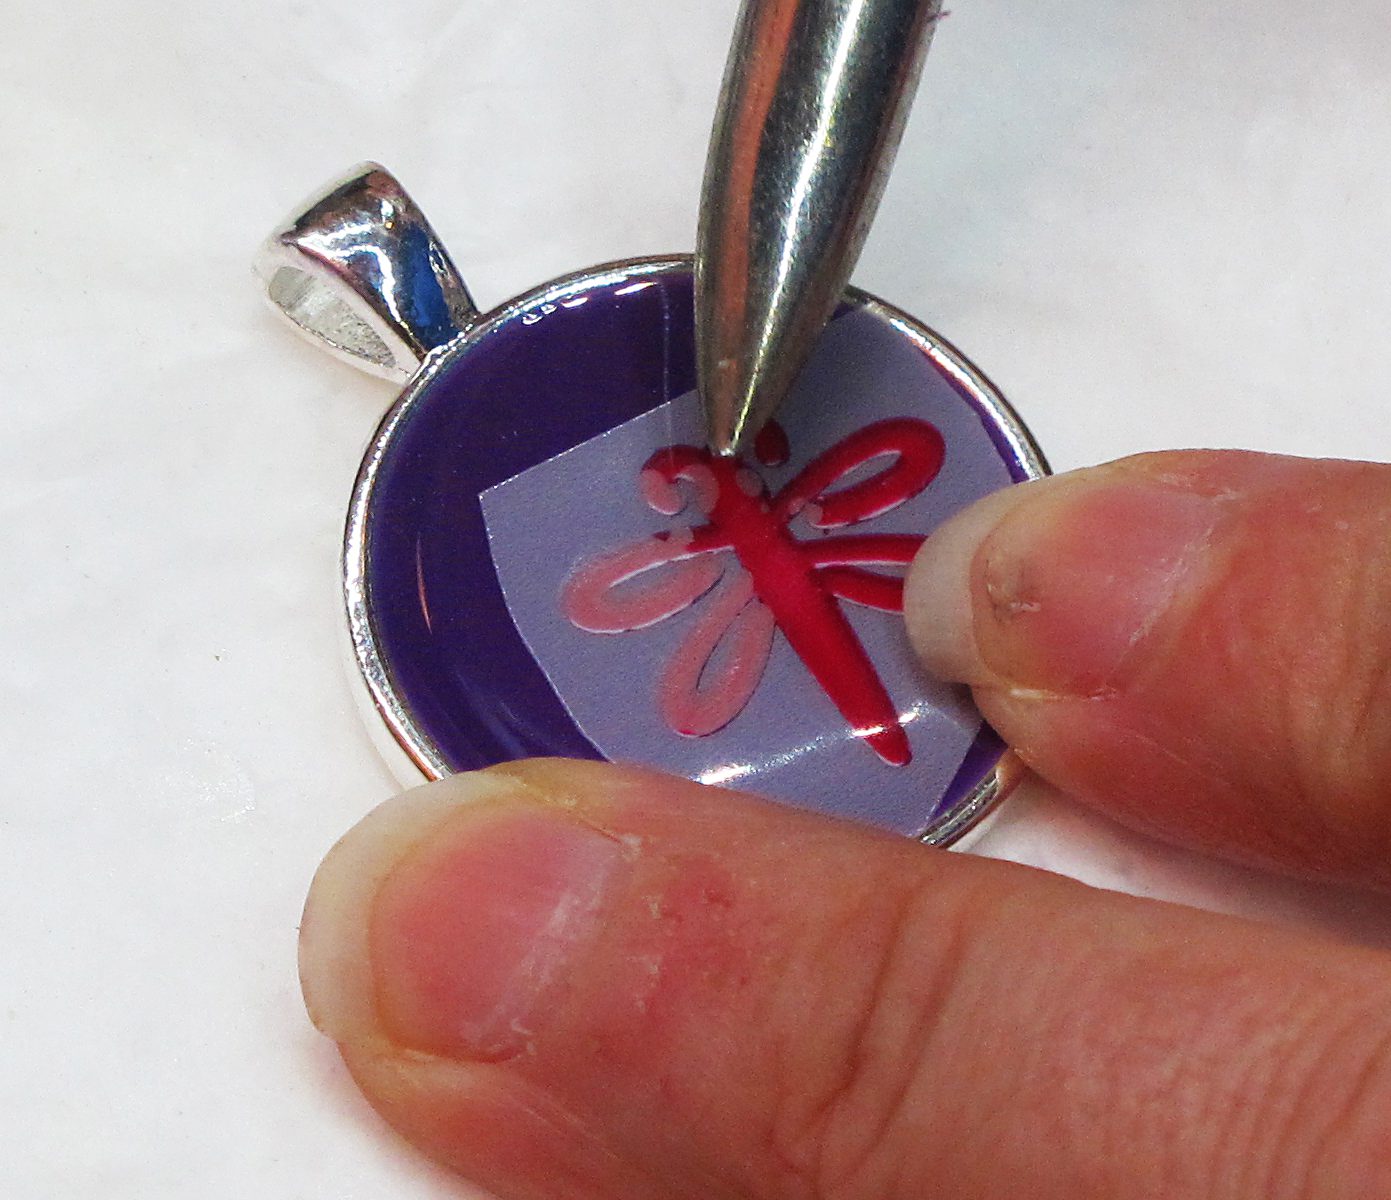
Use a jewelry burnisher to rub the transfer onto the resin. These come off easily. If you don’t have a burnisher, you can try using your fingernail or another curved edge tool to DIY the design for your resin pendants.
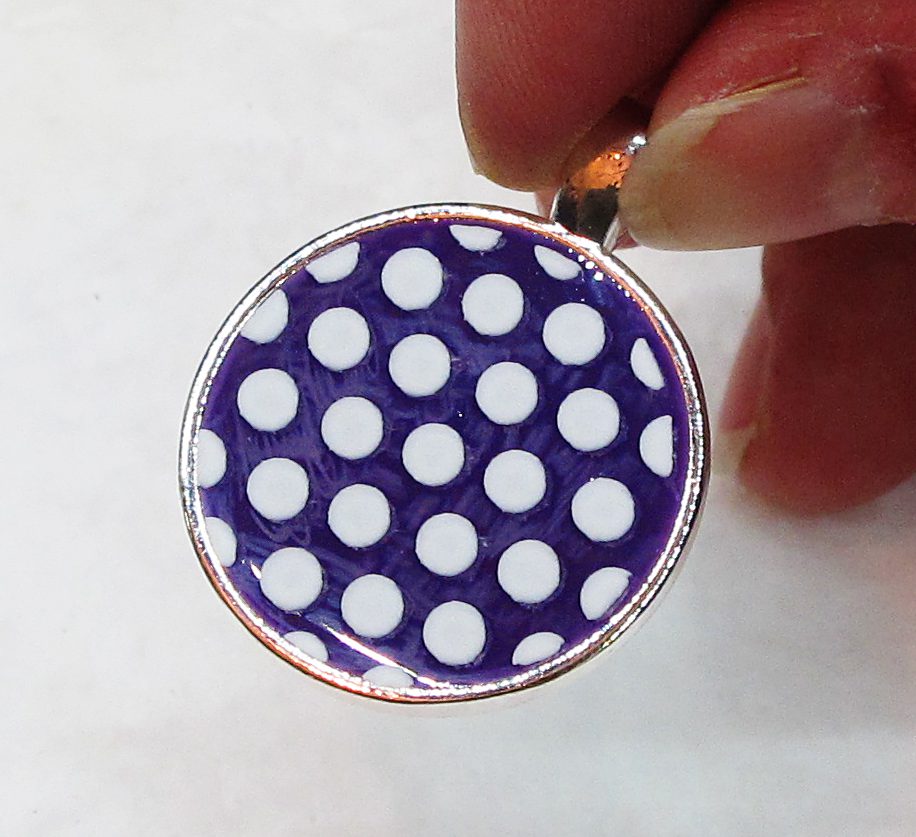
I love this pendant with the polka dots too.
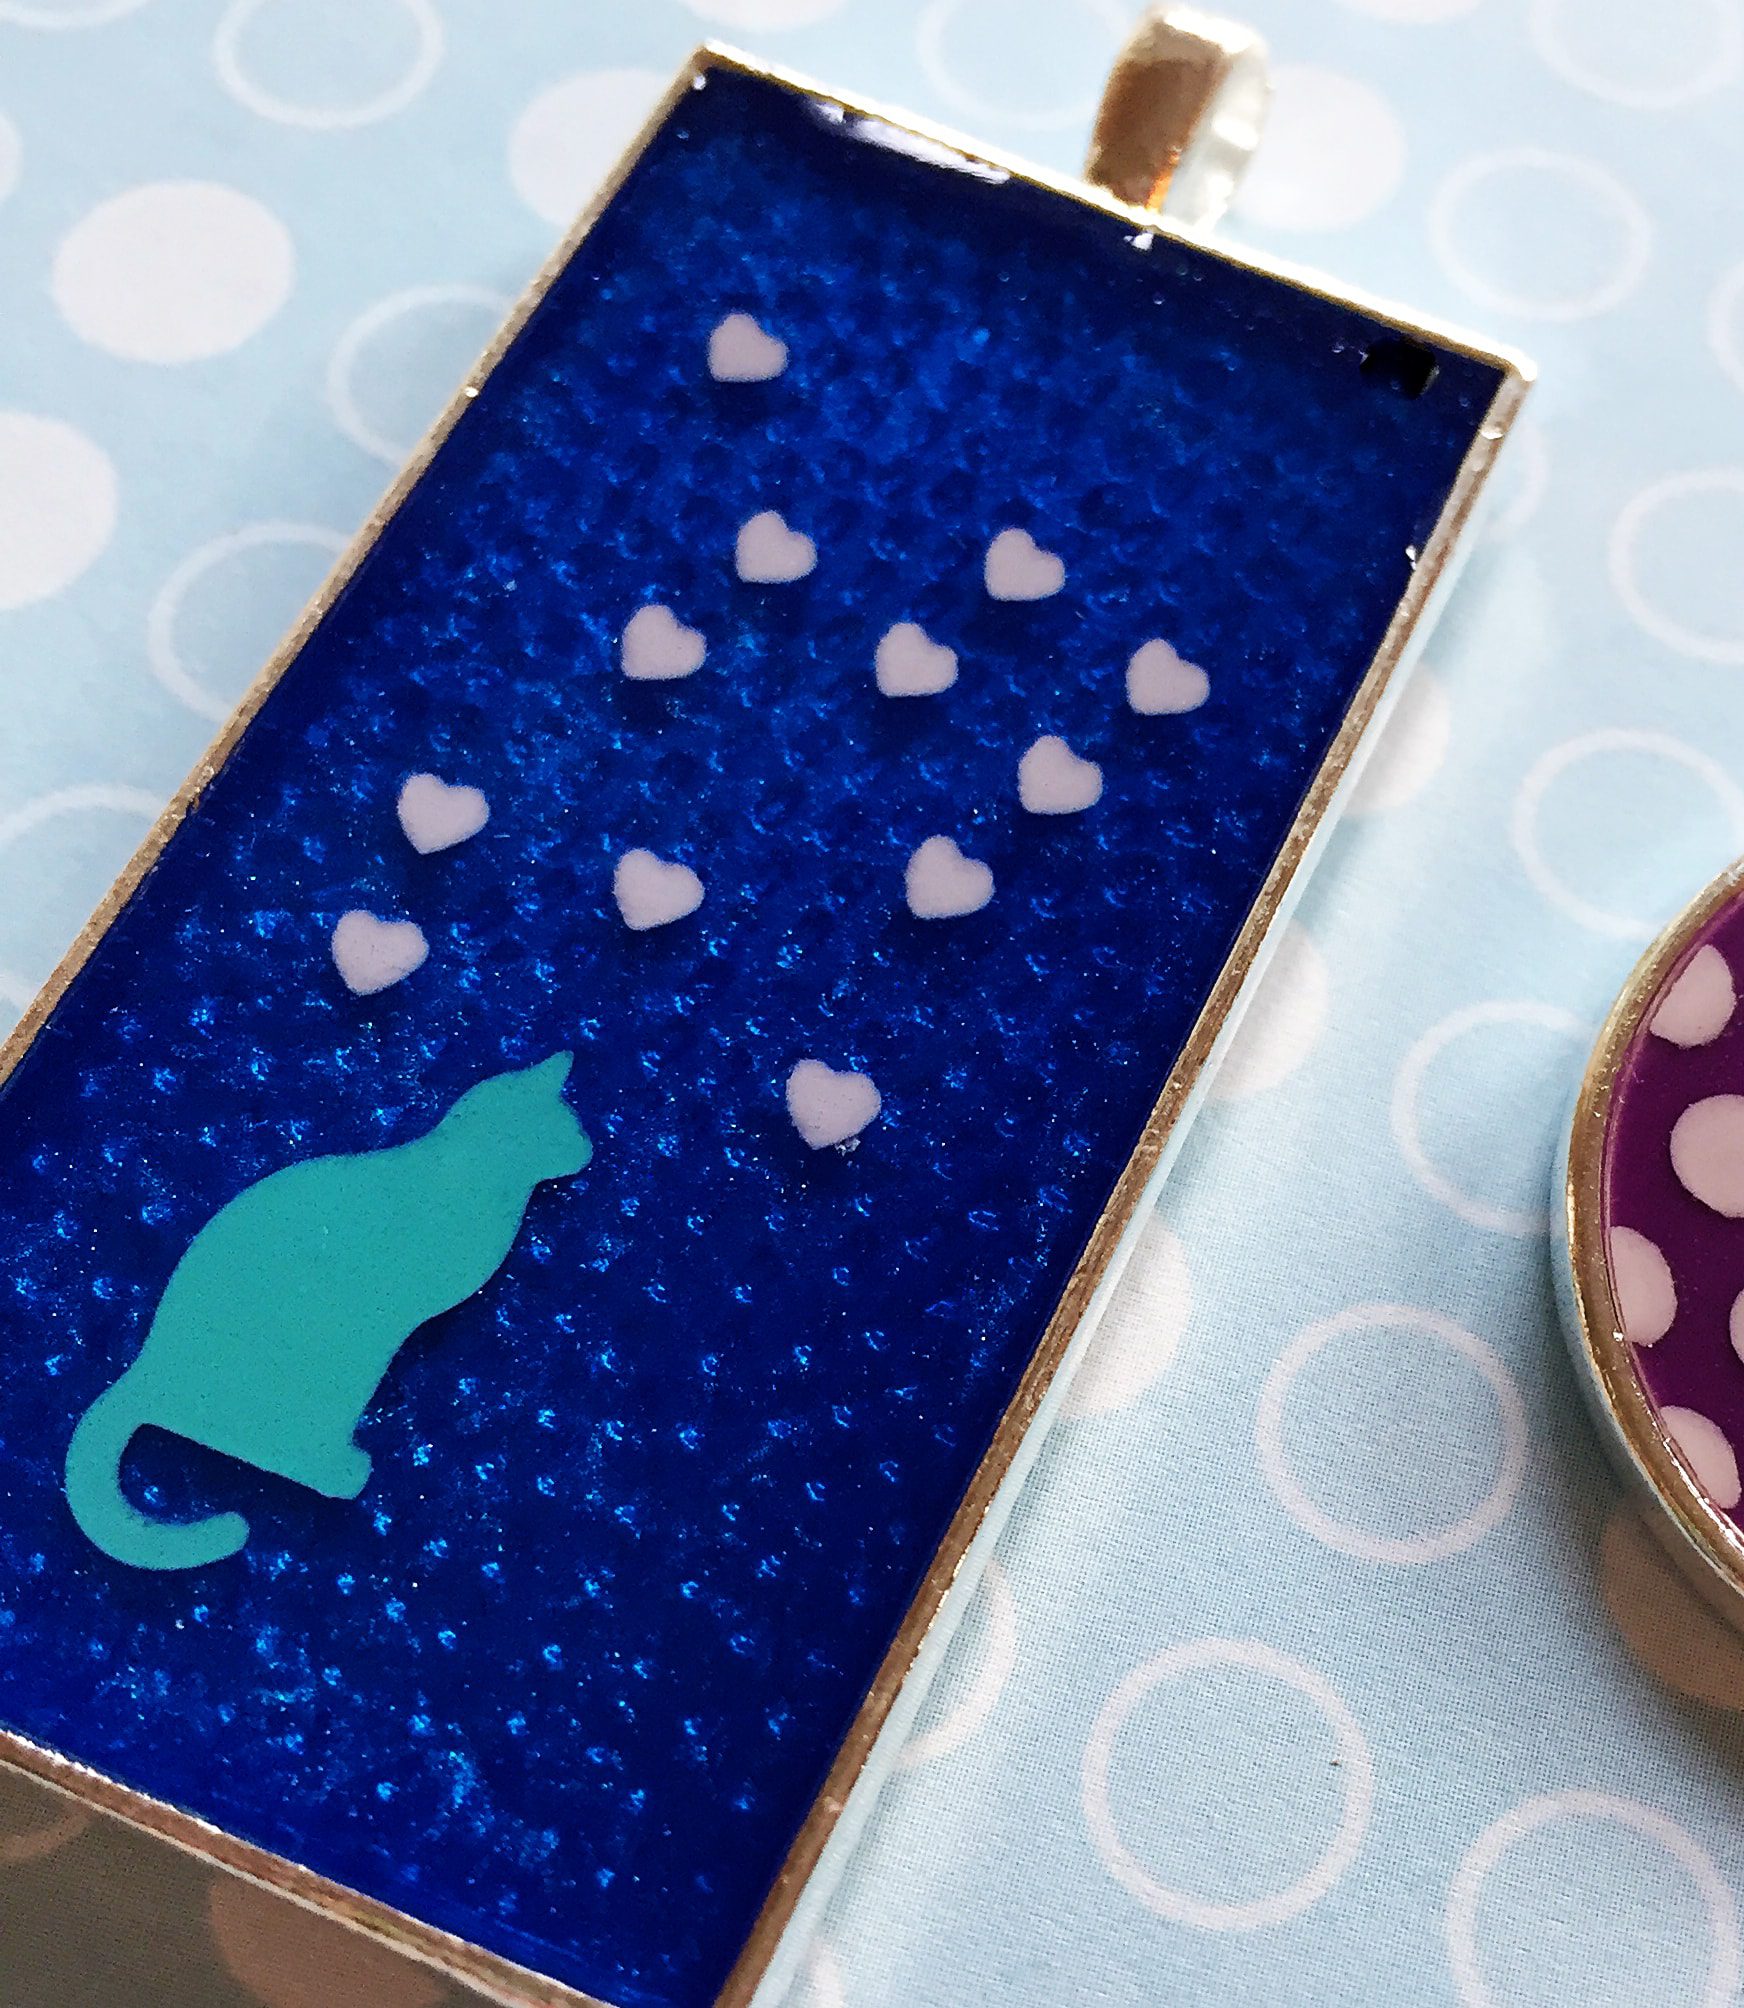
Blue resin pendant projects
Step 1: Mix and color resin
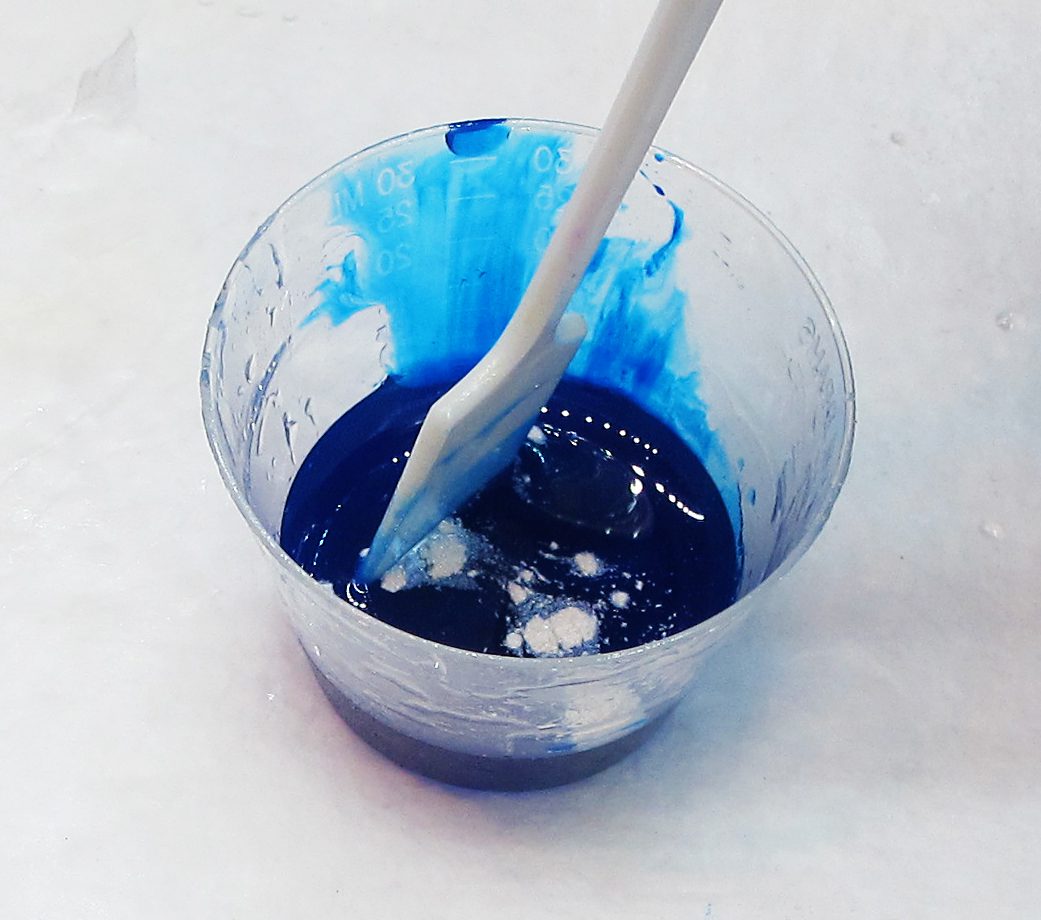
You don’t have to stop with one color. Mix more resin, but this time color with transparent blue pigment and pearl powder.
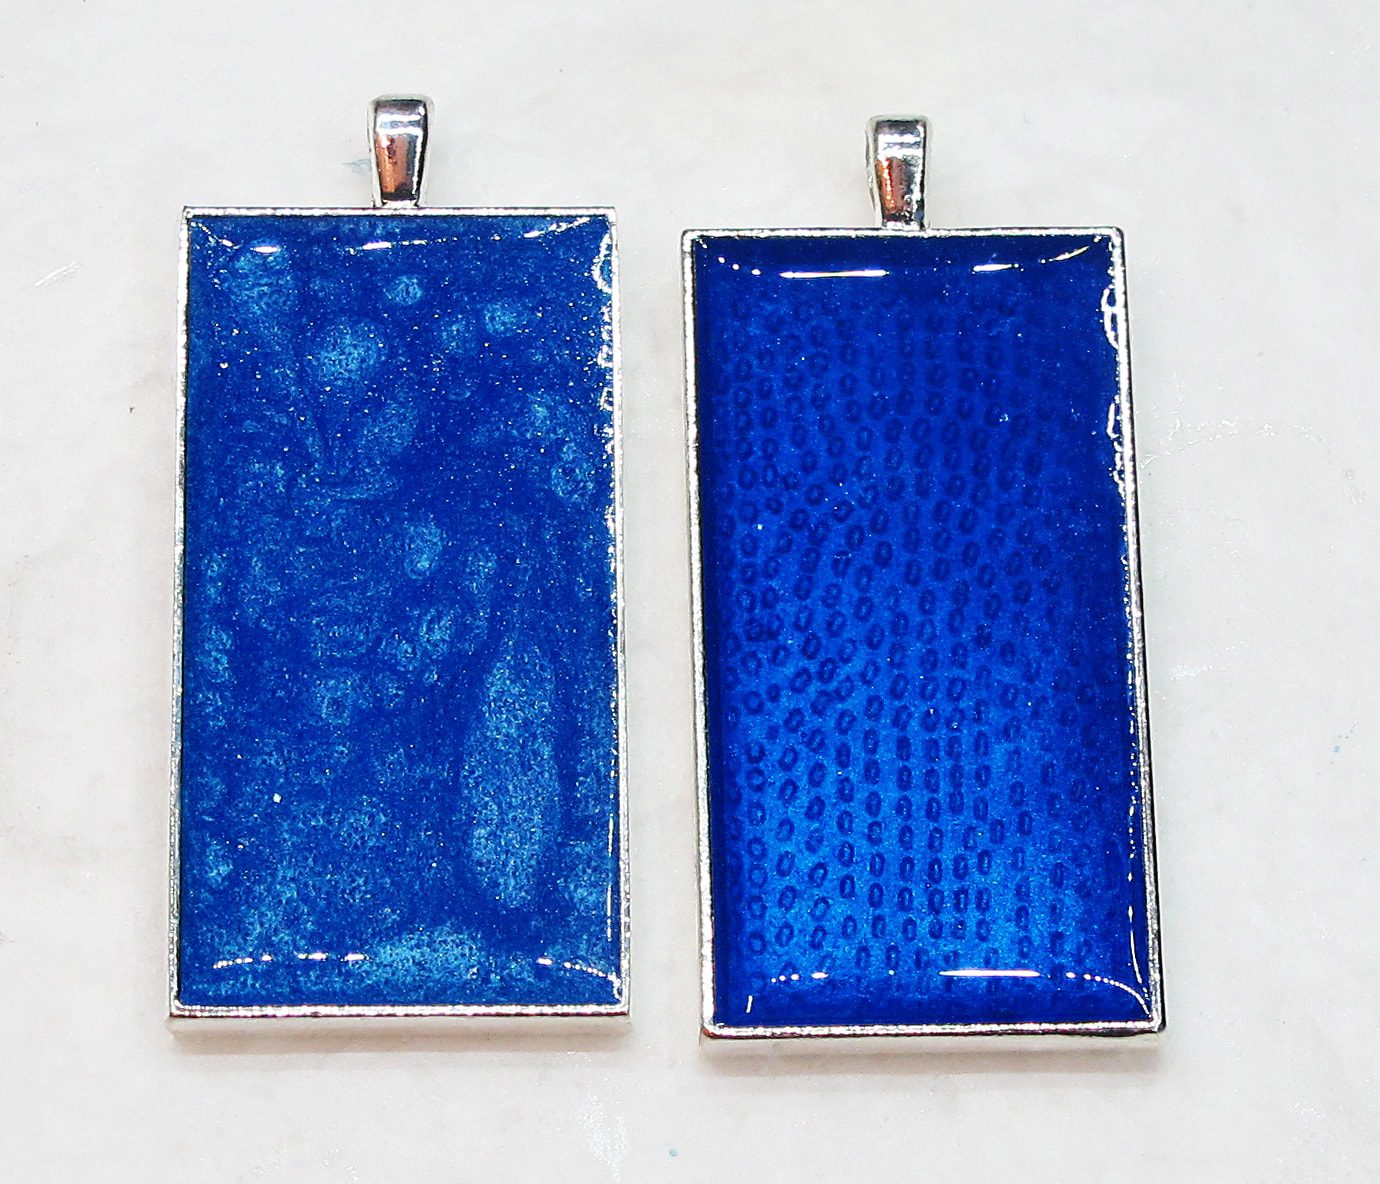
Step 2: Add to the bezel
After mixing the resin, pour it into your bezels to cover the bottom. These are extra-large rectangle bezels blanks.
You can see the different effects you can make with the pearl powder. Both pendants have the same amount of blue color, but the pendant on the left has a lot more pearl powder.
💡 Pro tip: Know that the more powder you mix in, the more likely you are to get lumps. Unless you don’t make lumpy gravy at Thanksgiving. In that case, you should be good.
Allow the resin to cure before moving on.
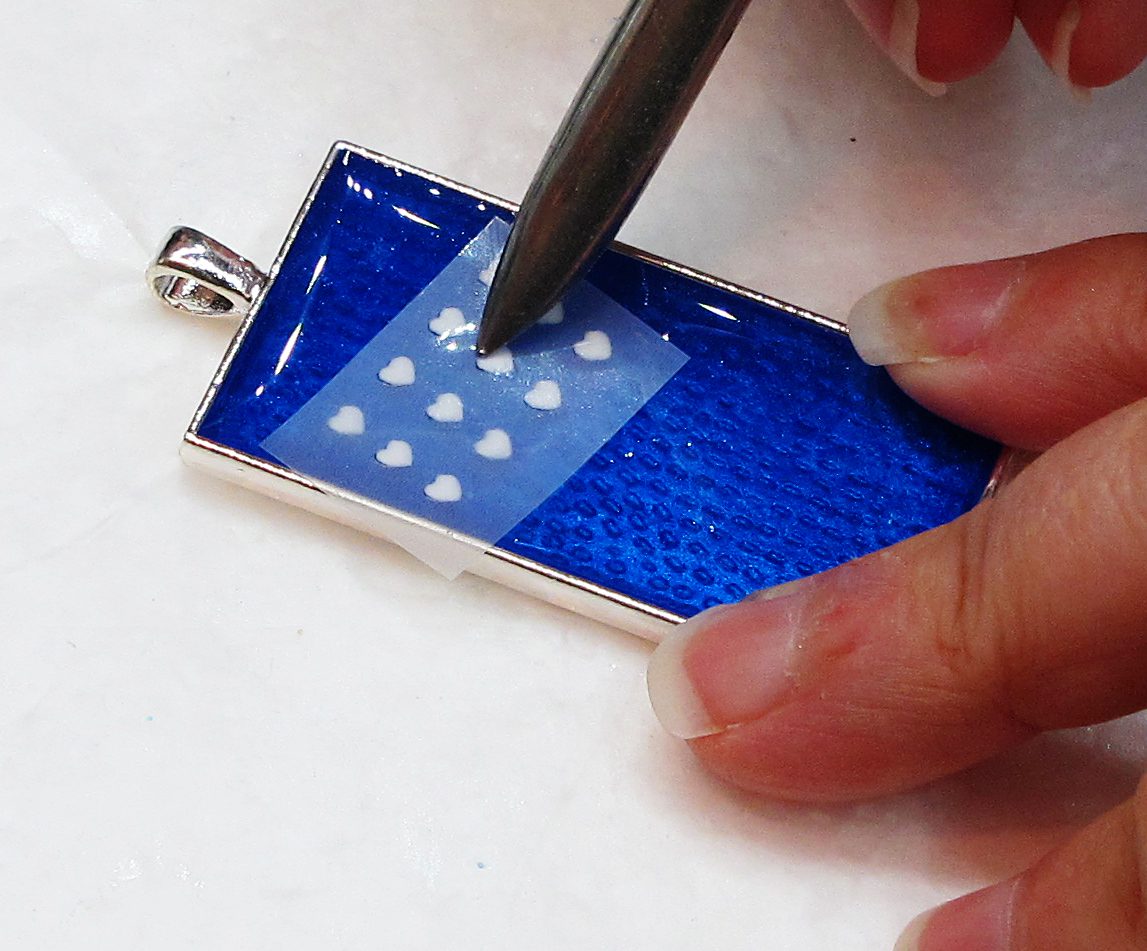
Step 3: Add the design
Use the same technique as above to transfer the rub-ons.
These steps are for both pendant colors
Step 4: Add a glossy epoxy layer to BOTH pendants
Once the transfers are on, it’s time to finish all the DIY pendants with a glossy layer of resin. You can mix more super clear resin, but if you want a domed finish, use the Resin Obsession crystal doming resin. This epoxy resin kit will produce a glossy surface raised above the bezel’s edge.

Since the bail on a pendant can tilt your pendant forward, place them on a drying mat before pouring. The bail can rest in one of the open spaces, allowing the jewelry blank to lie flat while you add resin.
Check the resin for bubbles before letting them cure.
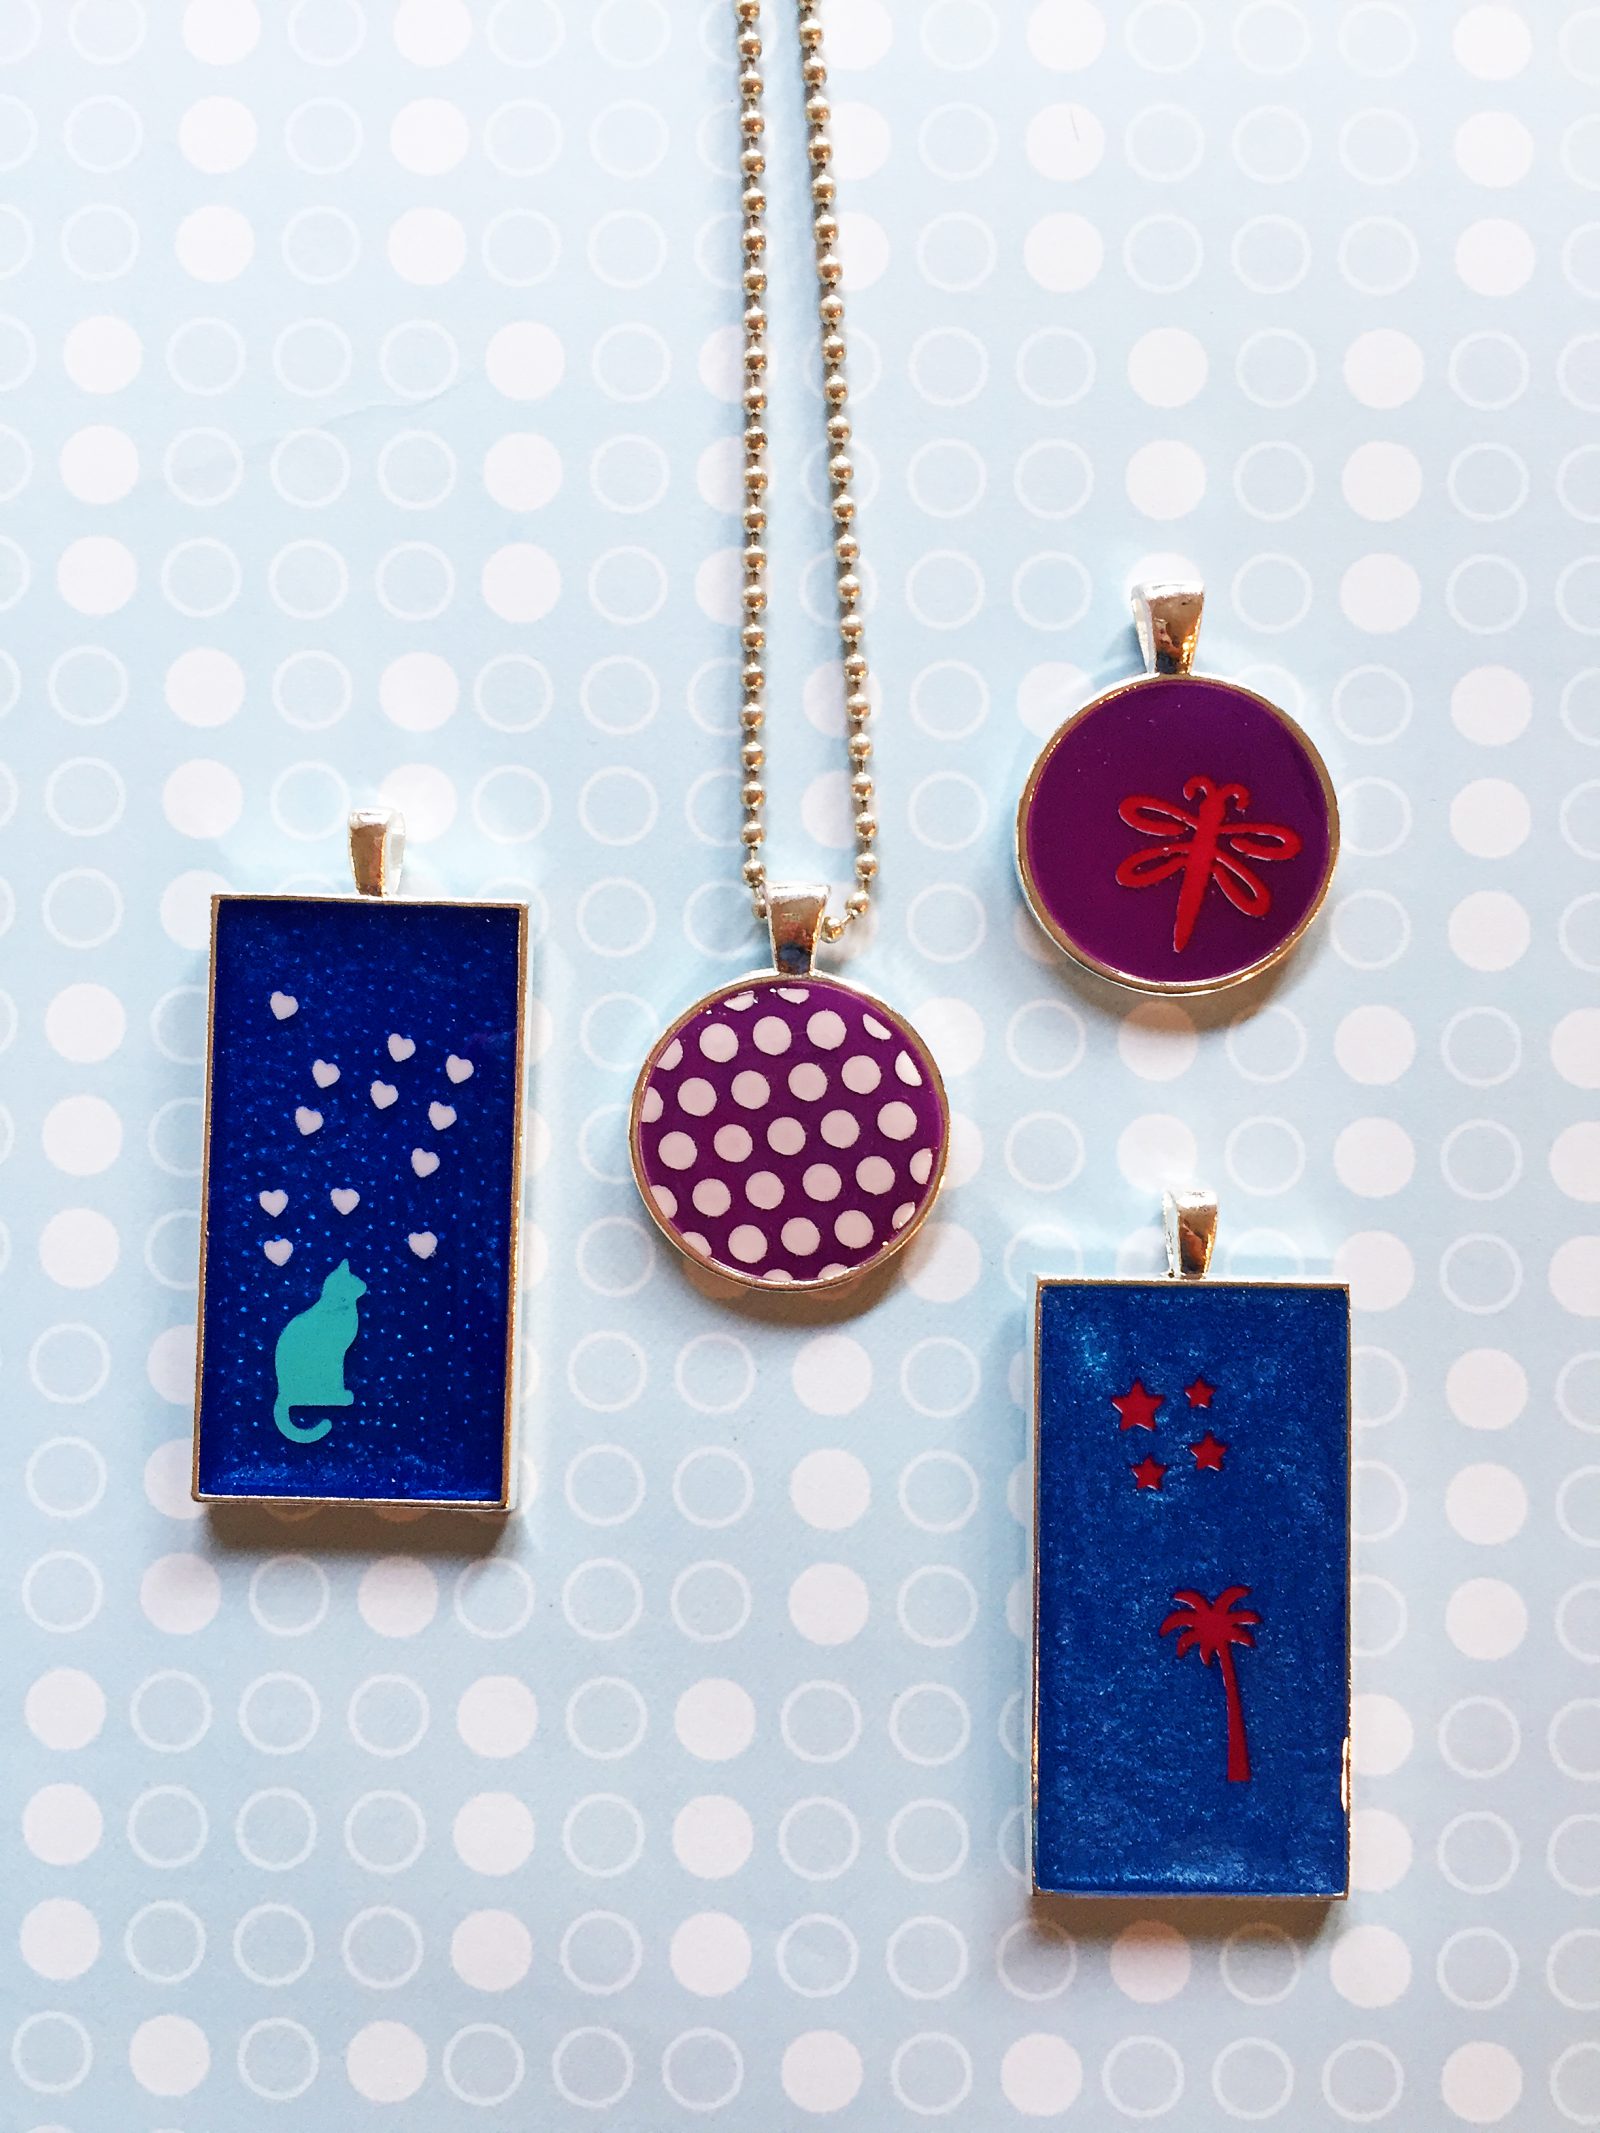
I love how these DIY pendants turned out and how easy they are to make with resin.
The rub-ons give unique details without any special skills. Yes, you can get a Cricut machine and cut out designs yourself, but I’m into easy and now. For next time, I would pour two coating layers, placing rub-ons on different ones.
Ready to take on more jewelry projects using bezel blanks?
Then you will love my newest book, How to Make Resin Jewelry In Bezels. It includes 15 projects, also geared towards resin beginners. Buy the PDF ebook now, and a download link shows up to your email in minutes.
Unpublished Blog Posts of Resin Obsession, LLC © 2023 Resin Obsession, LLC
great tutorial thanks for sharing
Are these rub on stickers?
Yes, I suppose that’s what you would call them. It’s not really clear on the packaging. LOL.
I LOVE this post! But I can’t find a place where I can get interesting transfers. I’ve tried Michaels, Dick Blick, Amazon, EBay. Where are you getting these great transfers?
I found these in the sale bin at Hobby Lobby.
Aw, bummer. None of those around here. I guess I’ll look at sale bins in brick and mortar stores around me. I’m in NYC. Thanks, Katherine!
Try Delphi Glass make them your self
Thanks so much, that does help! And Happy New Year! 🙂 Judy
You are quite welcome! Happy New Year to you too! 😀
I love the pendant idea. I am new to resin casting and just placed my first order. I can see many holiday and birthday gifts for my friends. Who doesn’t want a pendant with their grandkids or furry companions? The next project after the pendant with be the switch plate covers.
Great to see great minds think alike and shop at the same place. I found the same transfers in the bin at Hobby Lobby too. And use them in my resin pendants. I also use them on jeweler’s clay as well. Always with a resin top coat.
I tried using resin on an orgonite pyramid yesterday but when I poured in my resin with black glitter, it sunk past my gold flakes. What could I have done wrong?
Sometimes glitter will sink if it’s heavy. You will either need to pour in layers, or use a glitter that doesn’t sink. The one I like is the Stampendous microglitter. You can find it in our store here: https://shop.resinobsession.com/collections/colorants/products/stampendous-micro-glitter?variant=965326193
Once you add the sticker do you have to seal it before adding the top clear layer of resin?
Not usually, Orrah. This article explains more: https://www.resinobsession.com/resin-tutorials/stickers-in-resin/