
 New to resin? Wondering what you should try creating first? How about giving your DIY skills a try by crafting a resin coaster?
What makes resin coasters so awesome?
1. They are fun to make. Resin coaster molds have large open spaces. That means you can include lots of fun things like glitter, beads, candies, and more.
2. I don’t know a coffee table without room for a handcrafted resin coaster.
3. You don’t have to worry about whether a resin coaster fits like you do with a piece of jewelry. Resin coasters accommodate about every beverage that I can think of.
What resin should you use for your DIY coaster?
You must use a casting resin for crafts. Casting resins have an advantage over epoxy art resin because they release bubbles easier, making sure your resin cures crystal-clear. Plus, casting resins cure harder. You don’t have to worry about your coasters getting soft and bendy.
Best resin for coasters:
Resin Obsession super clear resin
- Hardens in under 12 hours, so you don’t have to wait long to use your DIY resin coaster set.
- It won’t bend after curing. Your coasters will be durable.
- Zero VOCs.
- USA made.
- Board-certified toxicologist reviewed chemical formula and conforms to ASTM D-4236.
(I get it. That’s a lot of big long words that might buzz over your head. But, the ASTM certification is a BIG FAT HAIRY DEAL. More than two-thirds of art and craft resins don’t have this certification which means their product is unsafe. I’ll get off my soapbox for now, but you can learn why this is important when you purchase resin.)
What resin supplies do you need to DIY a coaster?
You will need a coaster mold, plus resin colors for your epoxy. You will also need mixing supplies, a silicone mat to cover your surface, plus a plastic dome to protect your resin coaster while it cures.
What about resin safety?
Do it. Always. Using resin is like using other chemicals in your home, like bleach or ant killer. Ensure you’ve got good air movement in your room and wear protective gloves. Taking appropriate resin safety precautions is vital to having fun with resin for a very long time.
Ready to make that coaster? Let’s do this.
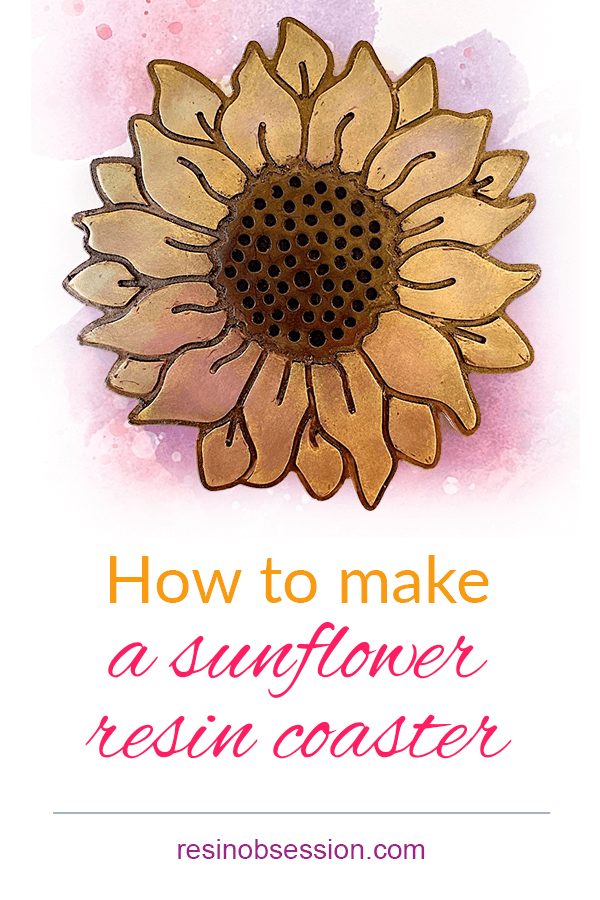
For this DIY resin coaster project, I’m making a resin coaster formed to look like a sunflower. It’s the cutest coaster ever for your she-shed.
Resin coaster supplies:
- Resin Obsession super clear epoxy resin for crafts
- Powder pigments for resin
- Paintbrush
- Ruler
- Mixing cups
- Stirring sticks
- Safety gloves
- Acrylic paint
- Silicone mat or plastic sheeting to protect your table
- Plastic bin or box
Step 1: Prep your area
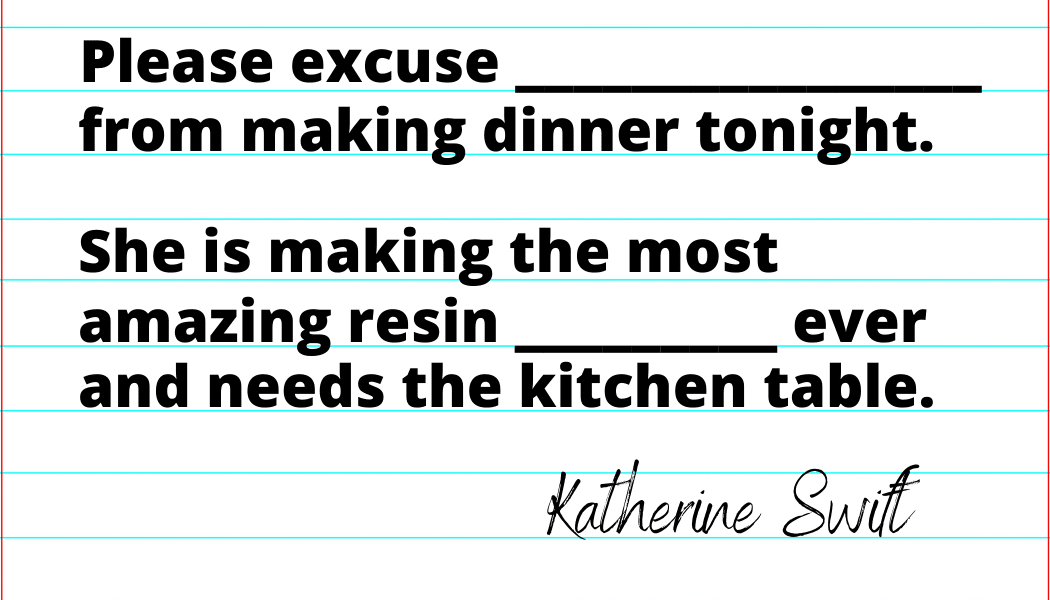
This might be the most challenging part of making this DIY resin coaster. You need to craft somewhere you and everyone else can leave the coaster alone for a couple of days. I’ve written you a fill-in-the-blank excuse in case you have to use the kitchen table and can’t make dinner.
Cover your table with a non-stick surface.
Step 2: Measure the mold
Did I forget to mention there’s a little bit of math here? Yeah, sorry about that. But, you don’t want to mix too much resin only to waste it or not mix enough resin that you can’t fill the mold all the way. So grab your measurements, then plug them into our resin calculator. It will tell you how much resin to mix.
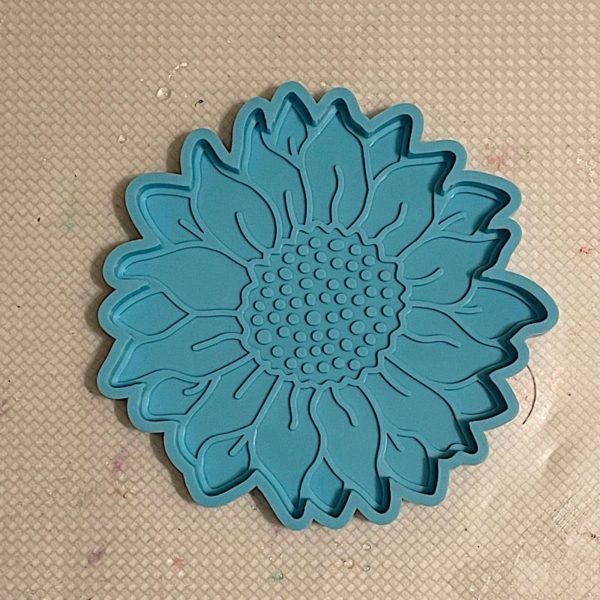
Or you can just believe me when I say this sunflower mold holds 2 1/4 ounces of resin.
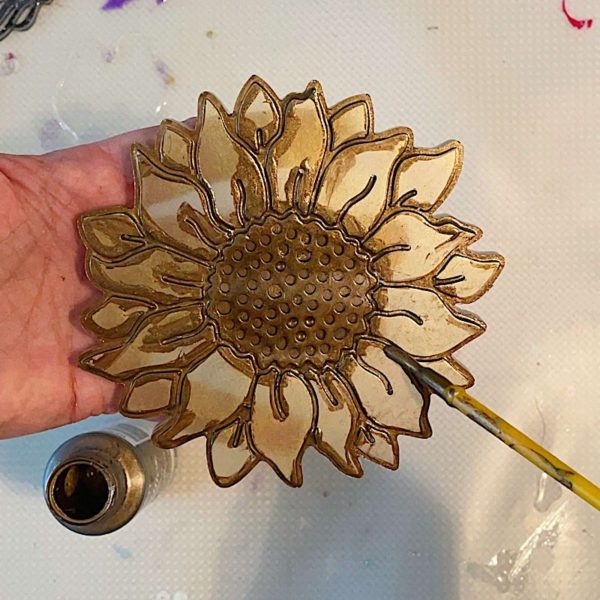
Step 3: Color the mold
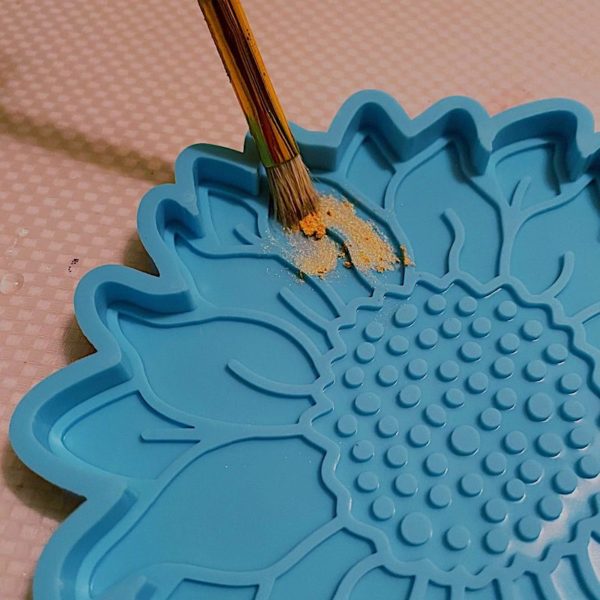
Grab your paintbrush, then dust powder pigment into the coaster to give it the DIY flare it deserves. I went traditional and colored the petals with Pearl Ex Solar Gold, but have it your way. There are actually some pretty unusual sunflower colors.

Work with one color before adding the second color.
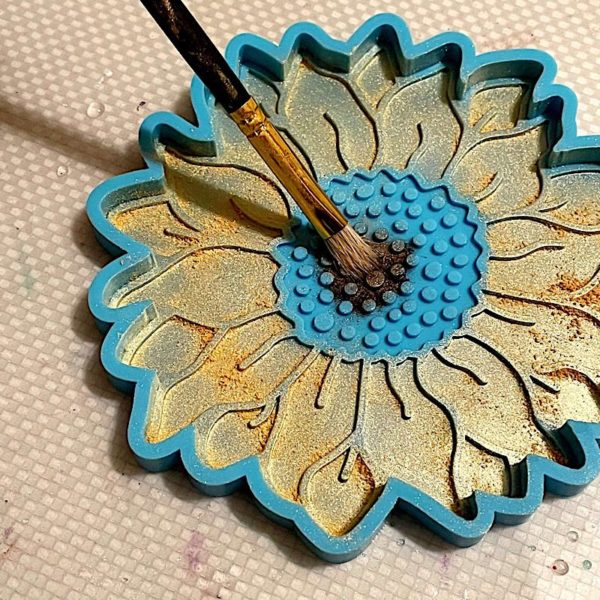
For the center, I used Pearl Ex dark brown.
Tap out the excess powder.
Step 4: Add resin
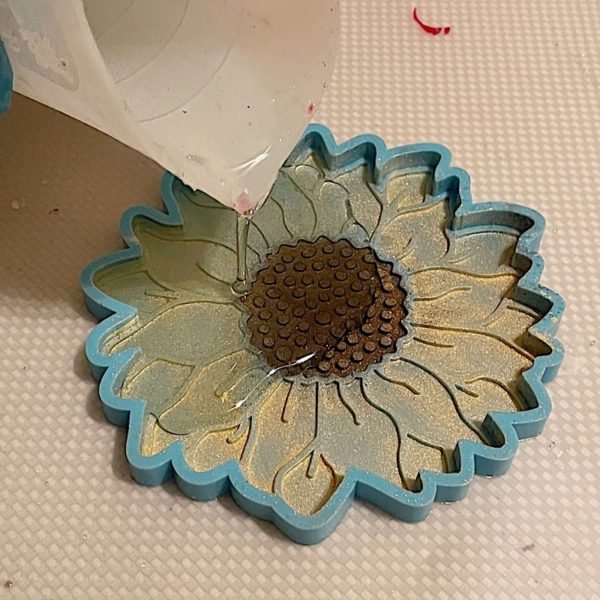
I mixed my clear epoxy and poured it into the mold.
Mixing resin is a topic in itself. If this is new to you, read how to mix resin in five easy steps so you know exactly how to conquer this step.
Step 5: Remove bubbles
Look over your coaster and see if any bubbles are floating on the surface. Then, scoop them out with your stirring stick, or go over the surface with a heat gun.
💡 Pro tip: Bubbles can hang in the edges and corners of a mold. Get a bright light to check for these little devils. Use a toothpick to bring them to the surface, then pop them like the resin boss you are.
Once your resin is bubble-free, cover it with your container and let it cure.
Step 6: Demold
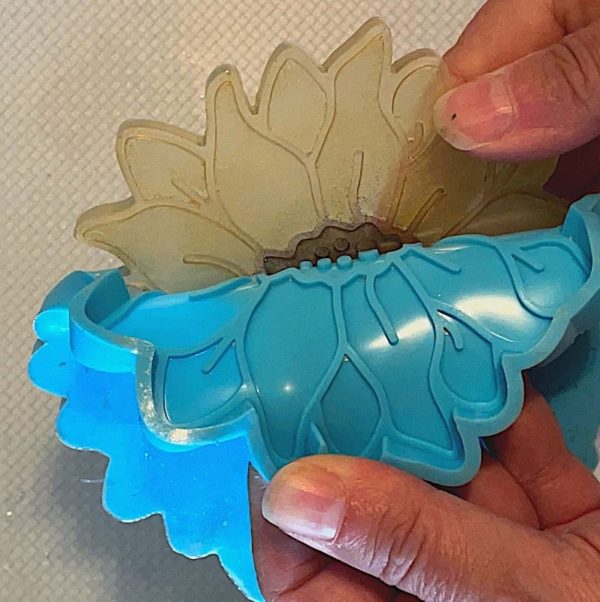
Gently pull the mold away from the coaster while grabbing an edge. Your coaster will lift out of the mold.
[OPTIONAL] Step 7: Highlight details
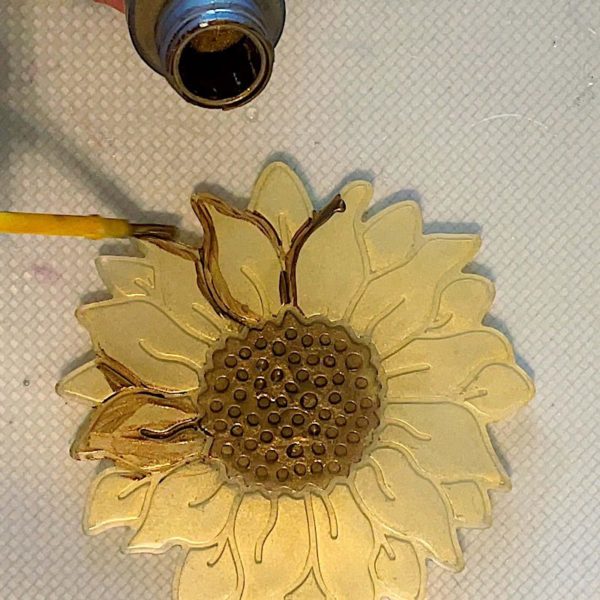
Get your paint, then brush it into the flower recesses. This brings your flower to life.
It’s okay to get a little sloppy.
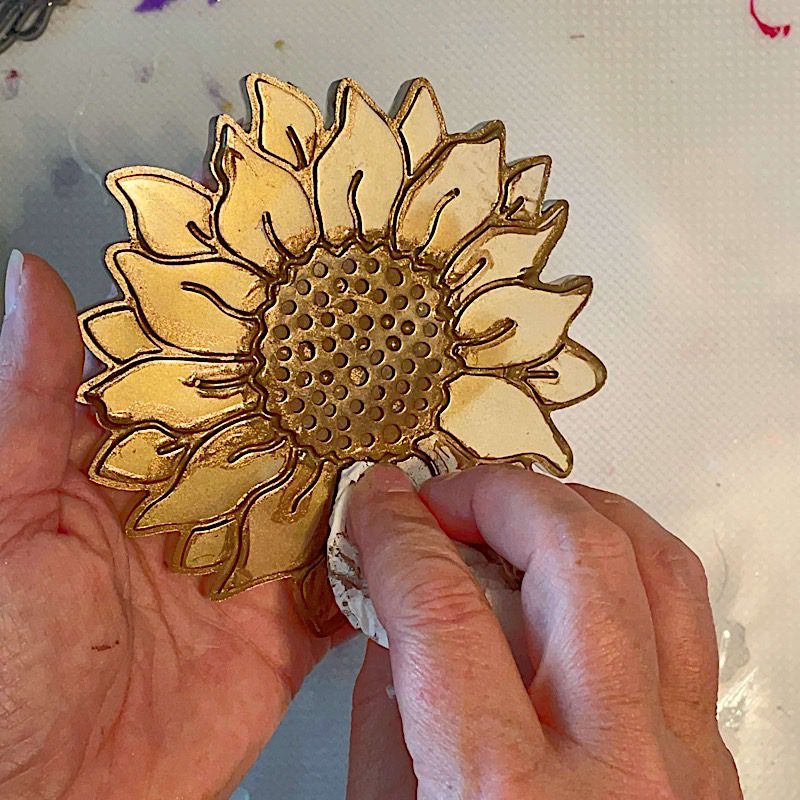
Before letting the paint dry, wipe off the big streaks with a paper towel.
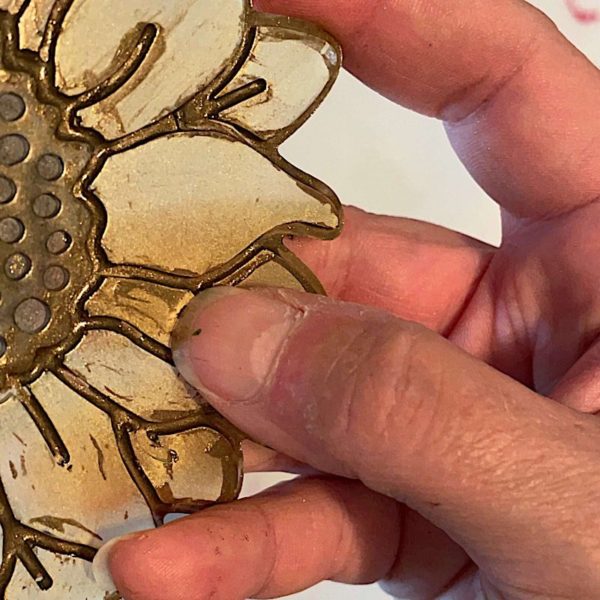
If you have long fingernails, you can use them to scrape off the excess. Don’t lose your mind trying to get all the extra paint off. We’ll take care of that in the next step.
Let the paint dry for a day.
Step 8: Finish
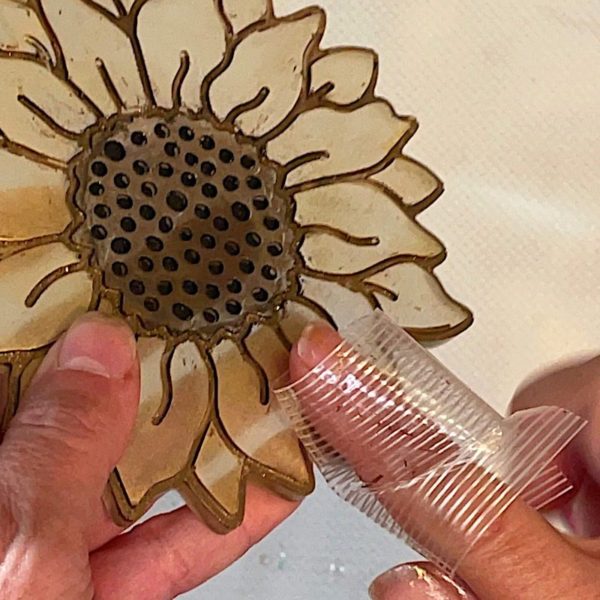
Use a piece of sticky tape to pull off any remaining paint. Rub the tape across your DIY coaster surface and watch the resin come clean.
So how did the DIY resin coaster turn out?
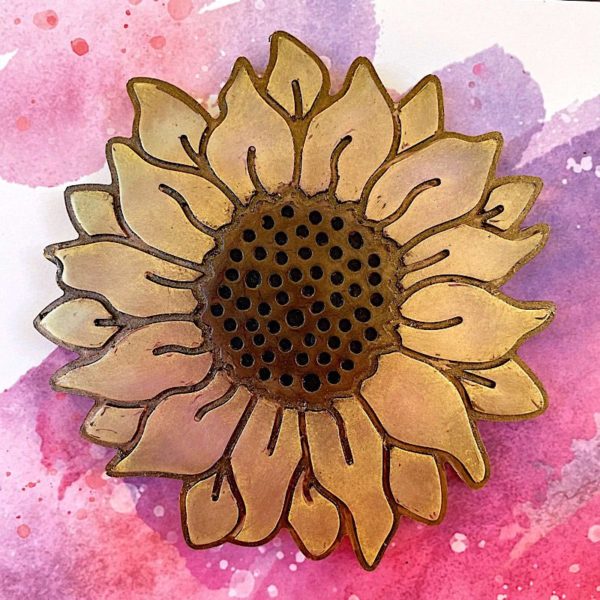
I’d say pretty good. Resin coasters are definitely more than just for man caves.
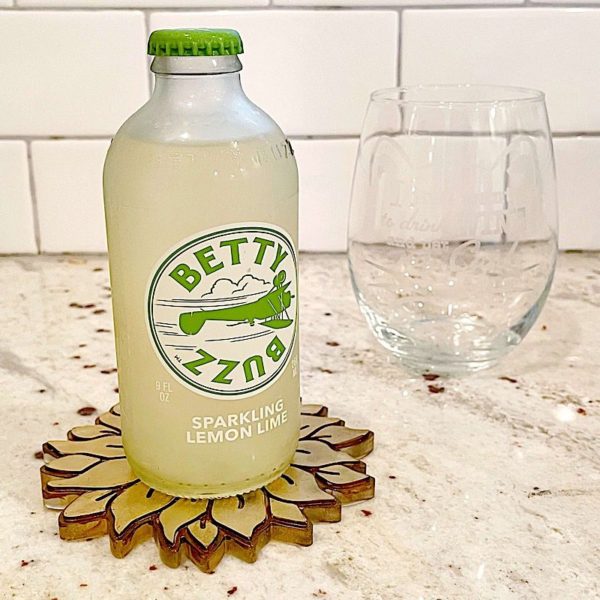
And as you can see, it holds my Betty Buzz beverage like a new resin coaster should. We only just met, but Betty and I are total BFFs.
Ready to take on another DIY project besides making a resin coaster?
Then you’ll want the ebook, Ten Epoxy Projects. Get ideas for more crafts you make with resin to keep, gift or sell. Buy the PDF book now, and it’s yours to download in minutes.
Unpublished Blog Posts of Resin Obsession, LLC © 2023 Resin Obsession, LLC
I’m a beginner and just did my first resin pour. everything went well for the base coat, then for the main pour….still everything was looking awesome. (actually doing a wooden Michigan sign w/letters routered in the face and the great lakes around it) I thought, man maybe all my research is paying off. That was until I did the final clear coat to top it all off…….Then all the routered letters started bubbling up. I used a heat gun to try and remove bubbles but they kept coming to the point at which the more I used the heat gun to clear them, the resin started curing and now the bubbles are permanent and pretty much ruined my project. Everything else looks awesome, just the letters look like crap.
Can you give me any idea what might have gone wrong? Or if there’s anyway to fix now? Only thing I can think of is to paint them, which I don’t want to really do, or router them back out and try to sand and polish back to a little luster. Any thoughts would be deeply appreciated. Thank you.
Hi Grant, I’m sorry this happened to you. Unfortunately, wood releases bubbles into resin if it isn’t sealed first. Either of the options you mention (painting or drilling out the resin) are options to fix it.
is there a certain way or product you would suggest to seal the wood with, or am I suppose to do it w the resin somehow? and thanks for your help
Hi Grant, you can apply a thin layer of resin and let it soak into the wood. That will push out bubbles and seal other ones in.
Thank you for all your help and I will definitely use your advise on my next project. (wish I’d of known on this one) but that being the only issue so far, I’m feeling pretty good so far. Still have to remove the mold, sand and polish, so wish me luck. lol
Good luck!
How to mix my resin mines was sticky
Always remember to make sure you have equal parts A and B and mix until completely combined. Allow your resin to cure in a temperature-controlled space. You don’t want the temp changing much more than 65-75 degrees