
 Hand up if you hate bubbles in resin.
Me too.
Nothing ruins your resin crafts faster than finding a bubble in your cured epoxy.
How about you show those bubbles who’s boss?
Here are ten tips for banishing bubbles in resin.
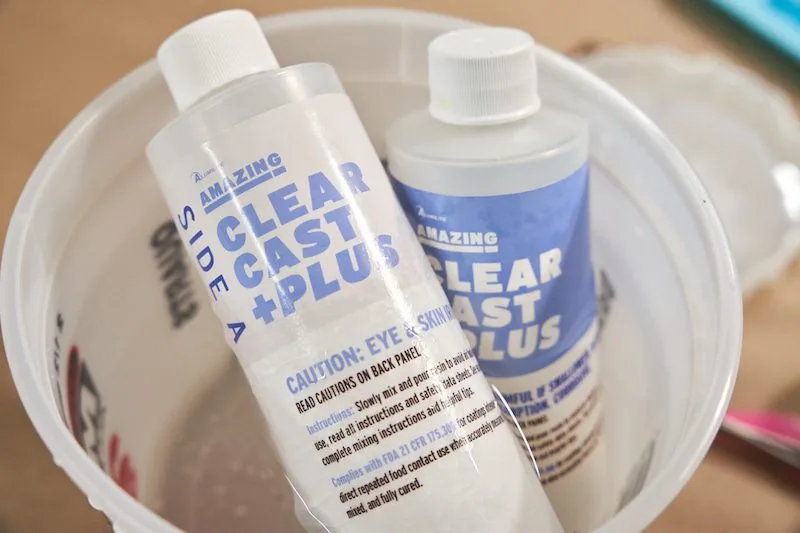
1. Choose the right resin for your project.
This tip is #1 for a reason.
There’s a big difference in resin formulas. Certain types of epoxy hold onto bubbles whereas others don’t. 90% of your resin bubble problems can be eliminated by buying the right resin for what you’re making.
Because there is NO ONE SIZE FITS ALL RESIN. Despite what anyone tells you. (and yes, I’ll die on that hill.)
Now there’s so much to cover here, so I’ve written an entire article about it.
And it shares how to tell a doming epoxy from a deep pour epoxy.
⭐️ BONUS: How to choose the best epoxy resin for your project
2. Cast resin in a warm room.
Resin needs a room temperature of 70 to 75F to cure completely. If it’s difficult to heat your whole house or apartment, try heating a smaller space such as a bathroom or closet. A space heater generates enough warmth so that the area stays warm during the entire curing time. You can also try making a resin ‘hot box’ for your projects. This works great for avoiding bubbles in small projects like a resin jewelry box or dandelion paperweight.
⭐️ BONUS: Learn how to make a resin hot box in this article on cold weather resin tips.
3. Warm your resin before casting.
Warm water in your microwave. You want it hot but not boiling. Then, place your resin kit bottles in a plastic bag. Place the bag in the hot water bath for five to ten minutes.
💡 Pro tip: Keeping your bottles inside the plastic bag not only keeps the labels intact but keeps water out. Extra water keeps your resin from curing.
Be careful that you don’t roast your resin. (Yes, there is too much of a good thing.) If your resin is too warm when you mix it, you might avoid bubbles, but you’ll shorten your pot time.
⭐️ BONUS: What happens when your resin overheats.
4. Be careful when mixing.
Mix your resin deliberately and carefully.
You’re not scrambling an egg. Or whipping cream. Or churning butter.
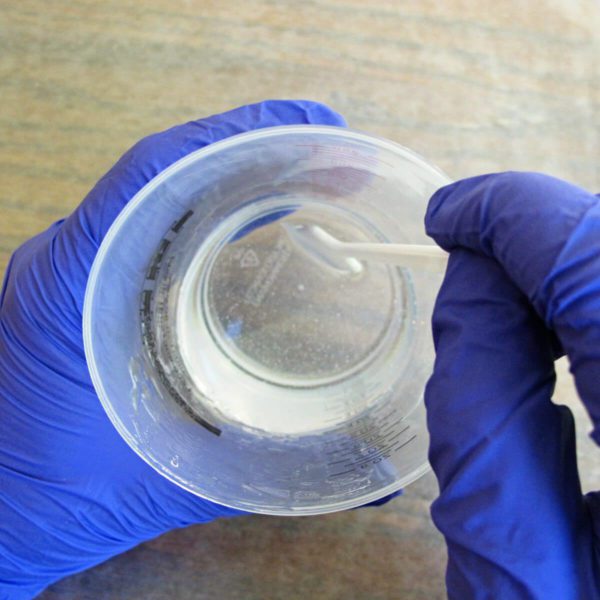
💡 Pro tip: You’re not going to mix resin and not have bubbles. But, the point here is not to create any extra work for yourself. You’ll spill epoxy resin at some point to do that. 😂
5. Warm up the space you’re pouring the resin on or into.
Temperature differences produce surface tension. That tension traps bubbles when you pour your resin. Warming the space with a heat gun is easy. If you are working with oven-safe molds, you can also gently warm them (generally to 150F) before use.
⭐️ BONUS: How to use a heat gun with resin.
6. Decrease the surface tension by dusting a powder on the surface.
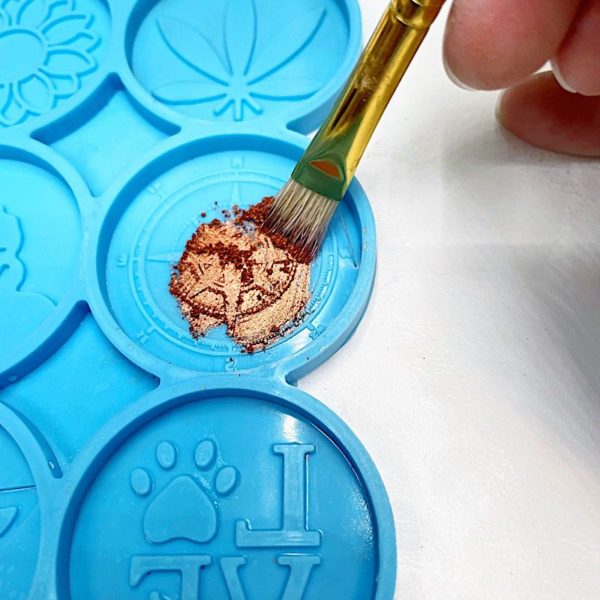
Dust resin powders onto the surface of your mold before adding resin. Tap out any extra before pouring.
⭐️ BONUS: You can mix resin color powder with your epoxy to color it.
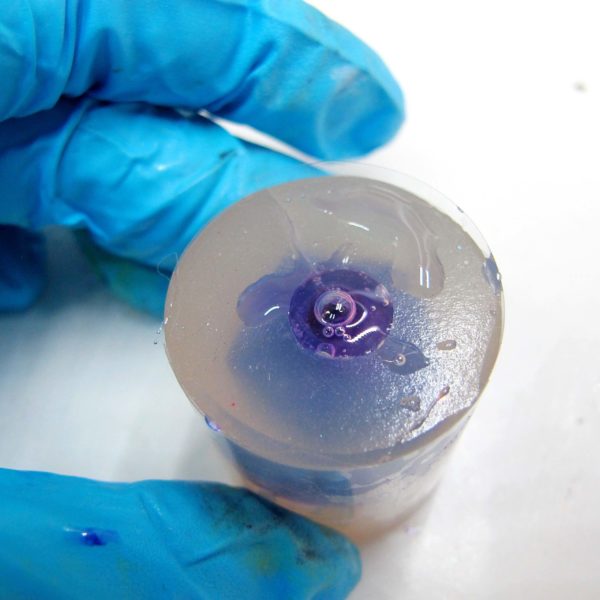
7. Roll a small amount of resin in your mold or bezel before filling completely.
This also helps to break the surface tension. If you do get any resin bubbles, they’ll be easier to pop because there is less vertical space for them to move. You’ll have them trapped.
8. For intricate molds, try to ‘demold’ the resin several times during pouring.
This lets bubbles trapped in grooves escape.
9. Dip inclusions in resin before putting them into your mold or bezel.
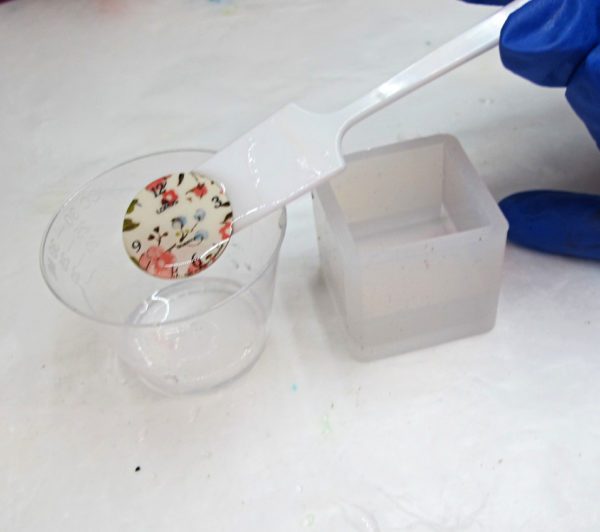
This is another way to break the surface tension. Once you’ve dipped them into the liquid, put them into your resin project.
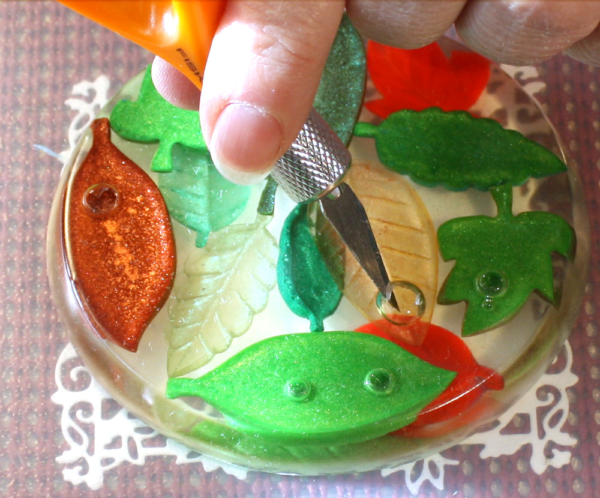
10. Once you’ve used your resin, go over it with heat to pop bubbles.
You can use a heat gun, or a source of fire (like a creme brulee torch or barbecue lighter). Know, too, that excess heat may damage your resin molds.
⚠️ IMPORTANT: Use caution when using a flame. It’s another reason I like to use a heat gun.
Frustrated with making resin mistakes?
Want to learn other resin basics to help you make something that will have people saying, “Whoa, you” made that?!” Then you’ll want to get a copy of my PDF ebook, Resin Fundamentals. It contains everything you need to know to go from confused to confident with resin. Buy it now and get a download link in minutes.
Unpublished Blog Posts of Resin Obsession, LLC © 2023 Resin Obsession, LLC
Eat-A-Bubble is more practical and easier to use. I have used it in the shop for 8 years now.
Is bust a bubble the same thing. As I cant find eat a bubble
What is Eat a Bubble?
If there is only 3 to 10 bubbles in a small jewellery project using high viscosity resin I use a syringe and large bore needle to suck them up. You only require a tiny amount of pressure. Placing the piece on a light box is a great way to see the bubbles.
Thank you, I learned a lot.
Hi Katherine,
Thank you for all of the advice and support you provide for beginners! I just cast my first trial pieces. I uesd Art n Glow Clear Casting Epoxy Resin in pendant size silicone molds, no additives or inclusions to start. I followed all instructions, and the only problem I had was the presence of numerous micro-bubbles throughout the pieces. They did not cling to the sides or rise to the top, but rather were evenly dispersed throughout the casts, too small and numerous to manually remove. Do you have any advice on avoiding these in future casts? Did I mix the resin too vigorously? Should I let it settle for a few minutes before pouring into the casts? Will a heat gun remove those, or does that only work on surface bubbles? Thanks!
Hi Amie, I haven’t used that resin, but from what I understand, it is a doming resin. In my opinion, doming resins mix too thick for molds. Have you considered the Resin Obsession super clear resin? It mixes in a thinner viscosity, so it releases bubbles much easier. You can find it in several sizes in our store here: https://shop.resinobsession.com/collections/resin/resin-obsession
Thank you so much for your helpful hints!! I did lots of no nos in my mixing resin!! I will do it your way the next time!! Excellent ideas. I mix resin in my jewelry making & belt buckle blank making to seal my goodies I use in them.
I’ve found that waiting 15 minutes after mixing helps the resin go on with fewer bubbles. If you can afford the pot time to wait, it’s been very helpful for me.
What is and where does one find a pressure pot?
We have a forum discussion about that topic here: https://www.resinobsession.com/forums/topic/how-to-use-a-pressure-pot
I made one from a paint pot purchased from Harbor Freight. $60 on sale and works great!
Will a hairdryer work to warm the surface and to release bubbles? I’m covering a flat surface made of walnut. It is a corner desk in my kitchen. Thanks.
I don’t think a hairdryer works as well. It doesn’t get as hot as a heat gun and has more air force than a heat gun, which can blow the resin around a lot.
Any tips for bubbles when using a mold that closes? For example bracelet/bangle molds . I keep getting bubbles at top where the mold closes. I don’t see them until next day when I remove the bracelet.
What kind/brand of resin are you using?
I have seen several times on YouTube that someone is using some kind of spray over the resin in the mould before curing. I assume it’s also for popping the bubbles but what kind of spray is this?
That’s not anything I do. I have had a few people ask me about doing that with alcohol to pop bubbles, but that alcohol can impact curing. It’s not something I recommend.
It is called isopropyl and it only affects resin if you add alcohol inks. Has to be 99% and after you use it you CANNOT USE any kind of flame. You can use flame to burst bubbles leave for a few minutes then spray and leave. It’s also good sometimes to reduce bubbles to spray into your mould especially if they have hidden corners etc.
thank you for sharing your tips!…I think I now know why I get so many bubbles in my mold castings….I’m too fast at stirring…I will now deliberetly stir my resin!
I used a torch to try to get rid of bubbles and my resin caught on fire. What did I do wrong?
It sounds like you got the torch too close to your painting. This situation can be dangerous which is why I recommend using a heat gun like this one: https://shop.resinobsession.com/products/zap-embossing-heat-tool
I am a retired Florist of 56 years and have been preserving flowers, by the Freeze Dry process for 28 years. I had these two companies run at the same time, but I just do the preserved flowers for now. I have had many requests for putting preserved, color treated (so never any fading through the decades) flowers into resin…especially single flowers…like the “Rose” from an casket, which becomes very meaningful…like into a 3″ round paperweight. I am old and like to learn new things…but need to be perfect! I also have flat, small cake pans, in the shape of 7″ hearts made out of silicone and circles, so I can put a few more flowers inside, to hang on a wall. These will be maybe 2″ deep.
My resin kit is RTC Supply Company, Clear CAsting craft resin, which says the resin can be used for bigger molds. I have painted many paintings with acrylic paints and covered them with a thicker resin to get that 3D look…very shiny and a thin coat. This resin that I mentioned is not for that… I guess my question is “do you think I have the right resin to make these bigger molds?”. Id not…can you recommend the right one? Also, can I pour the resin in smaller layers..let to harden…pour another layer on top etc….rather than one big pour? I have read and printed out the 10 mistakes in resin…but have these questions. I’d appreciate your advise.
Hi Ali, I’m afraid I haven’t used that resin, so I don’t know how well it will work for your project. Yes, you can pour your resin in layers as you describe.
It’s not a good idea to use a heat gun or hairdryer to pop resin bubbles because you can easily blow dust, etc. into your resin without noticing. A torch held a good distance away or a grill lighter is your best bet.
Hi Melissa, I must respectfully disagree. The heat guns sold in our store apply a lot of heat without a lot of force. https://shop.resinobsession.com/products/zap-embossing-heat-tool . I’ve never had a problem with them blowing dust onto a project and I’ve used them for this purpose hundreds of times. They also don’t pose a fire hazard like a flame from a lighter does.
To each their own. It isn’t a chance I am willing to take, and in the 7+ years I have been working with resin, I have never had a problem with setting anything on fire. Common sense and safety precautions make sure of that for me.
Great advice and ideas here. My first few tries with resin jewelry were excellent but now I am suddenly getting tiny air bubbles in all my mixes. They are evenly dispersed and I have tried everything to get them out. No luck. My resin just looks cloudy. It is warm enough (summer in South Africa) and I am mixing slowly and long enough. I am a retired analytical chemist so I should know about mixing by now 😊 Could it have something to do with opened bottles of resin and hardner? I only opened them two weeks ago but I have used quite a bit of the contents.
Hi Marcelle, I wouldn’t expect that to be the problem. I spend a lot of time covering bubbles in my online jewelry making class. You can sign up here: https://shop.resinobsession.com/products/online-resin-class
Thank you, Katherine! I’m building a small pressure tank right now. Will let you know if I don’t get blown up first.
I need to know if you can use resin on glass.
Hi Rebecca, while resin sticks to glass, it isn’t always a good idea. What are you trying to do?
thanks so much for the valuable information you have inspired me to do resin in my future days when I’m older I’m only 12 right now. please do more I would love to look into it.
I only did resin for my school research project because the information you have on your websites inspired me to look into it more.
That’s so great to know. Thank you!
For small jewelry/ bezel filled projects, I use a straw to carefully blow on the surface of the resin to remove large air bubbles. Seems to work, but my last bezel had lots of micro bubbles, barely seen, but annoying. Thanks for your info, think I’ve been stirring too quickly to cause the micro bubbles. Thanks for the wonderful tips!
These are great tips, thanks.
I’ve just poured some clear resin for the first time (usually use Mica colouring) and I have bubbles. The resin has almost set so I can’t get them out with a heat gun. I’d sand them out when it’s harder but the resin is inaccessible for a sanding tool in certain parts. So my question is – can I add a layer of resin that will fill the bubbles? Or is there another trick?
Hi Chris, have you looked at this article? https://www.resinobsession.com/resin-resin-resin/how-to-fix-bubbles-in-resin/
At what heat level do I have my heat gun at? Also high or medium for air pressure.
Hello Heidj, try the lowest heat setting and lowest air flow to start.
what wattage is needed for a heat gun
Hi everyone- does anyone have experience with misting 99 percent isopropyl alcohol on UV resin?
Hi, great information and so generously given! Thank you. My question is, can one use a sponge ‘paintbrush’ to apply resin on to a thin plastic surface? Many thanks. Regards Di
Hi Di, yes you can.
Hi, I’m flashing a chef’s torch over pendants but it can cause a ‘crazy paving’ effect On the curing resin sometimes. Is this perhaps just because I’m in too close with the blow torch?
Also, do certain colourants/acrylics cause a strange crinkly surface once heat it’s applied to domed/coated resin pendant? Or a kind of oily/smeary looking dried finish?
I use GlassCast 10/50 which I find very easy to work with as a rule.
Many thanks
D
Hi Di, yes, the torch could be causing your problem. I like to use a heat gun for reasons like this. You can buy one in our store here: https://shop.resinobsession.com/products/wow-embossing-multipurpose-heat-tool-heat-gun
Isopropyl alcohol
I am new to resin, but found I like using UV resin. Do your tips also work for UV resin. I have bought 2 different brands of the resin and both seem thicker than the epoxy resin. They are both supposed to be casting resin
Hi Pam, I’m afraid I don’t have enough experience with UV resin to know whether or not these tips will help.
Hey everyone. I’ve seen several websites or videos, ppl recommend spraying the top of the epoxy, after in the mold, with alcohol to get rid of bubbles. Can u pls tell me why this would or would not be a better idea than using a heat gun??. I saw this briefly mentioned a few places on your site, but I didnt find in detail why or why not use alcohol. Thanks so much!! Have a great one!!
Hi Amy, alcohol adds moisture to the resin. It can make your resin cure bendy or soft if you use too much. It’s also flammable, so I definitely wouldn’t use it as a spray, then use a torch to go over the top too.
Using a wooden stir stick will add to your bubble problem since they’re quite porous. Using a plastic or silicone coated stick will cut down that problem tremendously (and they’re reusable!)
Thanks for sharing that Kimberly. I agree!
I have had some luck with a large plastic straw, and blowing warm breath on the bubbles. Careful though warm breath can condense inside the straw and form water droplets.
Hello Katherine, I love the tips, thank you so much for the guide!
I have a question about the bubbles, I have a large (around 35cm*35cm*15cm) resin project that includes plant material. I don’t have a heat gun, so I was thinking I could use a hairdryer on high heat and blow this over top (not directly on the resin’s surface) to get rid of bubbles. Would this work? And would “tapping” the mold be useful to get the bubbles to rise? We used to do this for frothed milk to get the air bubbles to rise to the top. Any advice you could give on Resin brands would also be much appreciated, if you can.
Hi Rosh, the trick to getting such a large project bubble-free is going to be in the resin you use. For a project like this, the Resin Obsession deep pour epoxy is ideal. It mixes in a way to easily release bubbles for big projects like this. You can buy it in our store here: https://shop.resinobsession.com/products/deep-pour-slow-cure-clear-epoxy-resin-for-river-tables-1-1-2-gallon-kit. You can try a hair dryer to get the bubbles out, but I find it usually blows too hard and creates a mess.
Thank you so much for replying so quickly, I went to purchase the resin but unfortunately it can’t be shipped to the UK :/ Thank you for the information though!
How do I get the bubbles out from under the lip of a mold? That is my biggest issue. Such as a jar with lid. The lid mold has a lip on it, and I always get a bubble underneath the lip.
Hi Lisa, this article will help: https://www.resinobsession.com/resin-tutorials/resin-jewelry-box/
I have been pouring resin for about 3 months. I absolutely love it…however the millions of tiny bubbles I get after my project has cured us quite disturbing. My projects come out “cloudy”. I recently poured a small bathtub for deco purposes, for small soaps etc. for a friend. It came out ok but the bubbles r hideous…can u touch on this subject for me please?
Hi Donna, I’m sorry this is happening to you. This article will help: https://www.resinobsession.com/resin-frequently-asked-questions/why-is-my-resin-cloudy/
I have been working on large resin letters and I am working on the letter S. With the letter S, it backwards so when I finally took it out of the mold I had bubbles on the front of the pictures. How to I stop that from happening? Please help
I am casting in 12” x 12” x 2” moulds in 1/8” layers to get a particular effect. I am using a small torch to eliminate bubbles in the majority of the surface, but finding that small minute bubbles are forming where the resin meets the silicone on the sides. I find them only after the layer has cured. I sand between layers to ensure that the layers bond but it is not possible to sand the micro bubbles because they are too close to the inner silicone side of the mould and would end up scratching the silicone surface and damage the mould. I have tried putting a coat of polyurethane on the sides once I de-mould the piece but that doesn’t hide the tiny holes. Any ideas on how to prevent this or repair after the fact?
Hi Sydney! Ahhh that is so frustrating, I’ve definitely been there! The best way I have found to get those side micro-bubbles is to drag them out with a safety pin or toothpick. You can also spritz them with isopropyl alcohol.
Nice tips iam learning a lot
I frequently share your posts with beginners. so thank you for the resouce. In this post , when you say to “demold” the uncured resin several times, are you referring to squeezing the mold to release trapped bubbles?
Yes exactly!