
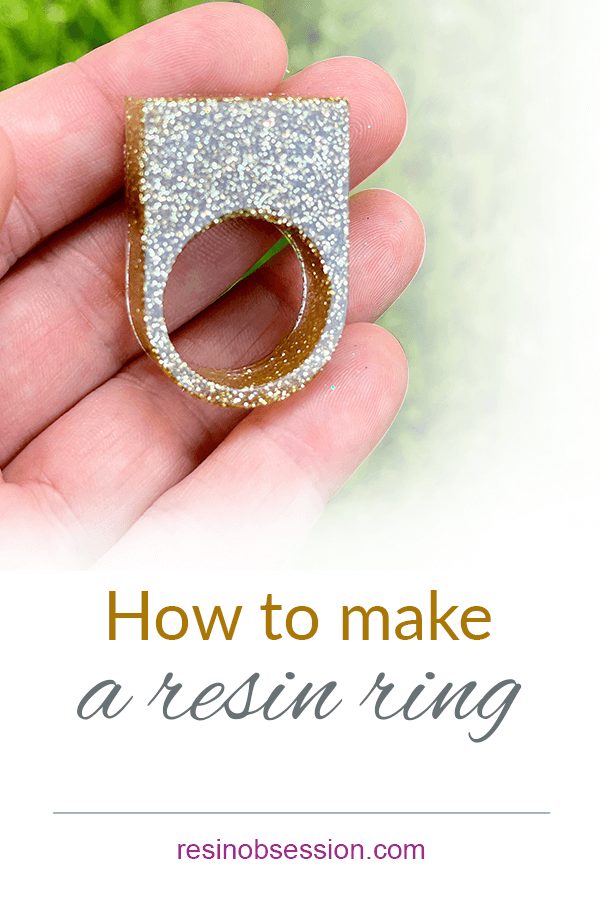
Ready to make a bespoke ring without investing in precious metal? Then you’re in the right place. You’re going to learn how to make resin rings. And you can do this even if you’re a resin beginner.
Why make resin rings?
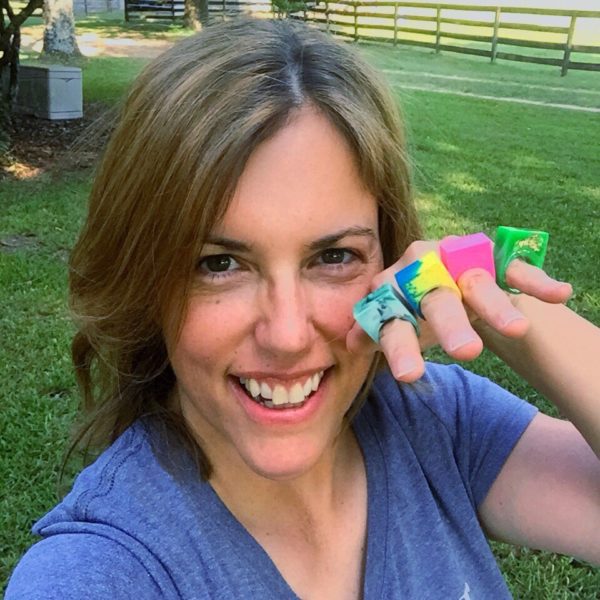
Rings are a piece of jewelry you can wear and admire at the same time. But what’s so awesome about making resin rings?
A rainbow of colors at your fingertips
You can choose to color your resin anything you want. Whether you want opaque or transparent colors, you’ve got plenty of choices. Resin rings also look great when made with glitters, micas, flowers, beads and – well – most anything. Here are more ideas of things to include in resin.
Resin is affordable
For less than $100, you can get a beginner resin kit, a resin ring mold, and resin colors to make your ring. Try doing that buying gold or silver metal, plus the equipment you need to make it.
They’re non-traditional
If you shy away from the ‘typical jewelry store’ for something more adventurous, then you’ll love resin. Resin ring molds come in various shapes and sizes, which you can easily personalize to fit your style.
What supplies do you need to make resin rings?
Resin ring molds
Casting resin (if you’re using a mold)
Jewelry ring blanks
Doming resin (if you’re using a metal ring blank)
Mixing cups
Stirring utensils
Safety gloves
As a part of making resin rings, you need a good crafting space. Your table needs to rest level (you don’t want your resin rings to be lopsided) and stay undisturbed the entire resin curing time. Plus, you want to cover your table with a non-stick surface to protect it from resin spills.
What resin should you use for a project on how to make a resin ring?
You’re going to need one of two formulas, depending on what you’re making.
If you’re using a mold, you want to use a hard-curing casting resin. Casting resins release bubbles quickly, plus they won’t soften with body heat. That means you’re ring won’t misshape when you wear it.
Best resin for ring molds
Resin Obsession super clear resin
*Mix between ½ ounce and 3 ounces at once
*25-minute working time
*Cured to demold in 8 to 12 hours
If you’re using a resin jewelry blank to make your rings, you want to use a doming resin. Doming resins produce glossy coatings on surfaces. You’ll get a beautiful, raised dome on your resin rings.
Best resin for ring blanks
Resin Obsession crystal doming resin
*Mix between 1 ounce and 1 gallon at once
*Thirty to fifty-minute open time
*Professional grade UV protectants
Now that you know what supplies you need, here’s how to make resin rings using a mold.
Step 1: Prepare the mold
Apply a light mist of resin mold release. Then, let the mist dry for at least 30 minutes.
Step 2: Measure and mix
If you’re new at making resin rings. And you don’t want to spend a lot of time on the math. Mix about one ounce of resin. Then, have a few extra molds handy for things to do with your excess resin.
But, if you want a more precise answer, this article explains how much resin you need to use. (and the first choice doesn’t involve math either 😉)
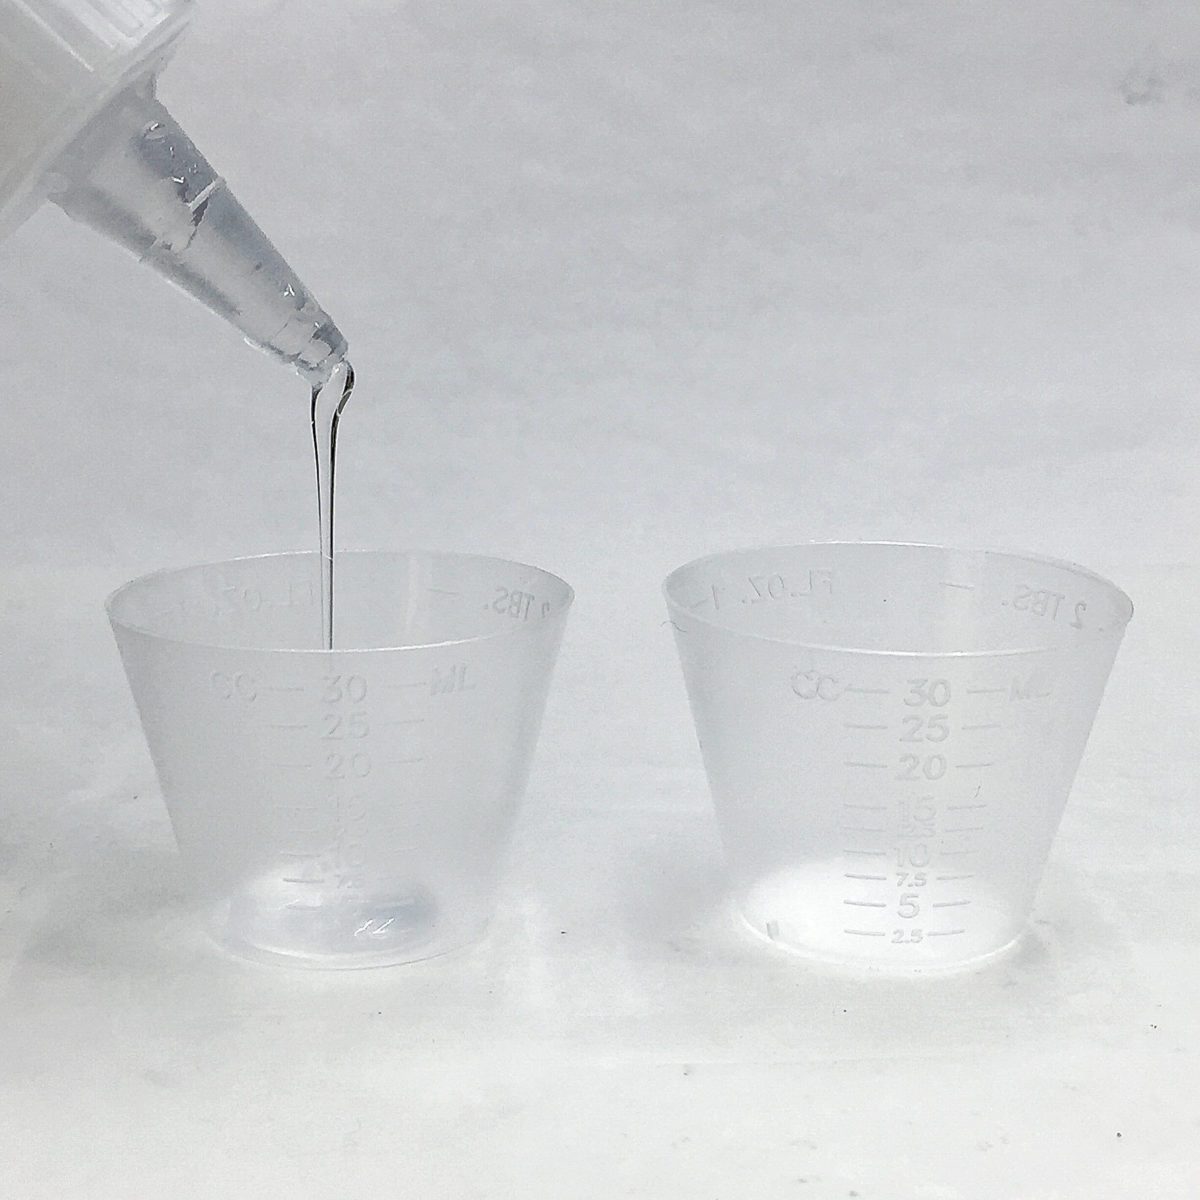
The super clear resin mixes 2:1. That means you’ll need 2 Parts of A and 1 Part of B.
You’ll need 2/3 ounce of A (20 ml) and 1/3 ounce of B (10 ml).
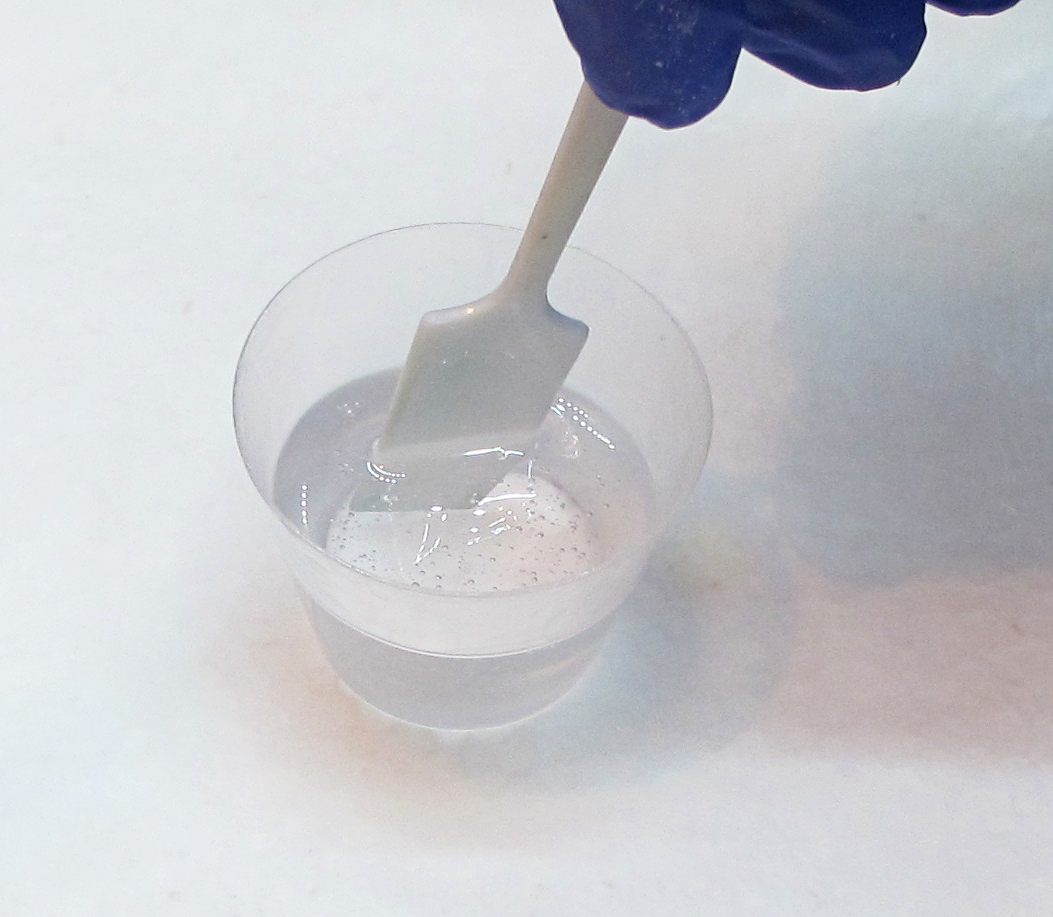
Pour both parts together and mix thoroughly. That includes scraping the sides of your cup and mixing stick several times during the mixing process. If you don’t, your resin can cure with a sticky surface.
Continue to stir until the resin is clear and streak-free. This takes about 2 ½ to 3 minutes.
By the way, if you’ve never done this before, this article shows you more details on how to mix resin.
[OPTIONAL] Step 3: Color
If you’re going to use resin colors, now is the time to do it. Color your resin or keep it clear. It’s your ring, so do it your way.
![]()
💡 Pro tip: You can never go wrong with glitter.
Step 4: Add to the mold cavity
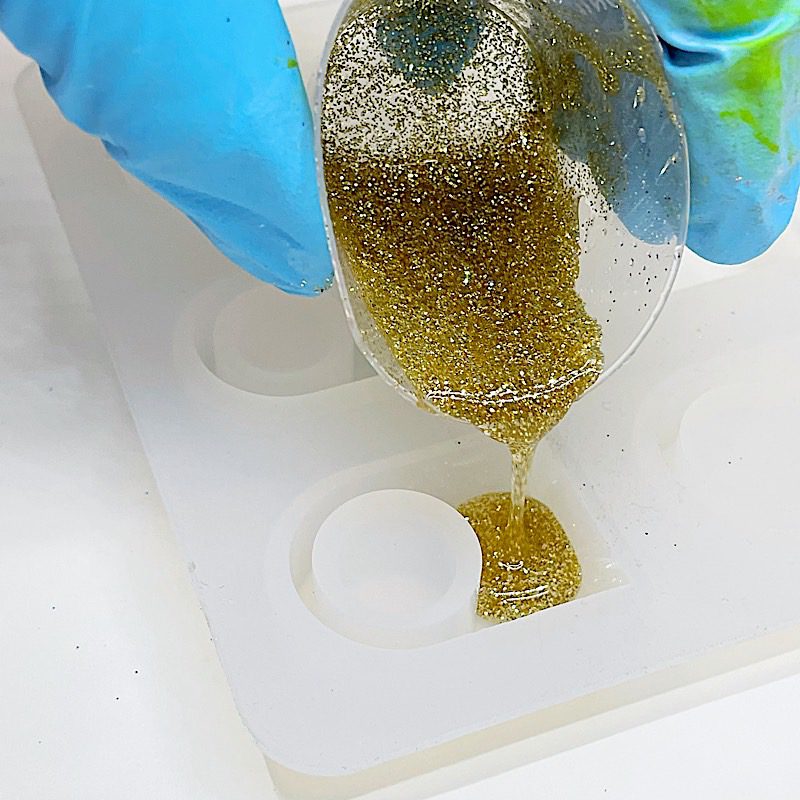
Now that your resin is mixed, pour it into your mold. It will start curing in a few minutes, so you want to use all of it before it starts to thicken. The thicker it gets, the harder it is to remove bubbles.
Step 5: Remove bubbles
Go over the surface of your mold with a heat gun to get rid of any. Then, check again in 15 and 30 minutes, as bubbles have a way of sneaking up on you.
Once you’re sure your project is bubble-free, cover it with a dome and leave it to cure for the next 12 to 24 hours.
💡 Pro tip: Because this ring has a thin band, you want to give it extra time to cure. Make sure your resin stays warm for an extra couple of days, and that will give your ring time to get extra hard and remain durable when you wear it.
Step 6: Demold
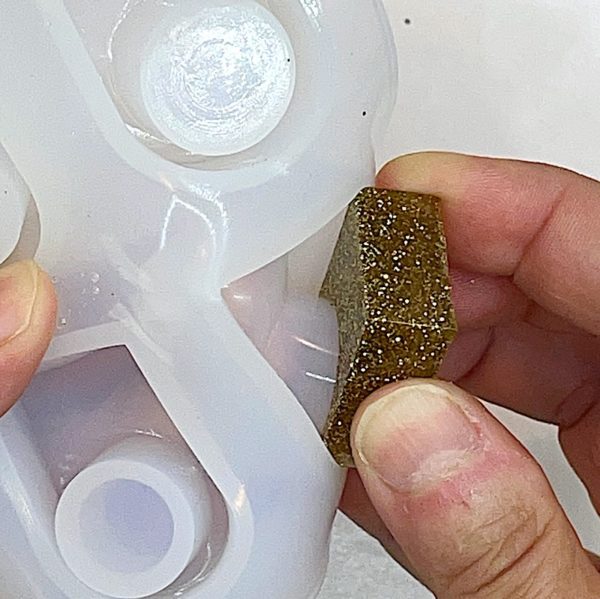
Once the resin is fully dry, it’s time to demold. If you haven’t done this before, you don’t have to worry. Simply peel the mold away from the ring while holding onto a ring edge. Your resin ring should peel out easily.
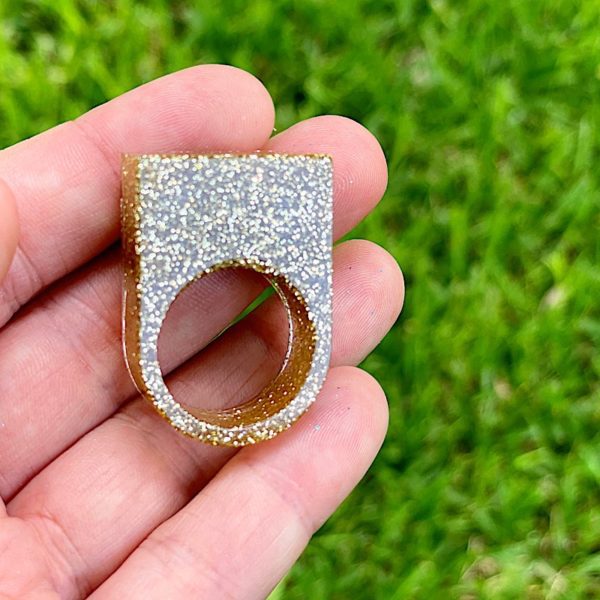
Step 7: Finish
Your resin ring might have a sharp edge or a point that feels uncomfortable. You can sand resin with a nail file or wet/dry sandpaper. If it isn’t glossy enough for your liking, you can polish the resin too.
Here’s the best part of how to make a resin ring. Wearing it!
Where will you wear your resin ring?
Want to try making resin rings but want more help getting started?
It’s why I wrote my eBook, Resin Fundamentals. I’ve condensed my seventeen years of resin experience into an easy-to-follow book sharing the essential details you need to make something beautiful from day one. Buy the PDF book now, and it’s yours to read in minutes.
Unpublished Blog Posts of Resin Obsession, LLC © 2023 Resin Obsession, LLC