

Sometimes when you’re creating resin jewelry or epoxy art, you may find that after your resin cures, you have an uneven surface. This can be a resin edge, unevenness, or gaps in your resin surface (also known as ‘fish eyes’). The good news is that you can sand resin once it’s fully cured to get an even surface.
Here’s how to sand resin smooth.

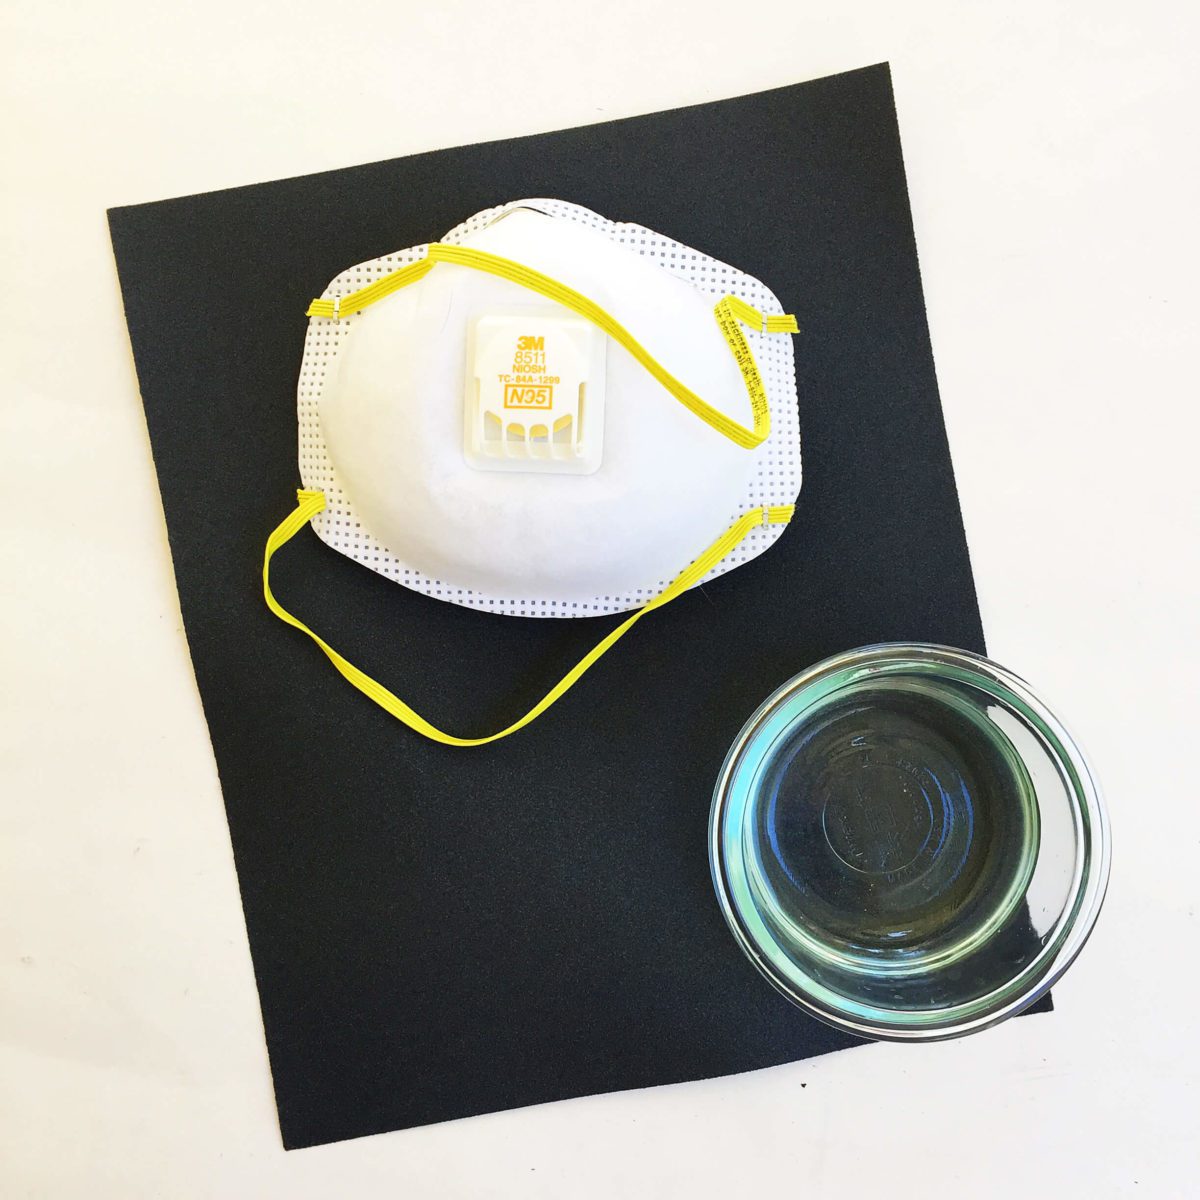
Step 1: Gather your supplies
You’ll need
*wet/dry sandpaper ranging from 400 grit to 1000 grit
*a hard, flat surface to rest the sandpaper upon
*water
*dust mask
⚠️ Before you begin, put on the dust mask. You don’t want to inhale resin dust.
Step 2: Sand
Sanding resin jewelry and crafts
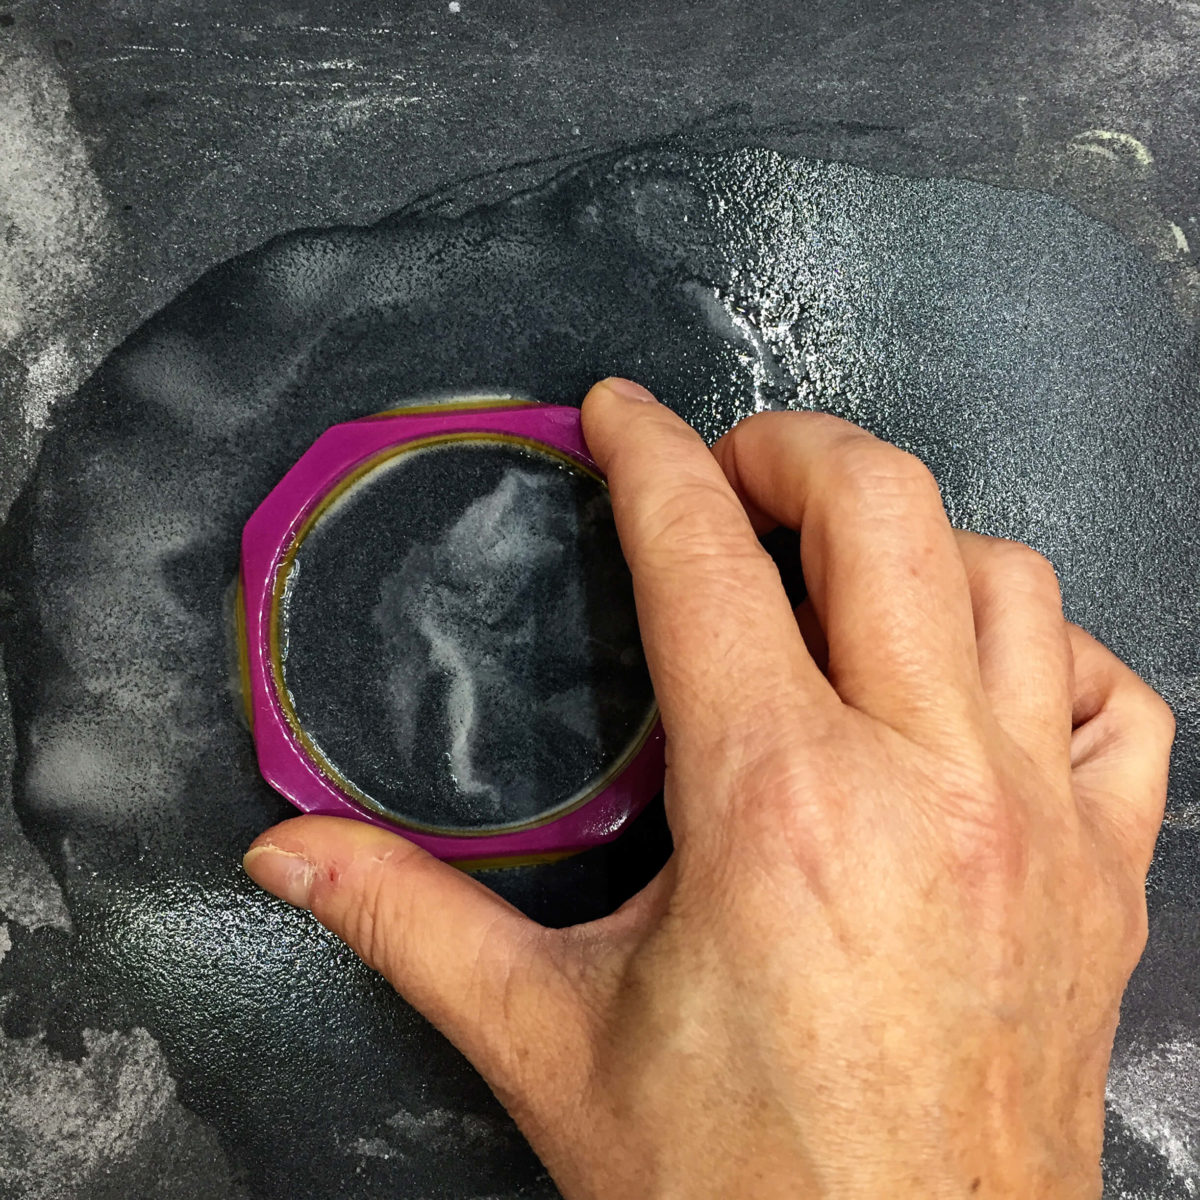
1. Place the sandpaper, grit side up, on a hard surface.
2. Then, grab your resin charms, craft, or piece of resin jewelry and dip it in the water.
3. Hold it firmly and sand in a back-and-forth motion on the sandpaper. Change directions several times. For example, if you’re sanding a resin bracelet, go ‘north to south.’ Then, go ‘east to west.’ You’ll also want to sand the resin in a figure-eight motion. Changing directions frequently is important to ensure you don’t sand off more from one side than another.
4. Once everything is smooth and even, pick the next finer grit of sandpaper. Continue sanding as you did in the previous step. Gradually use finer grits of sanding papers. Otherwise, you won’t remove all the scratches from the previous paper. Said another way, don’t use a 250 grit, then a 1000 grit. You won’t get all your scratches out.
5. Continue sanding until the charms have the smoothness you desire.

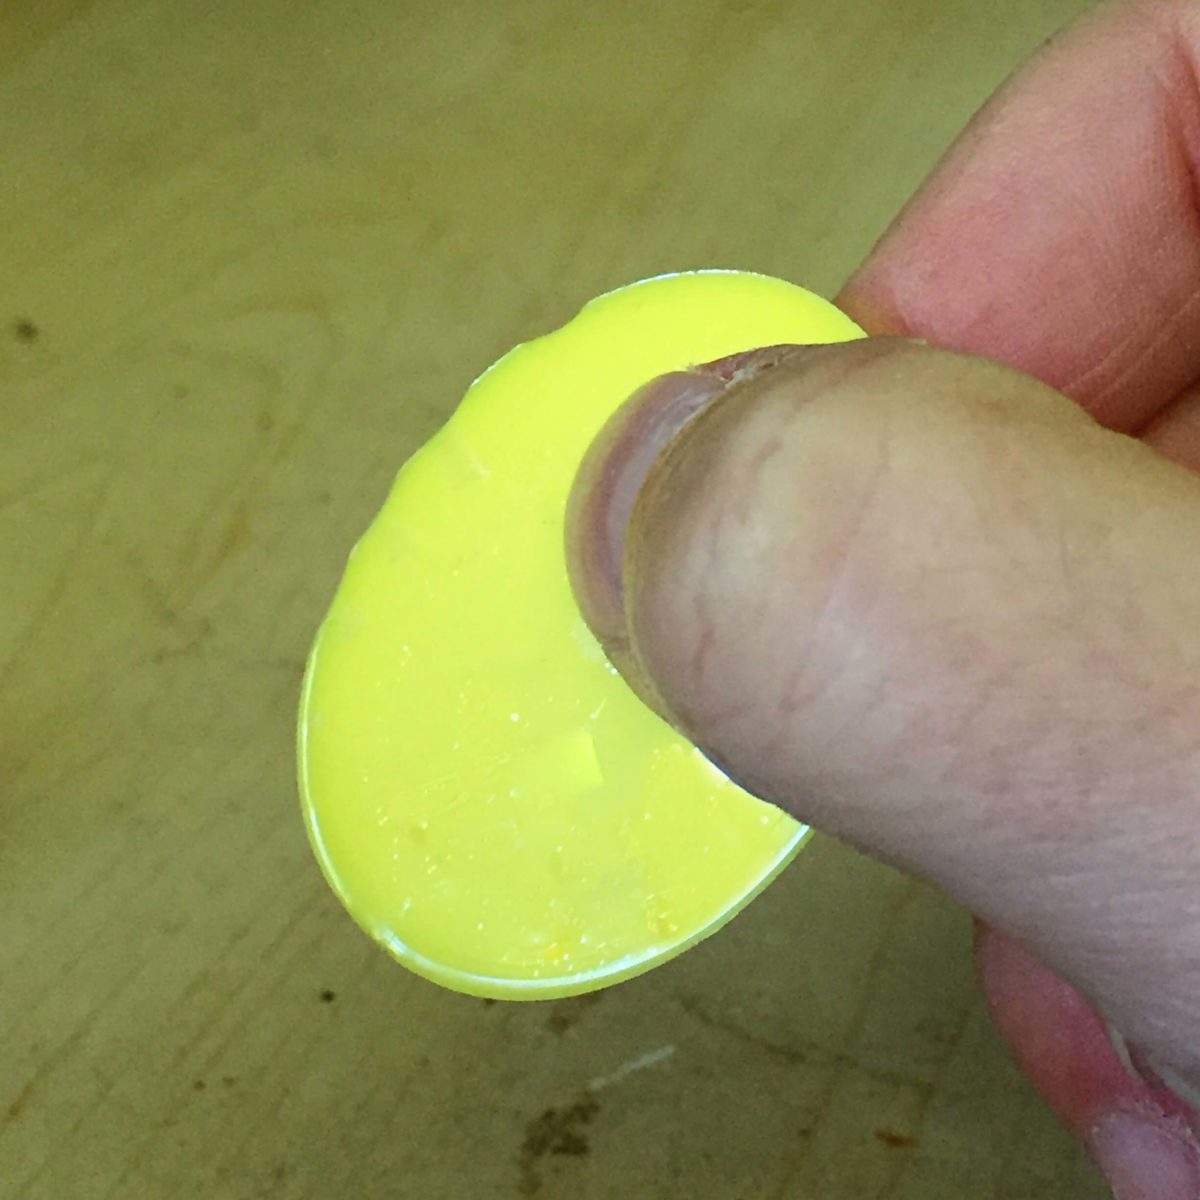
If you’re sanding a curved surface, move the cured resin according to its curve.
Why do you need the water?
It keeps the dust wet because you don’t want to inhale it. Plus, it keeps your piece cooler so that the sanding friction does not melt or distort the shape.
💡 Pro tip: If you want to recoat with another layer of resin, end with a 1000 grit or higher sandpaper. Otherwise, you’ll see sanding marks underneath a new layer of clear resin.
Sanding resin art
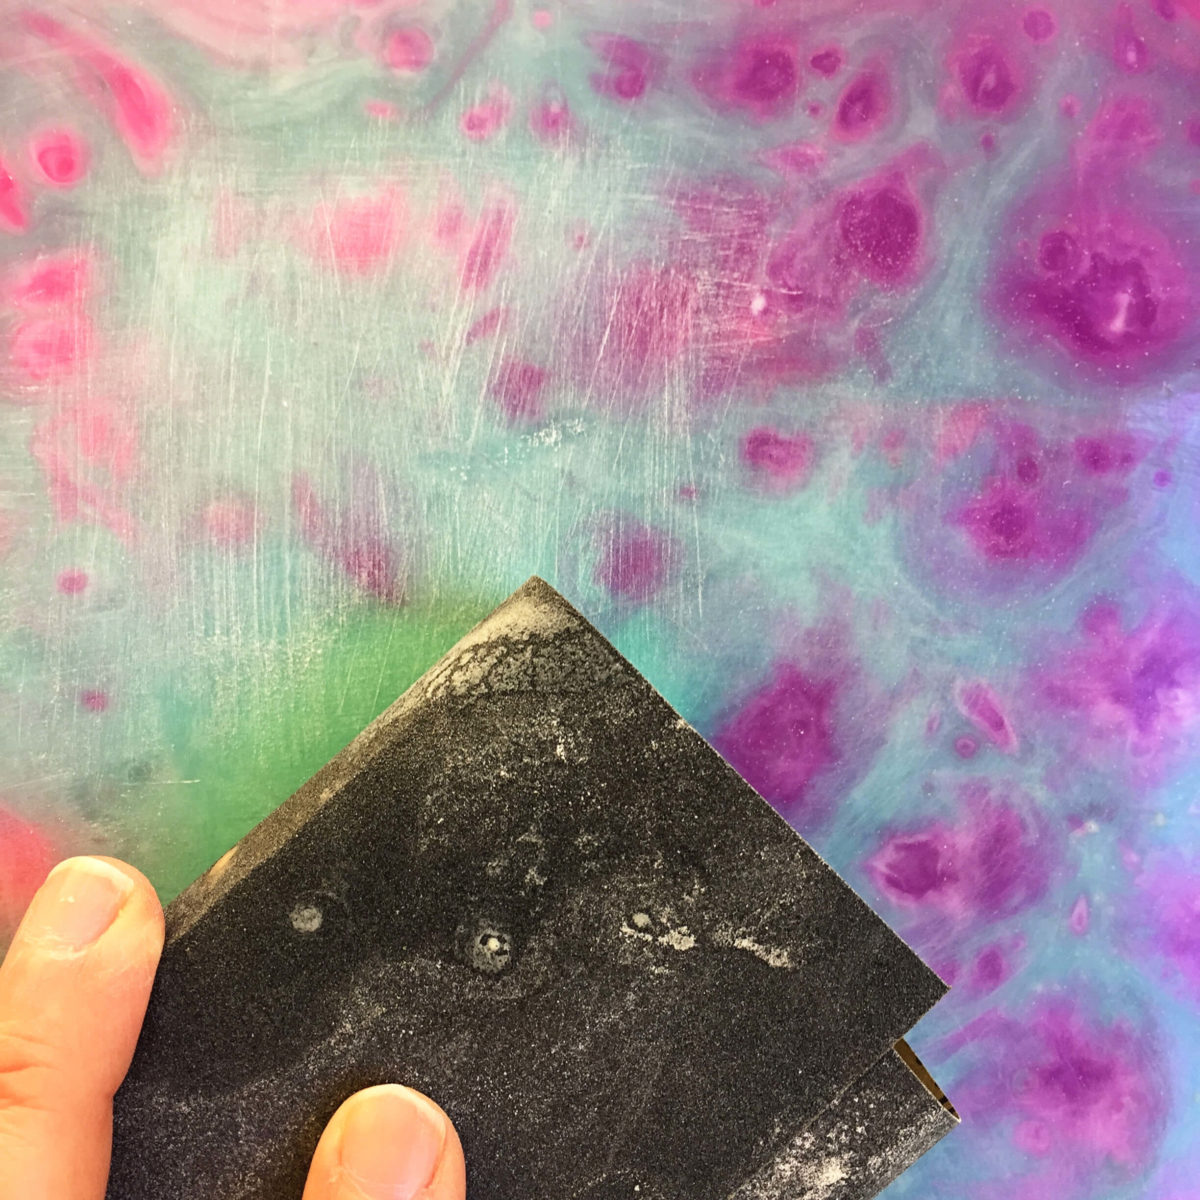
1. Cover a block with coarse sanding paper. You can also use sanding blocks.
2. Wet your paper or block.
3. Then, use the same techniques for sanding jewelry resin when sanding your epoxy art resin. Go back and forth and in circles to make sure you sand evenly.
4. Continue sanding with finer grits of paper until you are happy with the surface. Recoat with resin as necessary.
💡 Pro tip: Resin for art self-levels to a depth of 1/8 inch. That means you need to pay attention to the depth you’re sanding. You may not need to take much off. But, at least enough that a new layer of resin will completely cover the area and does not have to fill in more than 1/8 inch.
So, what about using a Dremel to sand resin?
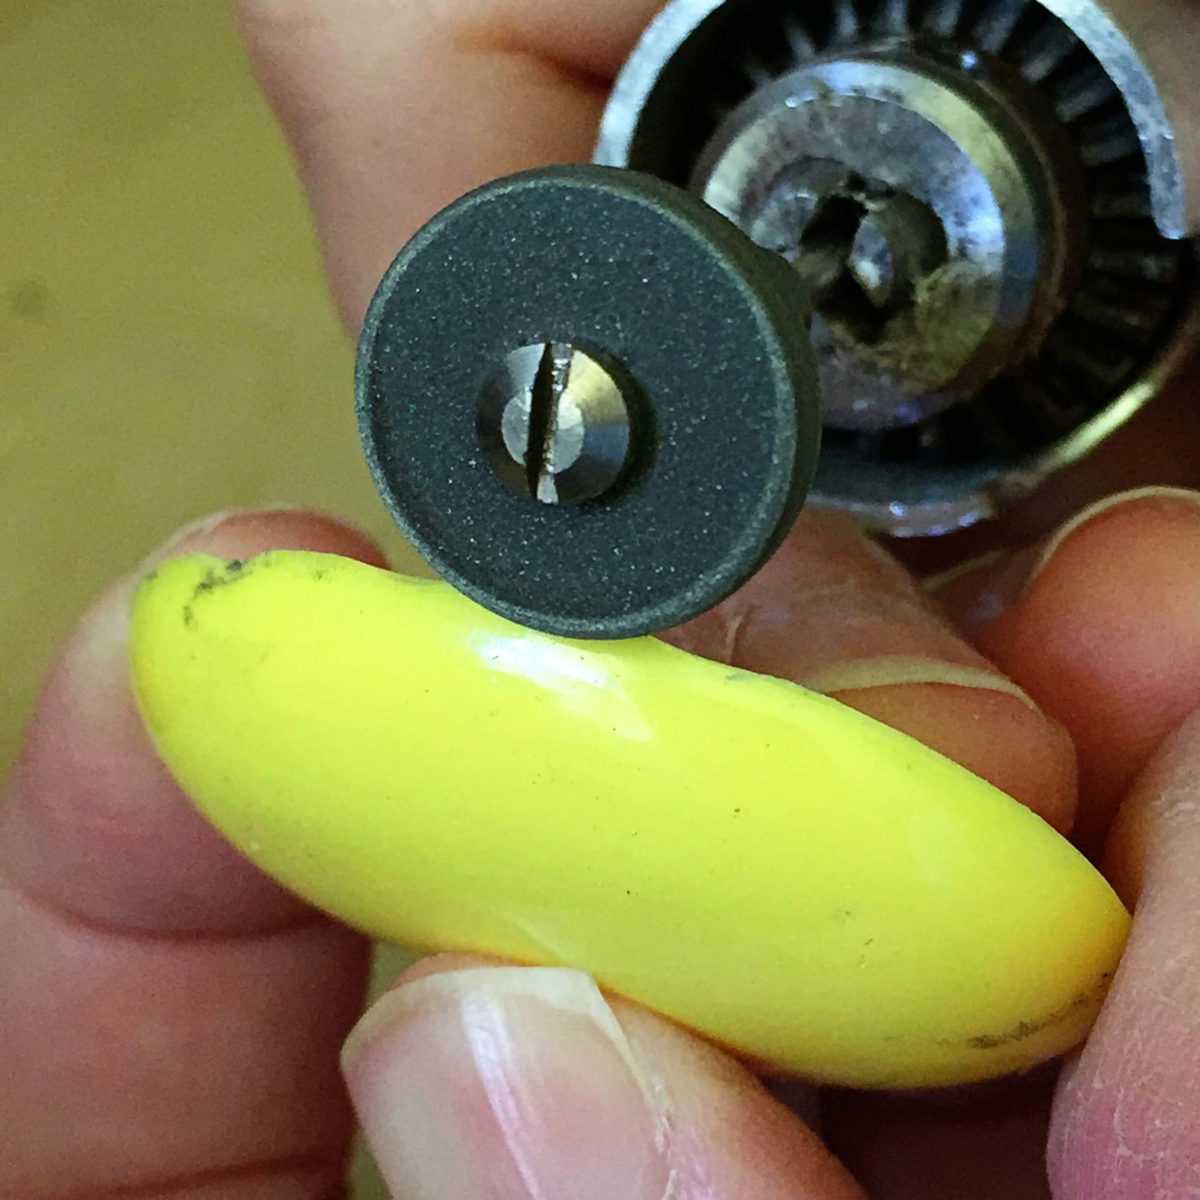
The quick answer is yes, you can use a Dremel tool to sand resin.
But, here’s the problem. A Dremel doesn’t sand a straight edge. It grinds in half-moons.
You’ll get a bunch of ‘scoops’ you must sand by hand to make flat.
The other problem is that a Dremel tool takes off resin quickly. If you aren’t careful, you’ll have divots in your resin that you’ll have to repair. Or fill in with more resin.
⚠️ Important: If you use a Dremel tool to sand resin, please wear safety glasses.
💡 Pro tip: Here’s how I use a rotary or Dremel tool for sanding resin. I take off large amounts of overspill and get it close to where I want the finished edge. Then, I use hand-sanding methods to get it smooth and even.
What about using a sanding belt or power sander for sanding resin?
Yes, you can do that. But those tools create a lot of friction. And friction causes heat. That heat can melt or warp your resin.
If you’re going to use big power tools, you need to make sure it’s a resin that can withstand the heat of sanding. It also helps to keep the resin surface wet to minimize the heat.
And don’t forget the safety glasses here too.
You can watch me in action to learn how to sand resin:
Now I need to let you in on a little secret here.
I dislike sanding resin.
Correction–I HATE sanding resin. Yes, I know HATE is a strong word. and I’m still using it.
(And for those of you who tell me you like sanding resin, I argue that it’s a cry for help.)
Here are a few of my tips to help you AVOID sanding resin to get a smooth surface.
(or at least not sanding any more than you have to)
Recoat with a new resin layer
For the times that a hair or dirt has gotten on a surface, (like when using resin on a tabletop), I’ve been able to notice it because I could see a disruption in the glossy surface. Not because of the hair itself.
Said another way, the light catches the imperfection. In my experience, another layer of resin without sanding takes care of that.
Spray finish the surface
If the surface is cloudy from a matte mold surface, a layer of doming resin or clear acrylic spray will make the surface shiny. No sanding is necessary.
Fill in with a doming resin
If you’ve got a resin edge, use that to your advantage. Let the edges act like a mold and fill in the space with resin.
⭐️ BONUS: Here’s how to fix a resin edge.
Can you sand sticky resin?
No. You’ll have to remove as much sticky resin as possible before sanding.
Struggling to get the results you want with resin?
It’s not your fault. There’s so much information out there about creating with resin. How can you possibly learn it all? That’s why I wrote the book, Resin Fundamentals. It has the essential details beginners need to know to be successful with resin. Buy it now and get a download link in minutes.
Unpublished Blog Posts of Resin Obsession, LLC © 2023 Resin Obsession, LLC
I put resin on a very large oil on canvas painting and it has brush stroke streaks because it wasn’t moving enough so I used a brush. Yipes! Would sanding it work? Would a second coat cover the streaks? Any advice is appreciated.
I don’t know that you need to sand it first. Instead, coat with another layer of resin using more resin the next time. This article explains how much you need to use: https://www.resinobsession.com/resin-frequently-asked-questions/how-much-resin-do-i-need/
Ce qui est dit dans ce texte est absolument vrai et ça mérite d’^tre essayé.
Merci
So I’ve been pouring into molds
Recently rings
Any suggestions in sanding these?
Specifically the part where you put your finger in
Some edges need defining?
Sand paper?
Dremmel?
I’ve used both maybe just need more practice.
Try sanding sticks specifically for rings. They come shaped to allow you to sand the insides.
When I Resin a canvas piece of art, I keep getting spots where the resin doesn’t stick. Maybe they’re called fish-eyes? Whatever they are it can ruin the piece.
Hi Brenda, I’m sorry to hear this is happening to you. This article explains why fish eyes happen in resin and what you can do to fix them: https://www.resinobsession.com/resin-art/why-are-there-dents-and-holes-in-my-resin-painting/
That’s some really cool tips!
What about an orbital sander, do you think that could be helpful for sanding relatively large objects?
Yes, but like using the dremel, you may end up taking off more than you intend to.
Hello , I have made a resin clock, but unfortunately one corner of clock seems very dull, I tried sanding but it went more dull can u help
Awesome!
Never heard of em
Will definitely try!
Thank you
Your information is so helpful. Thanks so much! I’m new to resin art, so I need all the help I can’t get ha!
Waar kan ik alles aankopen,
Help plz! 1st off, thank you for your wonderful instructions. I followed your advice and sanded my resin piece starting with 400 and ended 1000 grit. My piece is extremely cloudy now! What do I do?! Thanks in advance!
Thanks! Will this get rid of the cloudy tho?
As long as you end with a 1000 grit or higher sandpaper, layering with resin or the gloss sealer spray will take away the cloudiness.
You are the BEST!!!!! Yes, I ended with 1000 grit. Would Mod Podge work or do I stick to the spray?
I don’t think Mod Podge works as well. I show polishing options in this video: https://youtu.be/Wm89lAqDCqo
I’m having much cloudiness in my resin glitter domino’s. Sanding is not making it better. How do I get the back of the dominoes smooth like the front
Hi Jennifer, there are a few different ways to do that. This article will help: https://www.resinobsession.com/resin-frequently-asked-questions/how-to-polish-resin/
I’ve got some very minor imperfections in my top coat so I was going to lightly sand them down, finish with a 1500 grit and then use Novus to polish. Will this still give it the shine that I would get with just a top coat? I’ve already done 3 layers and would rather be able to just polish it after than doing another coat.
Hi Megan, it will look good, but it’s not going to be that ‘wet’ look. If you want that, you will need to apply another layer of resin. On a side note, it will likely look good enough that I don’t think anyone except you will know the difference. 😉
Can you put resin on with a brush to topcoat a small pendant…that I had to sand
Yes, you can do that.
Hi Janet, I hate when that happens! In cases like this, I use a jeweler’s saw and treat the resin like metal. I saw close to the shape of the charm, then finish it up with sandpaper.
So I’m having some issues. I’m casting clear with some things in the resin. They come out beautiful. The edges are rough so I want to
Sand them down and sometimes I will
Sand the whole thing level and nice. I’ve started at 400-1200 grit sandpaper and finish with Flitz polish. After sanding am
I not able to get that clear again? I’m so bummed. What am I missing? So so cloudy and dull now.
Hi Sam, it sounds like you could use a little one-on-one help. I offer consulting calls where you and I talk back and forth about what’s going on. A 15 minute consultation call is $20. I do them by video so I can have a chance to see what you are working on. If you are interested, please send a message through the ‘contact us’ page and I can get this going for you.
Should I wait until the resin is fully cured before sanding? I can’t seem to get it smooth enough but I didn’t wait till it was fully cured before I started.
Yes. If you don’t it will be rubbery and won’t sand correctly.
I just made some dice with different it’s in them but now epoxy resin is dry but there cloudy what should I try first? Will it be clear eventually?
Hi Tammie, it’s hard to say why your resin is cloudy. This article explains more: https://www.resinobsession.com/resin-frequently-asked-questions/cloudy-resin-why-is-my-resin-cloudy-reasons-for-cloudy-resin/
Hi I want to have resin connecting two sides of a ceramic bowl I made. ( picture a bowl broken in two pieces) . It is a curved surface so I am not sure how to do it. I am thinking of using damp clay on the back of the bowl covered in a wax resist ( this would give it support as well as the back wall of the mold). Then using tape on the top of bowl. This would leave a space between the two bowl pieces that I would pour the resin into. Do you think this would work? Or are there other ways to do a curved surface.
Hey katherine!
If I took some xylene to it and wiped it after sanding, would that shine it up. I’m an expert sander (used to be a painter) so the standing would be as smooth as can be. Or…. is the spray the only way to go. What does the spray look like compared to doing another layer?
Hi Jordan, I haven’t tried xylene to wipe off sanded resin, but I wouldn’t expect that to work. Recoating with another layer of resin will give you the smoothest, glossiest finish, but the spray can be easier to use, especially on an irregular surface.
Hi Katherine, just finished reading this, watching the You Tube vid, and sanded down some screw ups I had laying around. You are so right … sanding sucks! I was trying to reduce the thickness of some charms I made … while I kinda like the frosted edge look, it was taking too long to take off the additional thickness (abt 1/4”).
Any ideas on a quicker way to remove that much resin? Also, just kinda playing around, I brushed on some clear nail polish over the frosted edges and this made the frosting go away, nice and clear. Is this a huge no-no, will my charms spontaneously combust & create a toxic cloud? 😆
Hi Kim, I’m with you on trying to avoid sanding. You can use the nail polish, but I find it yellows over time. This article will give you some more ideas: https://www.resinobsession.com/resin-frequently-asked-questions/how-to-polish-resin-different-ways-of-polishing-resin/
I’ve been having a hard time with my resin making. I’m using spheres, and every time,the surface touching the silicon mold is cloudy. Should I sand it or just re-resin it? I’m kinda bummed I wasted a bee lol
Hi Holly, I’m sorry to hear this happening to you. This article will give you some ideas on what’s going on and how you can fix it. https://www.resinobsession.com/resin-frequently-asked-questions/cloudy-resin-why-is-my-resin-cloudy-reasons-for-cloudy-resin/
Hi Katherine! I’m new to resin art but wanted to preserve some flowers for my mother on law, so I figured I’d give it a go. I used a pretty big mold (10″x10″). I did do it in 2 separate pours. The first layer cured great, while the second…not so much. Seemed to pull away from the edges of the mold and pooled more on one side. Is it possible to sand out these imperfections? If so, what is the best way of doing so on such a large resin piece? Thank you in advance! So glad I found this site, you have some great info on here!
Hi Chelsey, yes, you can sand out the imperfections. Use the techniques I describe here in the article. If you want more detailed help with your project, I’m happy to set you up with a consulting call. Details are on our ‘contact us’ page. https://www.resinobsession.com/contact-us/
Greetings!
Thank you for all of this helpful information! I have recently started working with resin and I’m starting small with letter key chains. While doing this, I have noticed some of the backs are a little sharp but not too bad. In your opinion, is this something worth sanding to make a little more smooth? Or would that be a waste of time in this instance?
Thanks for your feedback!
Hi Nichole, what you are experiencing is normal. You certainly want the edges to be smooth enough that is won’t poke someone or tear something in a purse when someone goes to use them. Personally, I think it’s easier to finish the charms by filling with a doming resin. You can buy doming resin in our store here: https://shop.resinobsession.com/collections/resin/doming
Hi. I’m new with resin. I made some glass coasters but sometimes my finish product has sticky portions on it. Is there any way I can remove it? Sanding sticky portions might be hard cuz it’s not as solid/hard. Thanks
Hi Bev, this article explains how to fix sticky resin: https://www.resinobsession.com/resin-frequently-asked-questions/how-to-fix-sticky-resin/
Hi, do you ALWAYS have to sand down resin and then pour a topcoat? I just tried sanding by hand for 30 minutes and it’s so tiring, I can’t imagine doing it multiple times as I move up grades and doing it for every single item! Is it a must if there are no apparent defects?
Also, on defects – here are 2 scenarios I’d love your advise on please =)
I made a set of round coasters that has tiny little holes/pores on the sides of the coasters. Do I need to sand the sides down and THEN pour a top coat and let the resin flow over the sides OR can I paint resin into those holes to ‘fill it up’, let it dry and then pour the topcoat?
Second set of costers, a tiny bit of gold foil is sticking up the top so I poured a topcoat (badly, it’s my first time) and when the resin dried, it had moved. So now there’s a small empty pool on the surface of my geode coaster! Do I have to sand down the entire surface and start again OR can I pour a little resin in to fill that hole?
Thank you SO much. I appreciate you taking the time to help me.
Hi Juliana, I’ve never sanded down a surface to recoat. As long as the surface is clean, I will apply another layer of resin. For your holes and divots, this article will help you: https://www.resinobsession.com/resin-frequently-asked-questions/fix-holes-and-dents-in-resin/
Love this tutorial. I think it is crucial for all resin artists and crafters to know how to sand and when it is necessary.
That means so much Ilene. Thank you!
This is such a great site. It is so appreciated. I have a question.I make a lot of bracelets and my Dremelingl-ing is a disaster.
Can I use doming resin and not need to sand them?
Hi Adele, I don’t like sanding either! I will finish my project with a doming resin too. This is the doming resin I like to use for finishing jewelry: https://shop.resinobsession.com/collections/resin/resin-obsession-crystal-doming-resin
I have struggled a lot with how to get my resin jewelry smooth and shiny.
With a lot of trial and error I have finally come to the perfect solution that I can now apply on all of my resin projects, big or small, round, straight or even intricate.
The dremel tool can be useful but I choose to get up a notch higher and have bought myself a small handy sanding/polishing tool. When using discs one is able to sand straight and the discs come in grits to as high as 8000!
Because I like to have the smoothest touch ever, I make do discs from 10000 paper and attach velcro to the back and continue until glossy shine.
Then I polish it with polishing paste and finally a waxing paste.
A long process though, therefore I always make molds of the shiny items with high quality silicone so that the next couple of pours of the same items hardly need any work and that will safe time, big time!
Thanks for sharing this Nicole. So thoughtful of you!
Just a little tip I have discovered: to trim over pour from curved things like jewelry pieces and small castings, use a sturdy pair of nail clippers. I have a large pair and a small pair and sometimes a couple of tiny snips saves me from a ton of sanding.
What’s the best way to get my river rock table to come clear it’s like a inch and half pour?
Hi Wesley, you will want to use the right resin for a project like this. The Resin Obsession deep pour resin is a great choice! It cures bubble-free and can be poured up to 2 inches thick at one pour. You can buy it in our store here: https://shop.resinobsession.com/collections/resin/resin-obsession-deep-pour-resin
Hi! I used a clear sealer on my resin to make it more glossy and scratch resistant, however the sealer when dried is very patchy and has a lot of texture. How would you fix this?
Hi Faith, is applying another layer of resin an option?
Would painting it on there or pouring it over be my best bet? It’s bear keychains and bookmarks
I would paint it on like a glaze. This article explains more: https://www.resinobsession.com/resin-frequently-asked-questions/how-to-fix-cloudy-resin-cloudy-resin-fixes/
Hi Katherine,
I am using resin for a keychain (approx 1in x .5in) left it overnight to cure. cant really explain what it is but there are squiggly ripples on my resin. its not smooth. would applying a thin layer of resin do the trick? would the thin layer stick?
Pam
Hi Pamela, yes, you can apply a layer of a doming resin. Provided your surface is clean, it should adhere without any problems. This is the one I would use: https://shop.resinobsession.com/products/resin-obsession-crystal-doming-epoxy-resin-jewelry-grade
So the Castin Craft resin spray is out of stock. What do you recommend?
I’m afraid I don’t have another recommendation.
The epoxy/resin on the table tops at my work place have become tacky from using bleach on them. I’ve tried scraping the sticky parts off with a razor, but am now left with a scratched surface that doesn’t look very good. Is the next best course of action to sand? Will I be able to achieve a somewhat clear surface without haziness/scratches without needing to lay down another layer of resin? I do not think my employer would provide for that
Hi Michelle, I’m sorry to hear your tables aren’t staying solid. This article will help you know what to do next: https://www.resinobsession.com/resin-frequently-asked-questions/how-to-fix-dimples-in-epoxy-resin/
I read that you can use alcohol to get rid of bubbles in the epoxy resin but after spraying with alcohol there tiny holes left when it is dry. What’s the best way to get rid of the holes, should I use alcohol to remove the bubbles? Thank you really enjoy your site.
Hi Cindy, I’m sorry you’re having bubble trouble. This article will help: https://www.resinobsession.com/resin-frequently-asked-questions/resin-bubbles/
I did a beach pour and have had a lot of success on charcuterie boards but I think I worked too long and have a few fish eyes…duh. Do you think I can just pour a clear coat over without sanding to fix the problem? Plus if an old table has varnish on it should you sand it first and clean before pouring or can you just clean and pour the resin?
The best thing about a beach pour is you can always pour right over it and make new waves! The old varnish table absolutely needs to be scuffed up and sanded before you pour or the resin will not adhere.