

Hey there creative companions! Have you spent any time recently scrolling through social media (What, me? No, never!) Yes, you! You see those stunning epoxy resin art paintings?
Not the ones made with oil paints and acrylic painting, but ones made from all epoxy resin!
You think to yourself, hey I can make that! And now you feel the urge to make them, but starting epoxy resin art can be confusing.
And how can I paint with resin without wasting my _______?
Insert any of these…
Time.
Energy.
Money.
Sanity.
Tell that voice in your head to pipe down.
Here’s what you need to know to make beautiful epoxy art.
Why make epoxy art?
That question should be, why not make epoxy art? Every painting you make is a chance to be creative with resin. Plus, no two paintings are ever the same. You will never run out of things to try or techniques to learn.
The skills you learn in making resin art will help you make other resin crafts!
What kind of resin should you use?
For painting a surface with resin, the best epoxy for resin art would be a two-part high quality epoxy resin. This resin coats surfaces to give a smooth, shiny finish. I would avoid, deep pours or uv resin for this project.
Resin Epoxy Art Supplies
- Epoxy Resin
- Table Covering– we want to protect that table of yours from any spills or drips!
- Resin painting substrate– you can use Artboards, Canvases, Tiles, Vintage records
- ⭐️ BONUS: Here are more: resin painting surface ideas.
- Level– You need to be sure your surface is level so that your resin doesn’t run to one side. Then, completely off the surface.
- Colorants – such as alcohol inks or mica powders
- ⭐️ BONUS: Here are some of my best tips on how to color epoxy resin.
- Mixing Cups and Stirring Sticks
- Nitrile gloves – Protecting your hands is important. Resin kits contain chemicals that can irritate your skin.
- 💡 Pro tip: For the extra messy crowd, you may want to wear a plastic apron. It can take the resin drips instead of ruining your favorite shorts.
- Respirator – It’s an extra level of safety that ensures you can enjoy resin painting for a long time.
- ⭐️ BONUS: Learn more about respirators, including the one I use, in this resin safety article.
- Dispersion agents – such as alcohol, acetone, or silicone oil – Liquids like this are what help you to get cells in resin.
- Heat gun– You can use a heat gun to go over the surface to remove bubbles. Plus, you can push the resin around to create some unique effects.
- ⭐️ BONUS: How to use a heat gun with resin.
Steps to Make Resin Art
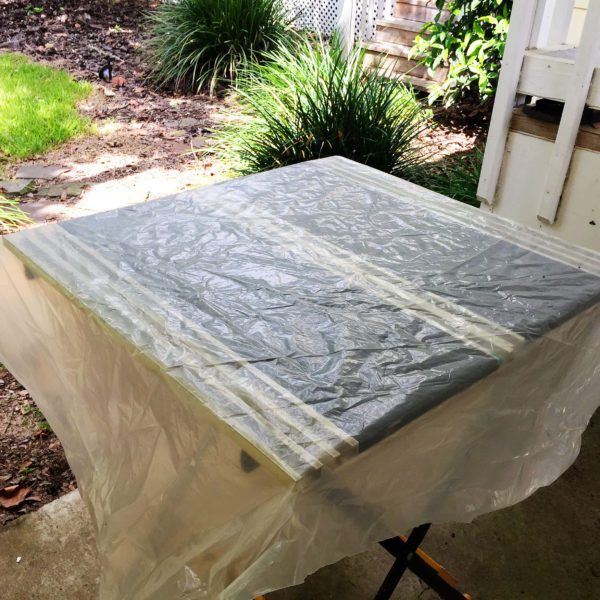
Step 1: Prepare your resin painting area.
You need plenty of room for your resin painting surface, plus extra space to allow the resin to drip off the side. Be sure your resin painting can stay undisturbed for a few days while the resin dries.
Resin may spill on the floor, but don’t worry – we have tips here for cleaning it up.
You need to work with resin in a well-ventilated room. If your outside temperature is warm enough, you can make epoxy art there.
⭐️ BONUS: Here’s the ideal temperature for resin.
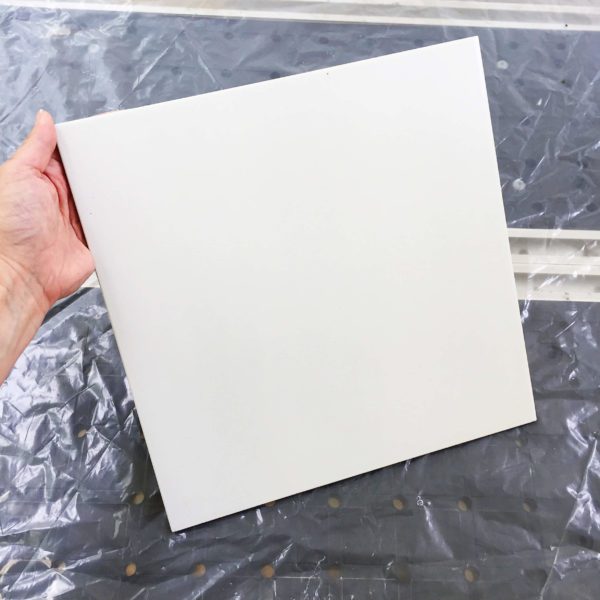
Step 2: Choose a surface for your resin art.
Choose a surface from the list above to be the base for your resin painting.
Step 3: Gather your supplies.
Have everything close by so you don’t waste time looking for your resin supplies.

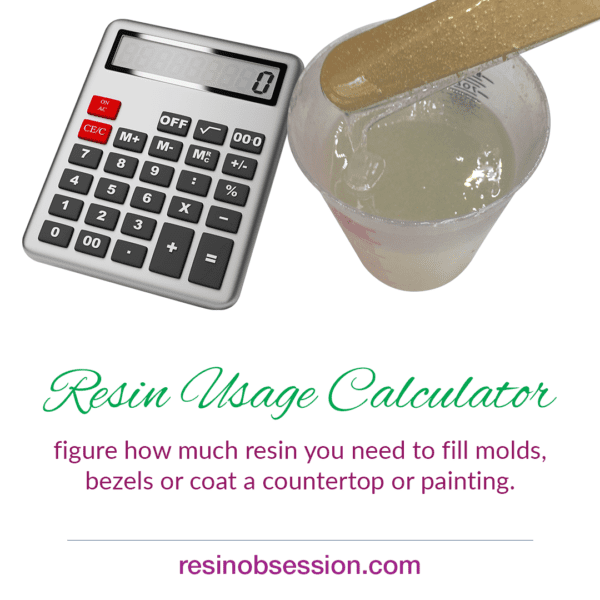
Step 4: Calculate How Much Resin You Need
Wait a minute. I have to do math??
No. You don’t need to do any math. (What kind of weirdo do you think I am? 😂)
We’ve done the hard work for you. Measure your painting surface’s length and width. Then, go to the Resin Obsession resin volume calculator. You input your dimensions, and it tells you how much resin you need to mix.
Step 5: Prepare the back of your resin painting
When the resin drips off the side of your painting, it will collect underneath along the edge. You can sand these drips off later. Or, you can add painter’s tape to the back, then remove it 18 to 24 hours after pouring. The drips will peel off with the tape.
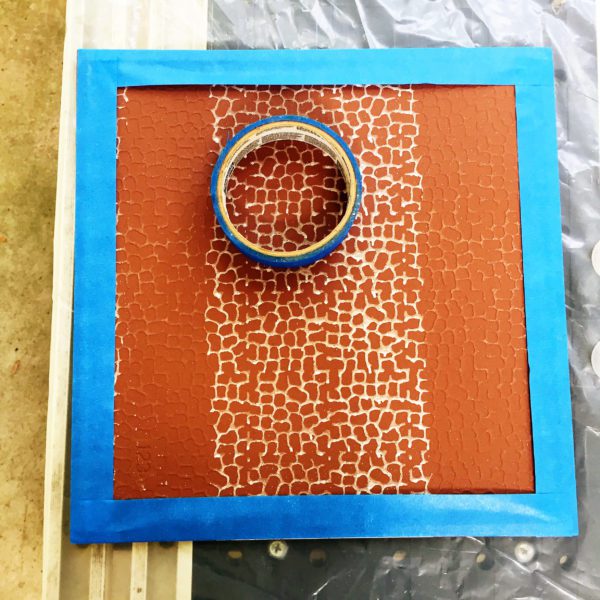
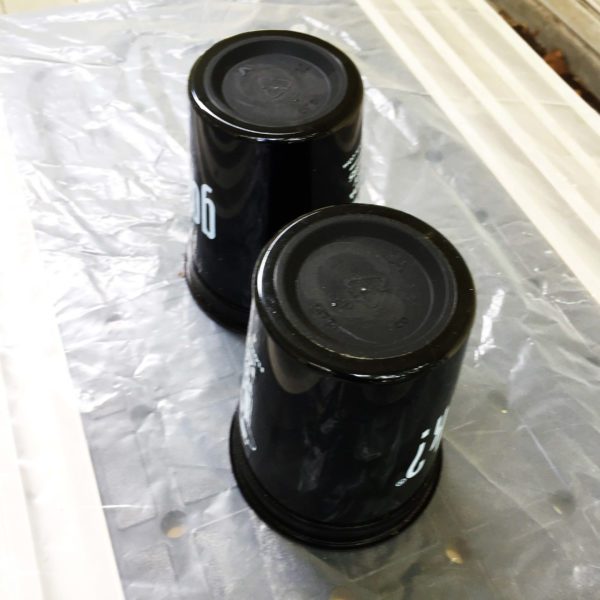
Step 6: Place cups underneath your resin painting surface.
You need to lift your resin painting surface to allow the resin to drip off the side. If you don’t raise the surface, the drips will cure as puddles around the edges of your epoxy art. And you’ll have to do MORE sanding.
Step 7: Level to make sure it is evenly balanced.
Your resin will quickly shift to the low side if your surface isn’t level. Plus, your colors will move, and blend quicker than you were expecting. And you might see the painting surface through the resin.
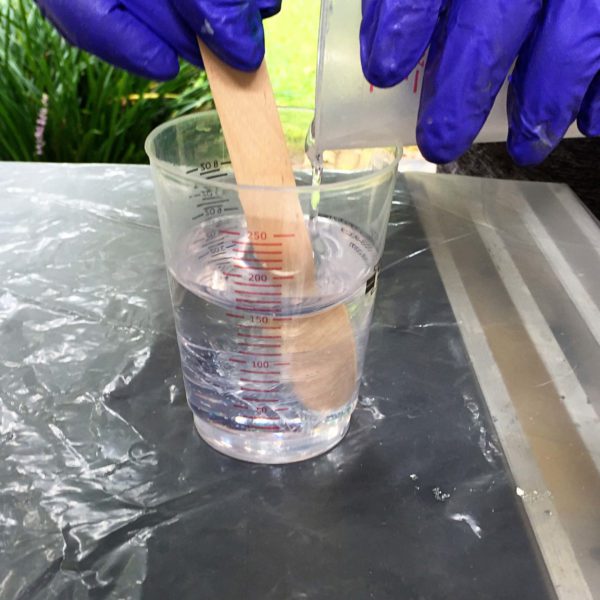
Step 8: Mix and Measure your Resin
The Amazing Clear Cast resin is a clear epoxy resin that mixes one part A to one part B by volume.
⭐️ BONUS: If you’ve never mixed resin before, you’ll want to read this: how to mix resin.
If you want to color the resin, now is the time to do it. Split your resin among several cups. Add your colors, then mix well.
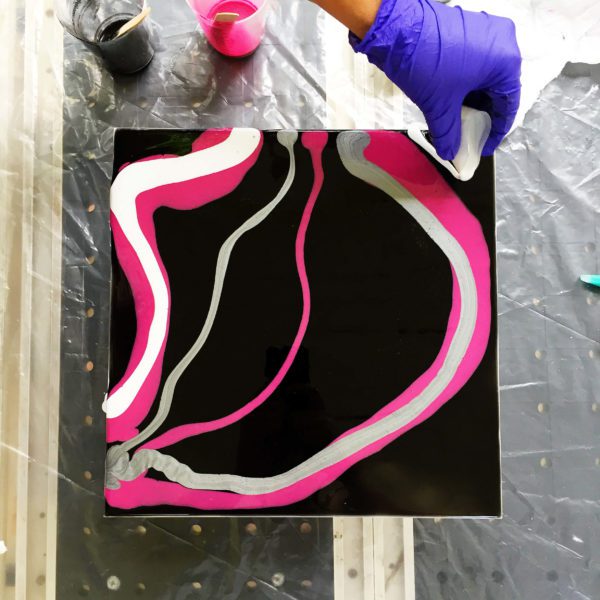
Step 9: Pour the Resin onto the Surface
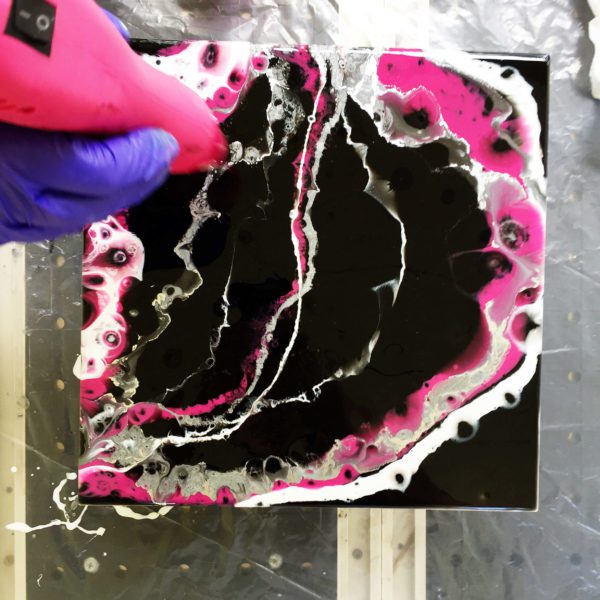
The easiest way to start is by pouring a small amount of the colors in ribbons onto your surface. Then, watch them blend. Next, use your stirring utensil to push the colors around. Another option is to tilt your resin painting surface back and forth to help the colors spread evenly.
💡 Pro tip: When you get a look you like, LEAVE IT ALONE. I have ruined epoxy art paintings because I didn’t stop when I should have.
Step 10: Apply some heat.
Go over the surface with a heat gun. It gets out bubbles and pushes the resin colors to create some exciting designs.
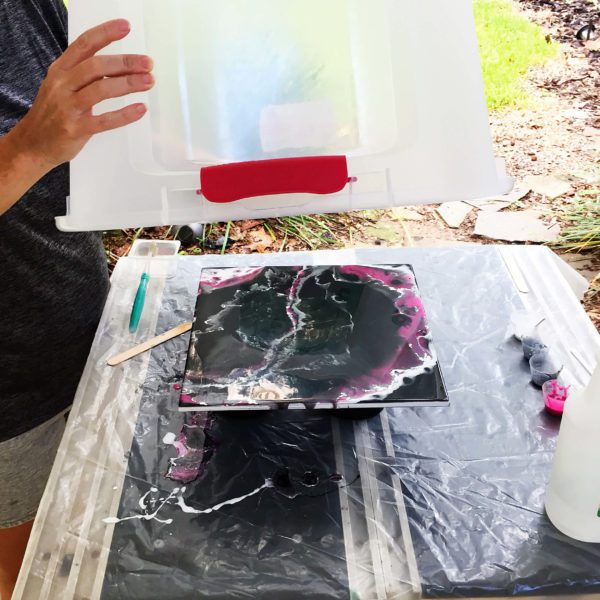
Step 11: Cover your epoxy art.
The cover keeps dust, hair, and other things out of your resin while it cures.
The curing time for this resin is a full 24 hours.
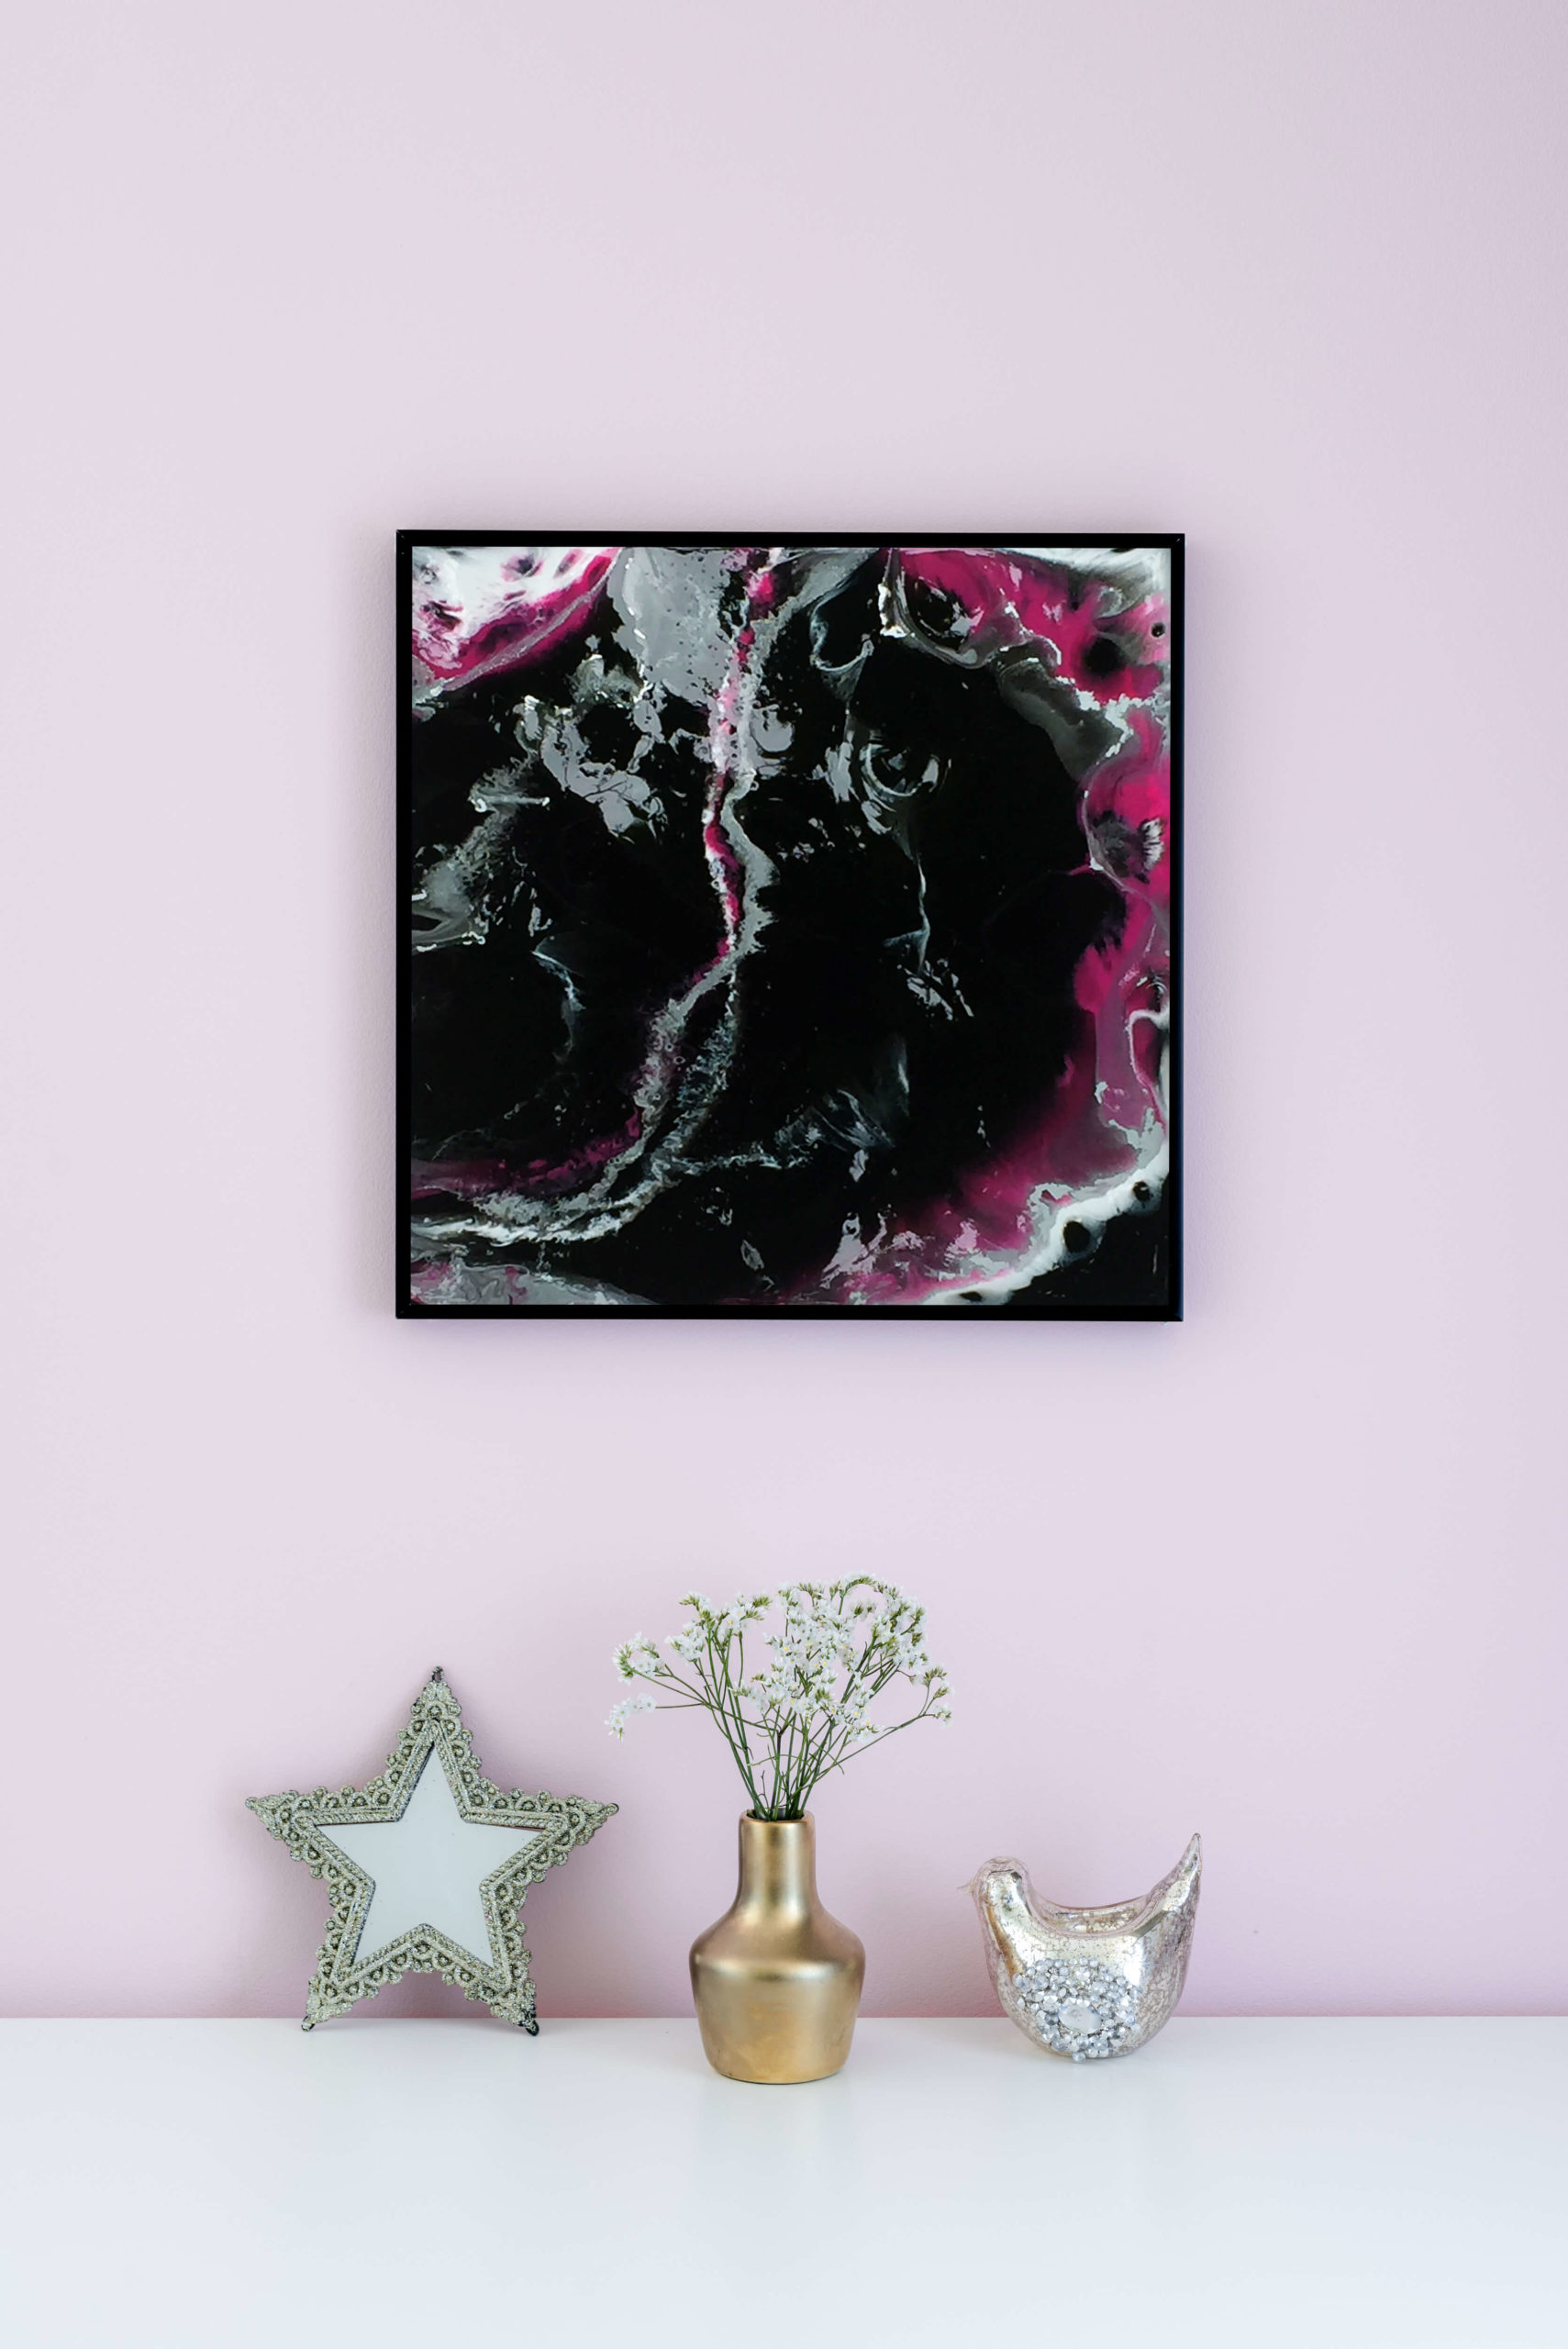
Step 12: Frame and hang your art.
Once you fully cure your artwork, it is time to show it off! Make sure to display it out of direct sunlight and away from heating and cooling vents. Your epoxy art is ready for you to enjoy for a lifetime.
Tips and Tricks
- Use a repellant to make those cool looking cells in your resin painting. Here are more details on how to get cells in epoxy resin.
- Try using metallic pigments or a metallic leaf to give your painting that extra shine!
- Avoid bubbles in your painting by warming your resin and hardener kit in a hot water bath for five to ten minutes before use.
- Work in layers. Working with multiple resin layers is an excellent way to create depth in your epoxy art.
- Go with the flow. Things go wrong, people make mistakes. It’s just the way of the world. Epoxy art is all about trial and error, keeping creating!
- Avoid Fish eyes. Fish eyes, voids, dimples, and other holes can sometimes happen when creating epoxy art. It happens enough that this topic deserves an article all to itself. Learn how to fix holes and fish eyes in resin.
Ready to make epoxy art?
Perfect! Get a [FREE] downloadable epoxy pouring supply shopping list.
For less than the price of a resin kit, you can get the downloadable ebook, Resin Fundamentals. It’s the book I wrote with the resin beginner in mind. You’ll learn the important details of creating with resin in under two hours. Buy the PDF book now and have it to read in minutes.
Unpublished Blog Posts of Resin Obsession, LLC © 2023 Resin Obsession, LLC
Thank you so much for your detailed instructions and helpful information, I will follow your advice and let you know the result.
Good luck Sam!
Thanks so much for all this info. Its beyond helpful. My question would be , what are the ideal temps to work in? I live in Arizona and its way to hot outside and I tend to keep the house cool at like 73° , we have solar and that helps. But I think its too cool inside and too hot outside. As ny advice? Besides dreaming of projects for later. Like October . Lol
Best advice “stop when you like the effect”….still learning that 😂. This tutorial (like all of your tutorials) is so thorough and I can’t wait to try doing some painting with resin.
Thanks, Jeannine. (Isn’t it funny how we artists can be so stubborn sometimes!! LOL)
Thank you for that it was very informative and you explained it better than others I have seen cheers
You’re welcome, Paula. Good luck with your next resin pour!
Thank you Katherine for your clear instructions. I have been really nervous to start using resin for my art products.
Thank you Joanne. I can’t wait to see what you create!
I would like to do some string painting with resin. Plan to try within the next couple of days. Every video I’ve seen always has acrylic paint for the string art. Don’t see why resin won’t work. Do you have any suggestions?
Hi Diane, I’m not familiar with string art with acrylic paints. Can you tell me more?
The order form won’t let me check out.
Hi Jody, I can see where you got your order placed. Was there something else going on we can help you with?
I have a similar challenge to Pauli. I live in TX and it is hot and humid outside nd cool inside. Can we use food dehydrators to cure resin? How about a toaster oven? If so, how long and at what temp? Thanks
Dawn
Hi Dawan, this article might give you some ideas: https://www.resinobsession.com/resin-frequently-asked-questions/resin-mixing-temperature/
By the way, I’m located in Florida and made this painting outside in the 95-degree heat and humidity. It is doable! 😉
Hi Katherine,
I have been looking for some sort of a printed nstructional book onresin art. I could find a couple, on Amazon, however, couldn’t find anything from Resin Obsessions. This email is very helpful, however, my printer is no longer working, and due to the virus and so many people working at home, there are no printers available suitable to my needs. Henceforth, I’m unable to print this out. If you know of any resin instructional literature/books I’d appreciate your input.
Many thanks.
Rosemary Gattelaro
Hi Rosemary, I’m sorry to hear you are having problems printing this out. Do you have access to a public library? They should be able to help you print this article.
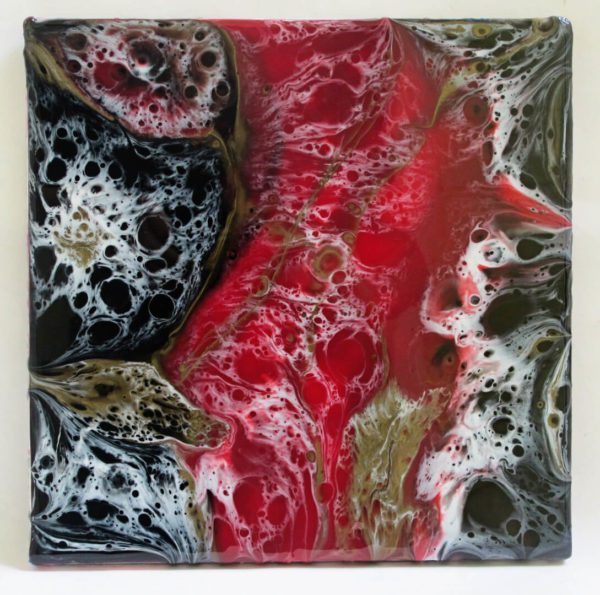
I want to make that beach piece you show at the top. What paints did you use for that?
Hi Patricia, you will need to use the Resin Obsession pigments in transparent blue and opaque white: https://shop.resinobsession.com/collections/liquid-colorants/resin-obsession
To do a dirty pour , how far along in the working time do you wait ? Or for a piece really , pitri dish , flip cup.
Have seen most of the resin was thick and pretty far a long in the working time . Thank you
Hi Curtis, it’s hard to say. Once you feel comfortable that you know when your resin isn’t workable anymore, pouring five minutes or so before that is where I would start.
Hello:
I’m interested in making backgammon checkers using this technique. During the course of a game, the sides of the checkers hit each other, as well has being hit by rolling dice and being pushed hard against the cork-lined railings. At the end of the game, when checkers are being removed from the playing area, they’re sometime shoved hard into the built-in channels on the board.
Will all this contact damage the discs? Each one would be 1.75″ x .37″.
Curious to know how much abuse they can take.
Thank you.
Hi Larry, I think it depends on the resin you use. If you cast with a hard-curing resin, I would expect the pieces to take use well. We have hard-curing resins in our store here: https://shop.resinobsession.com/collections/resin/casting
What can you put down that the resin won’t stick to? Then can you lay a rock with resin on it and it won’t stick to it?
Hi Jude, this article details surfaces resin won’t stick to: https://www.resinobsession.com/resin-resin-resin/surfaces-resin-wont-stick-to/
How can I block off a shape on a painting? Example, say I wanted resin in a heart shape in my painting. What can I use to form it into a shape? I need something I can use as like a heart shaped dam if that makes sense! Thanks !
I have been painting for years(oil,acrylic). Can acrylics be used to color epoxy pours? I like working with teens next door on trying to be creative using different mediums. l’d like to try epoxy for a sunset photo one of them really likes.
Hi Robert, sometimes acrylic paints work, sometimes they don’t. This article explains more: https://www.resinobsession.com/resin-resin-resin/how-to-color-resin/
This is a great guide! I’m a beginner and this has helped me a lot.
This is a great guide! I’m a beginner and this has helped me a lot.
I need to know more about this resin art please
What can we help with?