Hello, Techy Crafters and DIY Divas! Ready to take your phone from drab to fab with a DIY project that’s as much fun as a confetti cannon at a birthday party? Today, we’re diving into the dazzling world of UV resin to create your very own custom uv resin phone case. Let’s turn that boring case into a masterpiece that will make your phone the talk of the town. Grab your resin, and let’s get crafting!
What You’ll Need: The Ultimate Crafting Kit
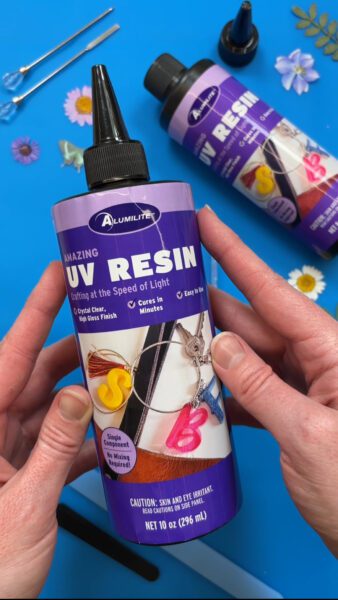
- Clear UV Resin: The magical goo that hardens under UV light.
- UV Lamp: Your mini sun for curing resin.
- Clear Phone Case: Find one that fits your phone model like a glove.
- Colorants and Glitters: Because life’s too short for plain phone cases.
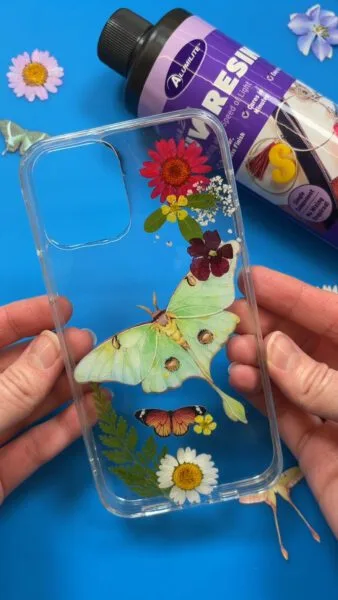
- Tiny Decorations: Think dried flowers, stickers, tiny charms—anything that makes you smile!
- Mixing Tools: Mixing Cups and stirring sticks
- Protective Gear: Gloves and goggles to keep things safe.
Step 1: Prep Your Creative Space
First, let’s set the stage. Cover your workspace with protective sheet to catch any resin mishaps. Suit up with gloves and goggles and cue your favorite playlist to get those creative juices flowing.
Step 2: Grab Your UV Resin
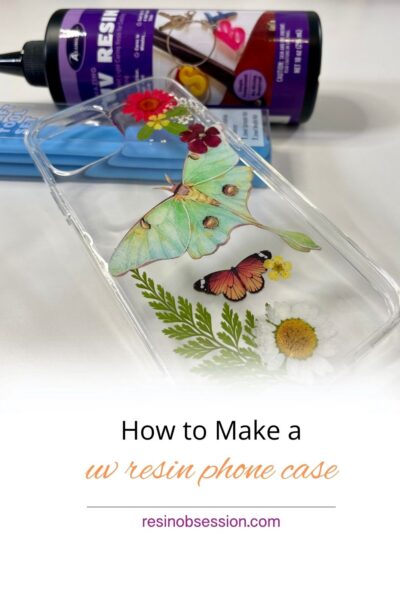
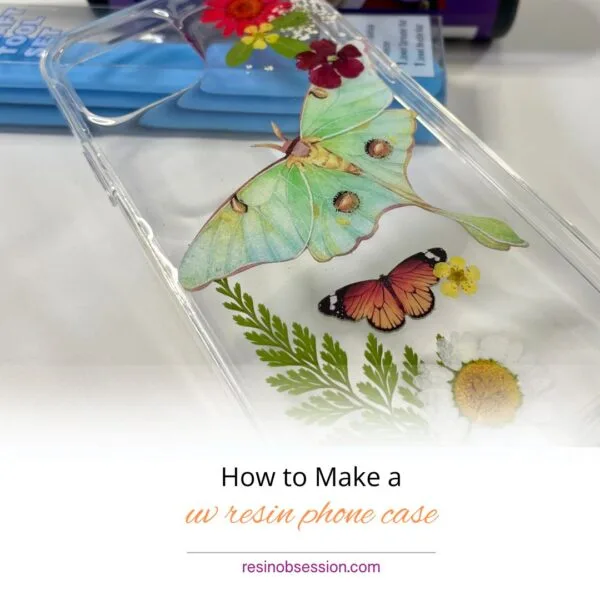
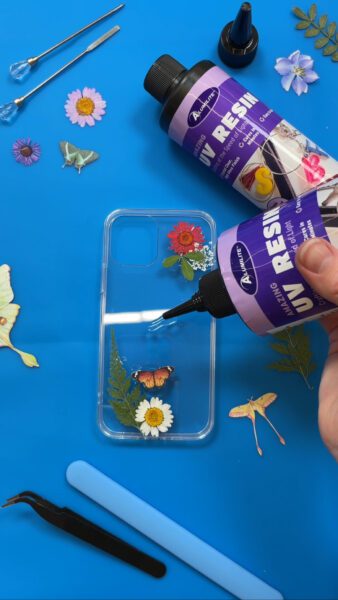
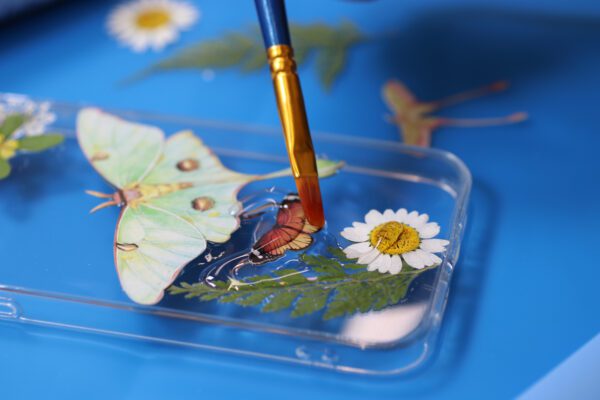
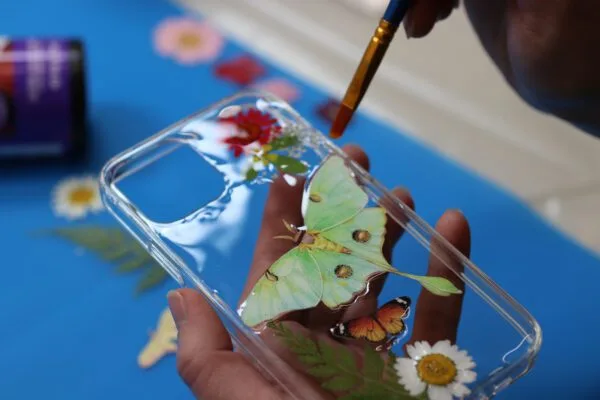
Use your clear UV resin as a glue to arrange your tiny decorations on the clear phone case. Dried flowers, mini charms, cute stickers—anything goes. Think of this as decorating a tiny cake, but way less edible.

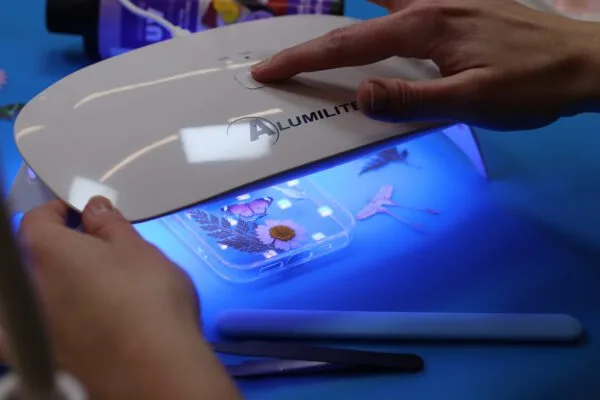
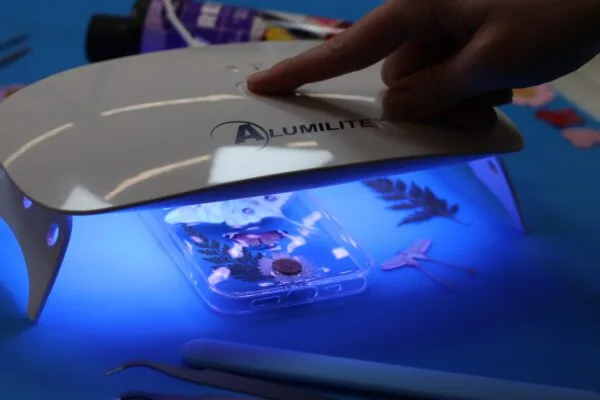
Step 3: Time to Cure
Once your decorations are perfectly placed, cure the first layer under the uv lamp.
The key to this phone case is working in layers!
Step 4: Final Layer
Once you’ve cured the decorations onto your phone case, add another layer of uv resin on top to seal them in! We don’t want those beautiful pieces going anywhere!
*Pro Tip: Use a lighter to remove any unwanted bubbles
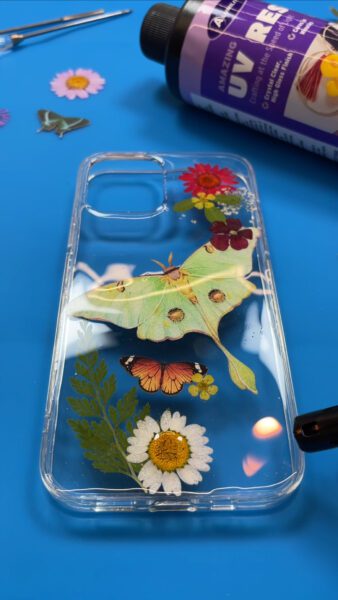
Step 5: The Final Cure
Pop your masterpiece under the UV lamp for its final cure. Depending on your resin and lamp, this could take a few minutes. Use this time to do a little victory dance because you’re almost there!
Step 6: Show It Off Your UV Resin Phone Case
Snap your new phone case onto your phone and show it off to the world. Take selfies, post on social media, and revel in the compliments that will surely come your way.
Bonus Tips for Extra Sparkle:
- Add multiple layers of resin and decorations for a 3D effect that will have people wondering how you did it.
- Experiment with different color combinations to match your style or mood.
- Always work in a well-ventilated area and follow safety guidelines to keep your crafting fun and safe.
Creating your own UV resin phone case isn’t just about protection; it’s about making a statement. Each case is a tiny piece of art that reflects your personality and creativity. So, grab your resin, get crafty, and let your phone case be the most fabulous accessory in the room. Happy crafting! 📱✨🌈
Thanks to Kelly for showing us how to create this amazing UV Resin Phone Case! Check out more of Kelly’s creations on Instagram @kellyybellyy62 or Facebook.