
 Did you know natural amber is fossilized tree resin? It came from resin that oozed from tree bark millions of years ago. Wearing amber as jewelry dates back centuries. It’s the original vintage find.
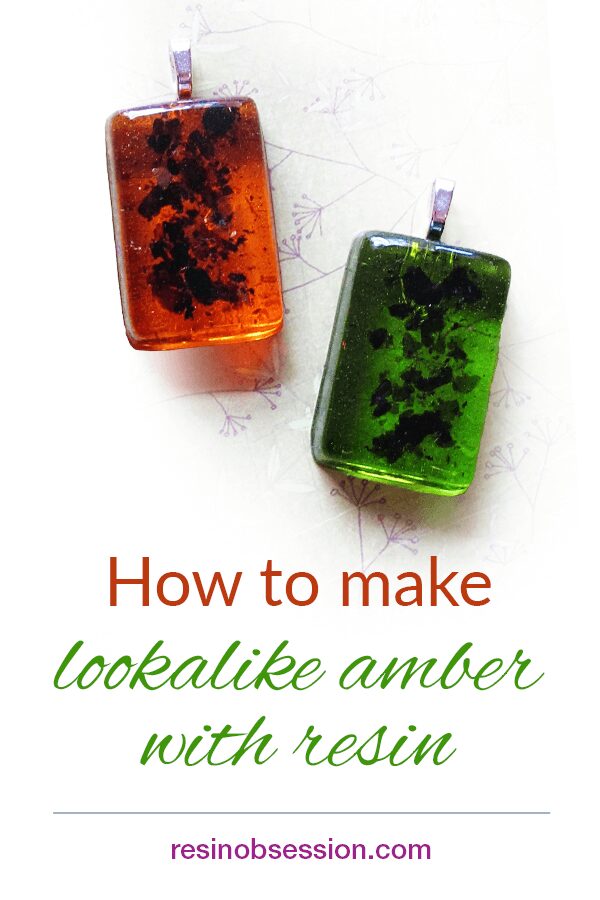
Here’s the cool thing. You don’t need to wait millions of years for amber for jewelry. Here’s how you can make lookalike amber with epoxy resin.
Step 1: Measure and mix your resin

Measure and mix your resin using mixing cups and stirring sticks. You’ll want to use Resin Obsession super clear resin to make your amber. It’s meant for molds and cures hard and durable.
Once mixed, divide the resin into two cups.
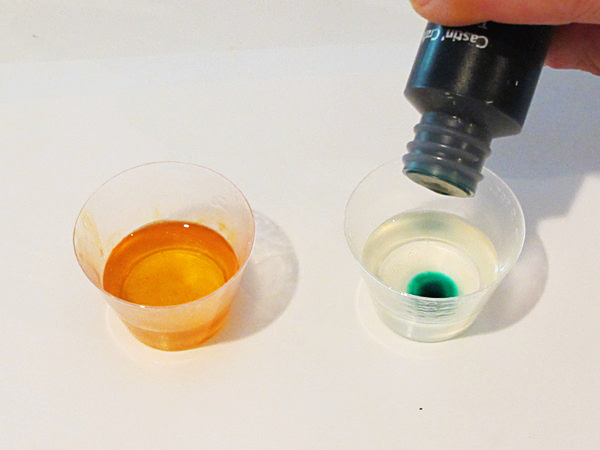
Step 2: Color the resin
You can make two amber colors:
To make traditional amber-colored resin, use two drops of transparent amber dye.
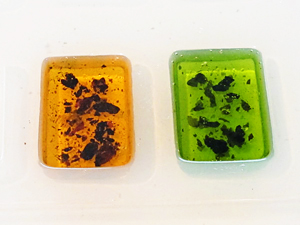
To make green-colored amber, use one drop of amber dye and one drop of transparent green dye.
💡 Pro tip: Adding the green by itself will make the resin look emerald-colored. You’ll need the amber dye to make it look like green amber.
Step 3: Add fragments
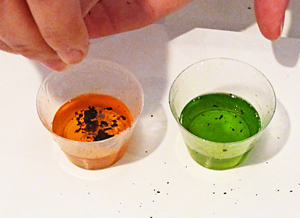
To give the resin the appearance of a natural fossil, you’ll need to add some inclusions. Mica fragments in the brown and gold color range work great for this. Crush or tear the mica flakes with your fingers to vary the sizes.
Then, mix the mica into your resin.
Step 4: Pour the resin into a mold
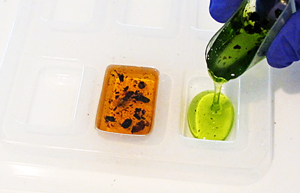
Select a resin jewelry mold and add your mixed epoxy. Larger mica flakes will sink to the bottom.
💡 Pro tip: If you want your mica flakes more evenly distributed, pour the charms into 2 to 3 layers.
Step 5: Allow curing
After pouring the resin, remove any bubbles before allowing it to cure.
Step 6: Demold
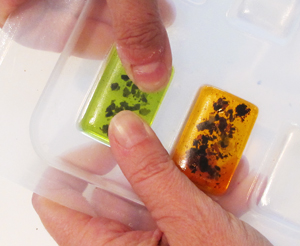
Once cured, turn the mold over. Gently push and twist from the back to pop the pieces out. If everything has gone well, the resin charms should come out easily.
Step 7: Finish
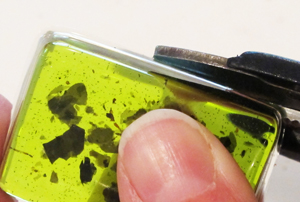
Trim up any resin edges. You can use scissors to cut away any tags or thin pieces, then go over the edges with wet/dry sandpaper to smooth them up.
Step 7: Apply a jewelry bail
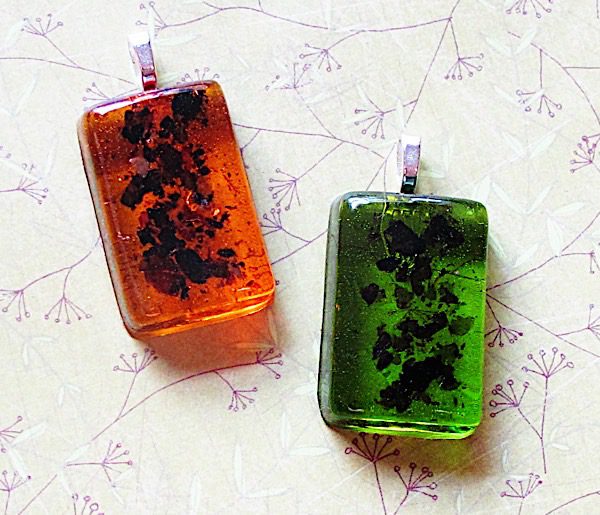
Now it’s time to make your lookalike charms wearable. The easiest way to do this is to add glue-on bails. Use E-6000 to adhere the bails to your resin.
Woo-hoo! You just learned how to make amber with epoxy resin.
Want to make resin jewelry but feel confused with all the information out there?
It’s not your fault. You can spend hours reading blogs and watching videos and still feel no closer to getting started. That’s why I wrote Resin Fundamentals. It takes aspiring resin jewelry makers on a path to making beautiful resin jewelry from the first try. Buy now and get an email download link in minutes.
Unpublished Blog Posts of Resin Obsession, LLC © 2023 Resin Obsession, LLC
Thank youso much ffor sharing, I’m
A huge amber fan especially green amber!
Thank you for sharing this information! I also love amber color and green amber. Several years ago I purchased a pendant from a co-worker, I always wondered how she did them. I’m anxious to try it try.
Awesome thanks! I’m storing my in-laws 100-year-old secretary and it has Amber reads on the handles. I will be trying this in the next few weeks. Is there a way to make the Amber darker? Do I use more drops or add red?
Yes Jennifer, you can do that.
Excellent, i will try both and see which matches what i need. Thanks!