
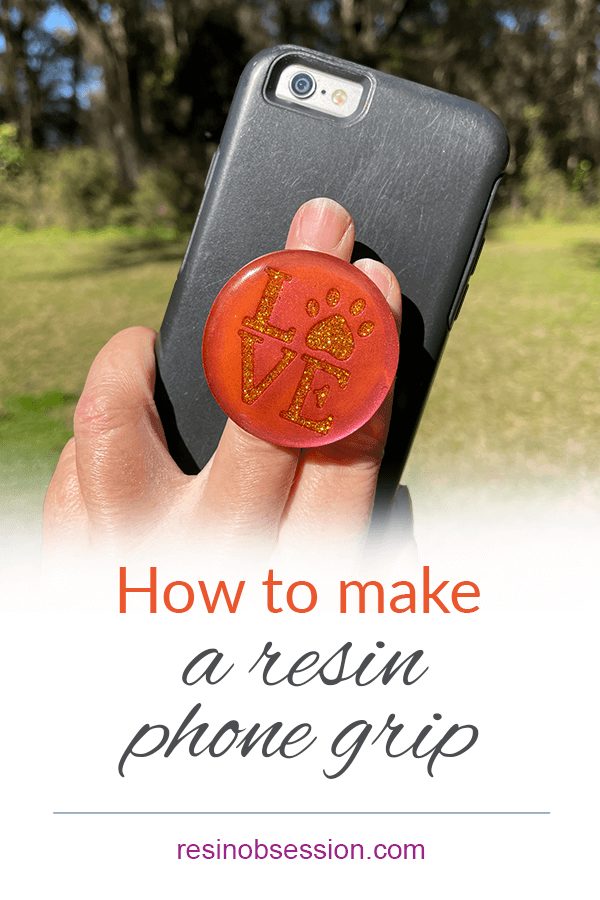
Your phone is no longer your phone. When was the last time you used it to make a phone call? Instead, we text, take photos, and play Wordle. Of course, all while multitasking and getting a video for social media. Which brings me to the next part. Until I can grow an extra arm to hold my phone, I’ve got to lean on the next best thing. Which is a way to balance the phone to help me capture all my resin videos. That, my friends, is why I’m going to show you how to DIY a phone grip with resin.
Step 1: Get a phone grip mold.
To make a resin phone grip, you’ve got to have a vessel to form the resin. In this case, a silicone phone grip mold works perfectly. And with many options on one mold, your phone can change grips faster than this.
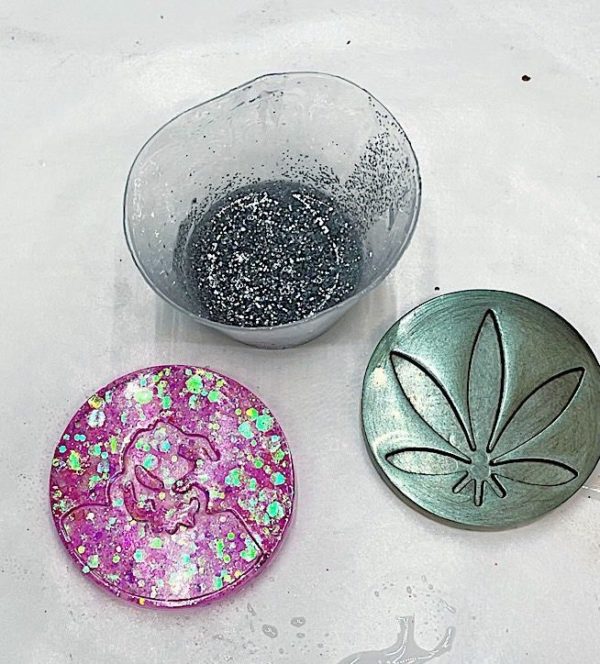
[OPTIONAL] Step 2: Color the silicone mold.
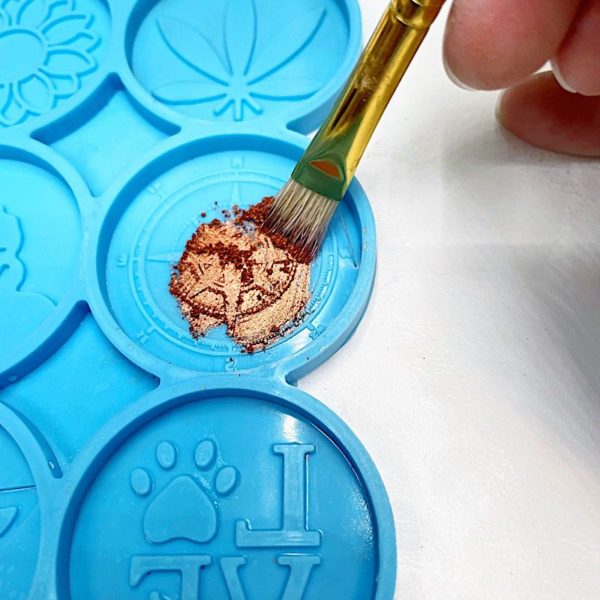
This is one of the ways you can color resin, but you need to do it before you mix resin.
Use a paintbrush to dust colored resin powder onto the silicone surface. Tap out the excess.
⭐️ BONUS: Learn two ways to use powder to color resin.
Step 3: Mix resin.
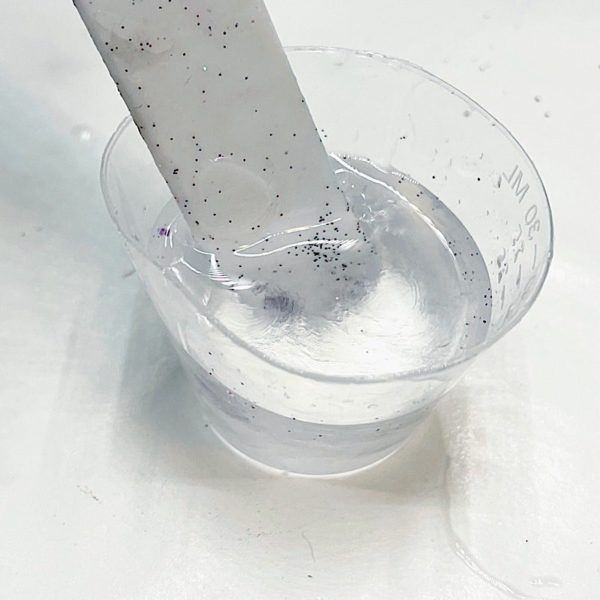
Measure and mix a resin for crafts for the mold. The Resin Obsession super clear is the resin for this DIY phone grip. It cures hard and won’t get bendy after curing.
Adding glitter and other resin colors are optional at this step, but that’s part of the fun of using clear epoxy. You can make it look like anything you want.
⭐️ BONUS: If you’ve never mixed epoxy before, here’s how to mix resin in five easy steps.
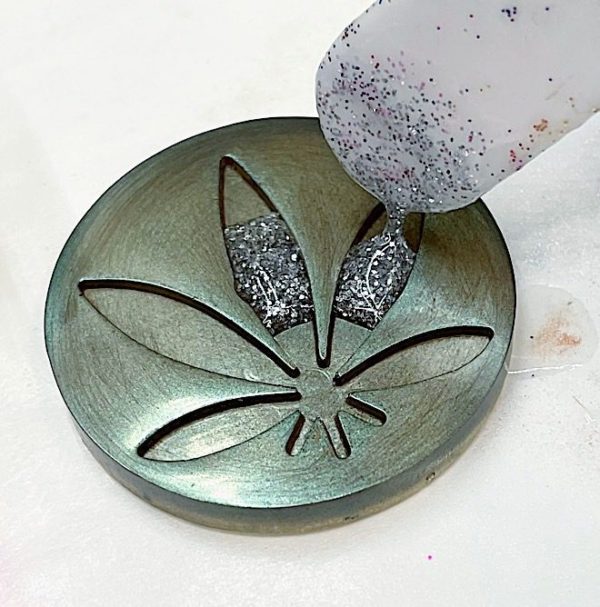
Step 4: Add to the mold.
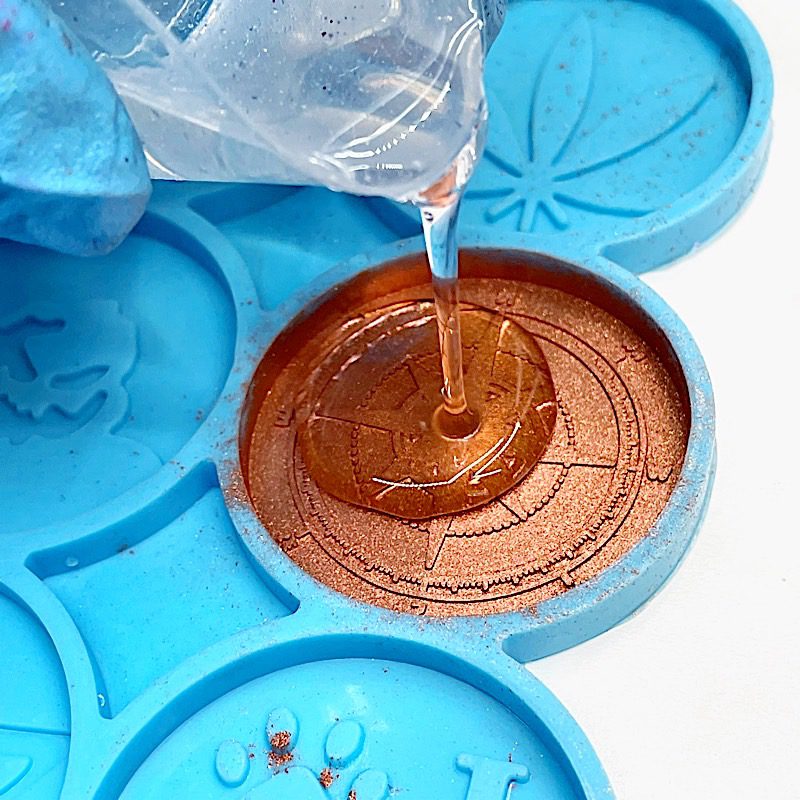
Pour your mixed epoxy into the mold. Don’t worry about the powder. It will stay on the mold surface.
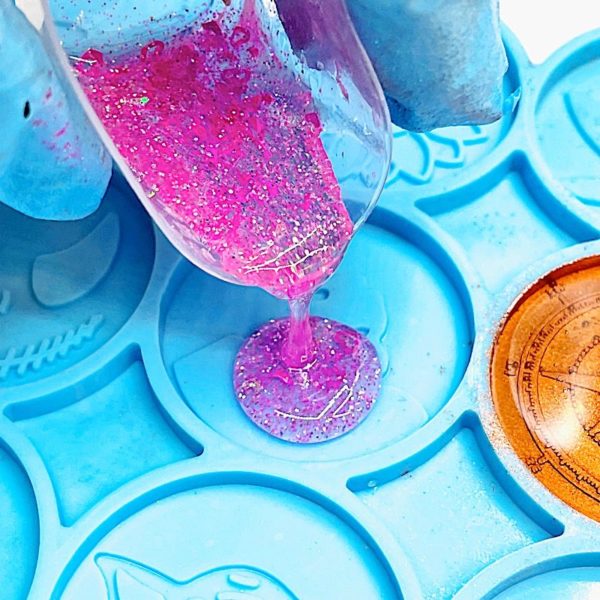
Glittered resin looks dazzling for a DIY phone grip too.
Step 5: Remove bubbles.
You’ll need to check your mold for bubbles and pop them before your resin starts curing. Go over the surface with a heat gun for this step.
⭐️ BONUS: Here’s how to use a heat gun with resin.
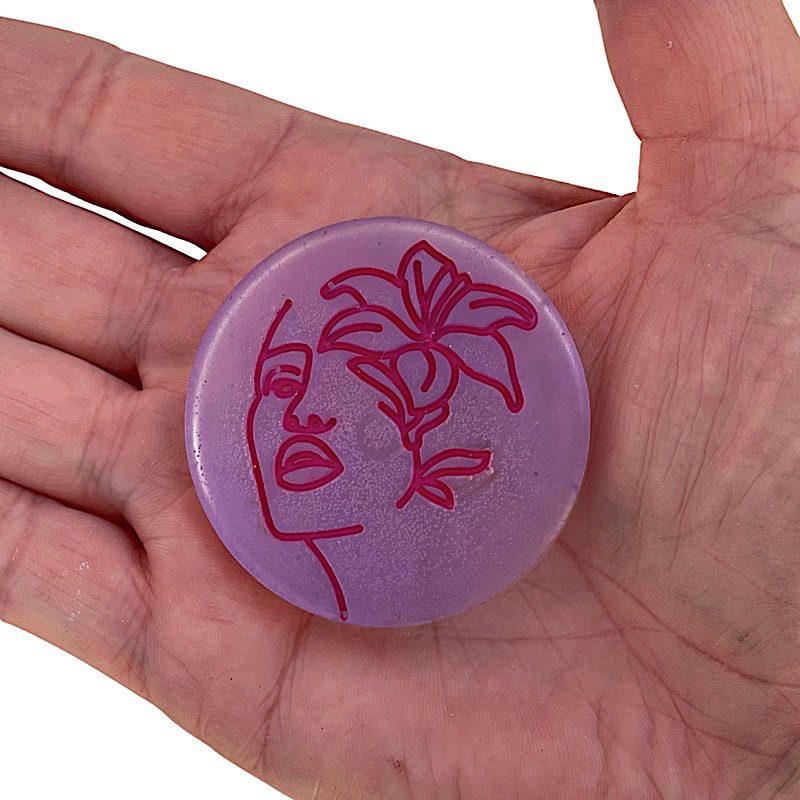
Step 6: Demold.
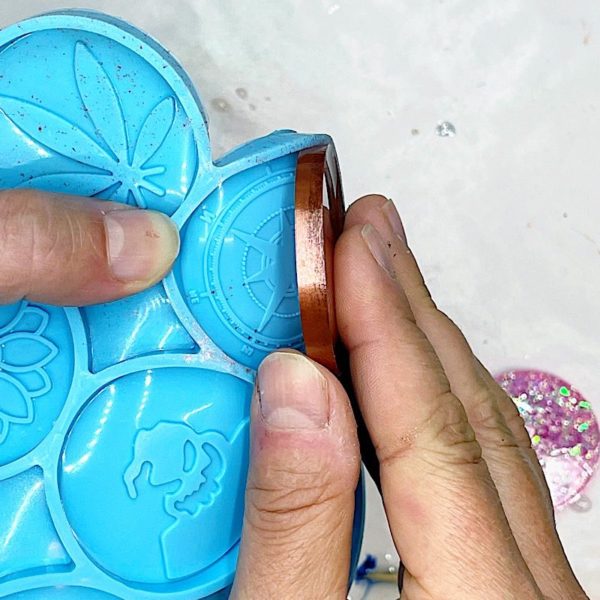
After the resin dries, peel it out of the mold. It should come out like you’re taking the skin off a banana. Unless you don’t take the skin off of bananas before you eat them. In that case, pretend you peel bananas, you maverick.
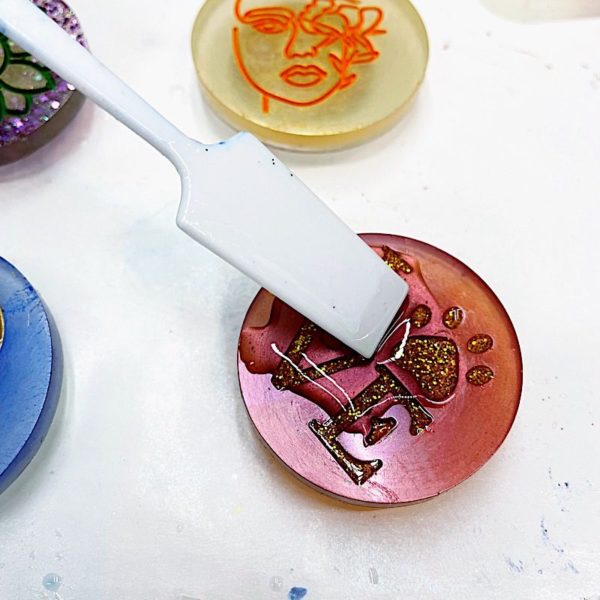
Step 7: Highlight details.
You need to accent the design to make the patterns easier to see on your DIY phone grip. You’ve got a couple of options to do this step.
Option 1: Use paint
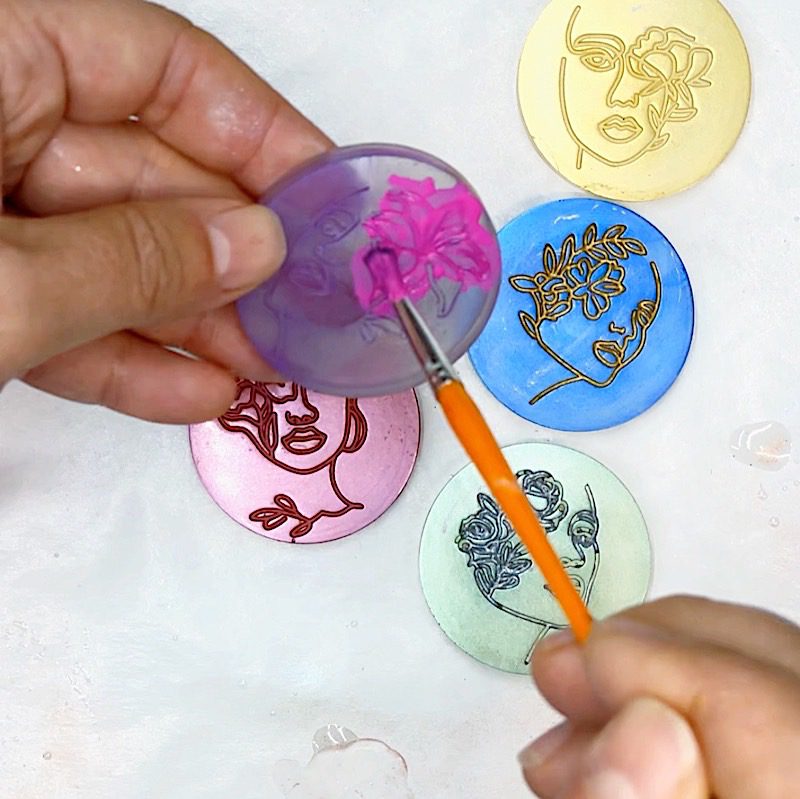
Choose a color of acrylic paint, then add it to the recesses. You can get sloppy with this part.
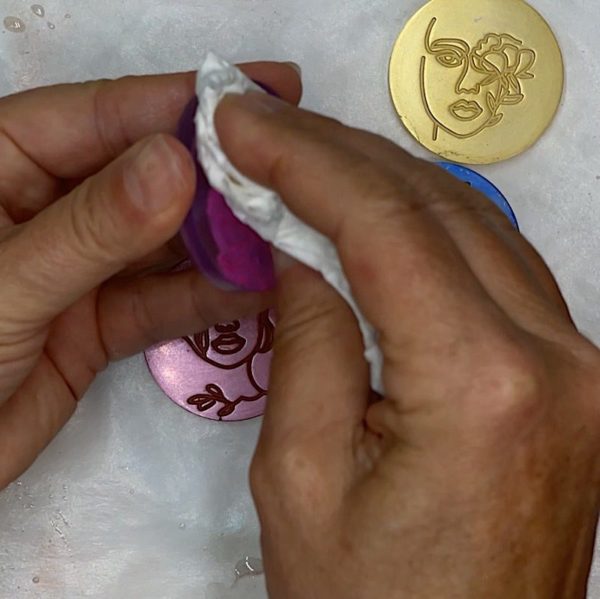
While the paint is still wet, wipe off the excess with a paper towel.
The color stays in the recesses.
Option 2: Use colored resin
If your hollow spots are large enough, you can mix more resin and add it to the open areas.
💡 Pro tip: Ease up on the coffee if you’re going to do this. It takes a steady hand.
Whichever way you decide, let your DIY phone grip dry for 24 hours before continuing.
[OPTIONAL] Step 8: Add a resin topcoat.
If you want a glossy surface for your DIY phone grip, you’ll need to add another layer of resin. Plus, it protects the paint details you so carefully included in the last step.
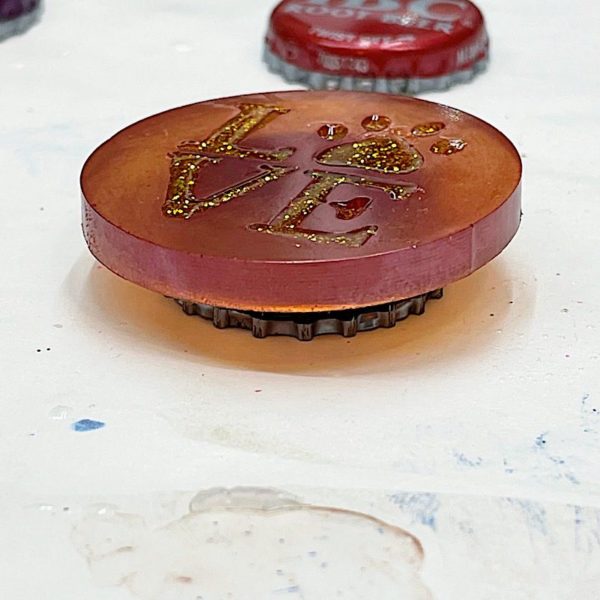
Elevate your resin charm so the resin can drip off the side. A bottle cap is the perfect size.
Then, use an epoxy resin kit that will cover the surface evenly. The Resin Obsession crystal doming resin is perfect. It mixes thick and uniformly levels over a surface without you having to do any extra work.
Once you’ve applied the resin, check for bubbles before giving your phone grips 24 hours to cure.
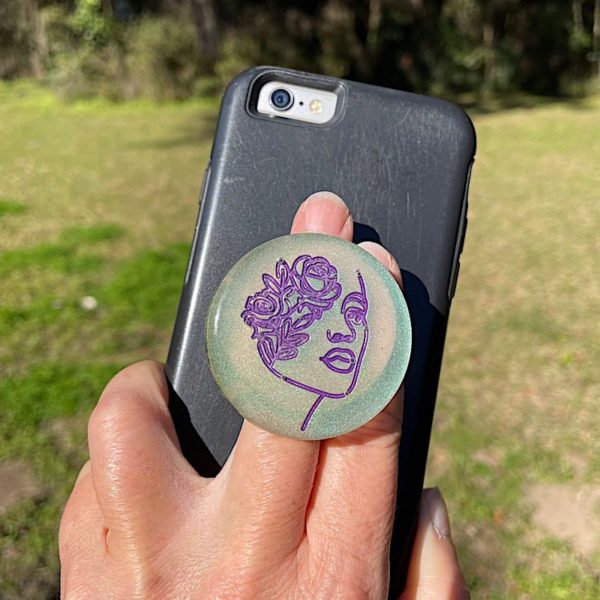
Step 9: Apply to the plastic phone grip.
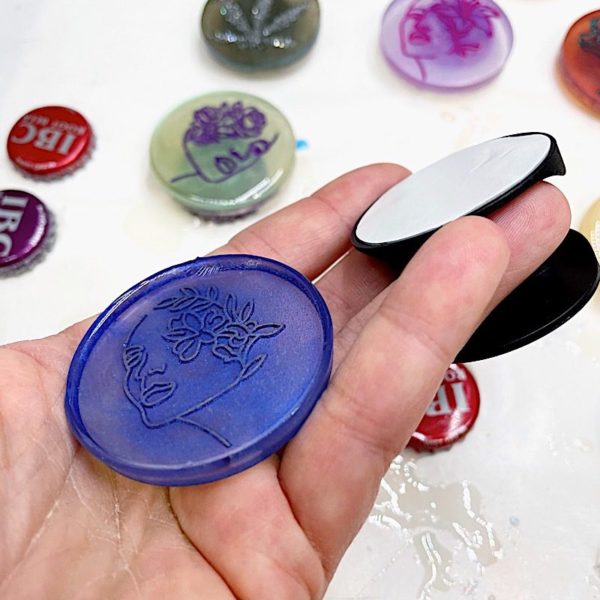
Now it’s time to apply the resin charm to the phone grip holder. Hold the phone grip in your hand to see how you like the fit. Then, glue the resin charm to the back.
💡 Pro tip: The adhesive on these phone grip holders isn’t great. Epoxy makes a great glue, and you don’t need much. You can do this step when you have leftover resin from another project.
Let your adhesive dry for 24 hours before using your DIY phone grip.
Give yourself a high-five because you just made something incredible with resin.
Want more help crafting with resin?
Then you’ll want a copy of the resin book I wrote for beginners. Instead of making a resin mess, you can learn from my 17 years of resin experience. I share everything you need to know in easy-to-read details. Buy the PDF ebook now, and a download link comes to your email in minutes.
Unpublished Blog Posts of Resin Obsession, LLC © 2023 Resin Obsession, LLC
You guys rock! You always answer anytime I got a dumb question. You make me feel like it’s a very popular question. I love everything I buy from y’all. Super quality n awesome prices. Thank you! Debs from Texas
Oh goodness, Debs. We love helping you with your creativity!
Hi Michelle, I don’t know about bulk, but we do have them in stock and ready to ship in our store here: https://shop.resinobsession.com/collections/molds/phone-grip