
 Old-school snail mail greeting cards are still a thing. Sure, you can text emojis. Or send a direct message. Or email a note that’s likely to get buried in someone’s inbox. But greeting cards have the superpower of giving joy with something you can touch and keep. And maybe you’ve held onto your greeting cards wondering how you can reuse them.
Grab that stack. Because you’re going to learn how to reuse those paper treasures in epoxy resin.
Supply list:
Greeting cards
Mod Podge glue
Scissors or 1-inch paper punch
1-inch square bezels
Paintbrush
Resin Obsession crystal doming jewelry epoxy resin
Mixing supplies
Heat gun
Glitter glue
Scrapbooking stamps
Stamp pad
Decorative scrapbook embellishments
E6000 jewelry adhesive
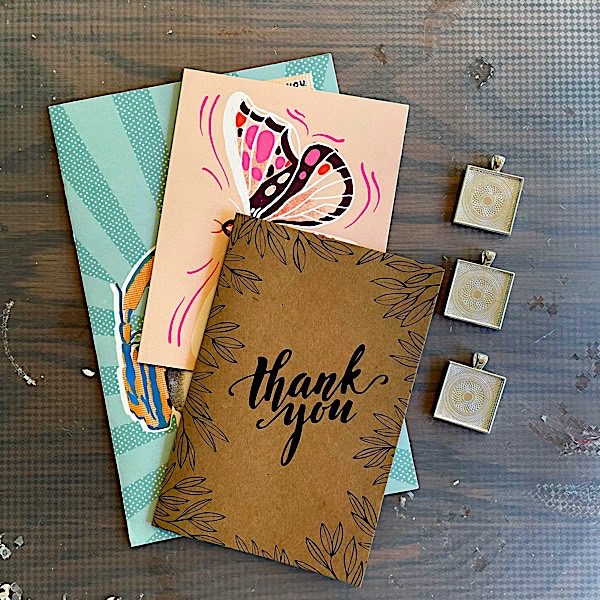
Step 1: Choose your designs
Pick cards from your collection made from heavy cardstock. They’ll be easier to place into the bottom of the bezel without trapping bubbles.
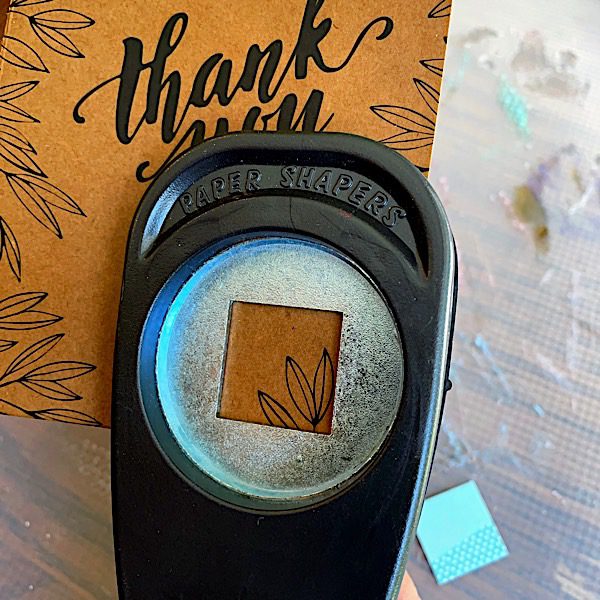
Step 2: Punch the cards
Choose a part of the card to include in your bezel.
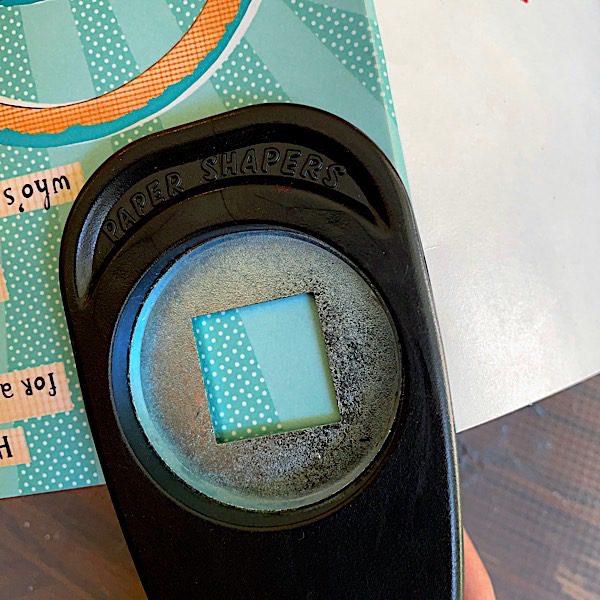
Don’t worry about the design looking uniform. That’s part of the fun of using greeting cards. They won’t have the repetitive designs of scrapbook paper.
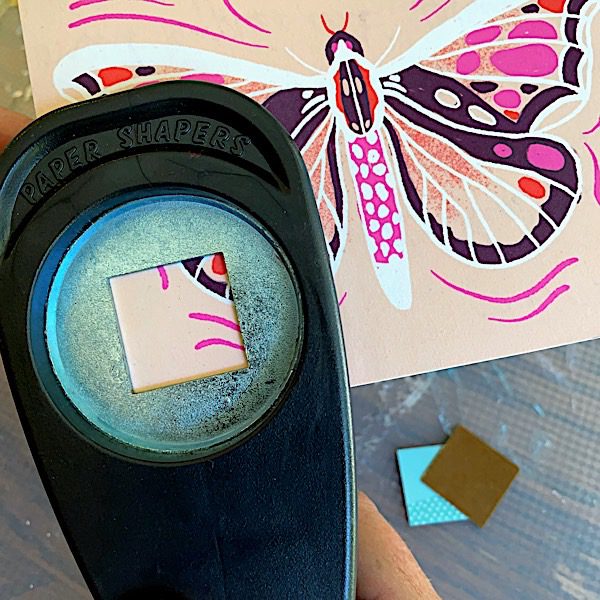
And you’ll make good use of the unusual nature of the designs too.
Step 3: Glue the papers to the bezel blanks
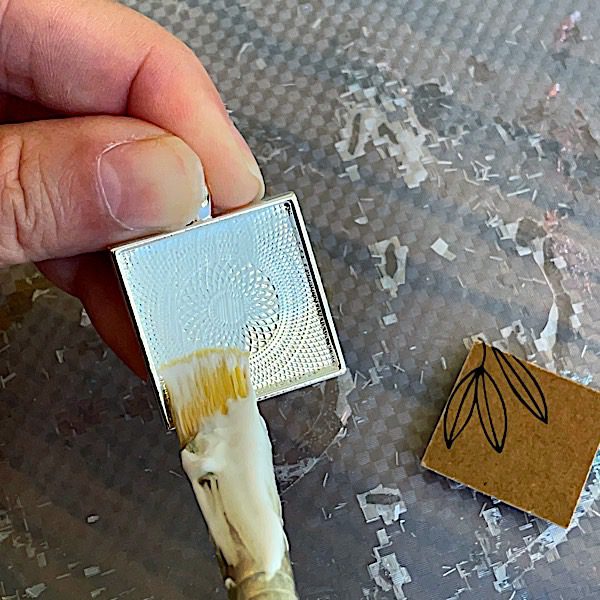
Brush a layer of glue to the bottom of the bezel.
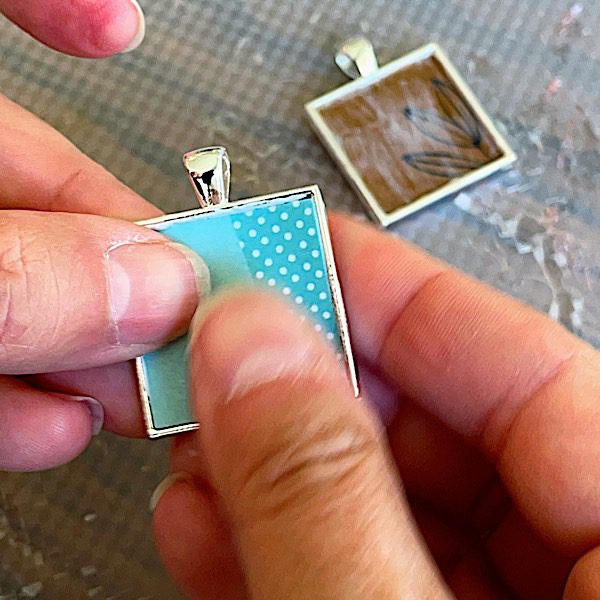
Then, press the paper onto the glue.

💡 Pro tip: Use the blunt end of your paintbrush to press the paper into the corners. This is a common place for bubbles to appear when you add your clear doming epoxy.
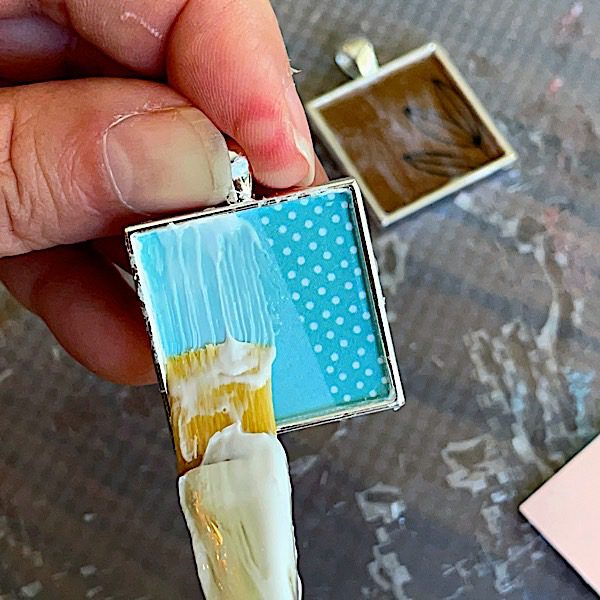
Add another glue coating and let the glue dry. It’s important when you reuse greeting cards with epoxy that you seal them. Otherwise, the paper will darken.
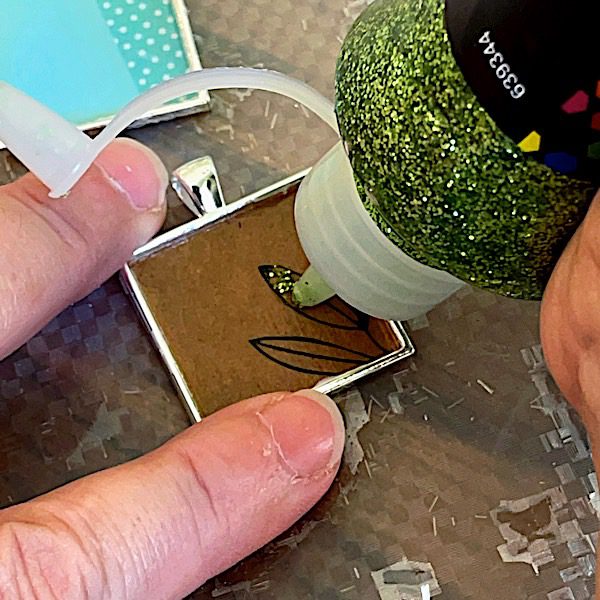
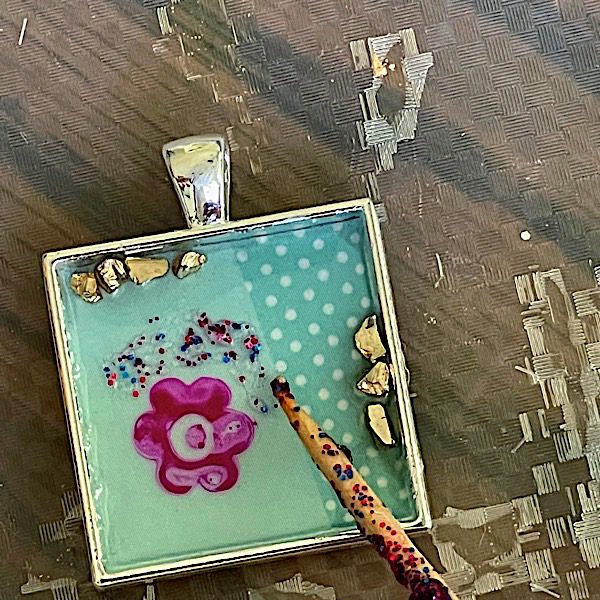
[OPTIONAL] Step 4: Add glitter
You can embellish your paper with glitter glue to highlight the details.
Step 5: Add doming resin
Mix crystal doming resin and add to the bezel in a thin layer. This resin is important to this step because it self-levels.
DO NOT overfill the bezel. You only need enough to cover half the bottom. Then, use a toothpick or mixing stick to spread it out.
Add chunky glitters if you want. They’ll add visual texture to the card design.
Go over the resin with a heat gun before letting it cure.
💡 Pro tip: If you’ve never crafted with epoxy before, spend a few minutes reading how to mix epoxy resin. You want to be sure your resin cures without sticky spots.
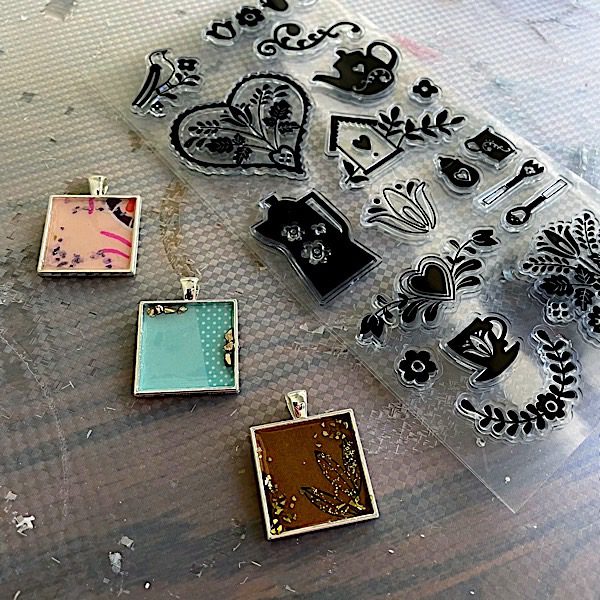
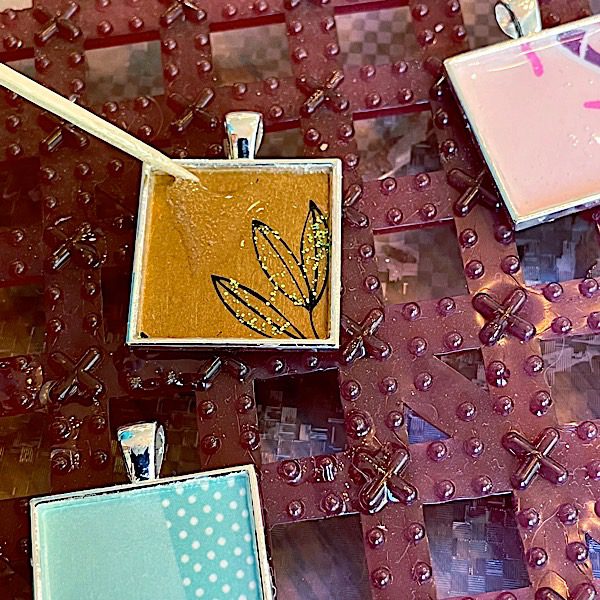
Step 6: Choose a stamp design
Select stamp designs that compliment your greeting cards.
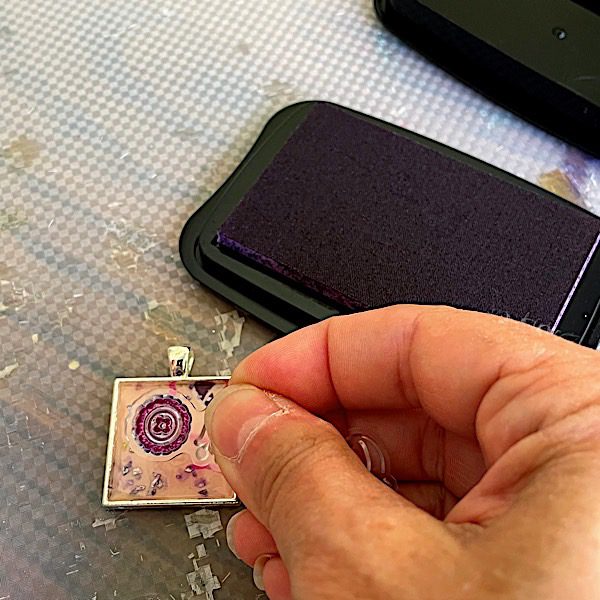
Ink the design. Then, press onto the cured resin.

Don’t get caught up in making sure your stamp adds the design perfectly.
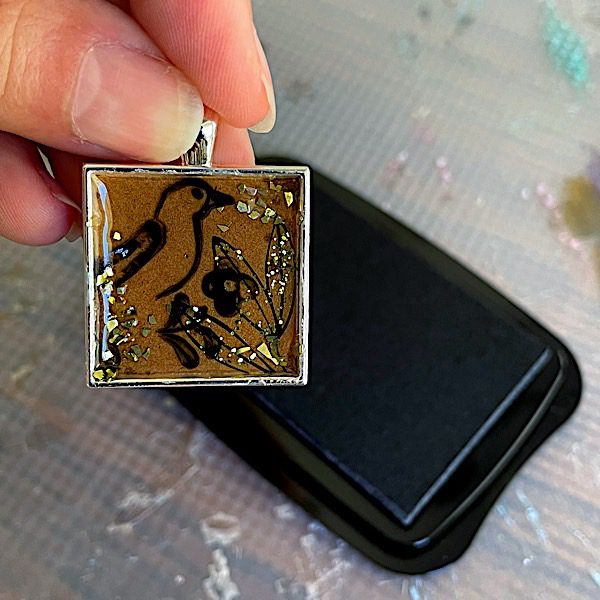
That beautiful imperfection adds to the uniqueness of the greeting cards you reuse for these pendants.
You can add more glitter glue at this step if you like.
Let the ink dry for 24 hours before continuing.
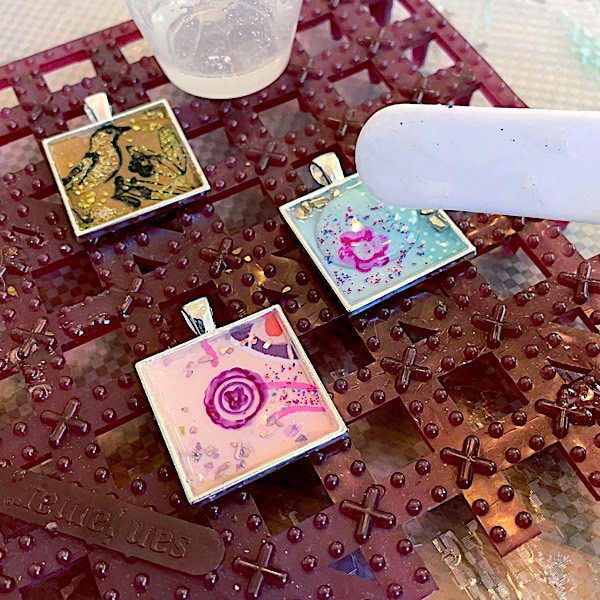
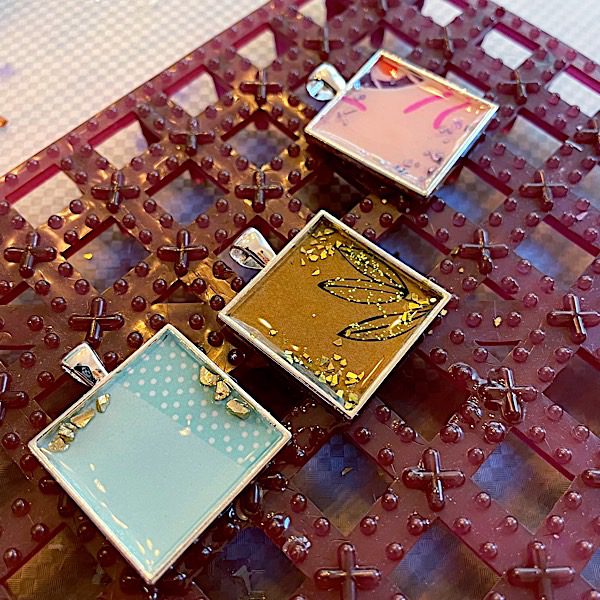
Step 7: Add more epoxy
Add a second layer of crystal doming epoxy resin. You’ll want it to be even with the bezel edge or a smidge higher.
Let the resin cure for 24 hours.
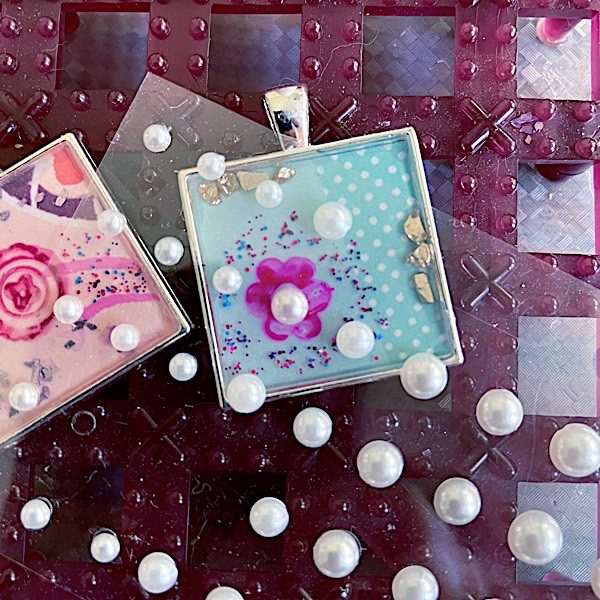
[OPTIONAL] Step 8: Add embellishments
The design can look flat when you reuse greeting cards (or any other papers) in bezels. But, by adding scrapbooking notions, you give the design an extra layer of depth.
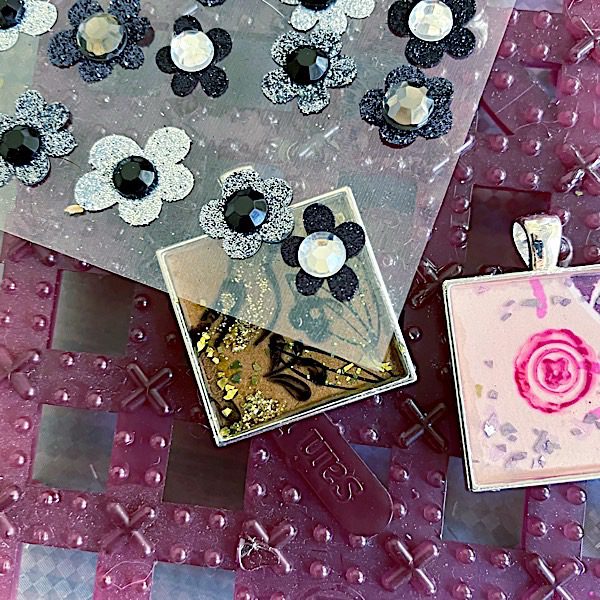
Find something that gives flair to your design. To bond it permanently, add more mixed epoxy or use jewelry adhesive.
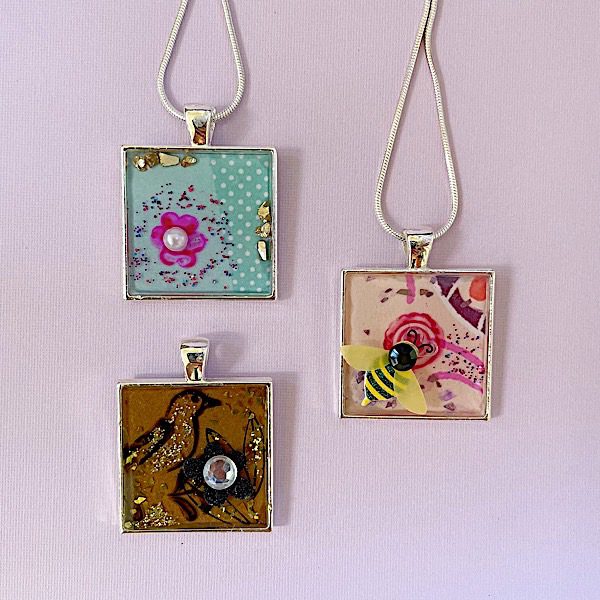
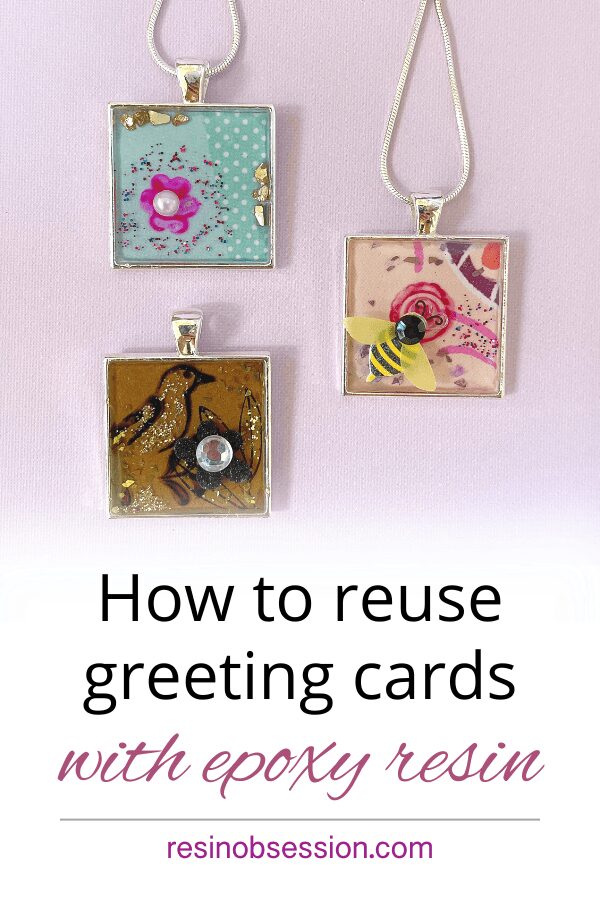
Ta-da! You just learned how to reuse greeting cards to make resin jewelry.
This bumblebee design is my favorite. Even though the original paper design wasn’t a flower, it looks like it was.
You’ll love using greeting cards from holidays throughout the year. Keep your greeting cards in a box so you’re ready to reuse them when you need a creative nudge.
Ready to try epoxy resin but unsure of the next step?
It’s okay. I felt the same way when I started with resin over 17 years ago. It’s why I wrote the ebook Resin Fundamentals. It’s got all the vital details resin beginners need to know to avoid mistakes and wasted supplies. Buy the PDF book now, and it’s yours to download in minutes.
Unpublished Blog Posts of Resin Obsession, LLC © 2023 Resin Obsession, LLC
Do you take debit cards? I have order a couple of items before with my debit card, but I don’t see that option today. I don’t have Pay Pal, nor do I want to get it. Please advise!
Hi Jeff, as long as the debit card has a Visa or Mastercard logo on it, we can take it.