
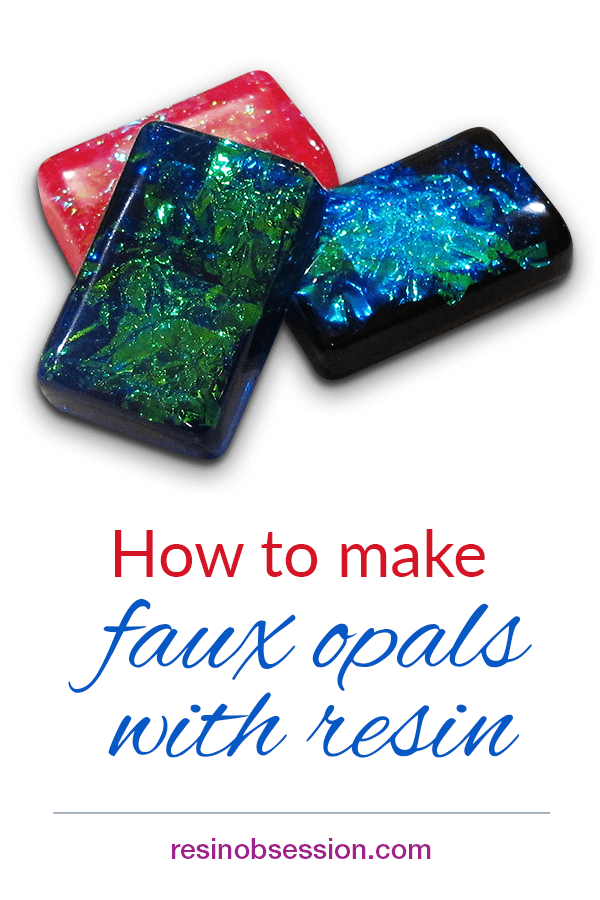
 Love opal jewelry but don’t love the price? Making a faux opal with epoxy resin is fun and easier than you might think. Not only are they fun to create, but they will cost you only a fraction of the price of real opals.
Supply list:
Cabochon jewelry mold
Resin mold release
Iridescent papers
Resin Obsession super clear jewelry resin
Resin Obsession opaque color pigments
1-ounce mixing cups
Stirring sticks
Safety gloves
Step 1: Choose a mold
Use a jewelry mold in a shape you like.
Step 2: Apply mold release

Mist mold release over your mold and let dry it dry for at least 30 minutes.
The mold release ensures your faux opal charms pop out of the mold easily.
Step 3: Cut papers
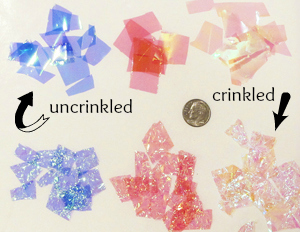
Cut iridescent papers into various sizes, about the size of a dime. You can buy iridescent papers in the gift wrap section of craft stores.
Crinkle the papers or leave them smooth. (more coming on that)
Step 4: Add resin
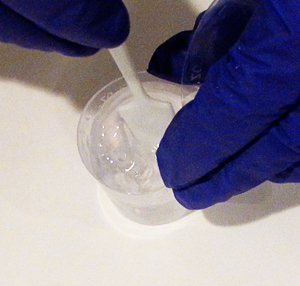
Mix 1 ounce of jewelry resin for this project. The super clear resin is perfect for this project because it cures crystal-clear. It releases bubbles quickly, making it perfect for mold projects.
Only fill mold cavities halfway with the mixed clear epoxy resin.
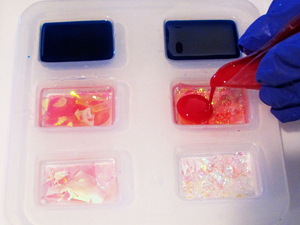
Step 5: Add papers
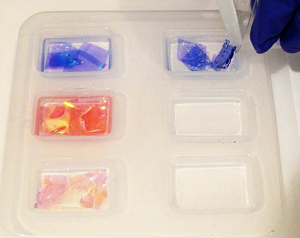
Put your cut papers into the clear resin in the mold. Use your stirring stick to move the papers to release any trapped bubbles. When you’re happy with the first layer of your faux opal charms, cover and let cure.
Step 6: Add another resin layer
This layer needs a color. That’s what will make your resin look like a faux opal.
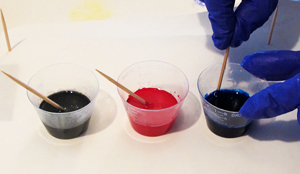
Mix another 1 ounce of super clear resin, then split into 3 cups. Add opaque color pigments and stir well.
💡 Pro tip: If you’re unsure what color to use, go with black.
Pour the second layer of colored resin over the clear layer with the paper. Remove any bubbles. Cover and allow to cure.
💡 Pro tip: Learn how to use a heat gun to zap bubbles.
Step 7: Demold
Twist the mold while pulling at a faux opal edge. Your resin will peel out.
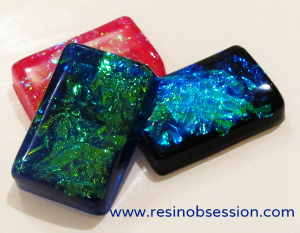
Here are the finished faux opals:
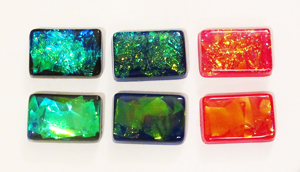
The top row has charms made with crinkled iridescent papers. The bottom row has resin charms made with smooth pearlescent papers.
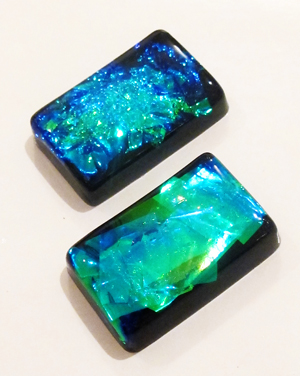
You can see the difference between the two styles. The crinkled paper charm is at the top and looks more like a natural opal.
Finish your faux opal charms as pendants, or string several together to make a bracelet.
⭐️ BONUS: Here are several options to turn resin charms into wearable jewelry.
Ready to take on more resin jewelry crafting projects?
I’ve helped thousands of artists worldwide with their resin obsession, and I’d love to help you too. I wrote the ebook Resin Jewelry Making, with the resin beginner in mind. It explains the basics of how to make resin jewelry, plus includes several projects you can make in a weekend. Buy the PDF book now and get a download link to your email in minutes.
Unpublished Blog Posts of Resin Obsession, LLC © 2023 Resin Obsession, LLC
Just amazing how resin can do wonders to make a woman smile.
Love it!
I love your Tutorials!!! You do a wonder job.
Is the iridescent paper transparent?
I would call it translucent
I’d love to be able to say that I learned more than I thought possible by creating something that puts a smile on people’s faces. And maybe come out even when it comes to the huge expense I’ve put into this Resin Obsession I seem to love so much! Regardless, I’m a winner for finding something that I love doing… Thanks Team!!!
The pieces look great. Is there a way to make them as heavy as glass?
I’m not sure you would want to (they might break when dropped). What are you trying to accomplish?
I am trying to develop jewelry items for men. Having a substantial feel (a.k.a. more weight) seems to confer a higher perception of value. Hence the question.
The first such kind of jewelry item I have in mind would be roughly around the size of a business card. I haven’t seen molds that big (so far), so I wonder, what mold making kit and clear resin would be the best to get started on it.
Thank you very much
I just hit on a new idea. To practice my design creation skills, instead of resin, why not use – water. I can freeze the art piece to a solid slab in the freezer, take a pic to see what worked and what didn’t – then let it melt and reclaim my materials. 🙂
Sounds great!
If you want more weight, consider getting there by way of framing the item in metal, which can be done using plating processes that are easy and can be done at home.
[Late information is still information]
Hi Katherine,
Which iridescent papers / foils are you using; from which store? My local shops don’t have anything like this, so I have to order over the net. Please!
Thank you!! 🙂
We have some here but are currently sold out. https://shop.resinobsession.com/products/ice-resin-foil-sheets
How do you achieve the crinkled look?
Hi Debra, crinkle the paper, then add it to the resin.
Fire opal is absolutely transparent in reddish orange. No iridescence to it. If it sparkles, it happens due to cut facets. Not a total expert but have worked with real stones.
Could you use crushed blue and black stone instead of using the papers or is that a bad idea? Thanks
I think that’s a great idea to try.