
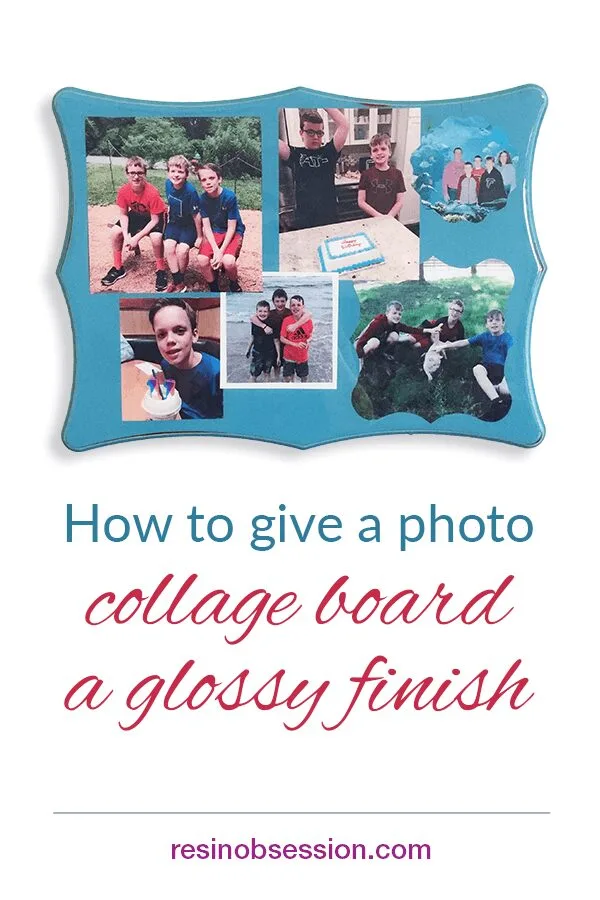
 There’s something about a family gallery wall. Even if it’s not your family. It’s magical seeing personalities come through in photos. Especially when pictures get added year after year. So why not add to the gallery with this photo gift idea?
You can DIY a photo collage board coated with a glossy epoxy resin finish.
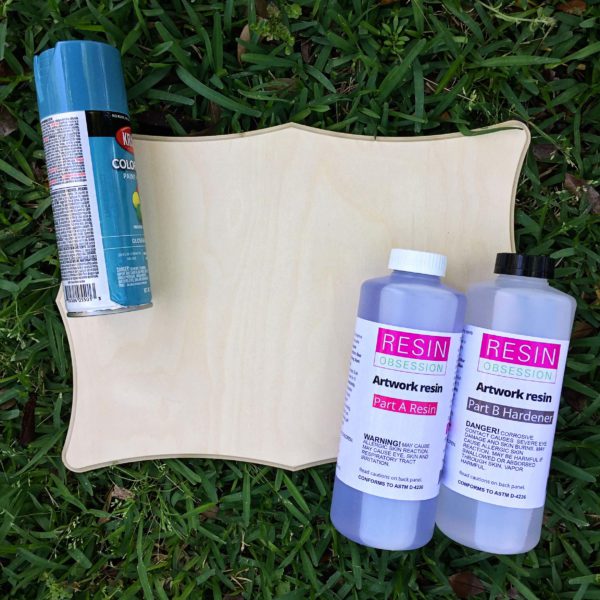
Resin supplies needed:
Wooden board for the collage (You can get one at a home improvement store)
Picture hanger hardware
Spray paint for a base color
Level
Decoupage glue
Sponge brush
Pictures in assorted sizes
Coarse sandpaper
Brown marker
Resin for art
Mixing cups
Safety gloves
Stirring sticks
Protective surface covering. (Here are some ideas: surfaces resin won’t stick to)
Heat gun
Dome to cover the board
Step 1: Gather your supplies
You’ll need to think about where you’re going to make your photo gift idea. You’ll be working with spray paint, plus your project needs to stay undisturbed for a couple of days.
You’re going to need your photos too. You can use Canva (it’s free!) to edit your photos and print them onto bright white paper if you’re tech-challenged.
💡 Pro tip: Try out different layouts of your photos. Once you find the winner, take a picture with your smartphone. It’s easy to forget once you start the project. (Coming from someone who can’t always remember what she had for breakfast.)
Step 2: Paint
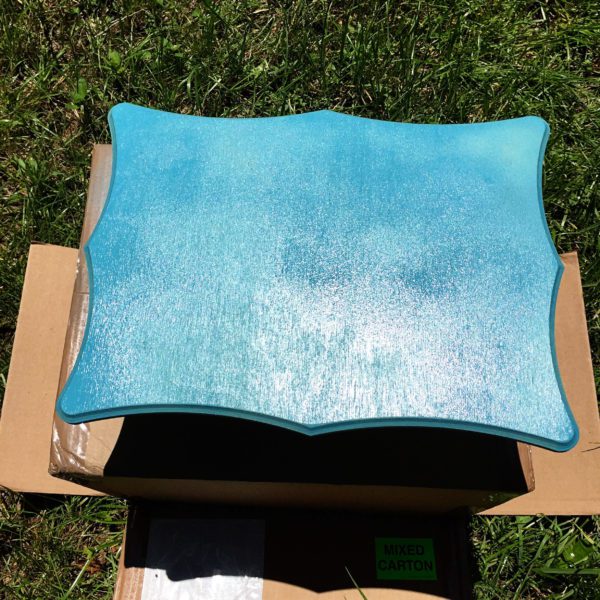
Set your wooden board outside, then spray paint the front and back. It may need two coats of paint. Let your board dry for 24 hours before moving on.
Step 3: Add hanging hardware
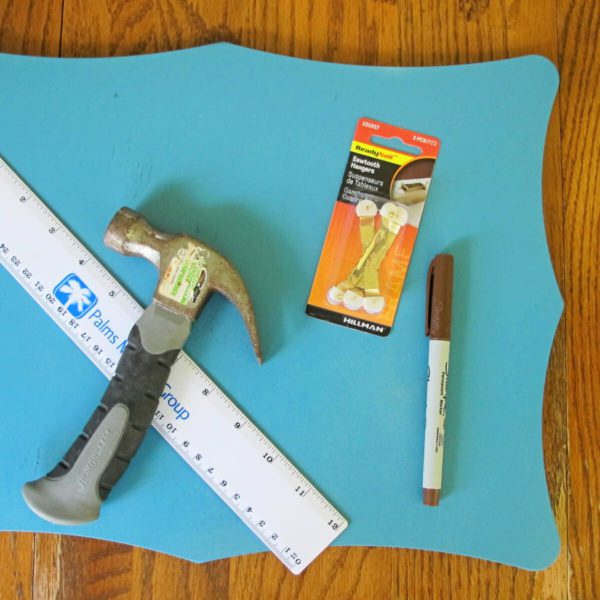
The next step in this photo gift idea is to make the board hangable. This part can be tricky since the board might be thin. (This board is only 1/2 inch thick.) Make sure your hangers don’t go all the way through when you nail them on.
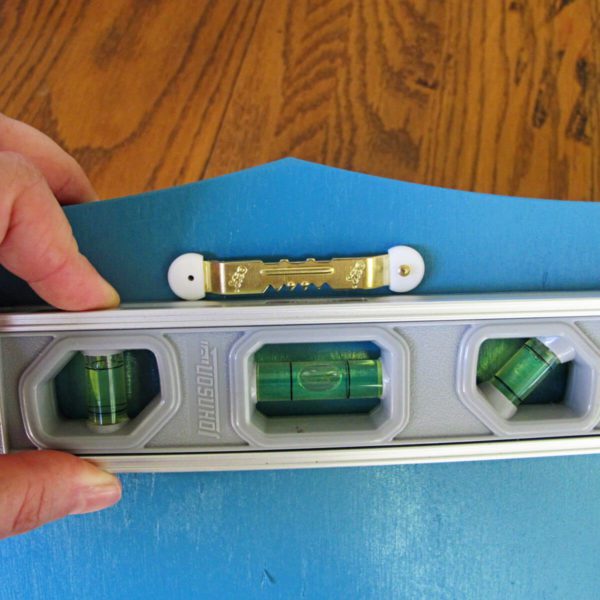
Before you nail on the picture hanger, make sure the hanger is level. Like you’re going to all this effort to turn your idea into a beautiful, glossy, photo gift. Especially if it’s an awkward family photo.
[OPTIONAL] Step 4: Add distress details
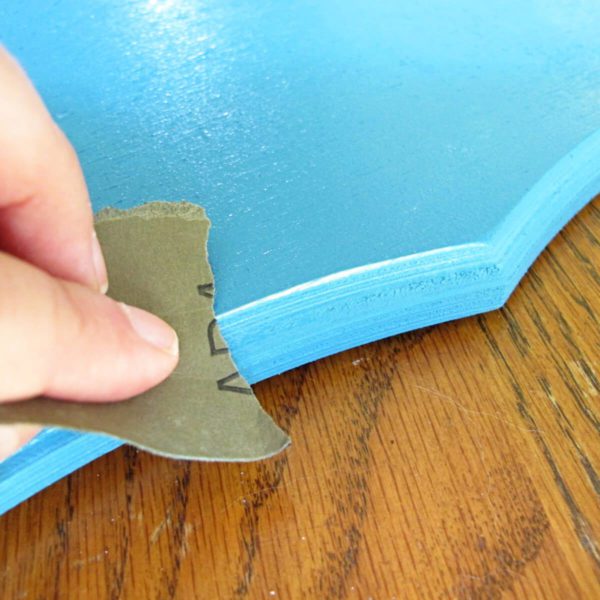
If you want your board to look vintage, sand a couple of the edges with sandpaper.
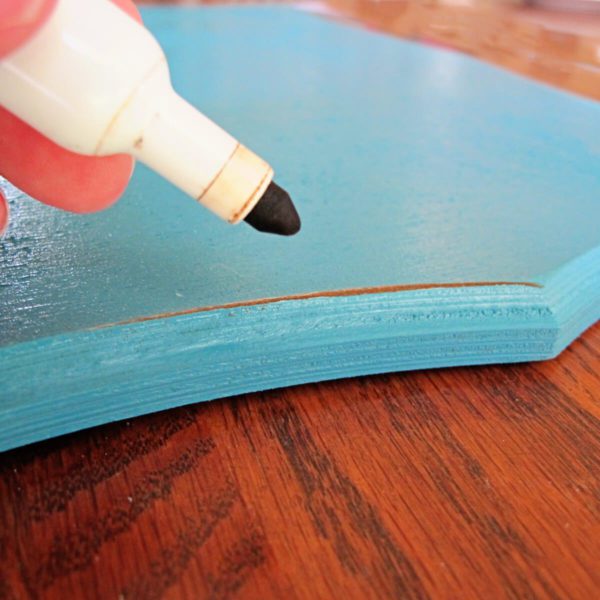
Then use a dark brown marker to fill in the sanded edge. This gives it a ‘shabby chic’ look. (Which started with this designer.)
Step 5: Add glue
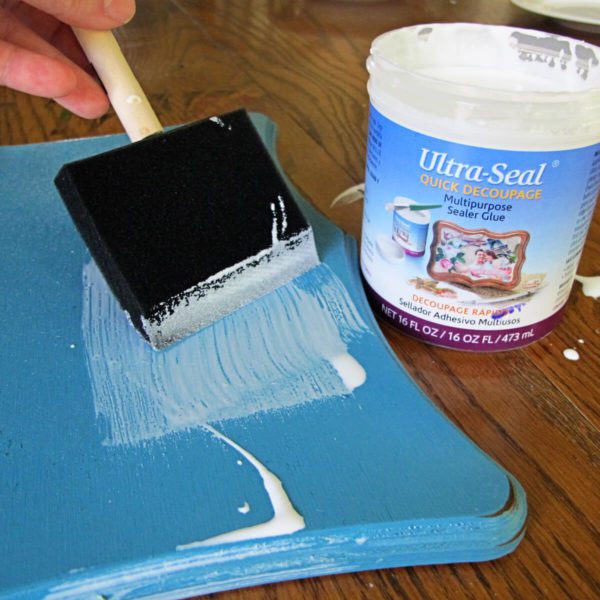
Now it’s time to apply your decoupage glue to the board. It will give you a thick base of glue to use the pictures.
💡 Pro tip: It goes from wet to sticky rather quickly, making it hard to work with. Work on areas of the board for your photo gift idea rather than applying glue to the entire board at once.
Step 6: Add photos
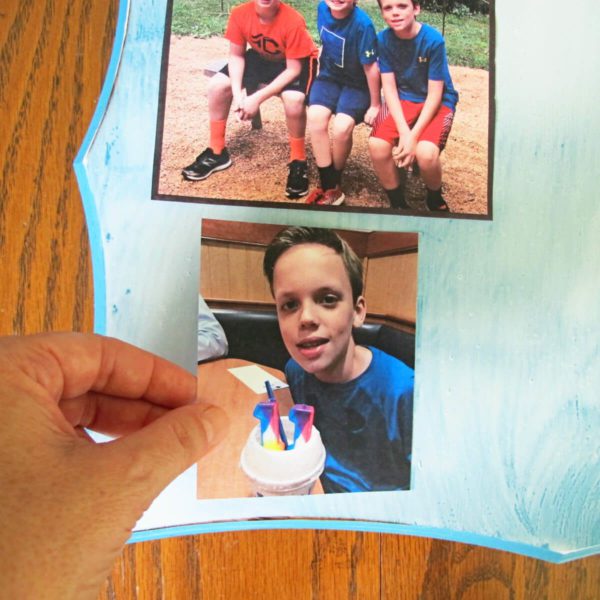
Apply your photos to the glued area, pressing firmly. You don’t want to trap underneath your pictures.
Step 7: Finish with another glue layer
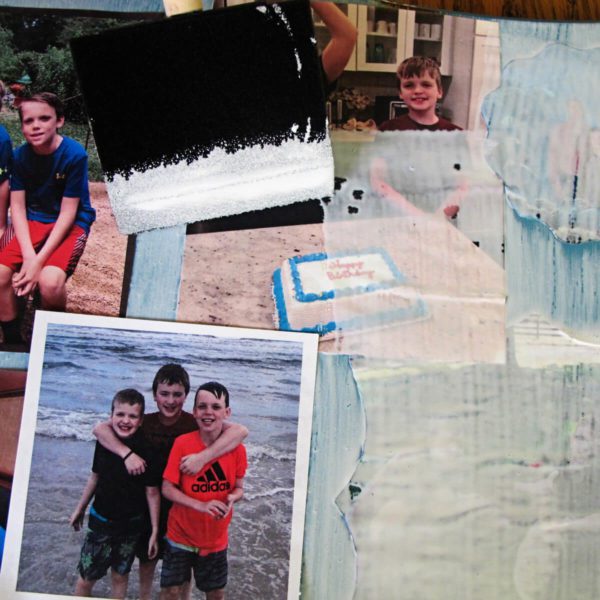
Once all your photos are on the board, apply a final layer of glue. Make sure you cover the images well. Otherwise, your pictures will take up moisture stains.
⭐️ BONUS: If you aren’t sure how to do this, you can watch a couple of videos on how to seal papers for including in resin.
Let the glue fully dry before going to the next step. This can take a day or two if you live in a humid climate.
Step 8: Prep for resin
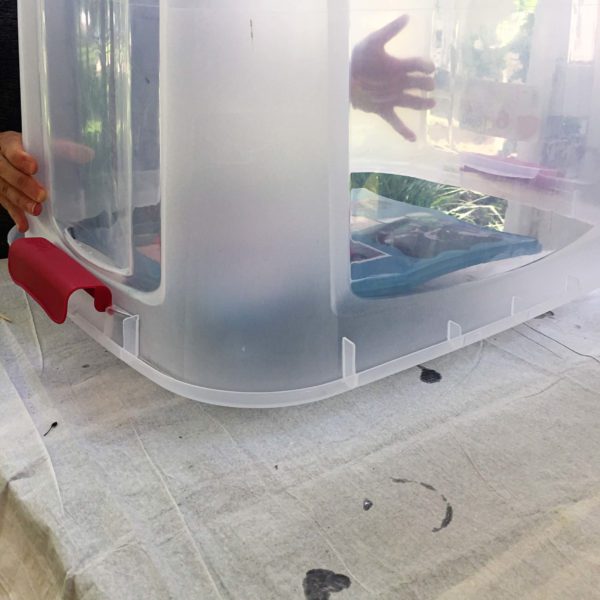
It’s almost time to apply the resin. But, before you do that, you need a place to make your photo gift idea where it can stay undisturbed for a day or more. You will also need to protect the surface because the resin will drip.
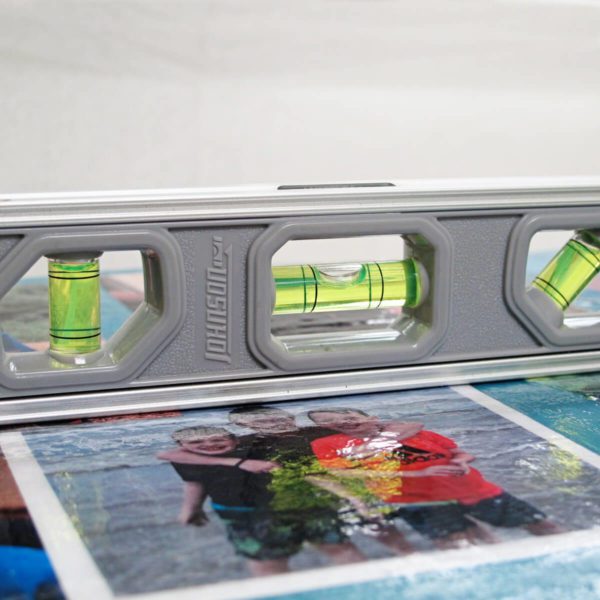
Because resin will run off the side of the board, you need to elevate it. Disposable plastic cups work great for this. Then, use your level again to make sure the surface is balanced. Otherwise, your resin won’t coat the surface evenly, and you can end up with resin dimples and fish eyes.
Step 9: Mix resin
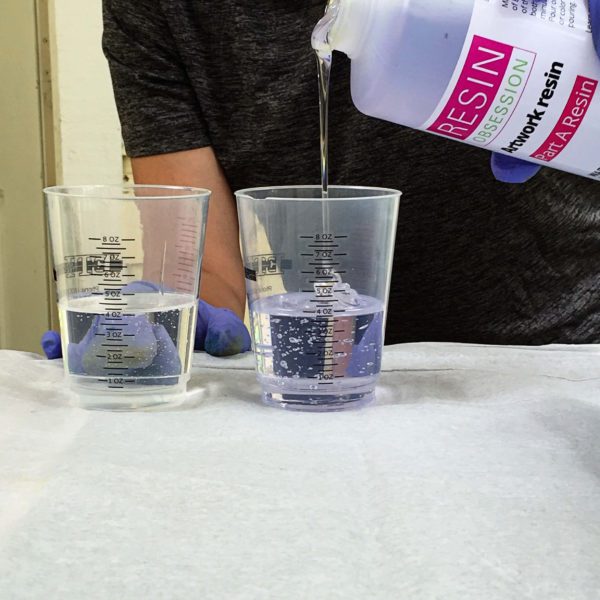
Here’s the best part — it’s resin time! This board needs six ounces of epoxy art resin to cover it. Measure equal parts of A and B by volume.
⭐️ BONUS: If you aren’t sure how much resin you need for your photo gift idea, this resin calculator does the math for you. All you need are your board measurements.
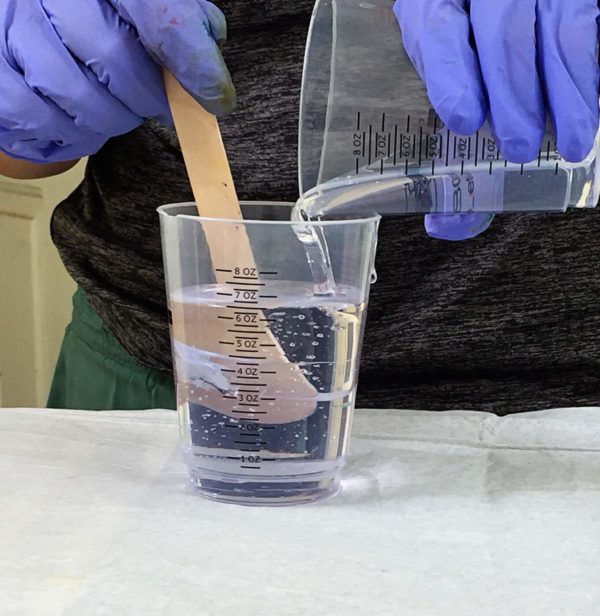
Stir the parts together for a few minutes until the resin streaks are gone, and everything is blended. This takes three to five minutes.
⭐️ BONUS: If you haven’t done this before, this article explains more about mixing resin.
Step 10: Add to the board
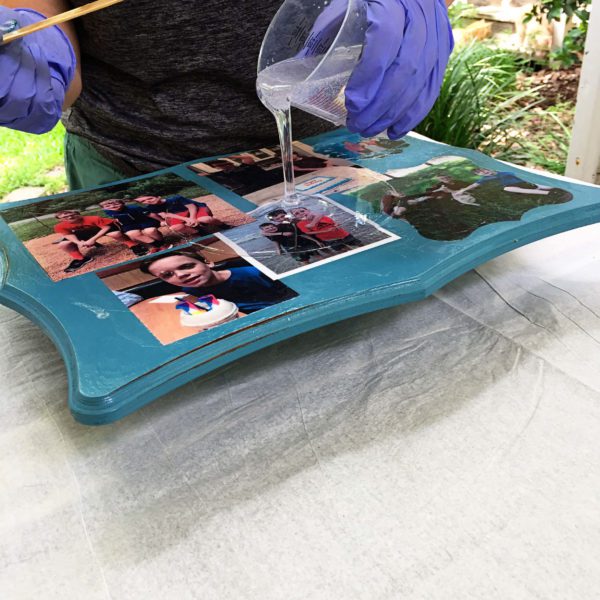
Pour the mixed resin onto the board, starting in the center. Let the resin roll over the surface.
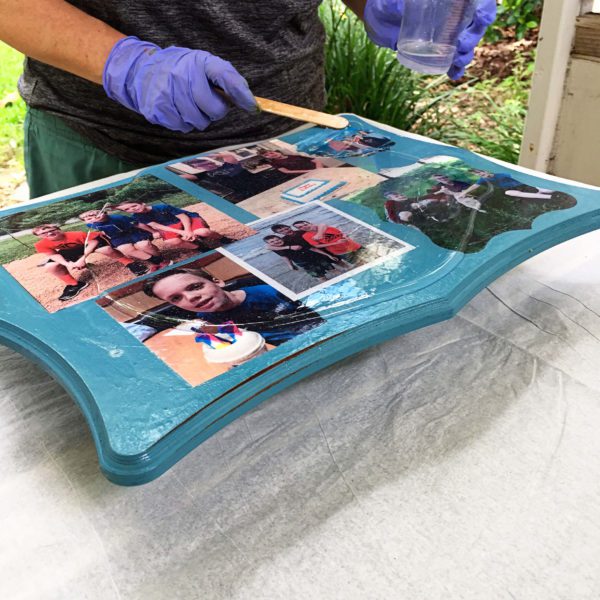
Use your mixing stick to push the resin over the collage board surface. The resin will drip over the edge. IT’S OKAY. I’ll show you how to deal with those.
Step 11: Remove bubbles
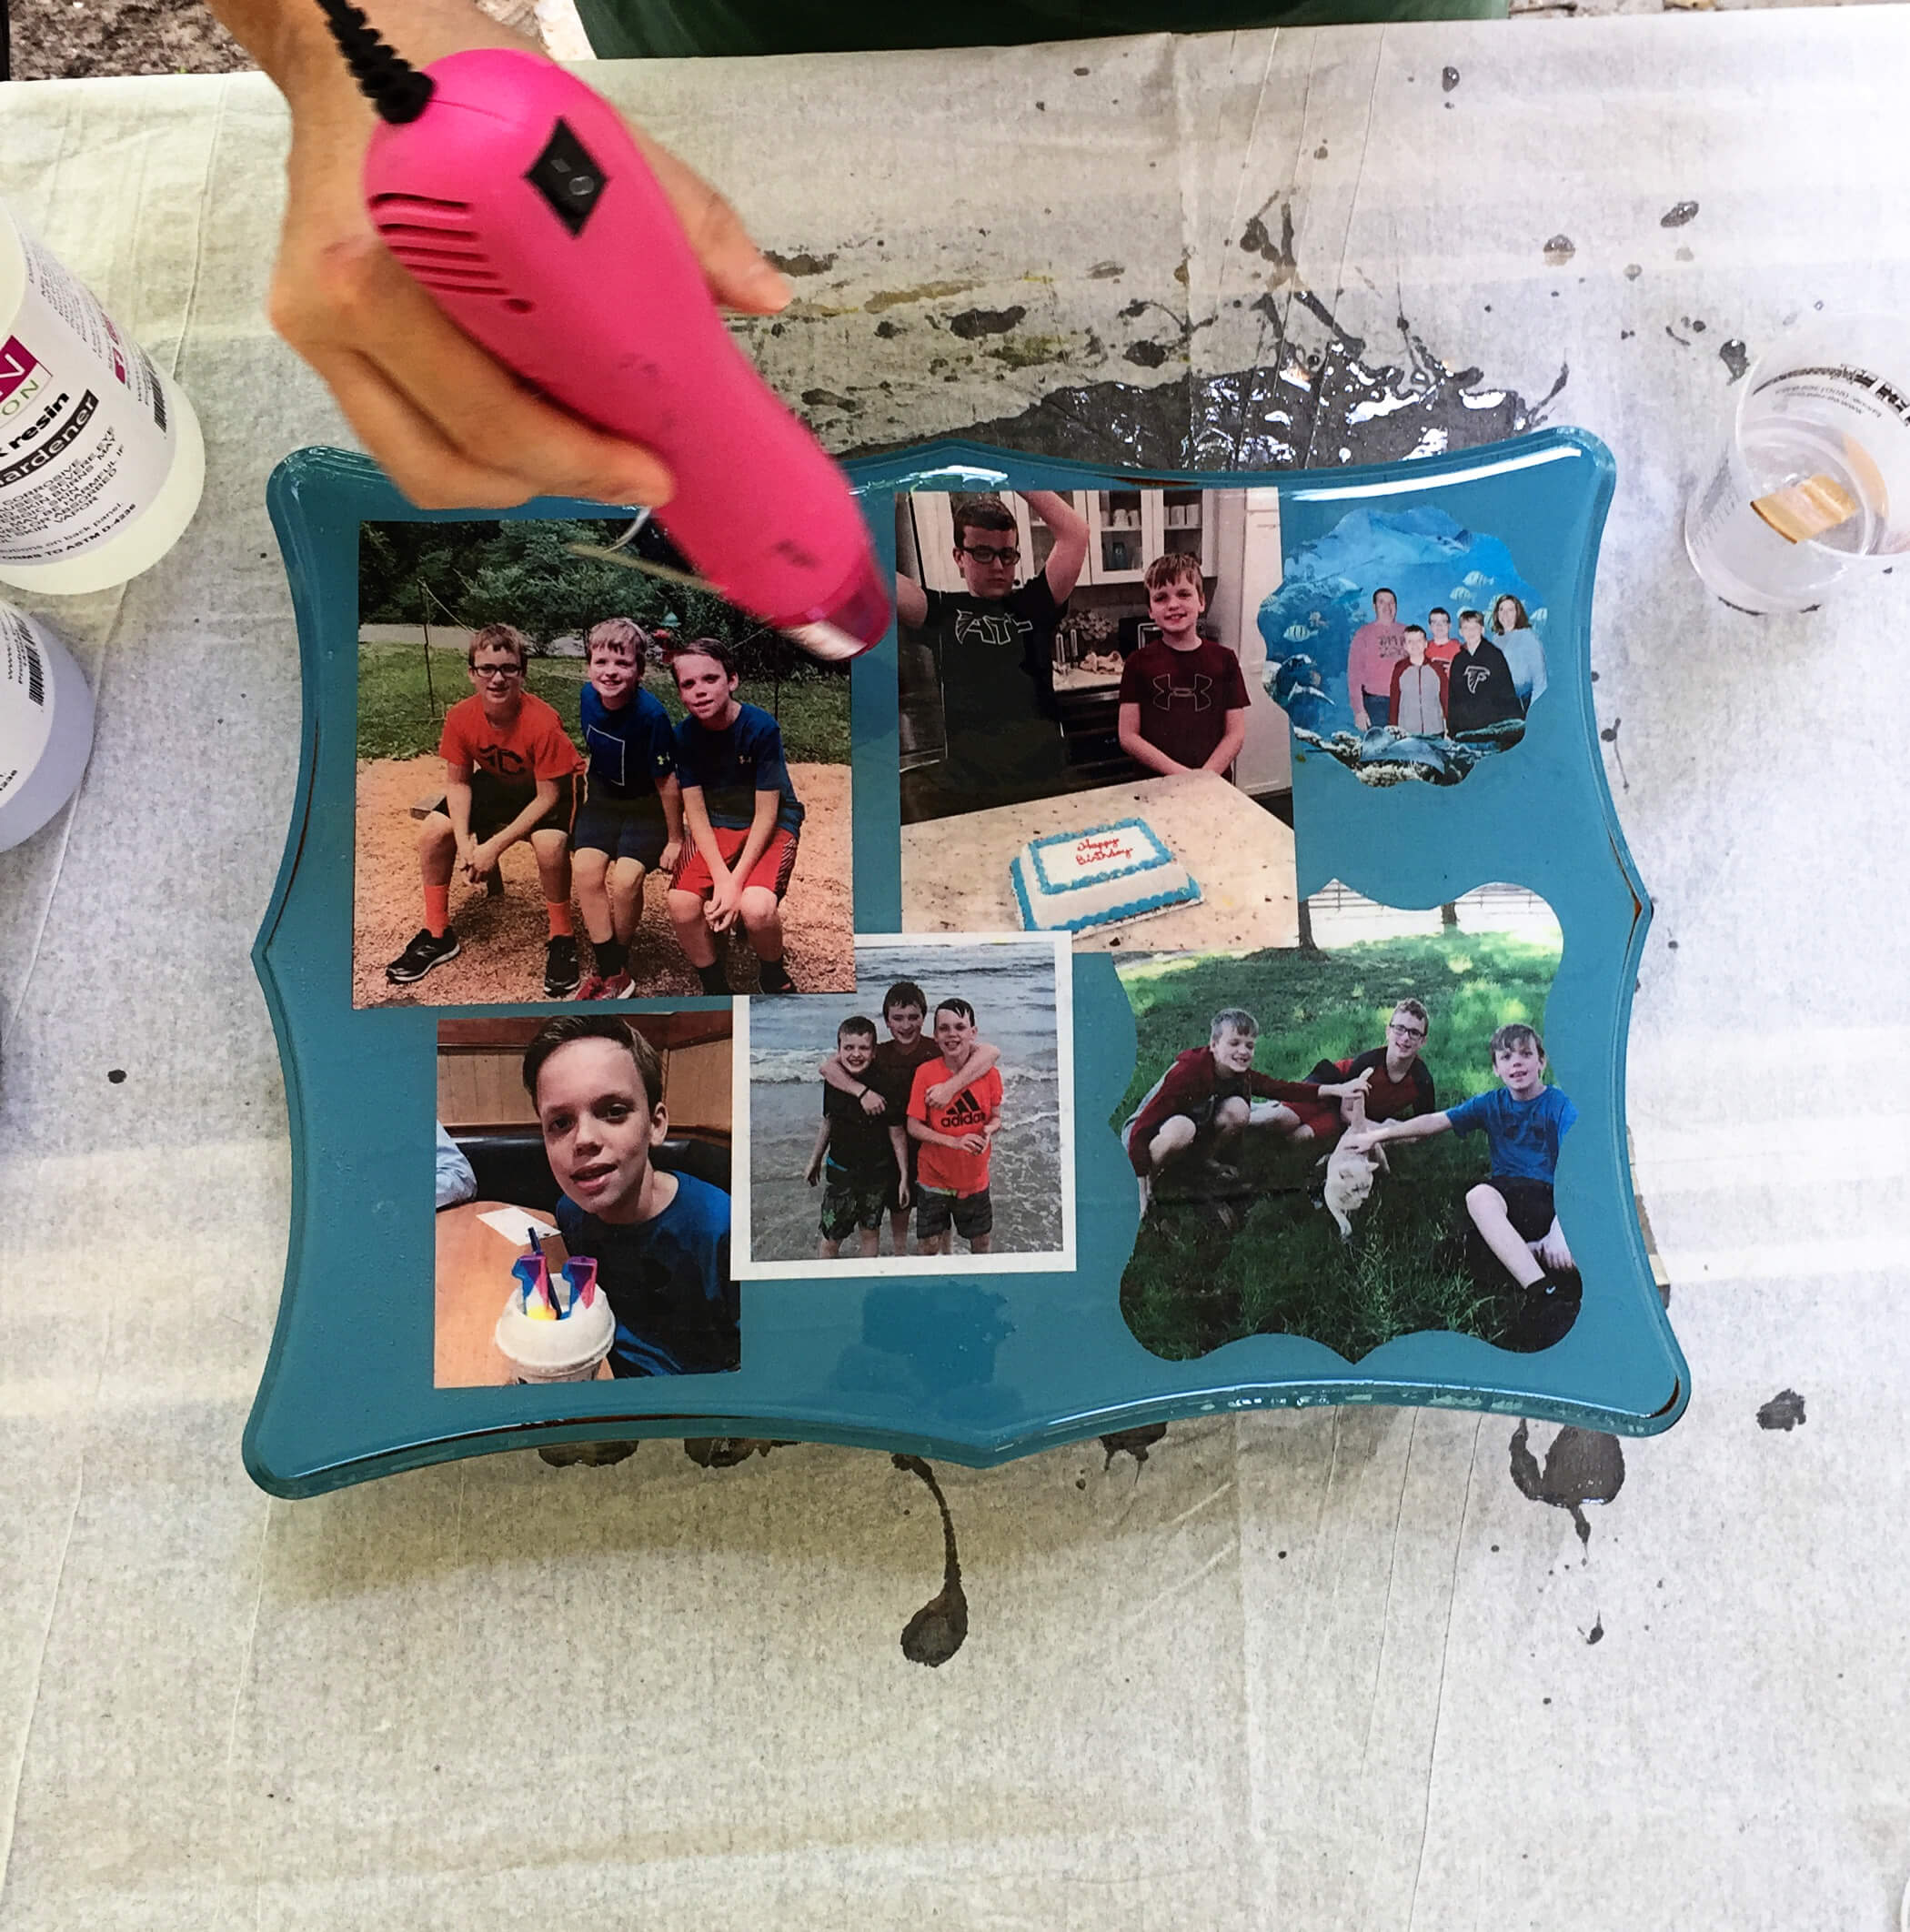
Before letting the resin on your photo gift idea cure, go over the surface with a heat gun. This will pop the tiny bubbles that form during resin mixing. While many will pop on their own, using the heat gun ensures you get them all before the resin starts curing.
Step 12: Cover
Because dust and hair (especially cat hair!) can settle onto the resin while it’s curing, you want to cover it until it’s fully solid. A plastic bin works great for this.
⭐️ BONUS: How to keep cat hair from covering your home without shaving your cat.
It will take your resin 24 hours to dry.
Step 13: Remove drips
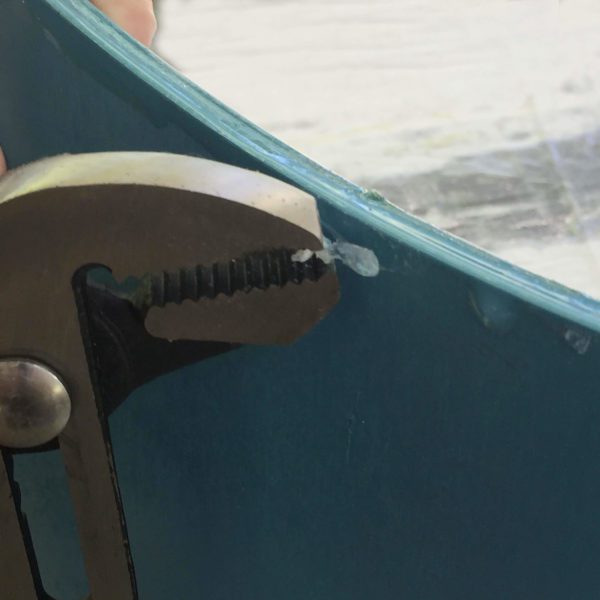
Because some of the resin will drip over the side, you must remove those drips. You can use pliers to peel them off. You can also sand them off with a Dremel tool or sandpaper.
⭐️ BONUS: If you don’t want to worry about resin drips, this video shows you how to take care of that:
Now it’s time to enjoy your resined photo collage
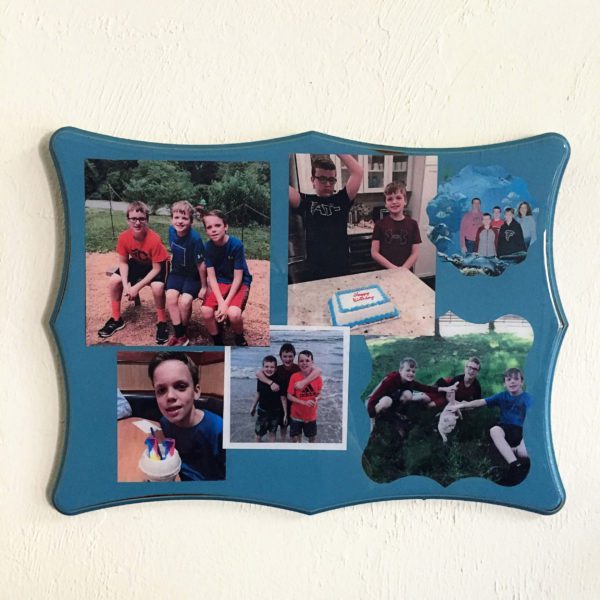
It looks great hanging on a wall but could also be displayed on an easel. There are a lot of possibilities here.
Want to learn more of the basics beginners need to know about resin?
Get your copy of the PDF ebook, Resin Fundamentals. It has everything to get beginners up to resin expert status. Buy the book now and get a download link in minutes. You’ll go from confused to confident with resin in only a couple of hours.
Unpublished Blog Posts of Resin Obsession, LLC © 2023 Resin Obsession, LLC
Hello Swift l really appreciate you for the guide n since am into resin art l would like you to guide me on the perfect resin to use in making table tops coz its a project that l want to do.Thank you so much n looking forward for your help
Hi Nicholas, our artwork resin works great as a tabletop coating. You can buy it in our store here: https://shop.resinobsession.com/collections/resin/resin-obsession-artwork-resin
I was just looking at some pictures and was wondering if I could use resin to hang them on the wall. Your tutorial was right on time.
I do have one question–are there any caveats about hanging resin art near a window (sunlight) or in humid areas like a bathroom?
Thank you so much. I have limited resources to spend on art supplies, but I spend them all with Resin Obsession!
Hi I have been trying to get a photo transfer to a glass tile to make a coaster however the pictures all have streaking effects from the glue and not looking good on the glass tile … can you help
Hi Sam, if you’re coating the tile with resin, those streaks will disappear.