
I have no idea why it took me so long to bring together my two passions: photography, and resin. And learning how to resin a photo is a great alternative to framing!
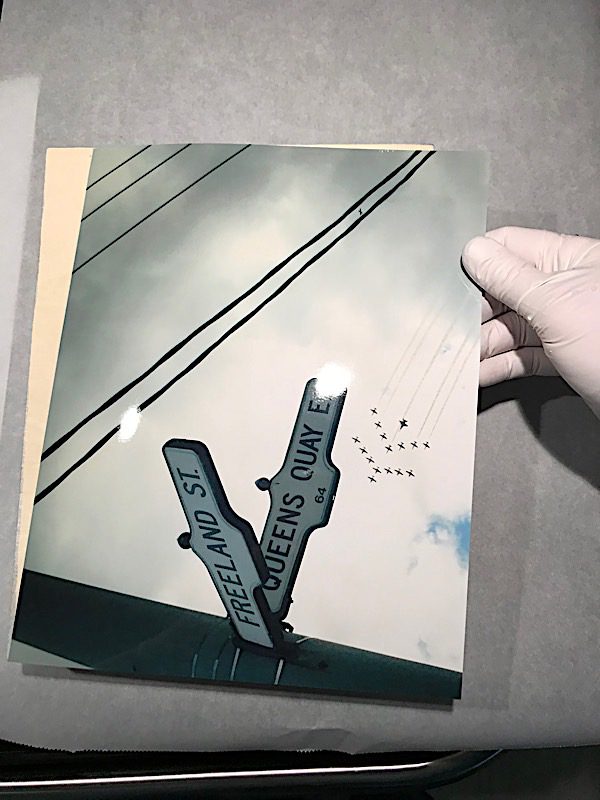
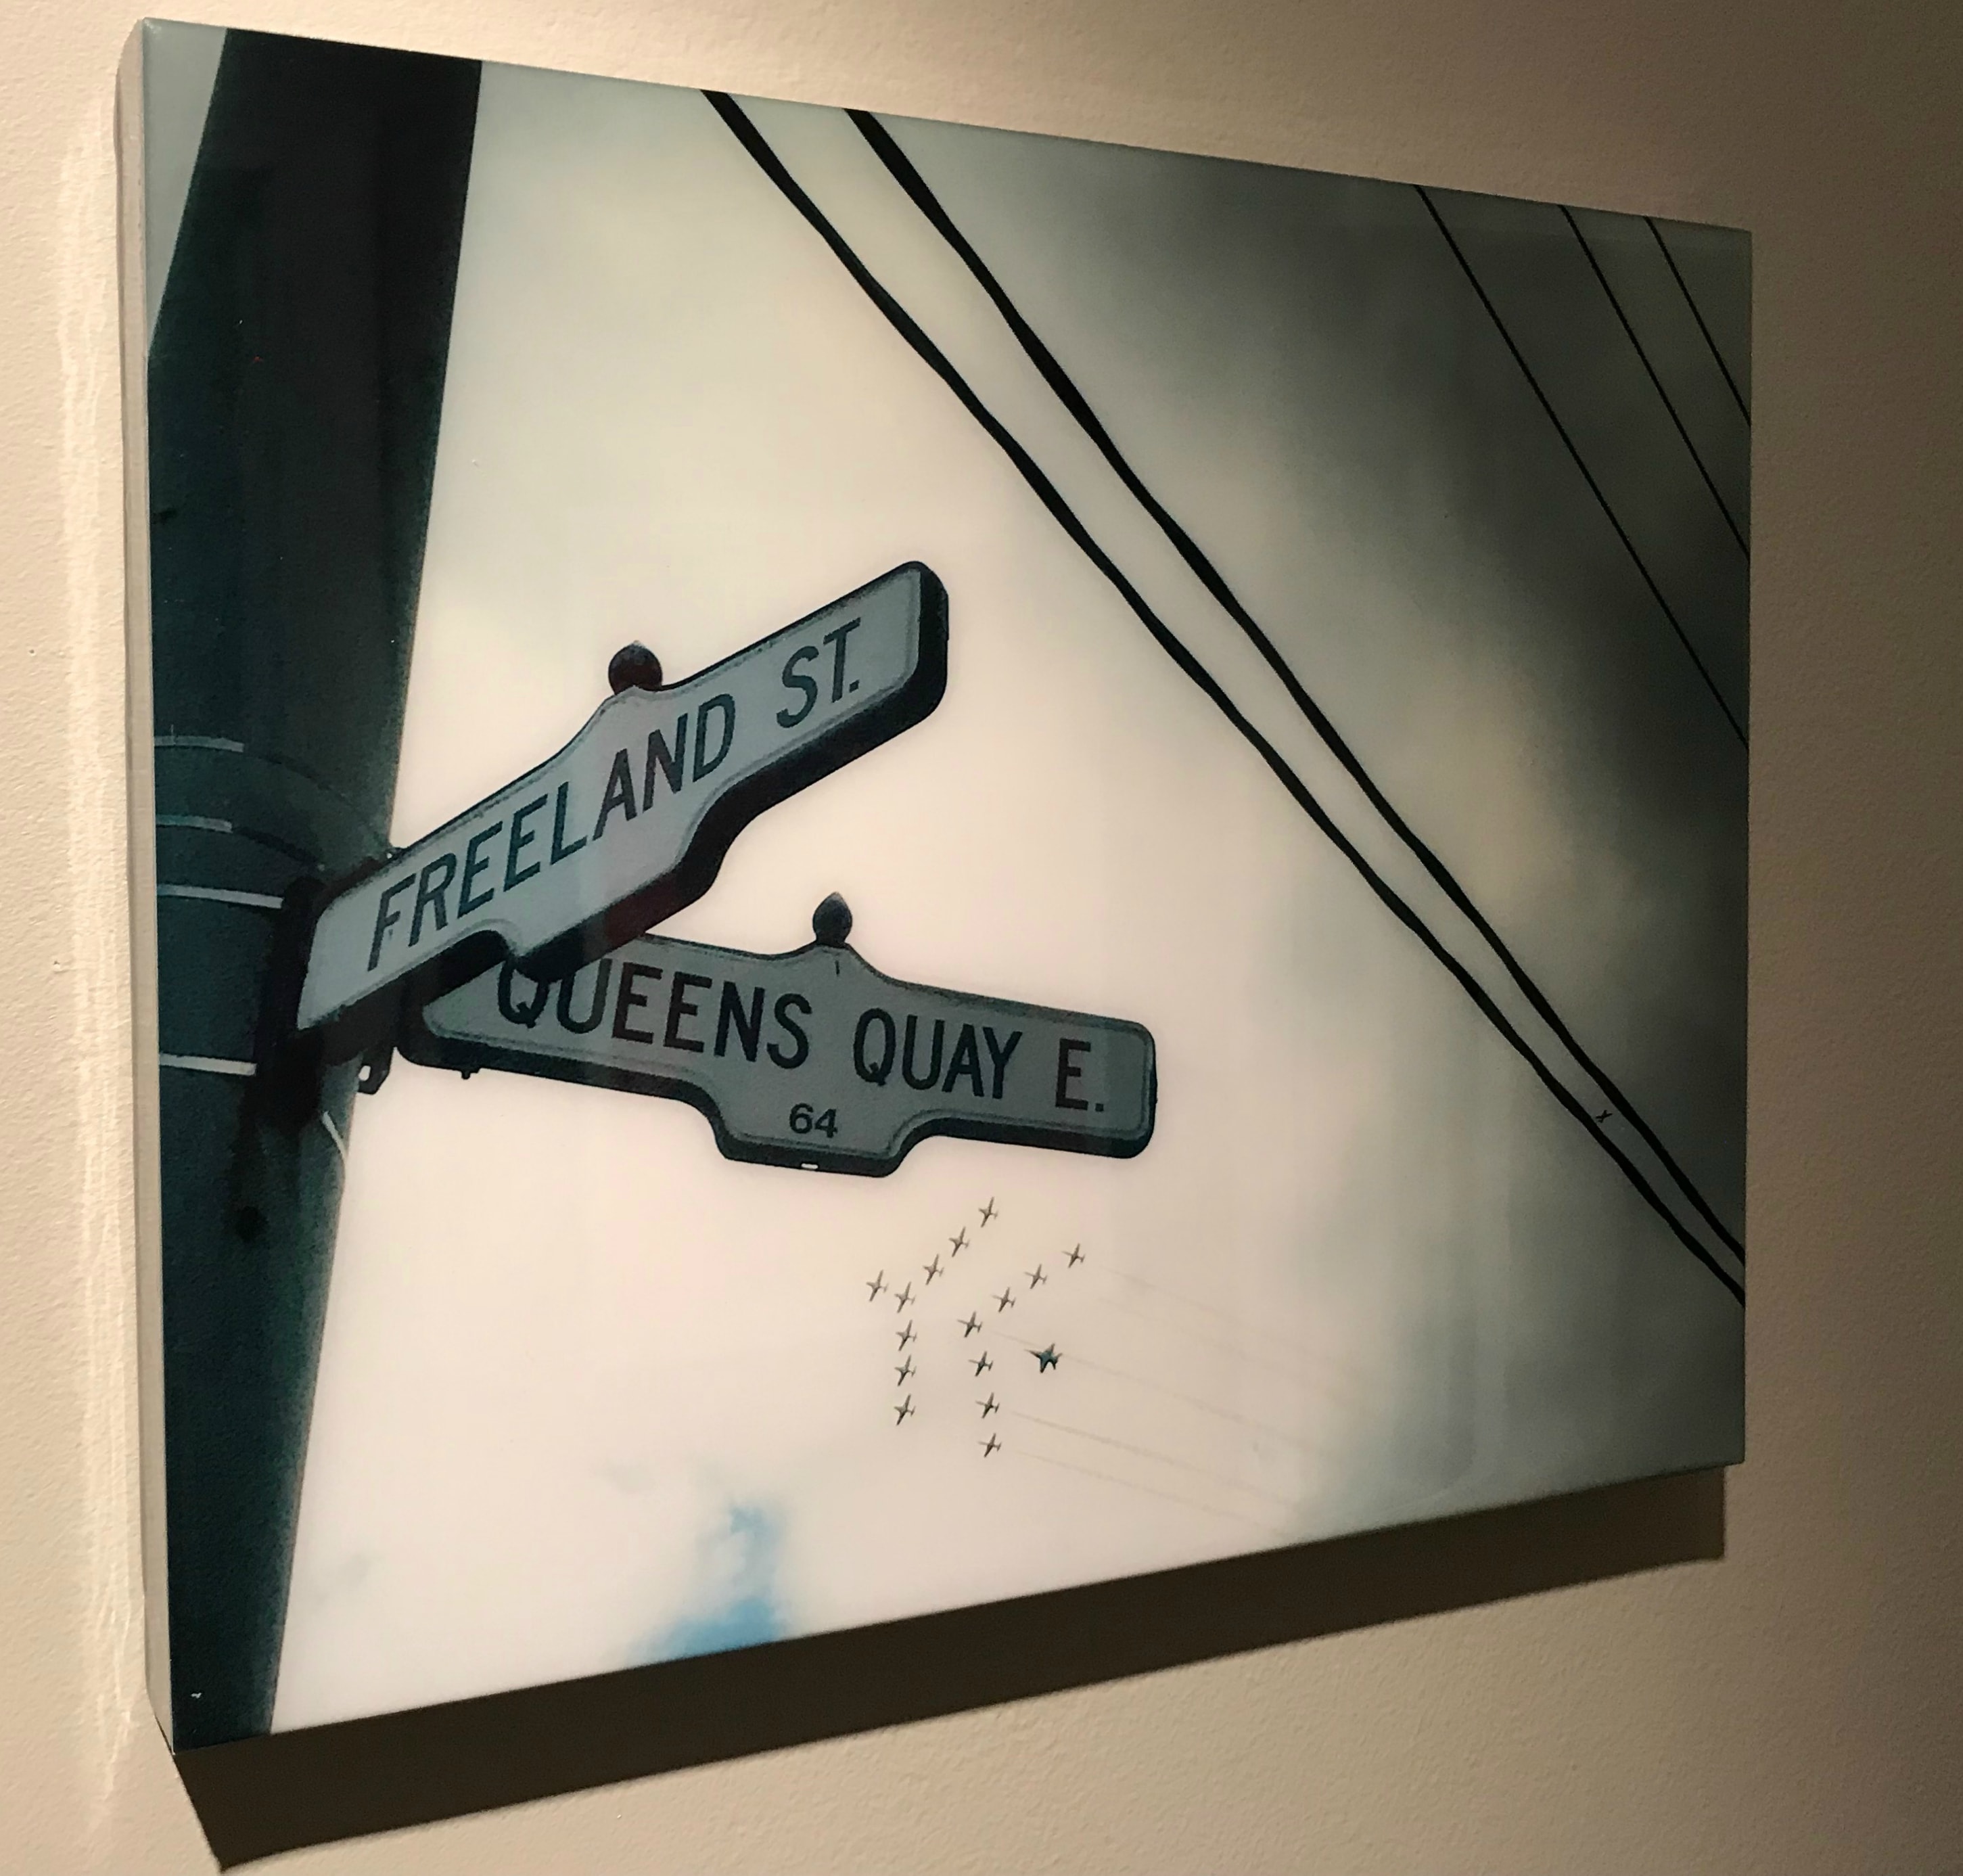
Maybe I simply needed the right photo. I captured this one during the Annual Air Show in Toronto (where I live) and which I attend every year. The planes go so fast. I don’t usually bother trying to snap a pic. But, sometimes, I will point my phone toward the sky and click. That is how I captured this photo. Most photographers won’t admit that their favorite photo was a random snap, but there it is.
Now I’m showing you how to cover this photo with resin.

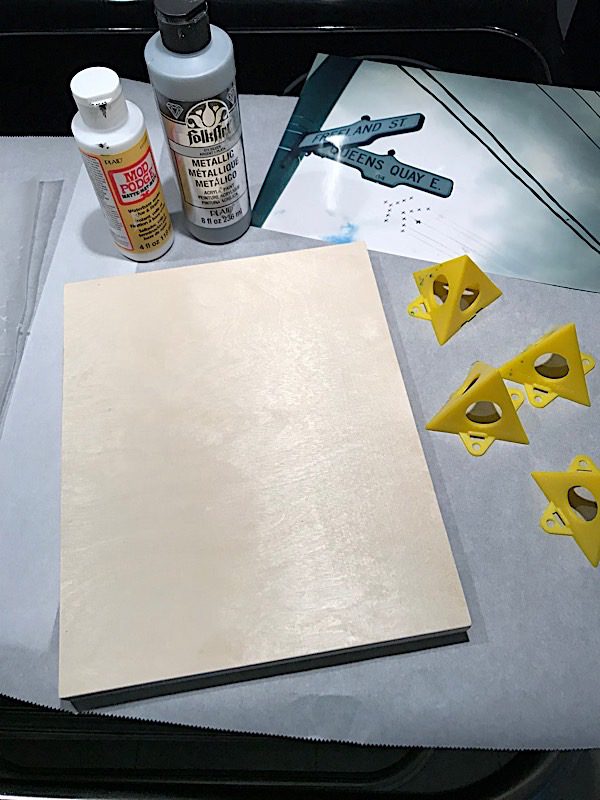
You will need:
• Printed photo
• Wood board
• Paint
• Foam brush
• Clear drying sealer or glue
• Wax Paper
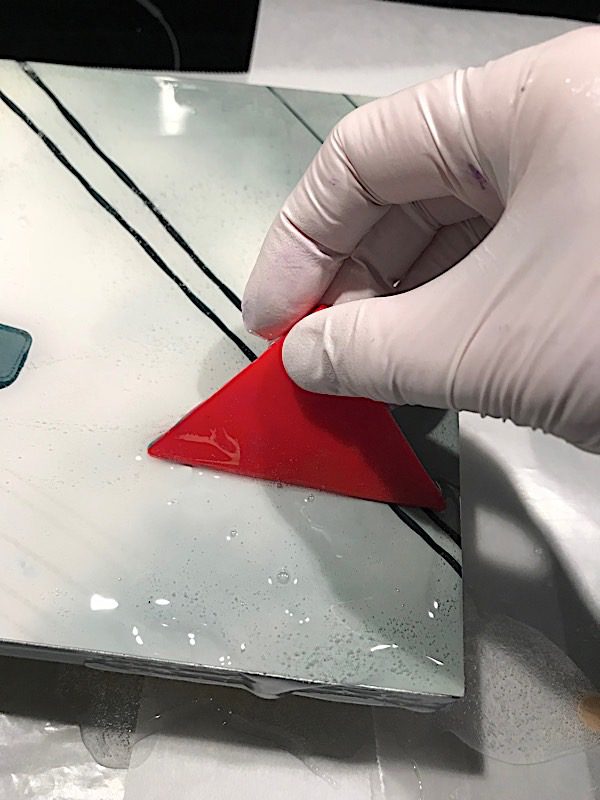
• Painter Triangles (or something to prop up your project)
• Epoxy resin for art
• Squeegee to spread the resin
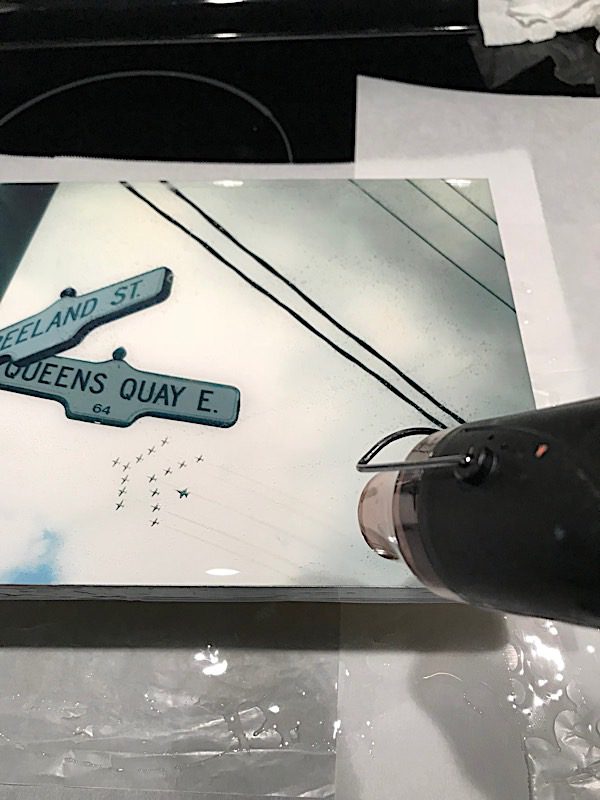
• Heat gun to pop the bubbles
• A plastic container/bin to cover and protect your photo while the resin is curing
STEP 1: Edit the photo
Use a photo that has a high resolution (1 MB or higher ). There are a ton of free online sites you can use. For this photo, the only editing I did was to increase the shadows a little to give it more depth. Once you like how it looks, you can send it to a photo shop for printing.
The most important thing is that you have a wood canvas that is the same size.
STEP 2: Prep the back of the board
Turn over your canvas and add petroleum jelly or cooking oil to the underside. Resin drips won’t stick, and you pop them off later.

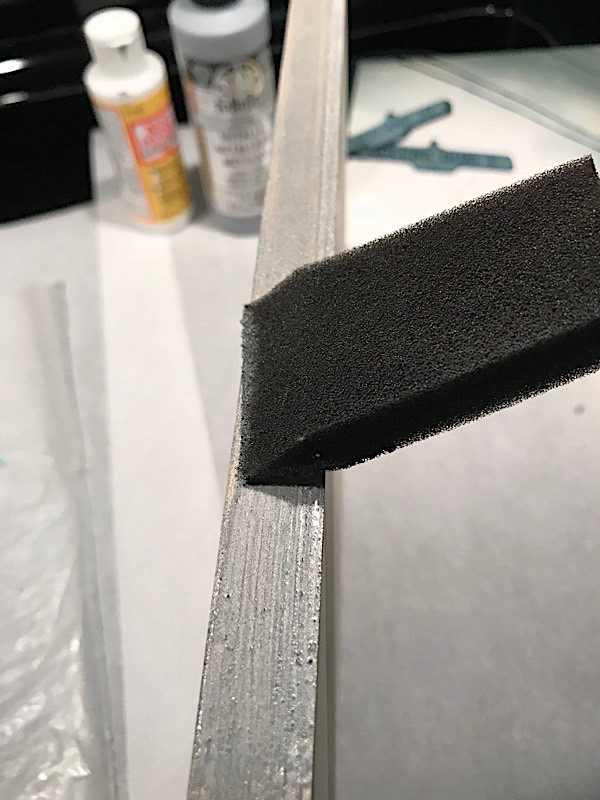
STEP 3: Paint the sides
Paint the side of the canvas with whatever color compliments your photo. I used acrylic silver paint.
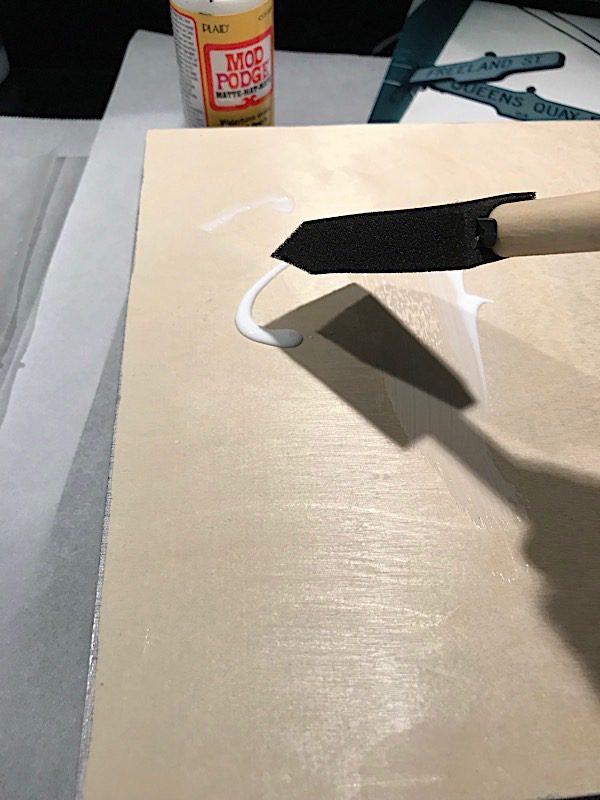
STEP 4: Glue the photo
Prop the wood canvas panel up with your painter triangles. Apply a thin layer of glue to the front of the canvas and place the photo onto the glue. (I did not seal the photo or do anything to it, and there was no staining.)
If you use a photo that you cut or alter in any way, seal the sides to prevent the resin from staining the photo.
Press it down from the middle and work your way out. You don’t want to have any air bubbles. Place your wax paper on top of the photo as you press it down. This will keep glue that oozes out underneath from spilling onto the photo.
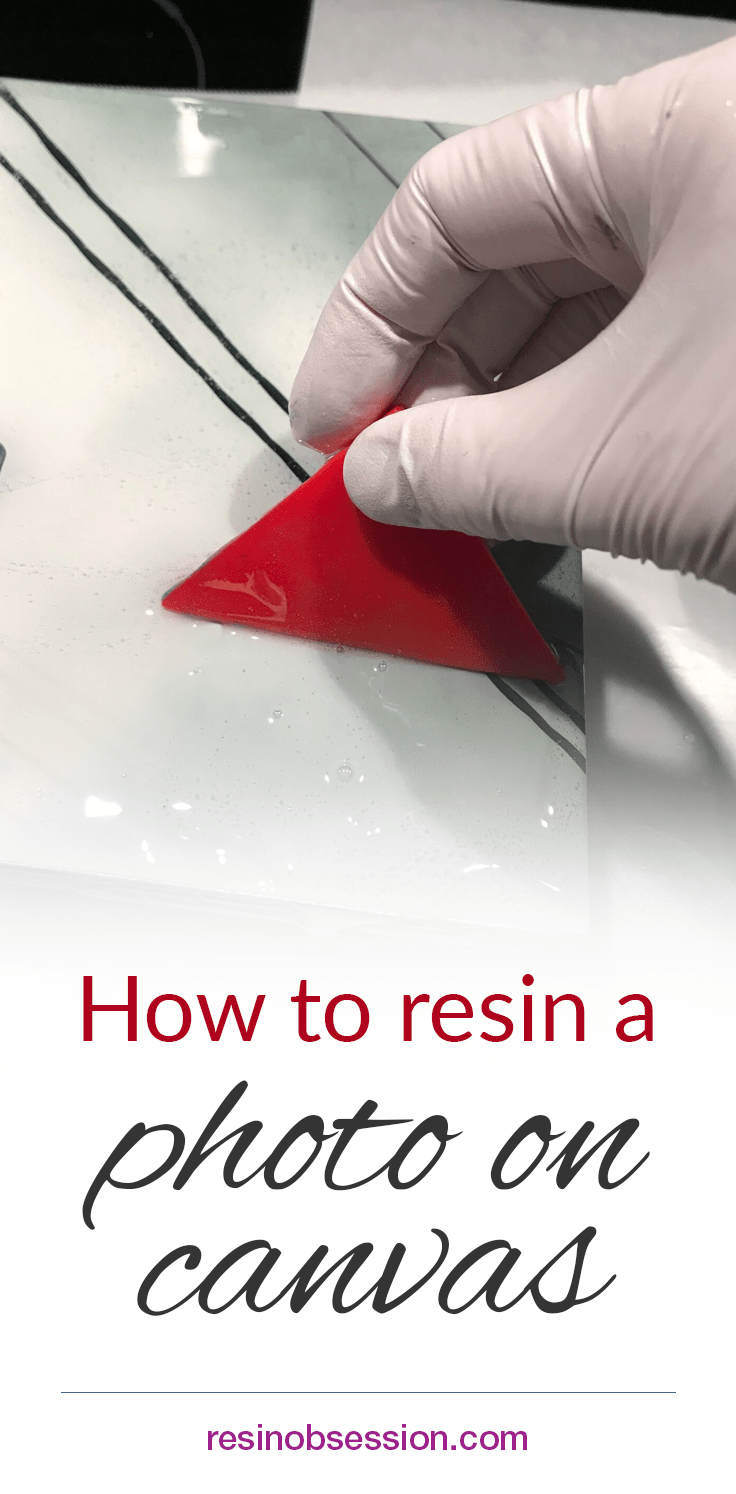
STEP 5: Mix and apply resin
It was cold in my studio when I mixed my resin, and I should have put the resin bottles in a warm bath beforehand. (Learn more about this and other cold weather resin casting tips.) I whipped it up quite a bit while stirring so it is quite bubbly.
If you’re new to resin, be sure you know how to mix resin before trying it on a photo.
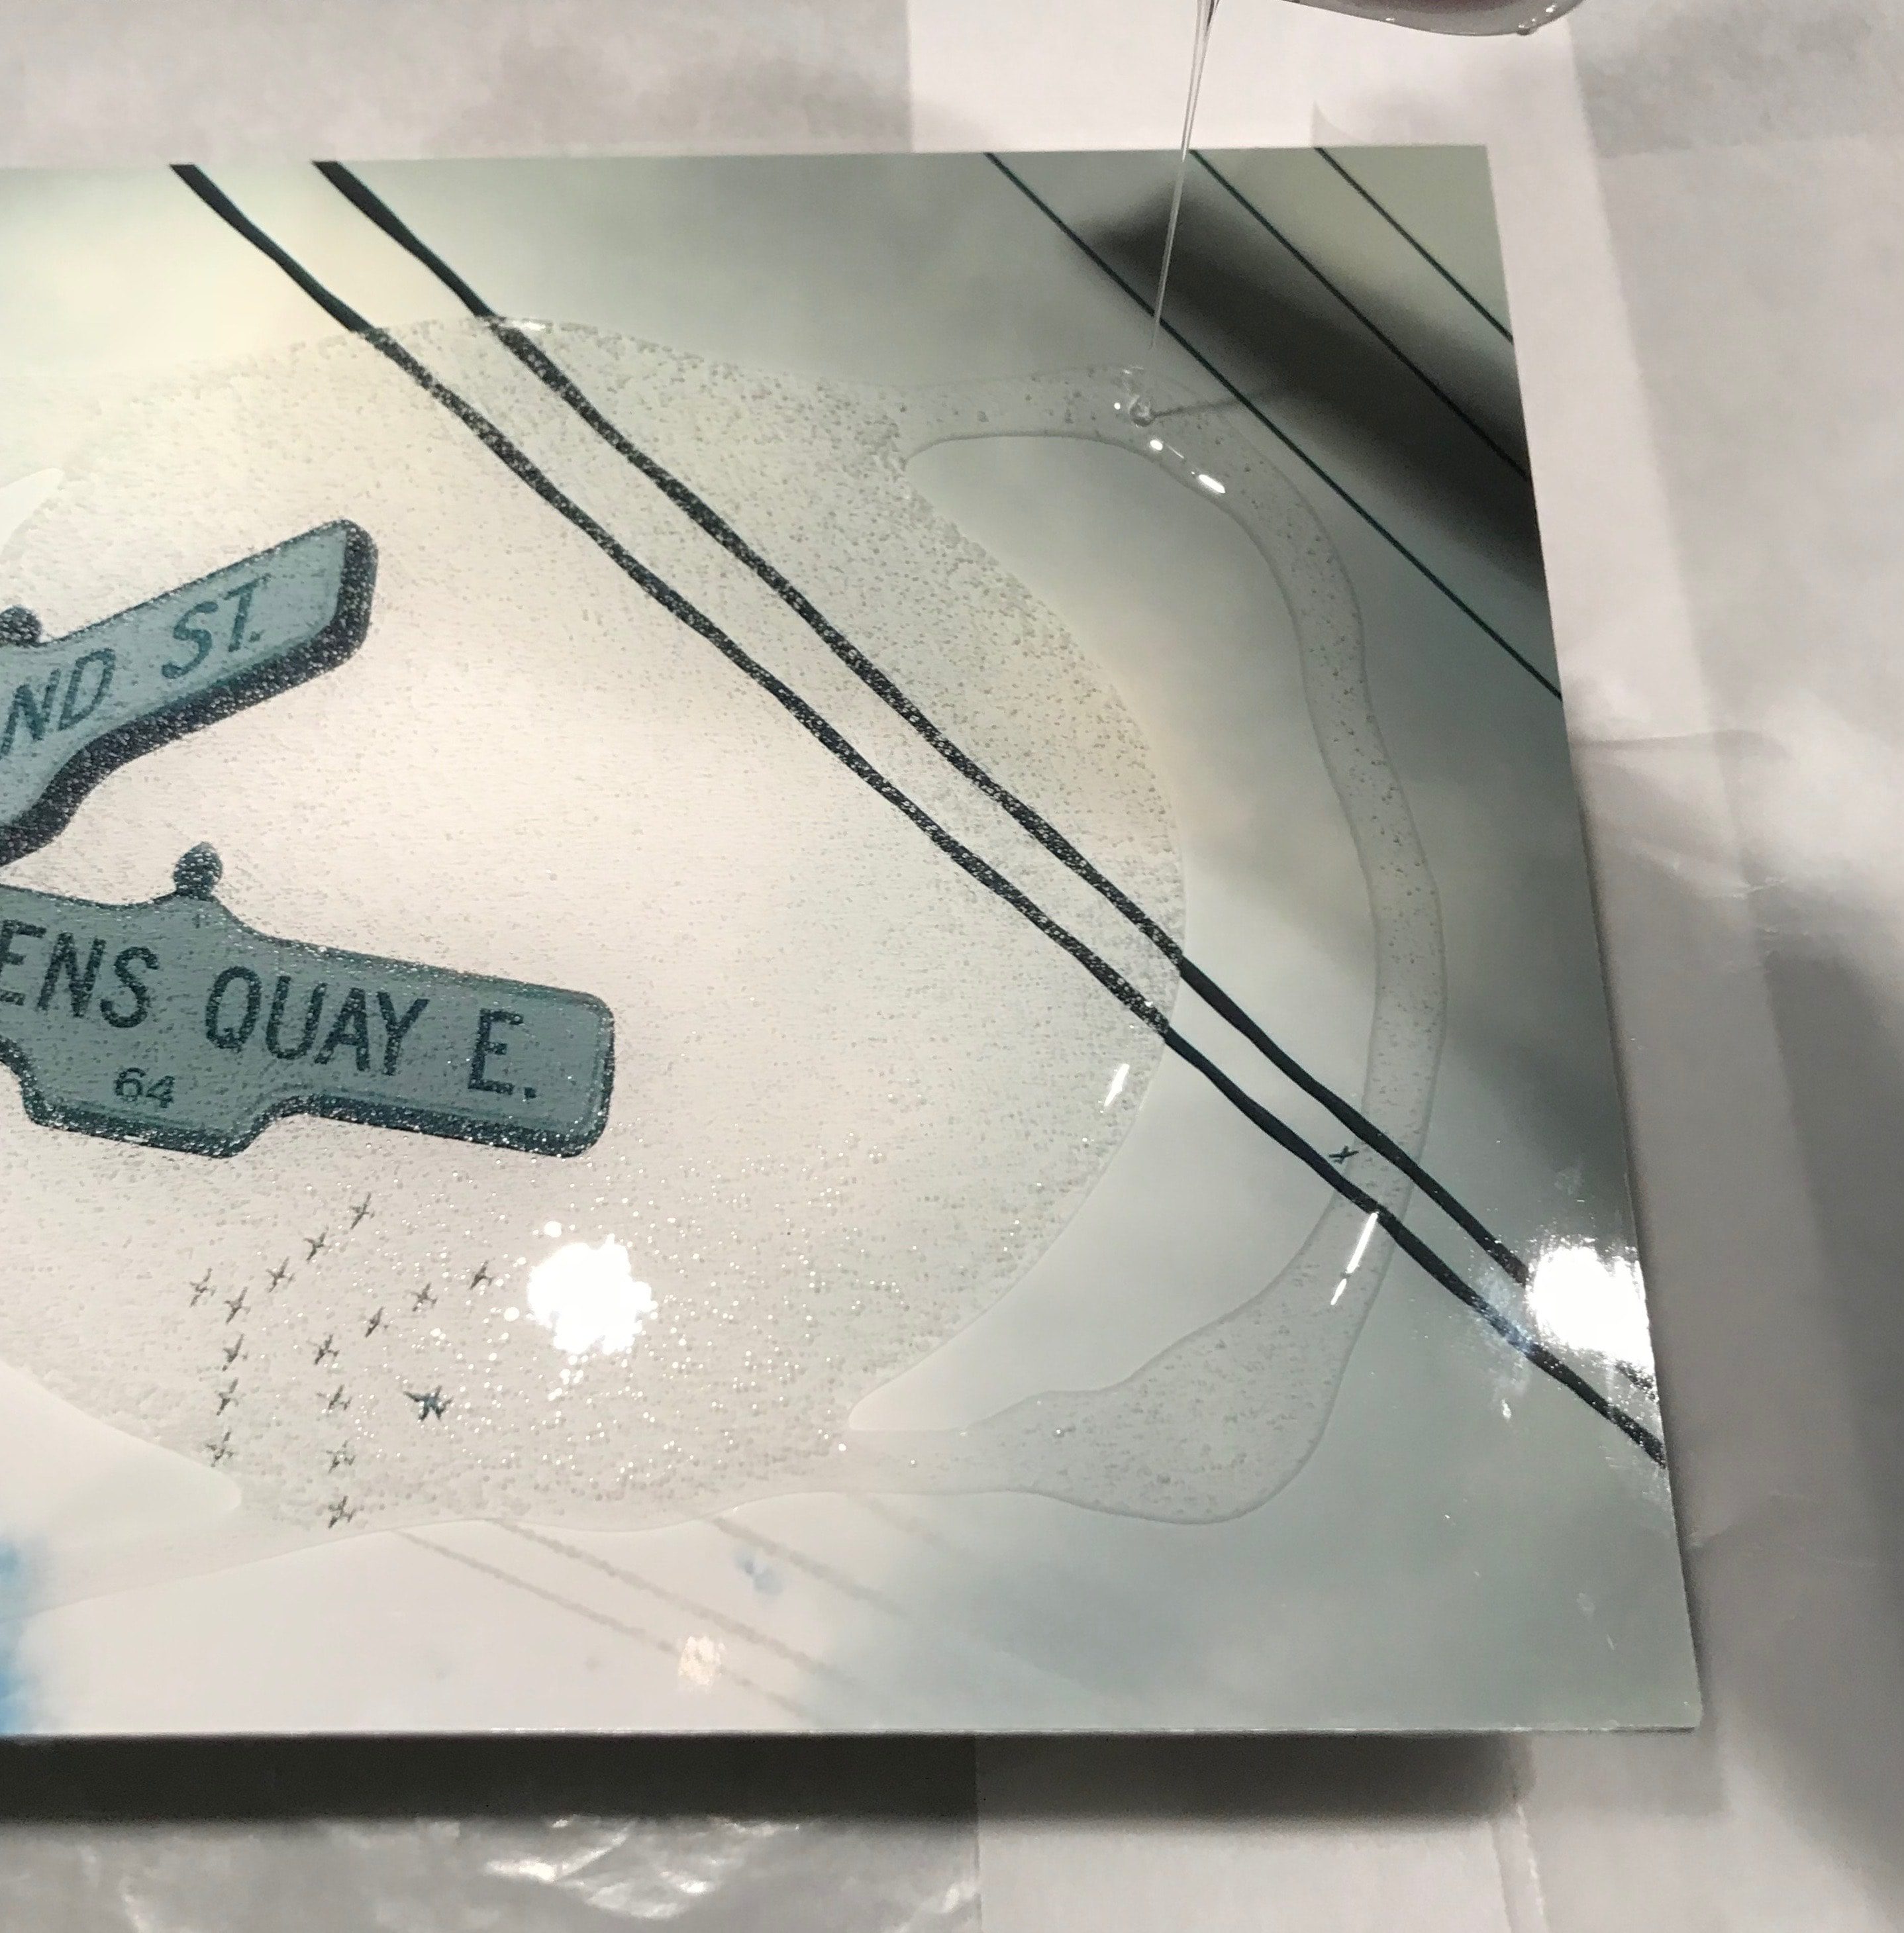
Use your squeegee to spread the resin.
Then, use the heat gun to pop the bubbles. Even with all the bubbles I created, I was able to get rid of all of them, but it took a few minutes. I checked back after 20 minutes and popped a few that had risen to the surface.
Cover to cure.

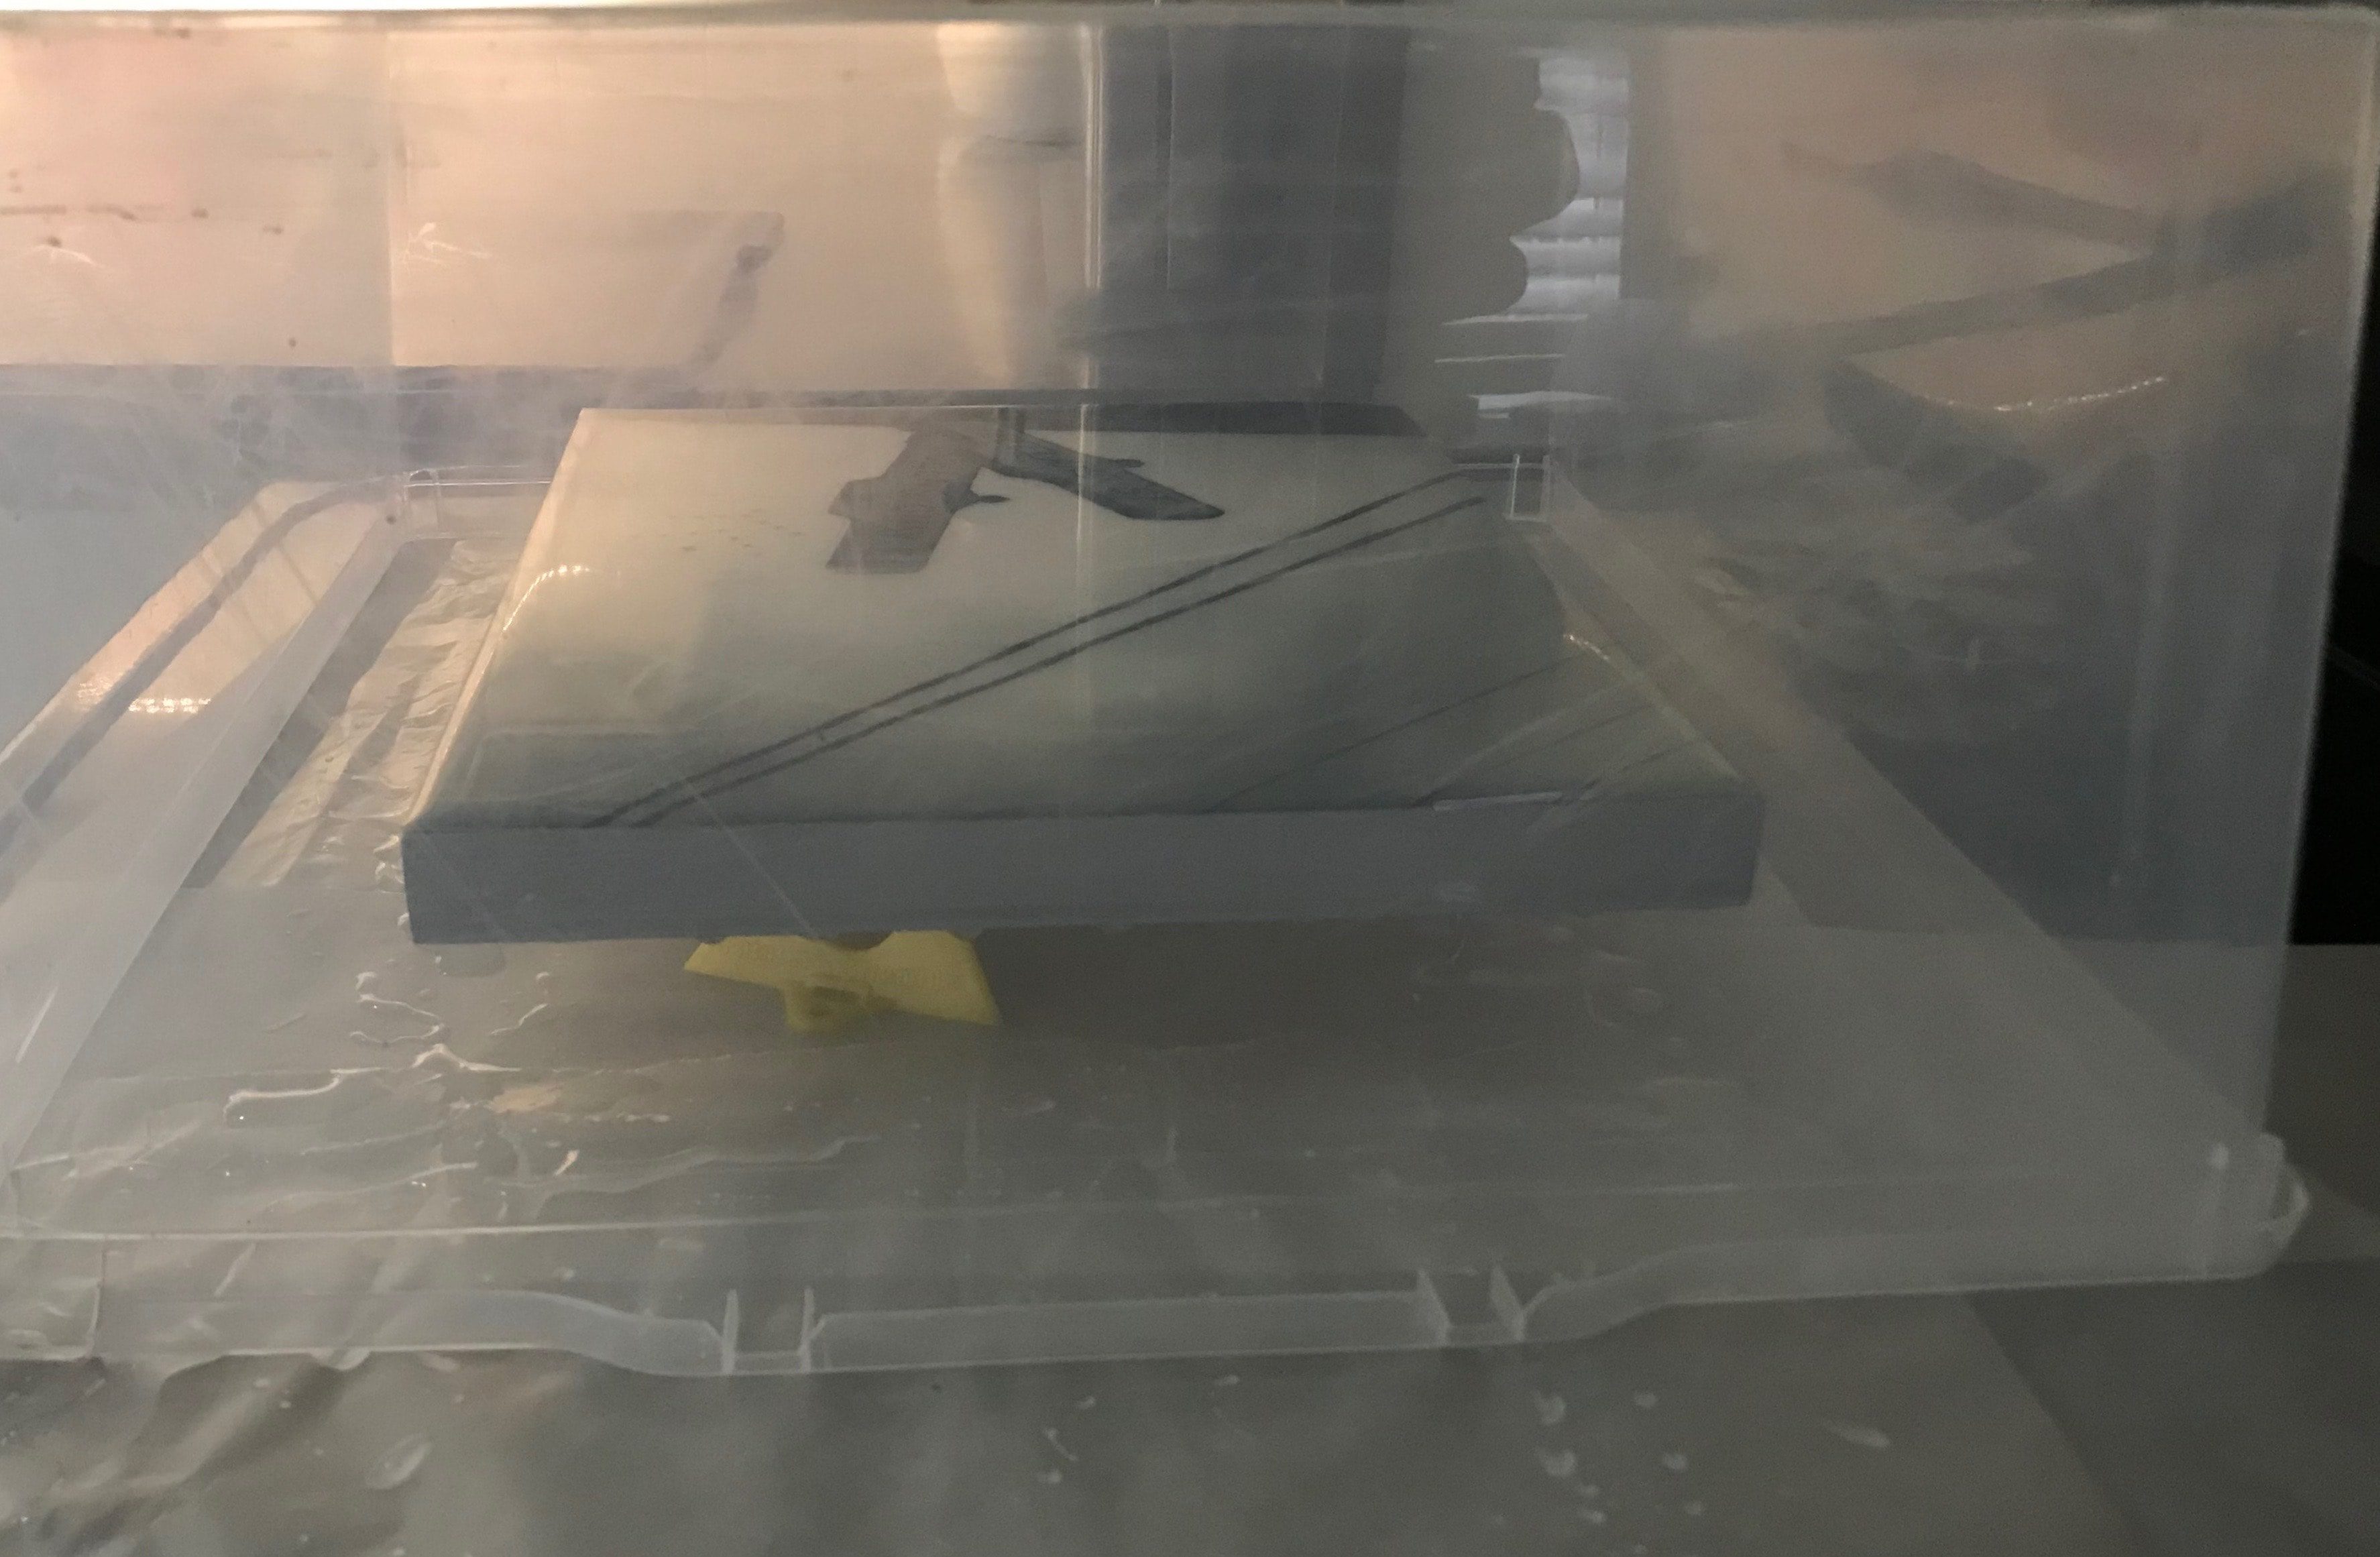
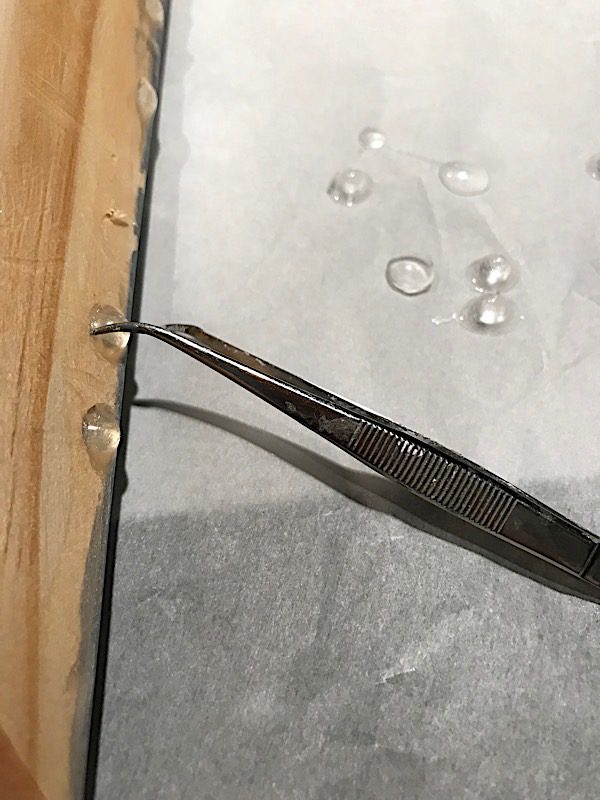
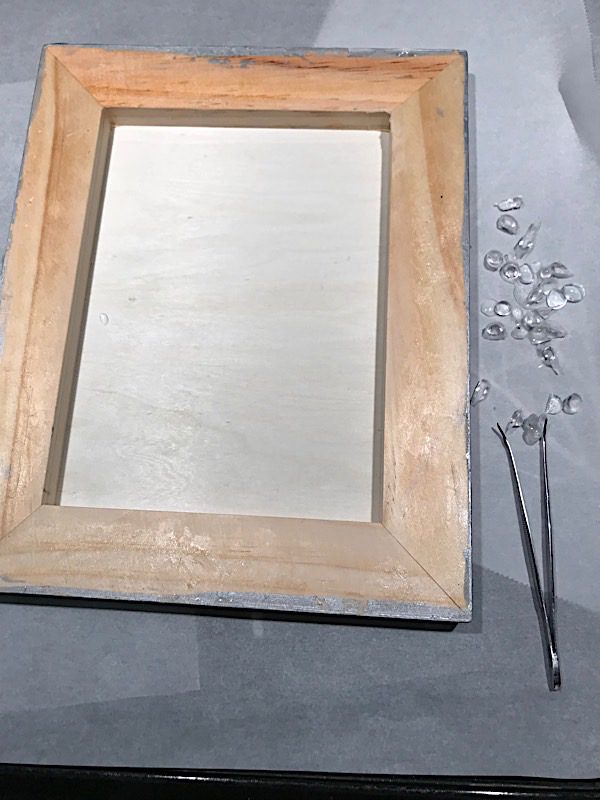
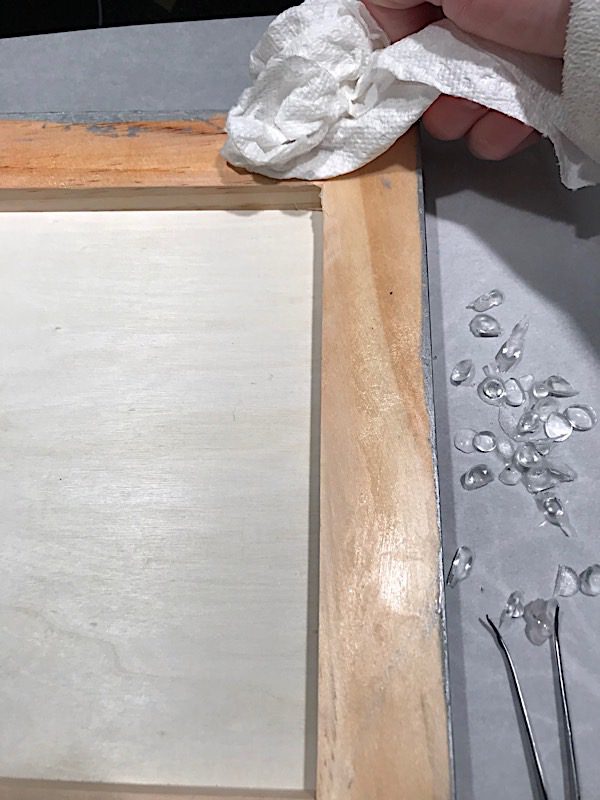
STEP 6: Remove resin drips
The best time to remove the drips from the back is when they are partially cured. They easily pop off with a flick with tweezers. Be careful to protect the front as it won’t be fully cured yet.
Wait another twenty-four hours for the resin to cure completely. It’s amazing how much the details of the photo pop with the resin. I’m hooked!
Overwhelmed knowing where to start with resin?
Tried resin but frustrated with your results? Stop wasting your time and energy on less-than-perfect results. Buy the ebook Resin Fundamentals, for less than the price of a resin kit. It will jump-start your resin learning curve with the essential details you need to know to make something amazing with resin.
Originally written by Penny Reid
Unpublished Blog Posts of Resin Obsession, LLC © 2023 Resin Obsession, LLC
Love it but I missed what you did with the resin dots, what are they for?
(On behalf of Penny) The dots were from resin that had dripped over the side of the wooden frame and collected underneath. Once they are cured, you can thrown them away.
They would be cool as ‘bubbles’ cast in resin or used in jewelry or as little ‘feet’ for some project. Or how bout filler for a flower vase. Or you could just pack them up and send them to me lol
Very cool ideas
Does it matter if you use a matte finish or a glossy finish.
No, it should work for either.
How do you seal the edges? I’ve tried this before and always end up with seepage around the edges.
Have you tried applying a clear-drying glue directly to the edge of the photo?
Not directly to the edge. I’m going to try that. Thanks!
Does it matter if the photo is ink jet or lazer as everything I have read says that photos have to be completely sealed in order to use with resin
Probably not, but I find I do better with laser jet prints.
You can laminate your picture first
Do you need to wait for the glue to dry before adding the resin? Also, I have a 16×20 print that was printed at Wal-Mart. Would this work with a 16×20 canvas, or does the phone need to be on printer paper?
Yes, you need to wait for glue to dry before applying resin. Wait at least 12 hours or longer if your climate is humid. A print from a print or photo shop will work well too.
I’ve tried putting a photo on a ceramic tile (not all the way to the edge because I like the white border) and the edges curl up or are not completely flat. Did you weigh it down as it dried? I then printed on regular paper and it worked way better. The paper print is less exciting but when the resin is added, it looks like the original photo. I would prefer to use the photos on photo paper though but the edges are stopping me from trying again. Help
Hello,
What do you mean, you cover it to cure it?
It means to cover it with a plastic dome, or something similar, to keep dust off of it while it’s curing.
How much resin did you need for this project? Is there a way to measure how much you need so you don’t waste too much?
If you don’t mind doing a little math, here’s how you can know how much resin you need for a project: https://www.resinobsession.com/resin-art/how-to-apply-a-glossy-resin-layer-to-a-painting/
Hi what would I use to seal the photo if a collage?
Hi Michele, I like to use the Mod Podge glue in our store: https://shop.resinobsession.com/products/mod-podge-water-based-glue-sealant-for-resin-items
Great post, have been way over estimating (and wasting !!)
My understanding is that all photos must be sealed before resin is applied. Unless I missed something you did not do this in this project. Doesn’t the colors run or become distorted?
I suppose it has to do with how the colors are printed onto the paper. Professional prints may not smear when resin is added. You will never go wrong to seal it first though if you are unsure.
What do you seal the photo with before applying the resin?
A clear drying white glue works well.
Clear spray paint i feel works the best
Photo places like Walmart use what’s called a sublimation printer, so no ink. Its 4 colors on reels each pass a layer of color is transferred from the roll to the print. Since it not ink like an inkjet or pigment printer, it is very hard to smudge a photo printed at a photoshop.
Hi Katherine,
Does the resin applied look even or is it more uneven? Or is there a specific process to even it out?
Tks
Lawrence
As long as you are using a doming (self-leveling) resin and pour on enough to make it 1/8 inch thick, it will even out.
Step 5 “and cover” what does that mean and what do you use to cover it?
I have been wanting to set some of my photos in resin for a while now, finally made the space in my garage to do so! Wondering where do you recommend getting photos printed at? The few times I have sent to a local printing place the quality isn’t that good. Also do you seal the photo before adding the resin? Thanks
Thank-you for your clear, step-by-step instructions! I have been wanting to do this forever, and this article has given me the confidence!
Your photo looks great!
I want to make wooden blocks (6 sides) for my great grandson with pictures on each side. How could I cover each side with resin
You will need to use a doming resin on each side, one at a time. We have several doming resins here: https://shop.resinobsession.com/collections/resin/doming
Great post. When you say ‘wood canvas’ to you mean canvas stretched on a wooden frame or do you mean a piece of wood? I’m wondering about flex in the canvas cracking the resin
No, a wooden board was used.
I’ve always wanted some way to make sure photos last forever and this is it I finally found it thanks
I’ve been using resins on photos for about five year. It took a while to perfect the proses but they did look amazing. Unfortunately, after several year the resin has turned pink. This hasn’t happened to all of my pieces but quit a few. Do you know what is causing this?
I haven’t heard of resin turning pink, but resin will yellow with time. It sounds like it’s either reacting to the UV light or something in the photo.
Can I use the same method to pour over a glossy picture cut out ?from a magazine
Yes, use the same techniques.
Love that piece! I’m about to cover a photo on a kids toy with resin. It’s a part of a puzzle and the resin layer needs to be thin. Do you think I could paint the self-leveling resin on with a brush instead of pour it on ( to keep it thin)? Or would you see brush strokes in the resin when dry?
Hi Rachel, if you want to try it this way, use a sponge brush. It will keep the layer thin without seeing brush lines.
I’m still not clear on the wood canvas, Do you make these or purchase them? ….if so where ?
You can purchase the wooden art board at a store that sells art supplies.
Dollar Tree sells them
I’ll be using a 11″ x 17″ piece of art on a 16″ x 21″ piece of clear birch plywood. painted black as a back ground for the piece of art. then place it in a frame. glue it first on a piece of plywood ( clear birch) cover it with clear glue as a sealer then pour the resin on it after being framed and this will stop the drips? am I doing this right? or cover the frame also?
This sounds like a good plan Frank!
I want to use resin/acrylic over a canvas print (of a photo). Have you completed a project like this? Thanks for any advice/
Hi Cynthia, you can do it the same way as shown in this article.
Can I use heavy cardboard instead of wood?
Hi Kat, I wouldn’t expect cardboard to be able to support the weight of the photograph and resin without bending.
Once the resin cures the cardboard will be stiff enough and will not bend
I wouldn’t expect it to Felicia.
Wow , I can’t thank you enough for all the wonderful, clear info .
You are welcome, Esther. I’m glad you found it helpful!
Hi from Auckland New Zealand
I’m new to resin and found this article very informative. Thank you for sharing.
Thanks so much, Margaret. 🙂
Thank you so much for the tutorial. I am new to resin and really want to use it on some of my photos, but I appear to be a few tools shy. I have never used a heat gun on my creations, but it appears to be necessary for photos? Is there a specific type of heat gun you recommend?
Thanks-
Heather
Hi Heather, yes, I like this one you can buy in our store: https://shop.resinobsession.com/products/wow-embossing-multipurpose-heat-tool-heat-gun
This is brilliant….thank you!
Thank you!
Hi…I am new to this exciting craft..I want to do photos in coasters…I want to know…can I first put a thin layer of resin…then pour my resin over..as I want the photo to be in the middle of resin??
Hi Maria, if you want your photo to be in a specific part of the coaster, you will need to pour in layers, letting them at least partially cure before pouring the next layer. This article explains more about how to make things float in resin: https://www.resinobsession.com/resin-tutorials/how-to-make-things-float-in-resin/
Hi I am hoping you can help
I’m getting a sign made from mdf and want to put photos on it but I want to cut photos to leave a 5mm border around the sides so it will be like a border
The sign will say family
My question is if I use the resin there will be a slight lip as Re the thickness of the photo
Should I tape around the mdf so the resin does not create a lip and will be even all over???
What would you suggest and what is the best product to use resin or epoxy or ??
Thankyou in advance
Tracy
Hi Tracy, this article on covering a photo collage board with resin will answer your questions: https://www.resinobsession.com/resin-tutorials/mothers-day-diy-gift-idea/
How do you cover a photo with resin if printed on paper? What is the best type of paper ie. gloss or luster? and do you require a spray sealant? If so, what brand of sealer is the best for photographs?
Hi Janet, this article will help: https://www.resinobsession.com/resin-tutorials/photo-pendant/
I have long been wondering, and meaning to write and ask, if photos (printed in today’s labs) would be good in resin. Now I see the answer is “YES!” I have wanted to use tiny, professionally printed, photos instead of my laser printer because details and colors were… less than perfect (and that’s being kind). I use 300 dpi with my printer but it’s still been lacking. I’m very picky!
I’m wanting to make a collage of cut out photos on a slice of tree ,and it still has bark and even moss on the sides. What would be the best way to do this . It’s a graduation present for my son.
Hi Amy, this article will help: https://www.resinobsession.com/resin-tutorials/photo-gift-idea/