
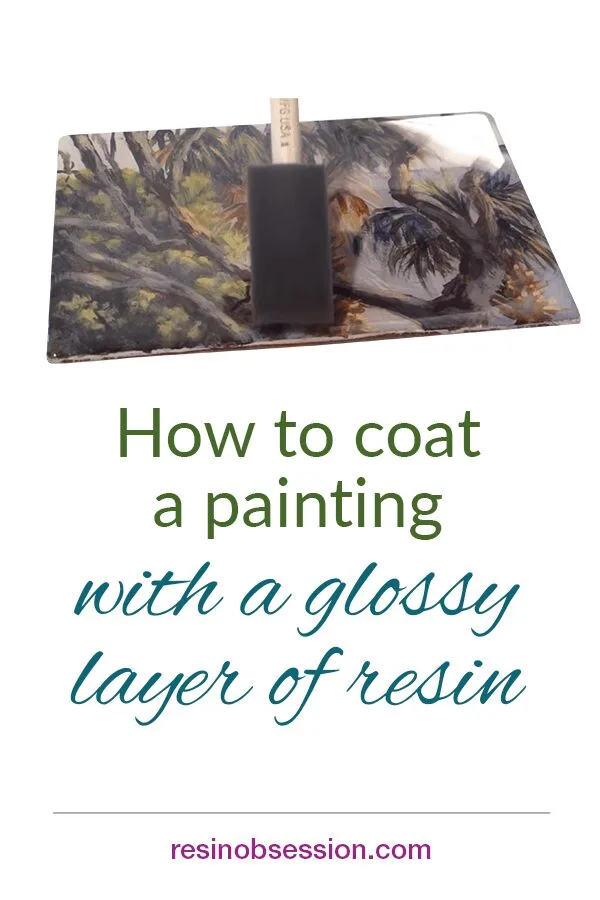
 Want to give your artwork a glossy finish, all while magnifying the details? Perfect. Then you’re going to love epoxy resin. Here are the steps of how to resin a painting.
Step 1: Get the RIGHT resin
For a project like this, you’ll need a doming resin. These resins mix thick, allowing them to evenly coat surfaces and give a smooth, shiny finish.
For giving a clear coat to your projects, you’ll love the Resin Obsession crystal doming resin. It gives a glass-like finish to photographs, paintings, tiles, and tumblers.
💡 Pro tip: You can use it in jewelry blanks too. It works beautifully to make photo resin pendants.
Step 2: Elevate the painting
Resin your art onto plastic cups. You’ll want at least 1 inch between your art and your table because the resin will drip over the side.
And while we’re talking about resin dripping, cover your table with plastic or a silicone mat. That way, you’ll be able to clean up your mess easily.
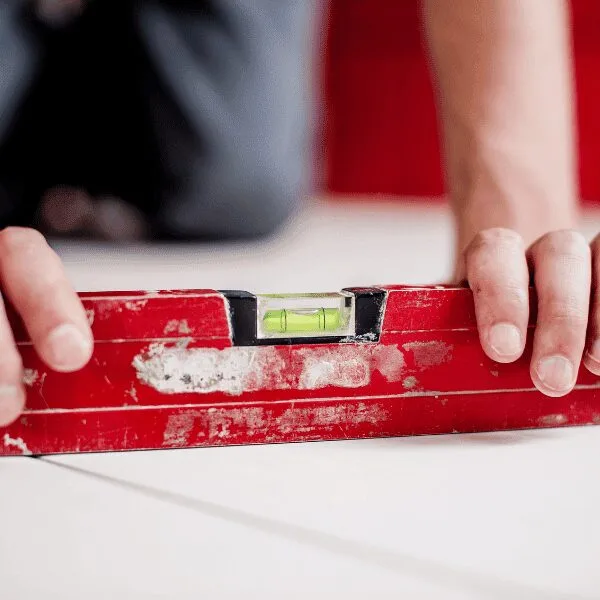
Step 3: Level the surface
Because you want the resin to coat the art surface evenly, you need to check that the surface is level. If it isn’t, it can pull or leave fish eyes.
Step 4: Calculate how much resin you need
You want enough resin to coat the surface without wasting any.
Measure the height and width of your art. Then, put those numbers into our resin calculator. It tells you how much resin you need.
Step 5: Measure and mix the resin
The crystal doming resin mixes one part A to one part B by volume. So whatever number you got in Step 4, you need to divide in half to get the amount of each Part to mix.
Example:
You to know how much resin you need to cover a painting that’s 5 inches tall by 7 inches wide.
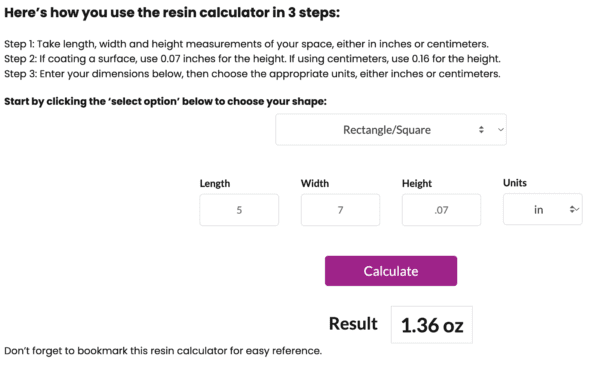
The resin calculator tells you that you need 1.36 ounces of resin. That number is mixed resin. And since the crystal doming resin mixes 1 part A to 1 part B, you’ll need 0.68 ounces of each liquid.
But the EASY way is to just round up to 0.75 ounces (3/4 ounce) of each liquid. And have a few leftover resin projects ready to use up the extra.
Step 6: Cover the surface of the painting
Once the resin is fully mixed, you want to cover the surface of your painting. Use your resin stirring stick to push the resin over your painting’s surface.
⭐️ BONUS: Here’s how to know when your resin is mixed.
Step 7: Pop bubbles
After the resin is over your painting surface, go over it with a heat gun to pop bubbles. Once the bubbles are gone, cover the painting with a cover. Let your resin cure for at least 24 hours.
⭐️ BONUS: Learn how to use a heat gun with resin.
Once done, your painting will have a glossy finish over the top. The clear resin also magnifies your art’s details. You can hang it as is or put it in a frame.
Here’s a demo of how to resin a painting:
Want to get started with resin but worried about making a mistake?
I get it. It’s a lot to sort through. How can you possibly read it all? It’s why I wrote the ebook Resin Fundamentals. It’s the PDF book that teaches you what you need to know in only a couple of hours. Buy it now, and it’s yours to read in minutes.
Unpublished Blog Posts of Resin Obsession, LLC © 2023 Resin Obsession, LLC
@Charlotee, you can try a long lighter. Move the flame quickly as to avoid yellowing the resin. Also be careful not to let the flame touch the resin.
If you do not have a hot gun, how can you remove any bubbles?
After the small amount of resin leftover in the plastic measuring cup that you use to mix the resin sets, does it peal off after it sets or do you clean the cup right after pouring the resin on your project? If you clean the cup right away do you use water?
Hi Sue, we have a video on how to do that here: https://youtu.be/17Ixaa0Lw6o
Do you ever worry about using resin indoors?
When using large amounts of resin indoors, I always do it at the end of the day when I can leave the room overnight. I also have windows open (weather permitting) for fresh air or I have a fan circulating in the room. I also wear a respirator for fumes while pouring the resin.
Hi looking for help on resin acrylic paintings ,when my painting is cured, there are dimples under the resin ,I have tried sanding and recoating but they are still there,I cleaned the canvas and wooden boards first with a baby wipe to make sure there was no grease etc .
Hi Marlene, this sounds so frustrating! This article explains how to fix dimples in resin: https://www.resinobsession.com/resin-frequently-asked-questions/fix-holes-and-dents-in-resin/
I have done a mosaic piece on glass that I want to resin, the dimensions are 24” long, 17” wide and about an 1/8” thick. How much resin do I need? I suck at math 😡
It’s okay, Mary. You aren’t the only one. 😉 It’s why we’ve got this resin calculator https://www.resinobsession.com/resin-calculator/