
 According to Entrepreneur, business cards are still relevant. Well then. That means a DIY resin business card holder is relevant too.
And if you are team ‘no business cards,’ that’s okay. Keep reading. There’s another way you can use your DIY resin business card holder.
Now, if you’ve spent any time around here, you know I go into deep details about why I recommend a specific resin for a project.
But if you’re new…
Spoiler–there is no one size fits all resin.
Despite what else you might read. (Especially on that store that would have you believe it helps businesses like this one)
That’s why I like to spend a little time on this, so the business card holder DIY design in your head is the one that comes out of the mold. 😀
Let’s start with how you’ll DIY this business cardholder with resin.
You’re going to pour epoxy resin into a resin mold to form it.
Now you might think you need to find an epoxy resin for business cardholders.
And it makes sense that you would think that.
But that’s not what you need.
When using epoxy resin, it comes down to whether you’re coating a surface or filling a space.
In this case, we’re filling a mold space with resin.
That means you need the best epoxy resin for molds. The business card part isn’t as important as the mold part.
And using molds means you need to use the epoxy resin type meant for molds.
That’s a casting resin.
⭐️ BONUS: How to fast-track your success with resin casting molds.
Now, you calculate how much resin you’ll need.
Hold on. This part is easier than it sounds.
1. Grab a ruler.
2. Take measurements
3. Put them into this resin calculator.
It will tell you how much resin you need.
Then, choose your resin. To DIY your business card holder in a mold, you have two choices for epoxy resin:
Resin Obsession super clear resin for crafts
Resin Obsession deep pour epoxy resin
Which one do you use?
How much resin are you using?
Yes, I’m one of those unruly people who will answer a question with a question. But it’s only because I’m trying to help you, young resin padawan.
When working in molds, the magic number is 3 ounces of mixed resin.
If you’re using less than 3 ounces at once, use the Resin Obsession super clear resin.
If you’re using more than 3 ounces at once, use the Resin Obsession deep pour resin.
Let’s recap.
❶ You need a resin for molds.
❷ Then, calculate how much resin you need.
❸ After that, choose the specific clear casting resin.
Now, the rest of this will make more sense.
Let’s DIY a flower business cardholder in layers.
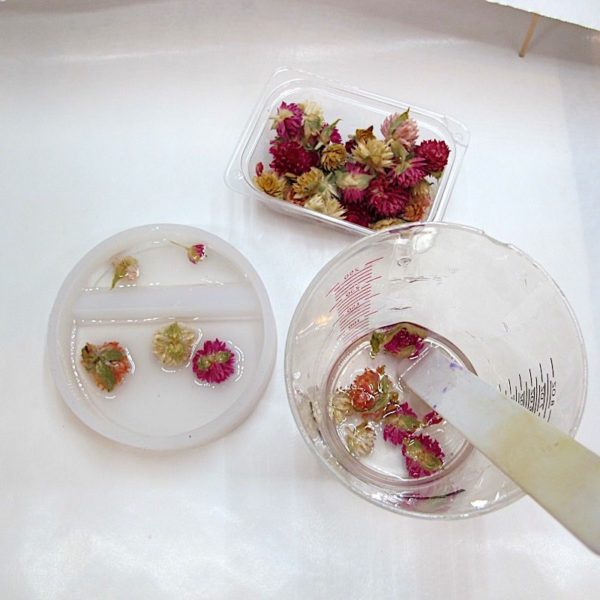
Step 1: Gather your resin supplies
Grab a business card holder mold, Resin Obsession super clear resin, and dried flowers. Your flowers need to be dry first. Otherwise, they will spoil and turn brown. (Yeah. I’ve done it.)
We’ve got several styles of business card holder molds for you to DIY this project.
💡 Pro tip: You can buy dried flowers online if you don’t want to dry them yourself.
Step 2: Mix the resin
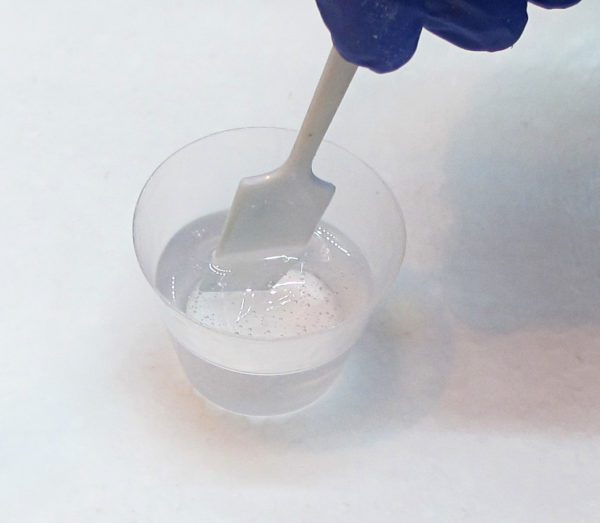
You’re using the super clear crafting resin here because each layer is less than 3 ounces. (It’s about 1 ounce, in case you’re wondering.)
The super clear resin measures two parts resin (part A) to one part hardener (part B).
Using the number you got with the resin calculator, determine how much you need for each part. Measure, then combine them until clear and streak-free.
⭐️ BONUS: If you’ve never done this before, here’s how to mix resin so it cures completely.
Step 3: Add to the mold
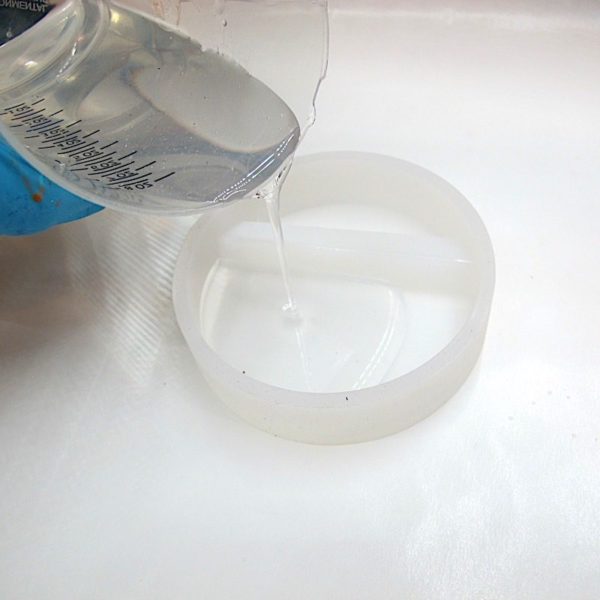
Pour a little bit of resin into the bottom of the mold. Then, add your flowers.
💡 Pro tip: Flowers can trap bubbles that will cure in the resin. Dip your flowers in your resin cup, then put them into your mold.
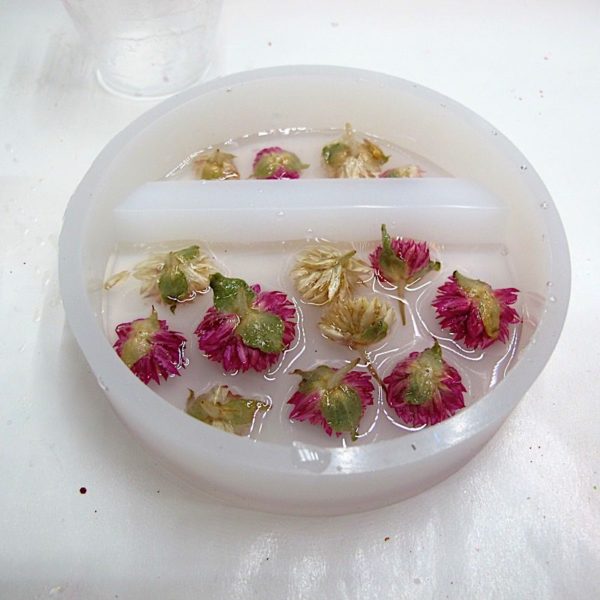
Because flowers will float to the surface, you’ll want to pour your resin in layers. To minimize the seams between layers, pour your next resin layer once the current layer starts to thicken like gelatin.
⭐️ BONUS: Here’s how you know when your resin is in the gel phase.
Continue with adding layers until your mold is as full as you like.
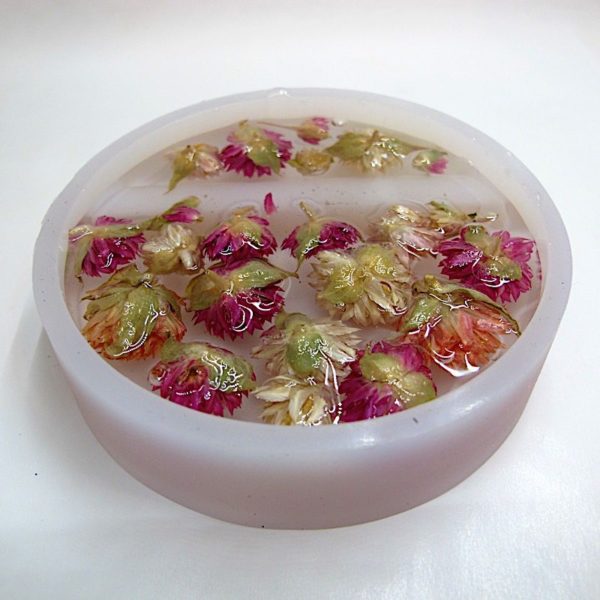
Step 4: Let cure
Once the resin is completely dry, demold by peeling the mold away from the cured resin.
Step 5: Finish the edges

Check your resin for sharp edges that might scuff a table or desk.
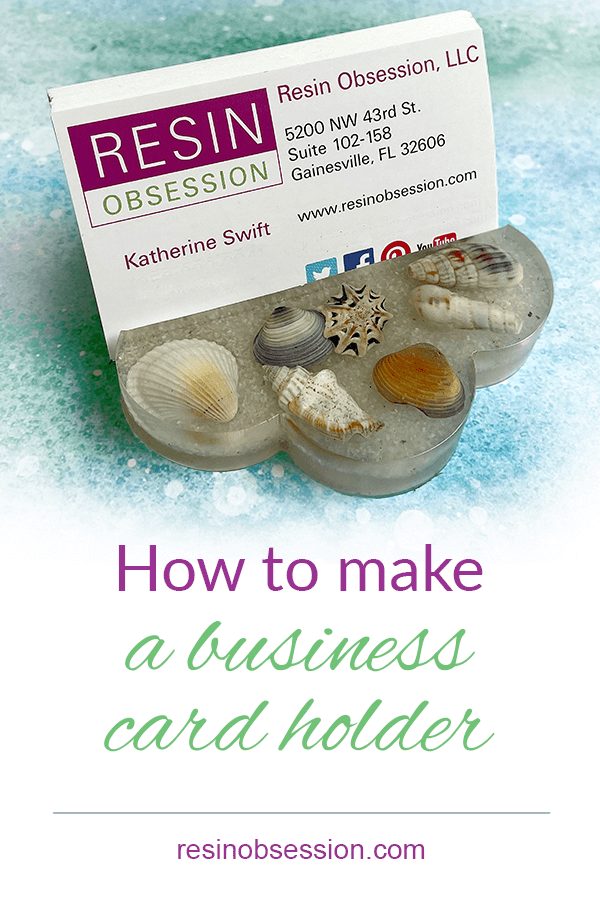
Ta-da! You just learned how to DIY a business card holder with resin.
You can also use the same steps to make a beach-themed business cardholder.
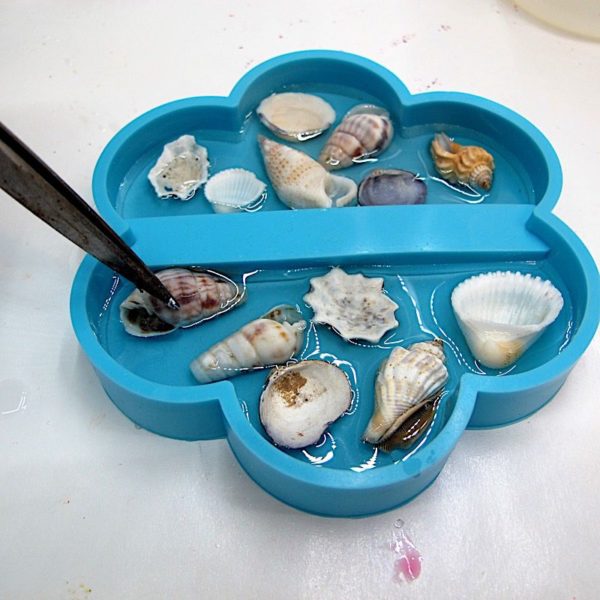
Instead of adding flowers to the first resin layer, you’ll add seashells.
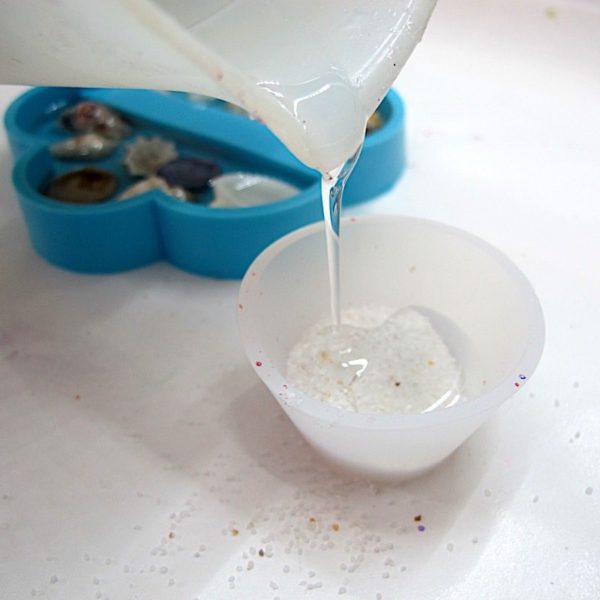
Then, mix sand into the second resin layer.

And fill the mold.
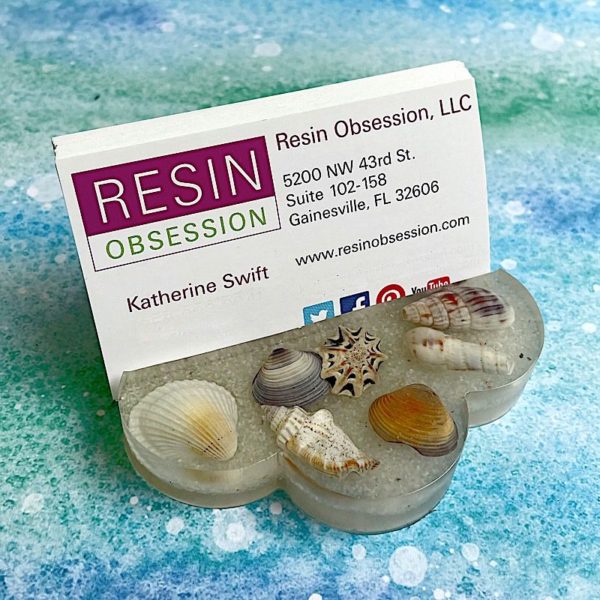
It turns out pretty cool too. (Ocean not included.)
But what if you want to fill the mold in one pour?
Ah, I like how you think.
Yes, you can do that, but you need to use a different resin.
Because these business card holder molds take more than three ounces of resin, now is when you’ll use the deep pour resin. It won’t overheat and crack while your resin cures.
⭐️ BONUS: Here’s what happens when resin overheats. I know because I’ve done it. 🧯
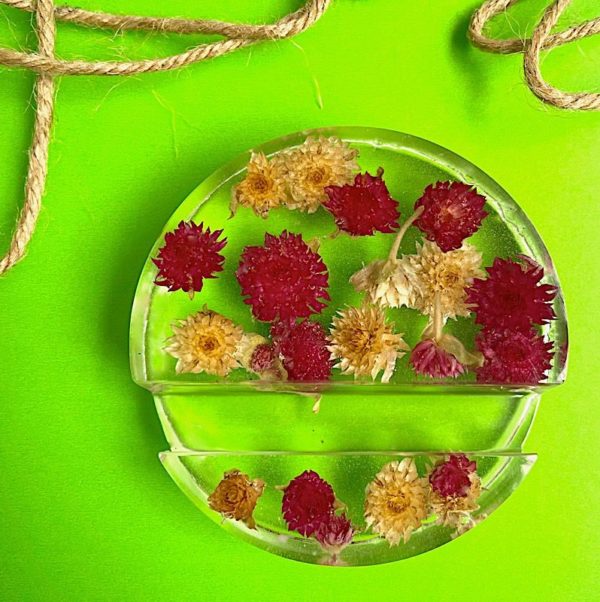
Here are two other business card holders you can make with the deep pour resin.
You’ll use the same steps as above, but you won’t need to pour in layers because you’re filling the entire mold at once.

Here’s a cool one with toy parts.

And another cool business card holder with pony beads.
Here’s the best thing about a DIY business card holder project…
They make great gifts. You can personalize the resin with fun stuff that your gift recipient will adore.
But what if you don’t use business cards?
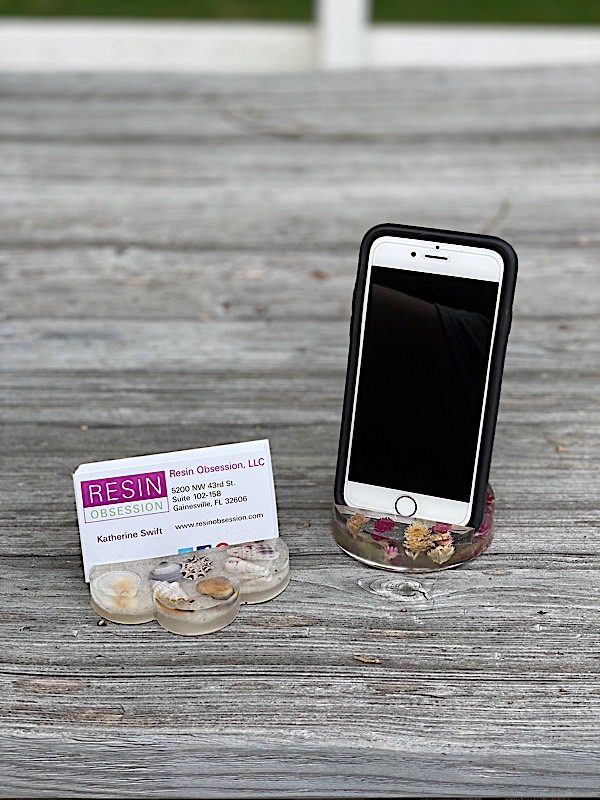
Your DIY business card holder might work as a phone holder.
I say it might because it will fit nicely if your phone is skinny and naked (i.e., without a case). But if you have a bulky phone, it won’t fit.
Ready to try this resin project, but want more help getting started?
I get it. I don’t like spending my time and resources on something that will only make it to the trashcan. It’s why I wrote the resin beginner ebook, Resin Fundamentals. I’ve condensed my 17 years of resin artist experience into a clear path for resin beginners. Stop making mistakes and start making something beautiful. Buy the book now and get a download link in minutes.
Unpublished Blog Posts of Resin Obsession, LLC © 2023 Resin Obsession, LLC
I love the photos of other ways to make the card holder! It really sparks my imagination!
Thanks.
You’re welcome, Constance. 🙂