
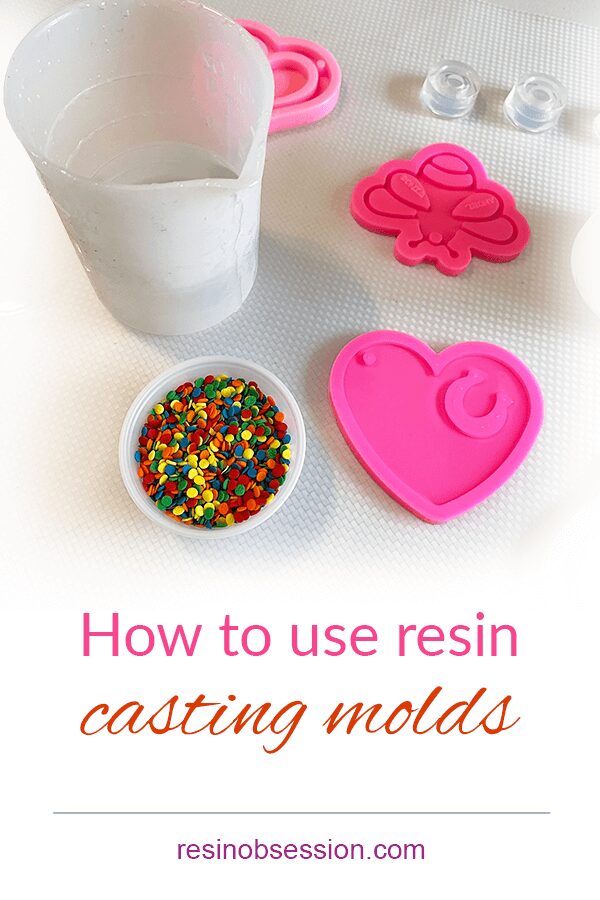
Using casting molds with resin is a fun and easy way to get crafty. There are so many options for resin molds out there. Let’s get into the basics of what you need to know to create something you can’t wait to show off!
What are casting molds?
Molds are hollow forms that you pour casting resin into to produce a shape. The structure and finish of the mold will impart onto the resin as it hardens. Once the resin fully forms, you remove the resin from the mold, and it retains the mold shape.
What casting molds should I use with resin?
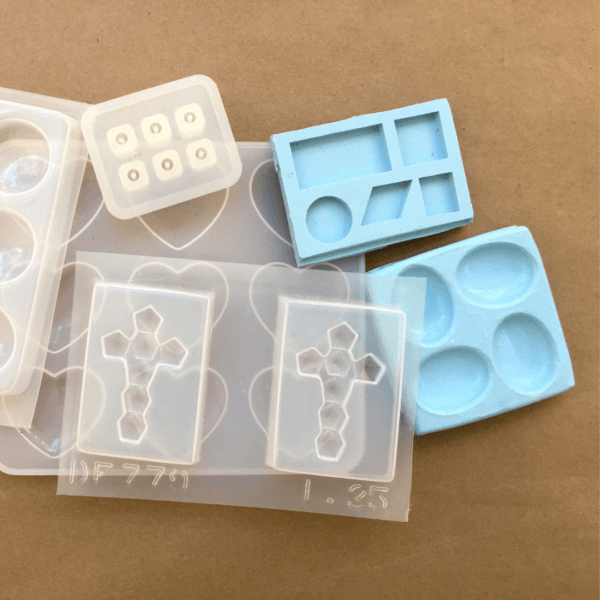
Molds specifically designed for resin will give you the best results. These include silicone molds and polypropylene plastic molds. Resin molds release resin easily once it cures completely.
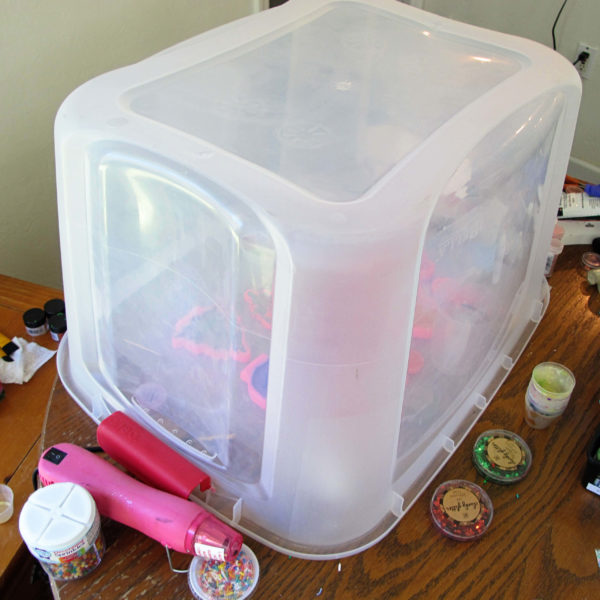
Other molds, like candle and ceramic molds, don’t work well with resin. In fact, the resin may stick to the mold and not release at all. If you don’t believe me, here’s what happened when I used a soap mold with resin.
What kind of resin should I use with casting molds?
For mold projects, you should always use a casting resin. This type of resin mixes in a thin consistency, making it easy for bubbles to escape the resin before it starts to cure. These resins also do better when poured in thick layers as compared to countertop resin, which is meant for coatings.
For mold projects where you’re pouring 3 ounces or less of mixed resin, use the Resin Obsession super clear resin. It cures hard and clear and is ready to demold in 8 to 12 hours.
For resin mold projects where you want to pour more than 3 ounces of mixed resin, use the Resin Obsession deep pour epoxy resin. Not only is this an excellent resin to use in molds, but you can also use it for thick-pour resin projects like river tables.
How do you use casting molds?
Here comes the fun part. It’s time to use your resin with molds!
Mist a light layer of resin mold release over your mold 30 minutes or longer before you fill it with resin.
This will make it easier to demold your resin castings, plus prolongs the life of your mold.
⭐️ BONUS: Here are three reasons why using mold release is a good idea.
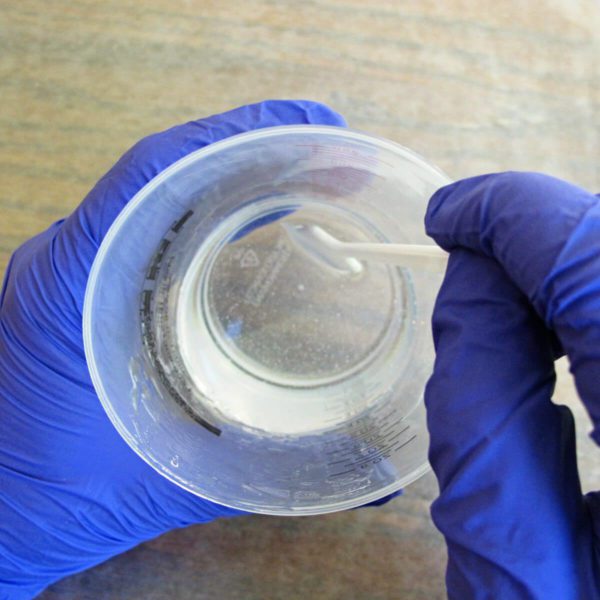
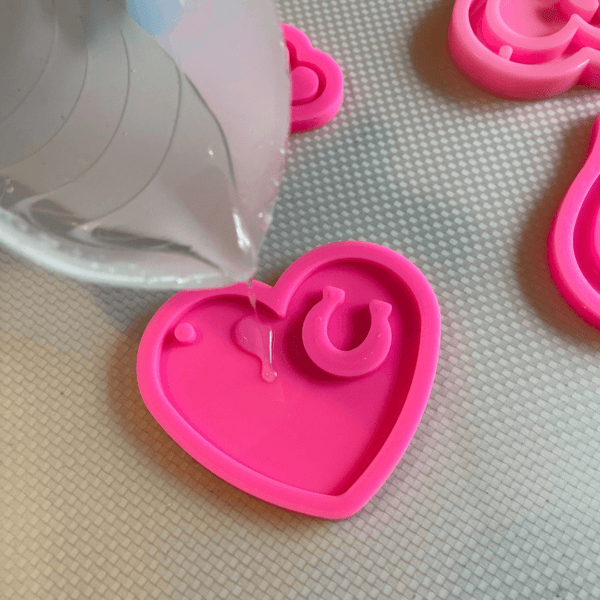
Measure and mix your casting resin.
Every resin has specific instructions that should be included with your resin kit. Follow them strictly so you don’t find yourself with a resin disaster. If you haven’t used resin before, this explains how to measure and mix resin in five easy steps.
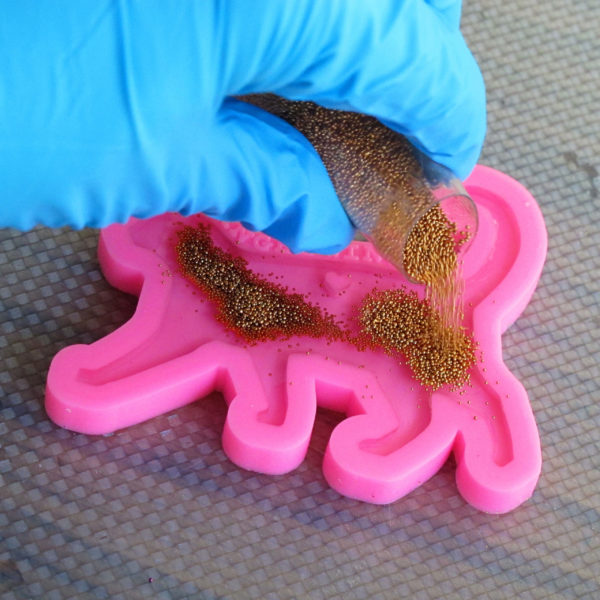
Pour the resin into the mold.
You can add fun stuff like found items, charms, glitter, stickers, or, like shown here, glass beads.
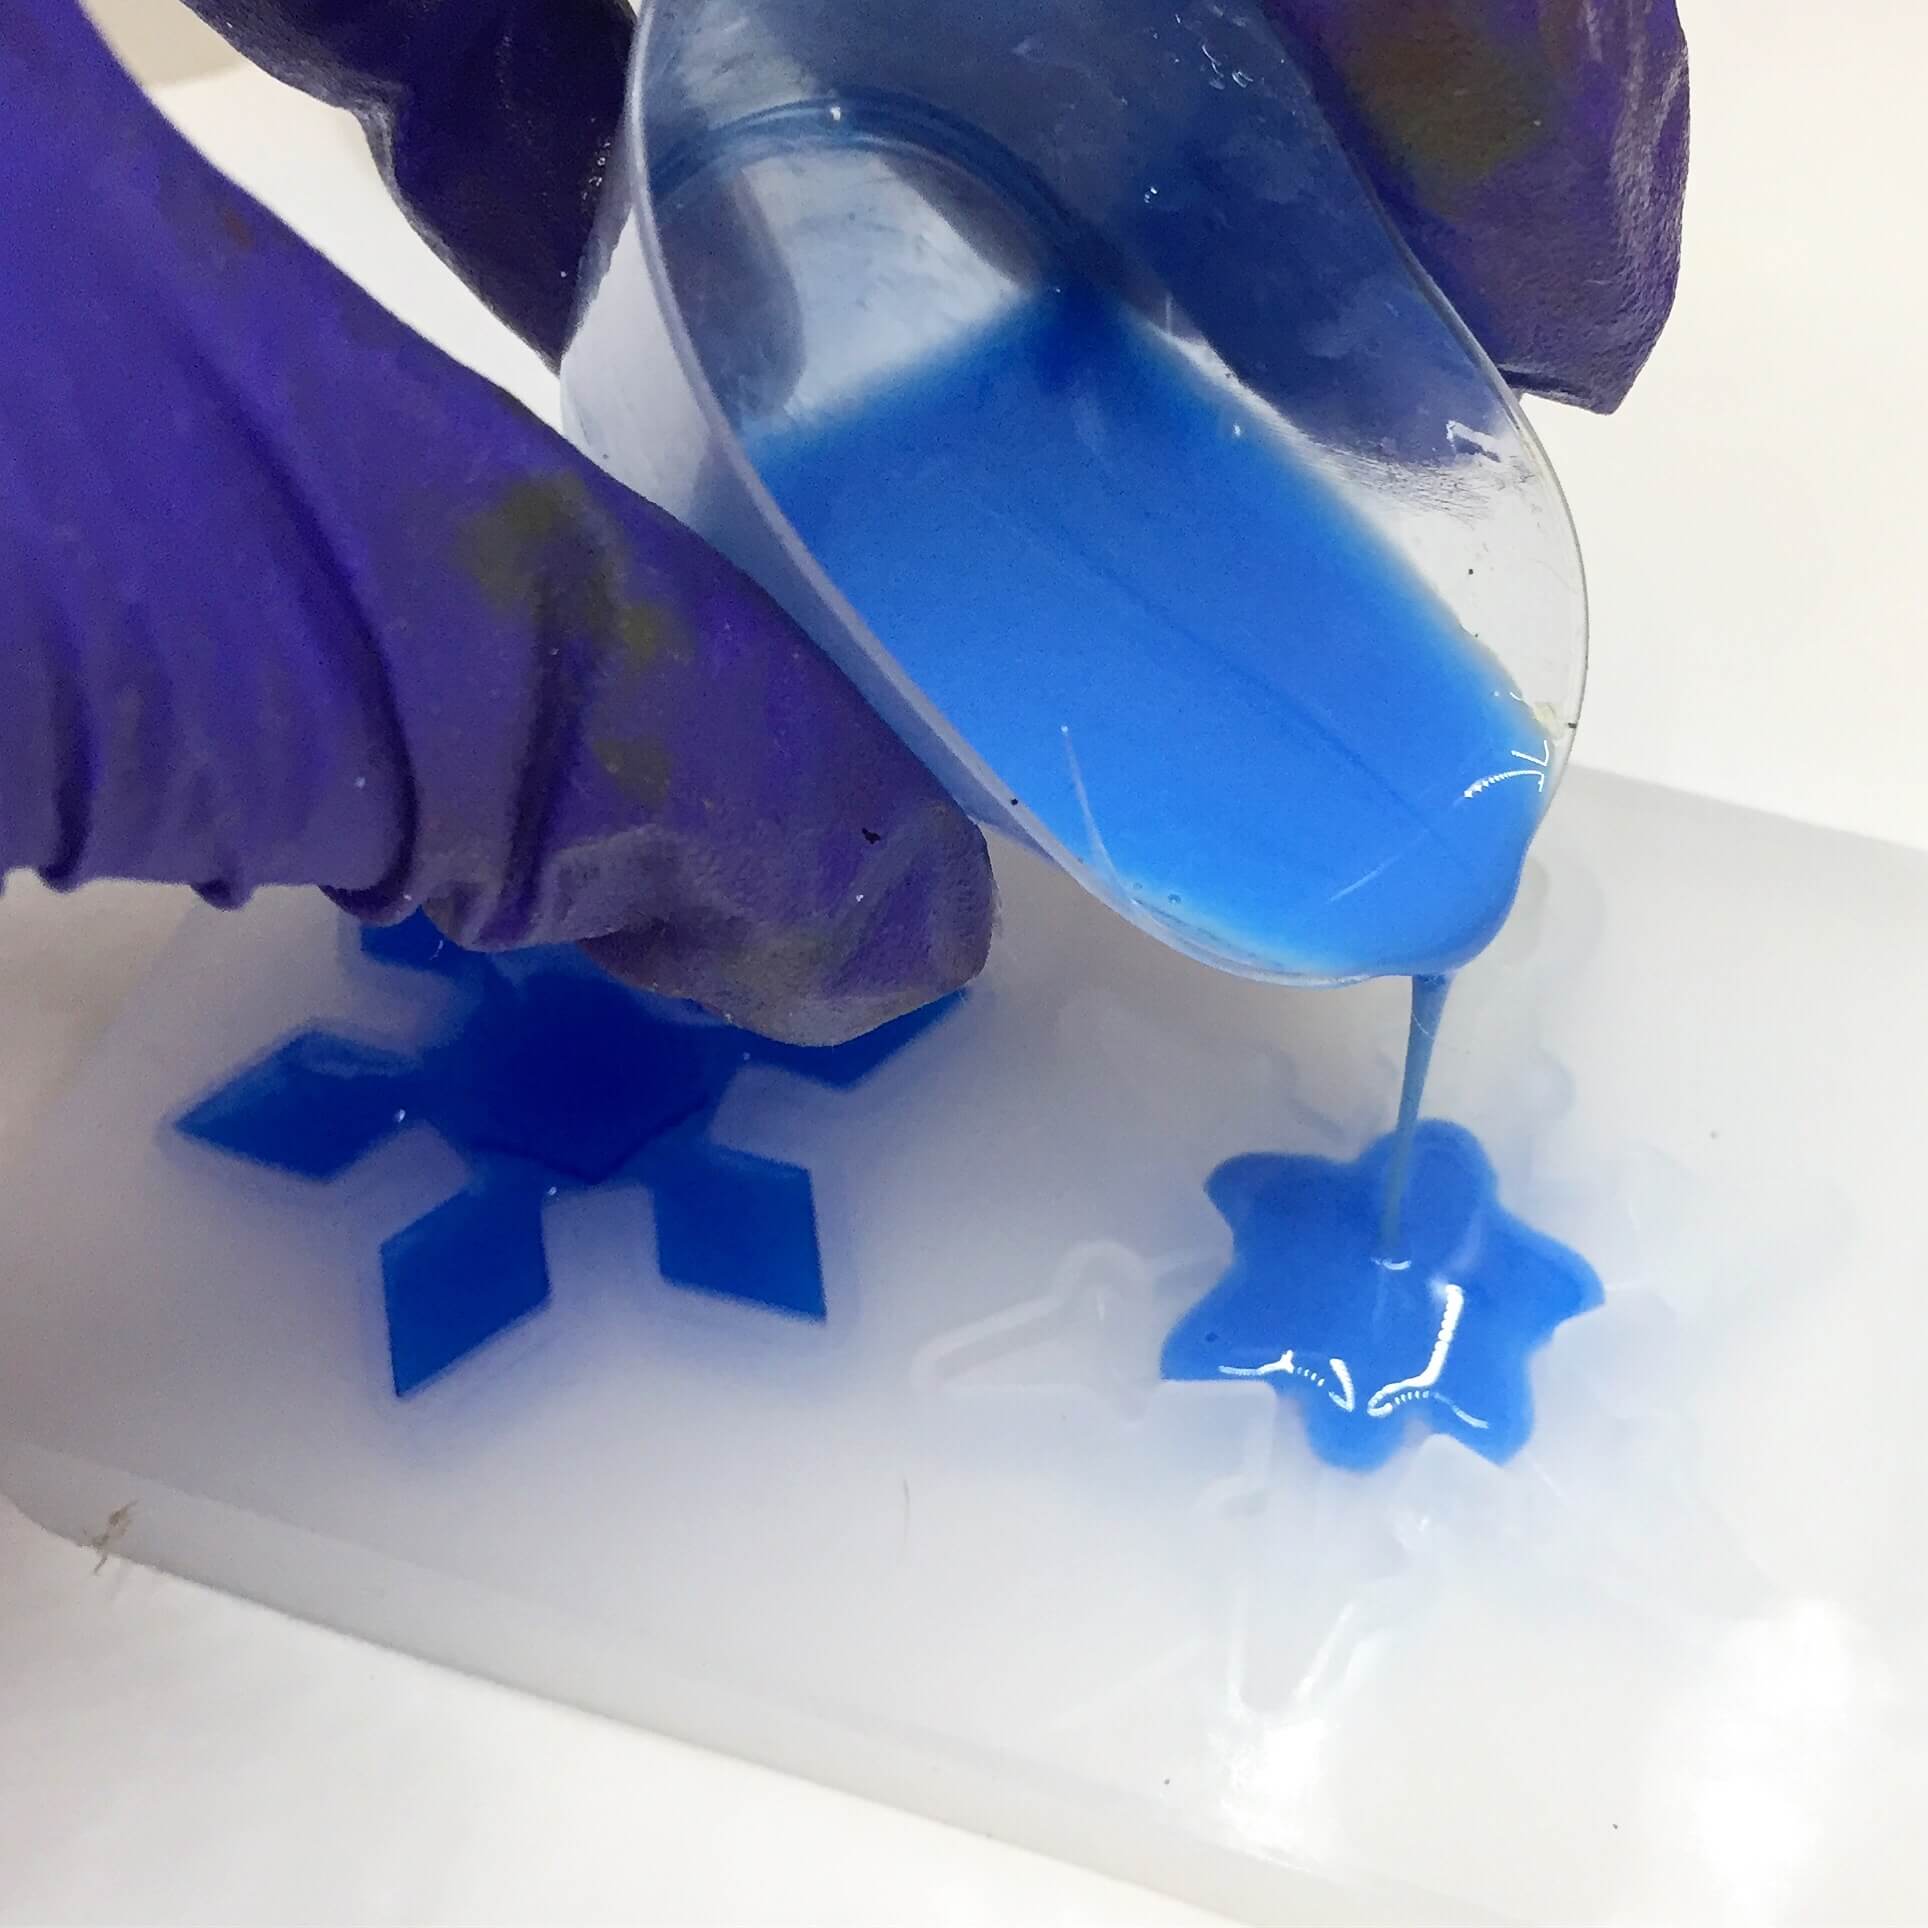
If you want, you can color the resin before pouring it into your casting mold. Use colors for resin as they will give me the most reliable results and are least likely to cause curing problems.
What other techniques can you try with resin casting molds?
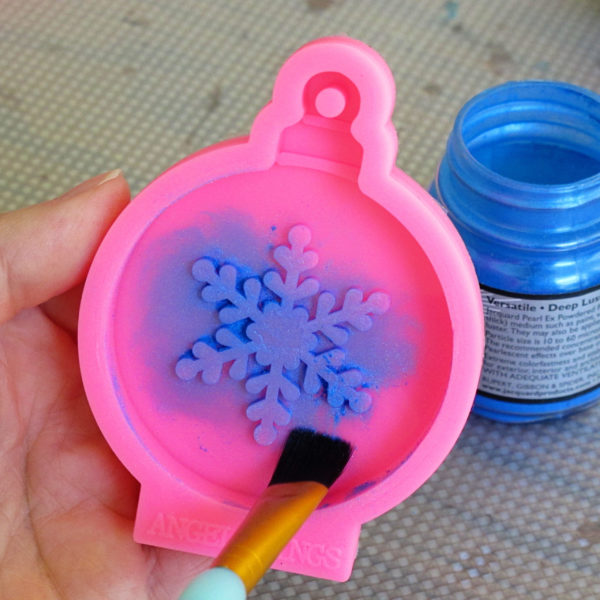
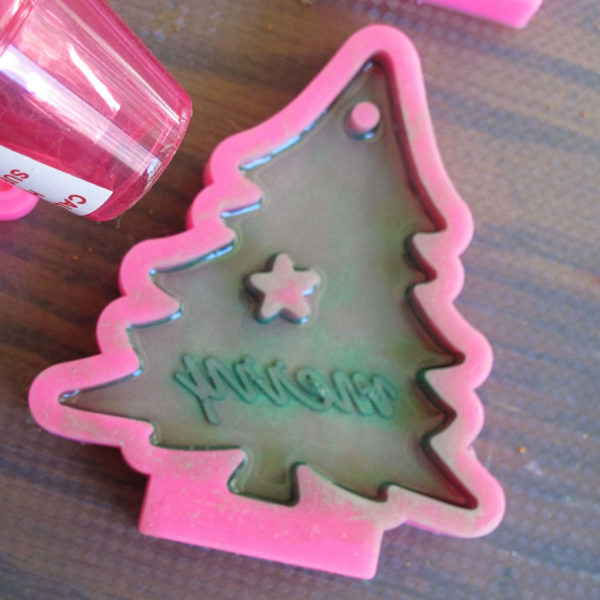
Dust some Pearl Ex powder into the mold with a paintbrush. Get all the surfaces, plus the cracks and crevices. Tap the mold to remove the extra, then fill it with resin.
The powder will stay on the surface of your resin charm after demolding.
Before setting your resin aside to cure, go over the surface with a heat gun.
This will pop the bubbles that rise to the resin surface.
Because resin has an affinity to collect dust and pet hair, cover your casting molds with a plastic dome after you have filled them with resin. Leave this dome on for the entire curing time.
Resin drying time depends on the one you use. Most epoxy resins need 12 to 72 hours to dry. Make sure the resin is formed before you demold. If it isn’t, you might misshape it as you demold and may not be able to get it back into the desired form.
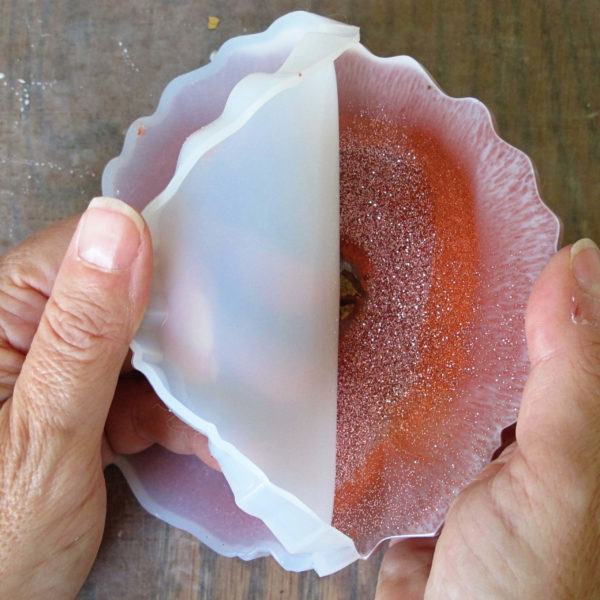
Once the resin is dry, peel the mold away from the resin while grabbing a formed resin edge.
Be firm but gentle. It should feel like you’re peeling the skin off a banana. If things aren’t coming out quickly here, you can always add soapy water to make this step easier.
How do you care for casting molds?
Now that you’ve found a mold you love, you want to make sure it’s going to perform for you for a long time. Keep it clean, dry, and flat in a space away from direct sunlight. Resin casting molds can warp and crack if neglected.
⭐️ BONUS: Here are seven best silicone mold care tips for your silicone resin molds.
How do I know if your casting molds will produce jewelry and crafts with a glossy surface?
To know that, look at the inside of the mold. Whatever the mold surface, that same finish will finish the resin the same way. If you want to make charms with a shiny finish, you want to use molds with the same shiny surface.
What happens if you use a casting mold with a dull surface?
Your casting resin will cure no different than using a resin casting mold with a polished surface. The only difference is that now you have to decide if you will try to make the resin charm surfaces shiny.
⭐️ BONUS: Learn how to polish resin.
What are some of the best resin casting molds?
Well of course, it depends on what you want to make. Here are a few of our customer favorites that might inspire your creativity too.
Want to learn more about using resin casting molds?
Then you will enjoy a copy of my PDF book, Resin Fundamentals. I share the important details you need to know to have success creating with resin from day one! Buy the ebook now, and you get a download link in minutes!
Unpublished Blog Posts of Resin Obsession, LLC © 2023 Resin Obsession, LLC
Man, there was so much I wanted to study on your site, but that persistent cluster of social media icons NEVER LEFT THE PAGE! It followed everywhere occluding the info and generally being irritating. At least on my iPad it was in the way. You need a redesign.
Hi Paul, as soon as you head to the store to make a purchase, the icons disappear. Sounds like some of these books would be a good fit for you: https://shop.resinobsession.com/collections/books
I want to set dried flowers in resin but can’t find a suitable mold
Hi Phollomena, we’ve got a lot of fun molds in our store here: https://shop.resinobsession.com/collections/molds