
 Making your own resin charms is way more fun than buying them. Promise. All you need is epoxy resin, colors, and a few extra supplies. You can make this super simple resin project this weekend.
Even if you’re a resin beginner.
Resin supplies list:
Pendant silicone mold
Matched earring silicone mold
Resin Obsession super clear resin
Resin Obsession opaque color pigments in assorted colors
Mixing cups, stir sticks, and gloves
Step 1: First resin layer
You want to use the Resin Obsession super clear resin to make jewelry in molds because it cures hard and clear. It’s also pretty amazing at releasing bubbles, meaning your jewelry won’t look like something that you would see in a champagne glass.
💡 Pro tip: If you’re looking for something to put in a champagne glass, here’s one of my favorites.
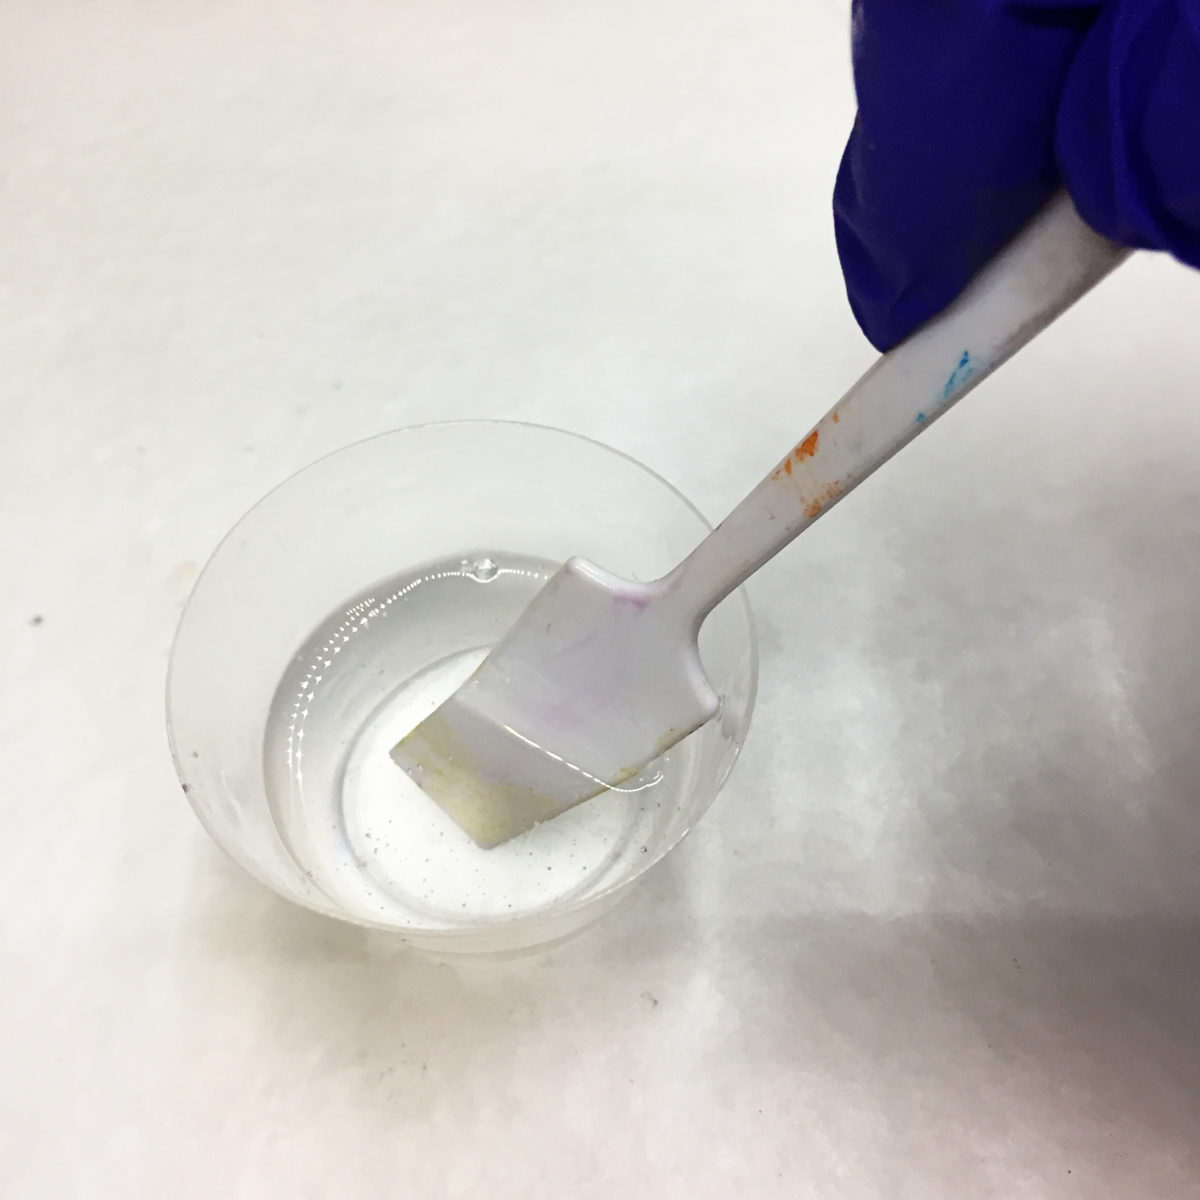
Use measuring cups to measure 10 ml of Part A resin and 5 ml of Part B hardener for your charms. Mix together until clear and streak-free.
You can mix more resin than the amount above if you’re making a lot of these. But 15 ml total (1/2 ounce) is enough to make these resin charms.
⭐️ BONUS: If mixing resin is new to you, here are the deets on how to mix resin. It includes pictures and a how-to video.
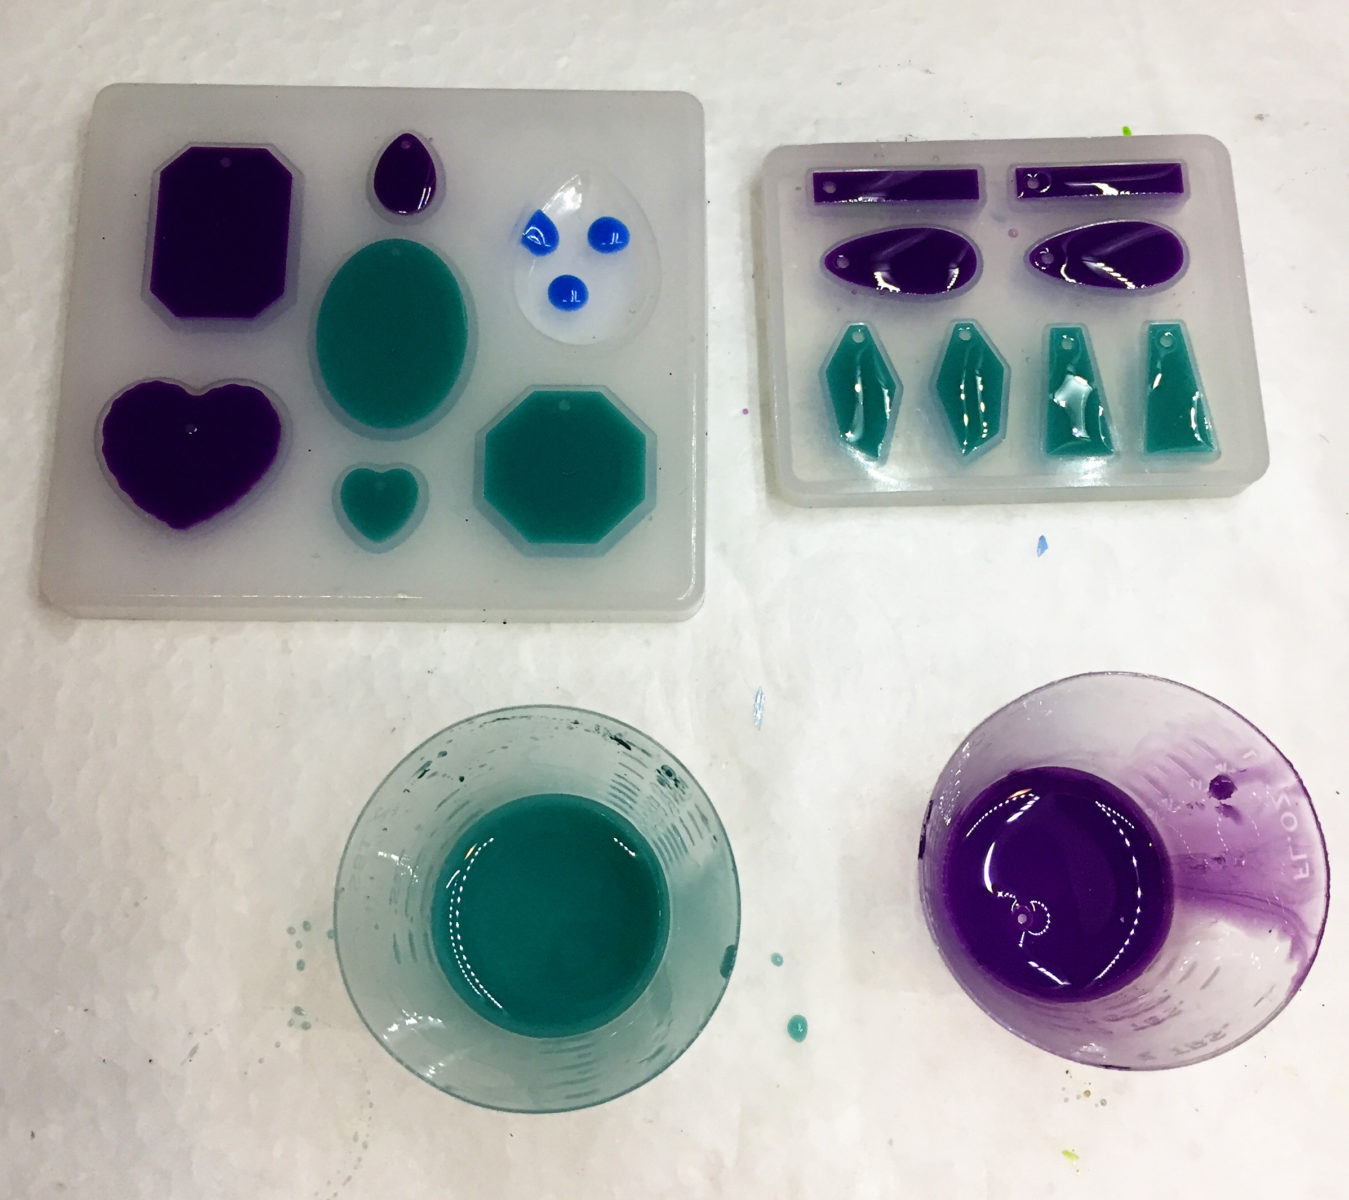
Step 2: Color
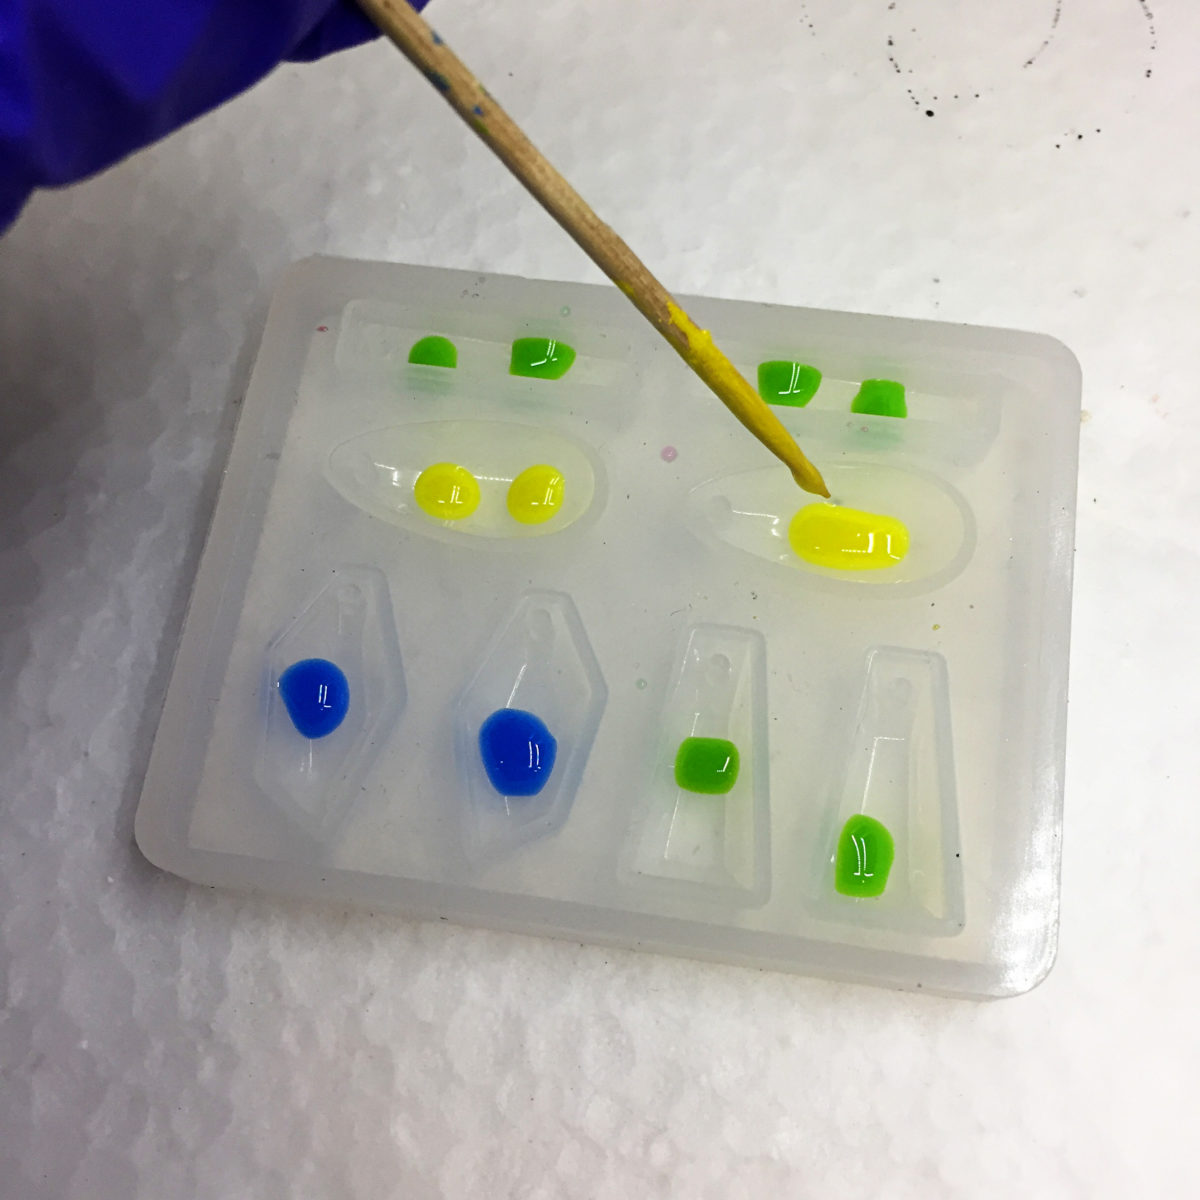
Split the resin between several cups and mix in your favorite resin colors. Then, use a toothpick to drip a small amount of resin into each cavity without covering the entire surface.
I used opaque blue, green, purple, yellow, and teal for these resin charms.
💡 Pro tip: The colors will be on the front of the jewelry. Pick colors that are a good contrast or complement the color you’ll use in the second pour.
⭐️ BONUS: Learn how to color epoxy resin. It dives more into the weeds than what you see here.
Allow to fully cure.
Step 3: Second resin layer
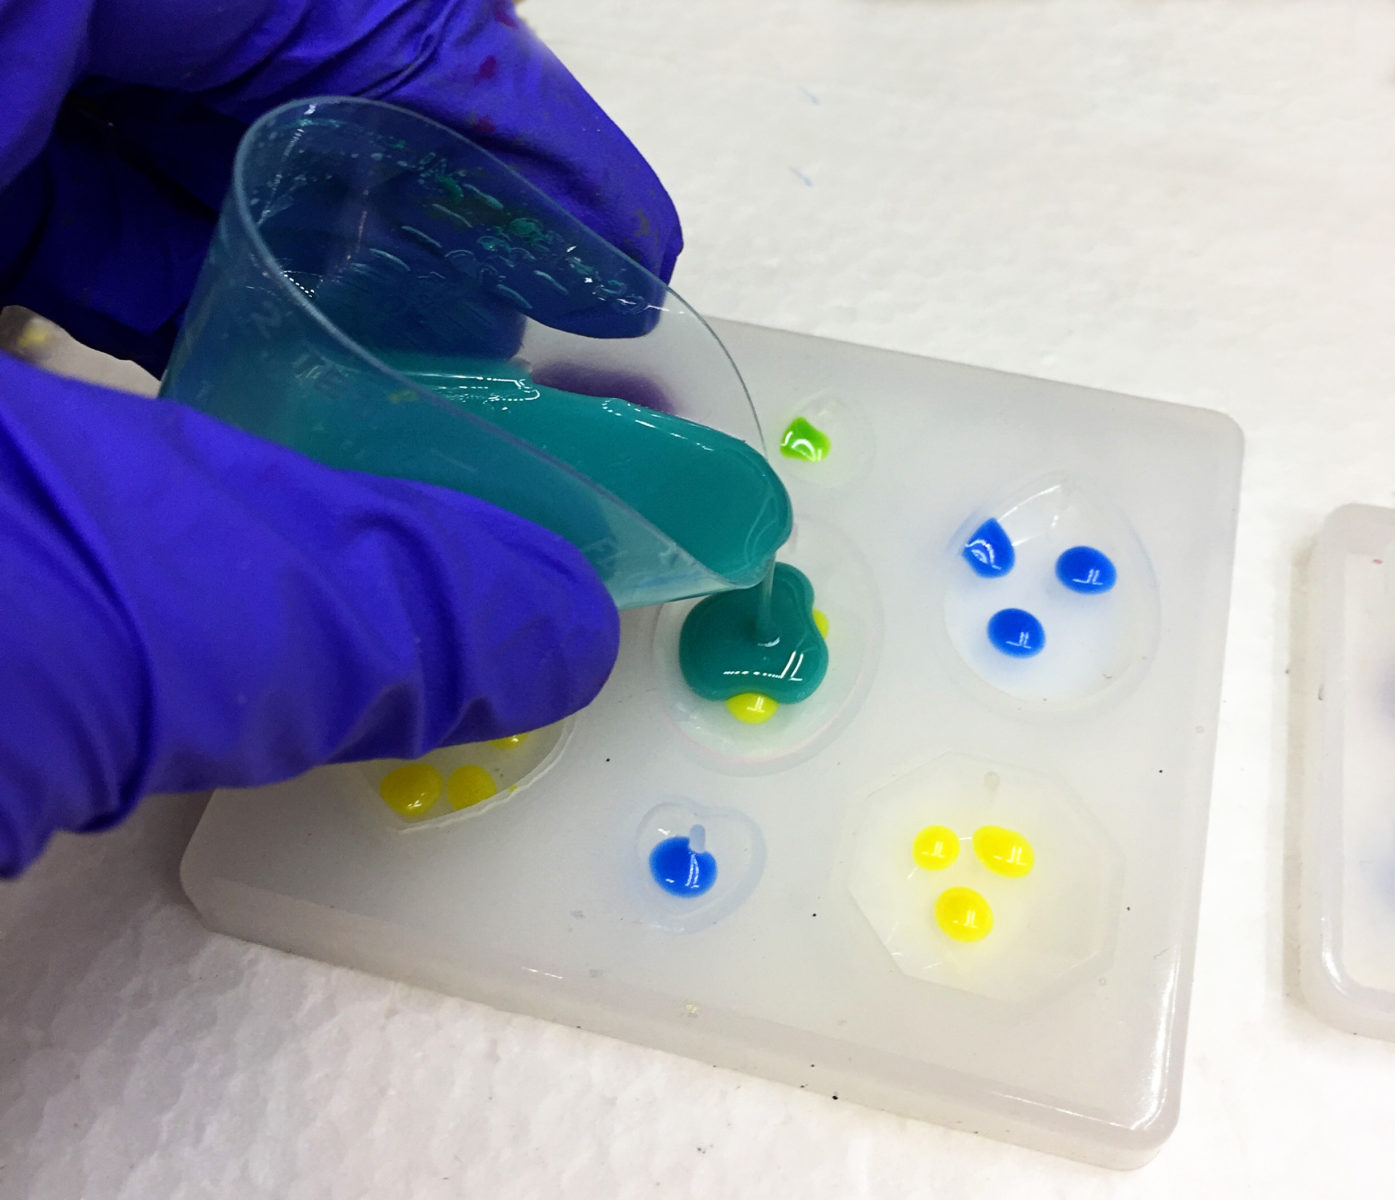
Mix another 15 ml (1/2 ounce total) of super clear resin. Tint with contrasting colors. Pour the resin over the cured resin dots from the first resin pour.
💡 Pro tip: Be gentle when moving the molds. You don’t want to break the dots away from your silicone mold surface.
Completely fill the mold cavities with resin and allow it to harden.
Step 4: Demold
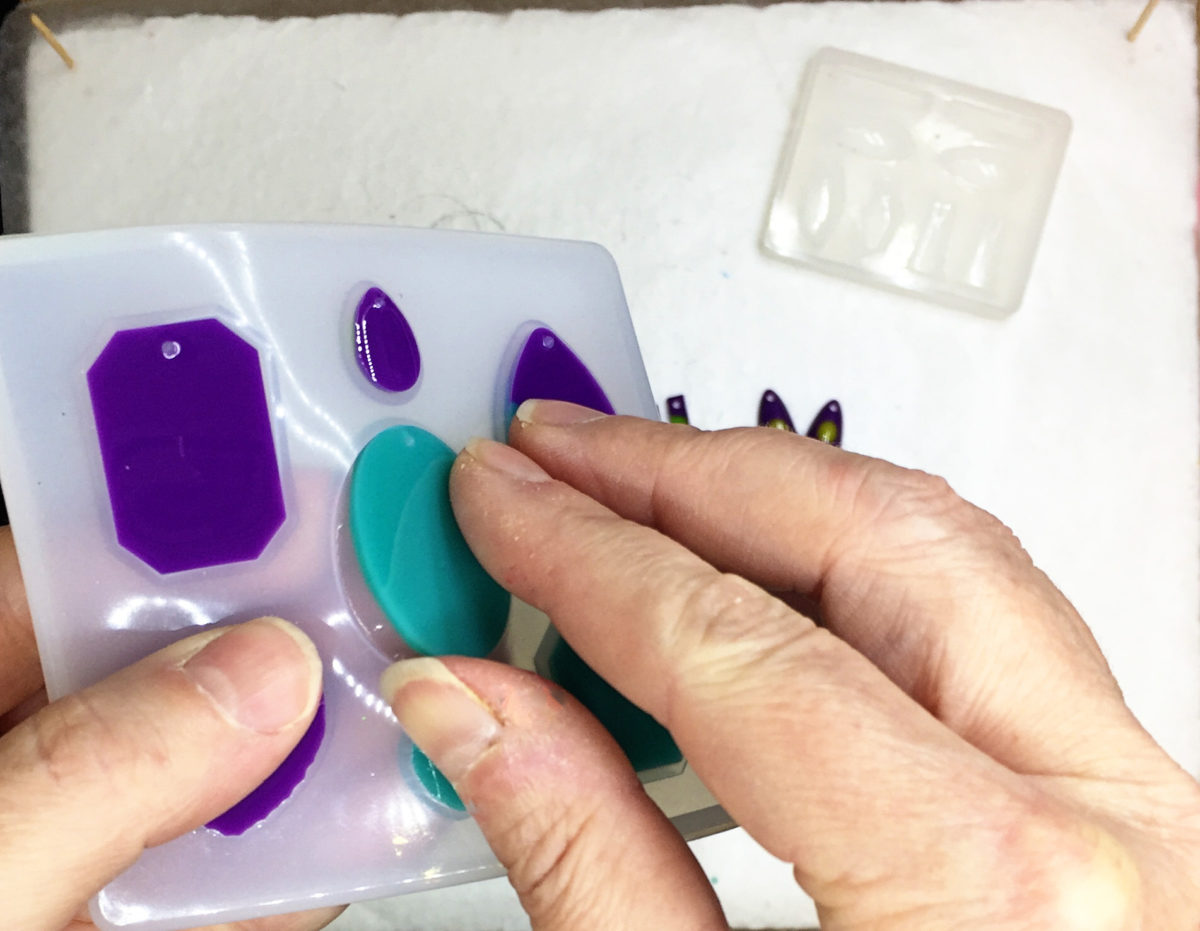
Once cured, demold the charms by twisting the mold and grabbing the resin edge. Sand off any rough edges as necessary with wet/dry sandpaper or a coarse nail file. You don’t want a sharp edge to poke you in the ear or snag a sweater.
(and if it does poke you, it’s usually just a flesh wound 😉 )
Step 5: Finish
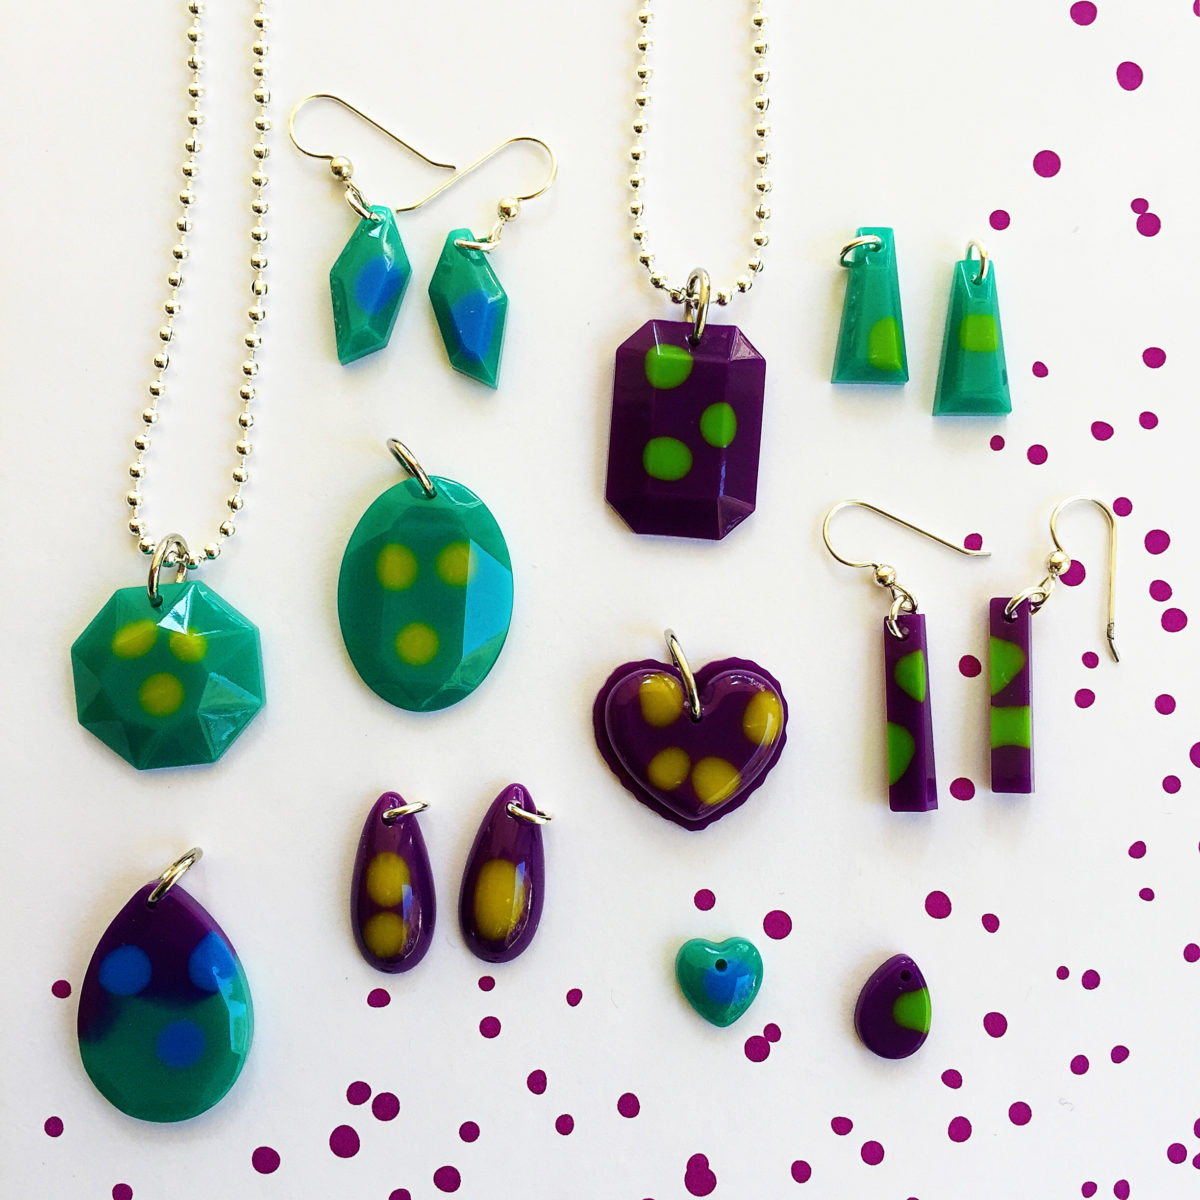
Add jump rings, then hang your resin charms on a necklace or ear wires.
💡 Pro tip: If you use molds with cast-in-place holes, you don’t need to drill after demolding.
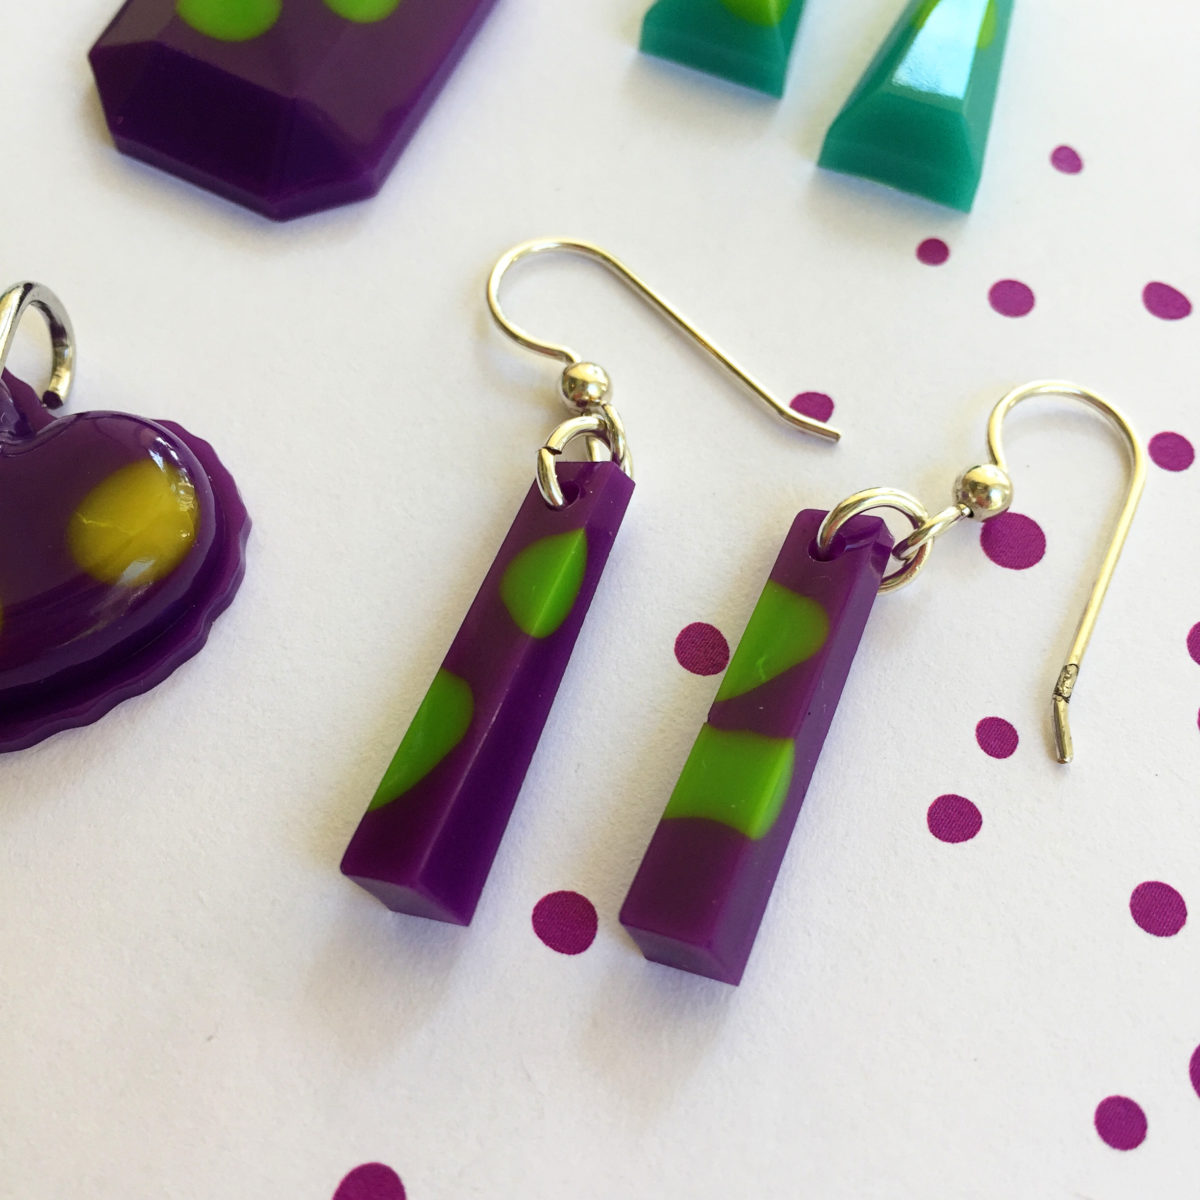
These resin earrings are my fav because I love the funky colors. I’m keeping this pair for myself.
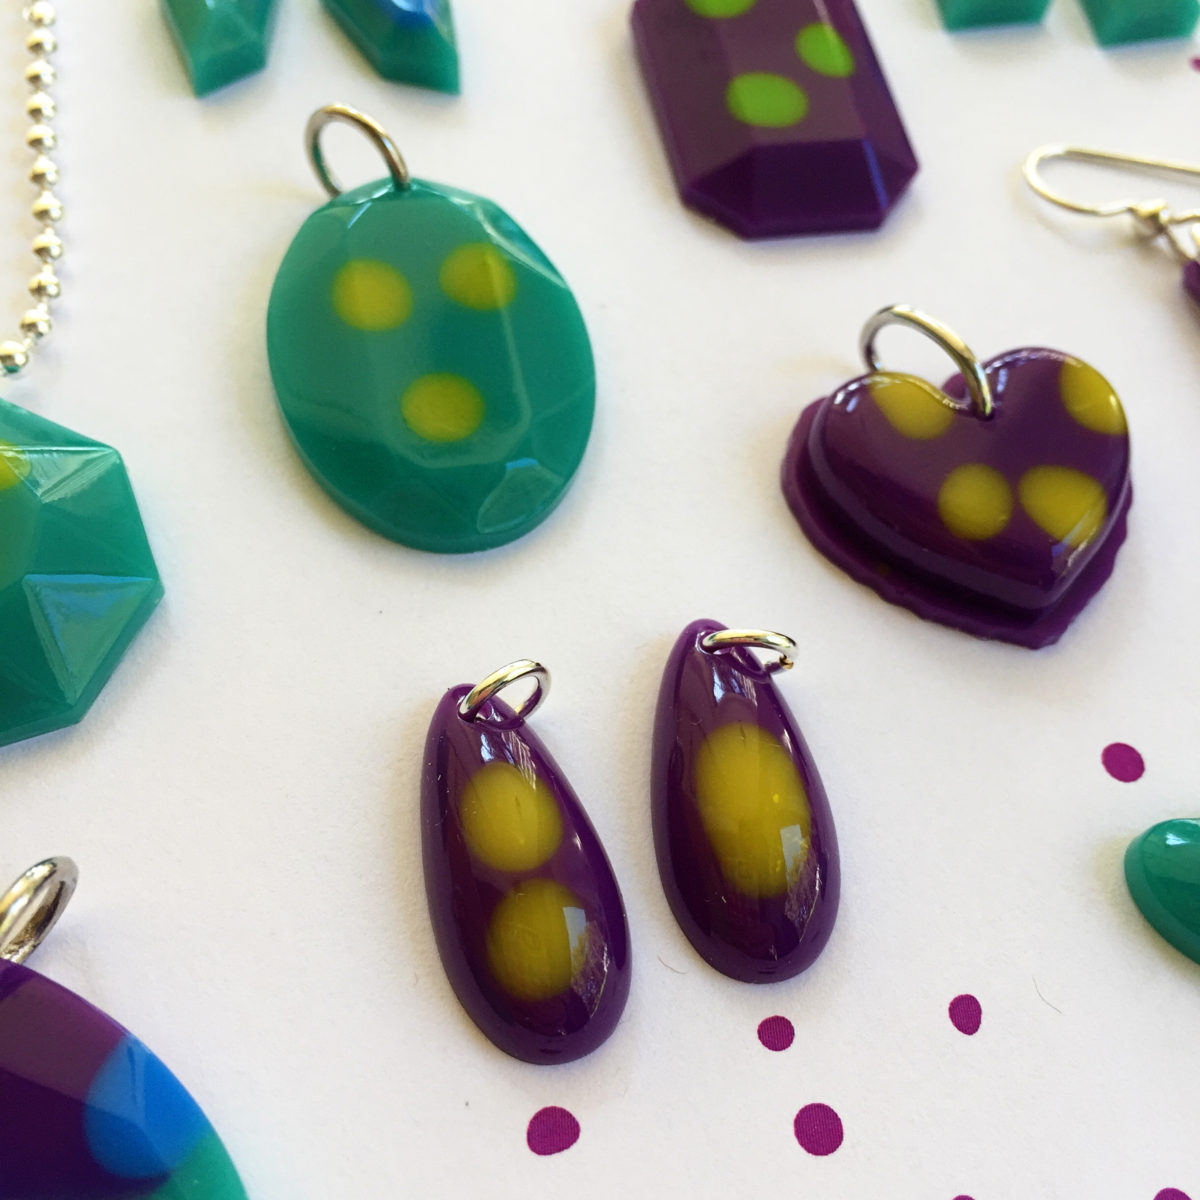
Even when the shapes don’t match, you can make a set when you use the same color combos.
Which of the resin charms color combos is your favorite?
And if you want to see this easy resin charms project in action, here ya go…
Want more easy DIY resin jewelry projects?
Then you will want to get your copy of the Amazon best-seller, Resin Jewelry Making. You’ll learn how to make beautiful resin jewelry, even if you have never crafted with resin before. Buy now and get a download link for the PDF ebook in minutes.
Unpublished Blog Posts of Resin Obsession, LLC © 2023 Resin Obsession, LLC
I have some of the clear resin with the two bottles. It says one part to one part of each. You wrote two parts to one part. What kind of resin are you using? I am new to all of this. Thanks in advance, Loretta Sturkie
Hi Loretta, I’m using the Resin Obsession super clear resin which mixes two parts A to one part B. It is a clear casting resin that is meant for molds and other things with sides like bezels. You can find it in several sizes in our store here: https://shop.resinobsession.com/collections/resin/resin-obsession
Hi Katherine, those colors look so opaque! I love them. What did you use as a colorant??? I’m pretty new, I’ve tried alcohol inks… transparent and seemed to mix ok sometimes but not others…..
Hi Julie, I used the Resin Obsession opaque color pigments: https://shop.resinobsession.com/collections/colorants/products/resin-obsession-opaque-color-pigments-single-1-ounce-colors
What resins can be used to achieve crystal shiny finish?
Any clear resin should be able to do that for you. Is there a specific problem you are having where you can’t get a shiny finish?
I just want to say how much I enjoy your constant attention & encouragement, it does help, keep them coming, Diana
Thank you Diana!