
 When I think about the technology of my childhood, it seemed amazing at the time. I used my tape recorder to capture songs on the radio. I traveled the world through my View-Master. And every Christmas, I remember my grandmother taking pictures with her Polaroid camera.
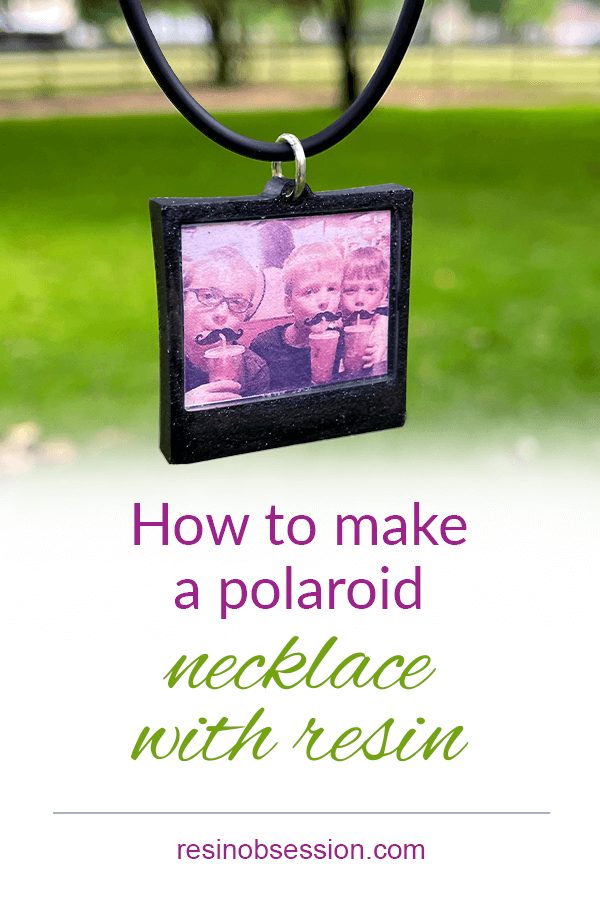
You could capture the moment with an instant camera and relive it in only a couple of minutes. It was a one-of-a-kind piece of art.
Let’s recapture that magic by making a polaroid necklace with resin.
Resin Supplies:
Instant camera pendant mold
Resin Obsession super clear resin
Resin Obsession crystal doming resin
Resin Obsession black epoxy pigment
Resin Obsession pearl powder
Mod Podge glue
Mixing cups
Stirring Sticks
Safety gloves
Heat gun
Step 1: Mix resin
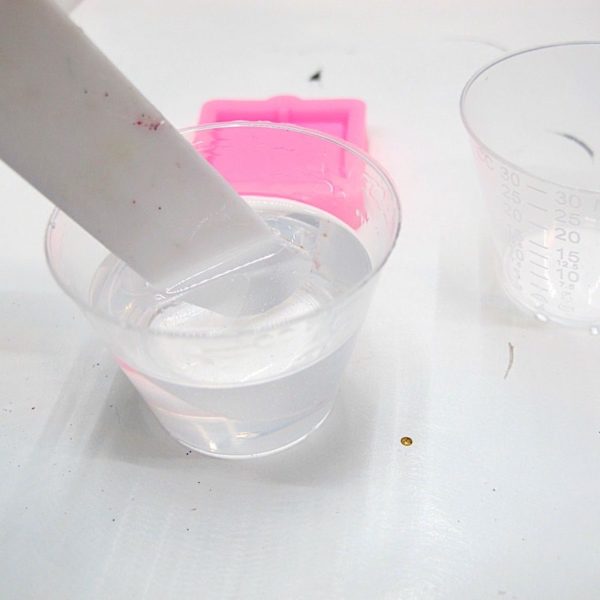
Measure and mix ½ ounce of the Resin Obsession super clear resin. It’s the perfect craft resin for this project because it won’t soften after curing. You don’t have to worry about your resin getting bendy when you wear it.
⭐️ BONUS: If you’re a resin beginner, here are the easy steps to mixing resin.
Step 2: Color

Add a dot of black pigment to the resin and mix well.
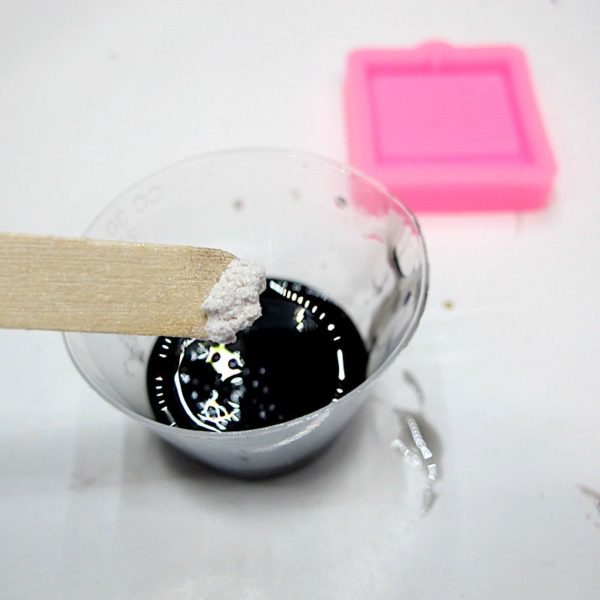
Then, add a pinch of pearl powder. This gives a subtle shimmer to the black epoxy.
Step 3: Add to the mold
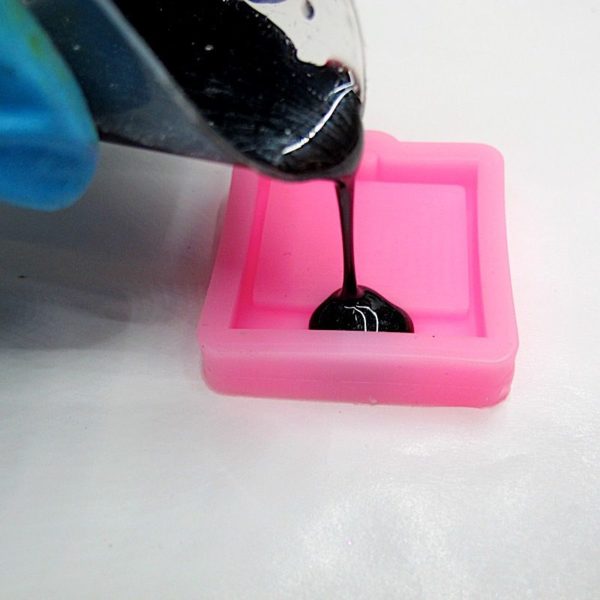
Pour the black resin into the silicone mold.
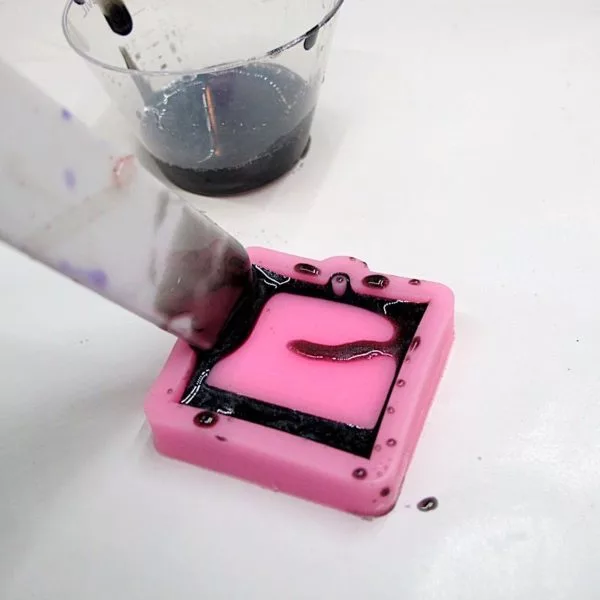
💡 Pro tip: Before completely filling the mold, run your stir stick along the edges of your polaroid necklace. This will get bubbles to release from the crevices and rise to the surface.
Go over the polaroid necklace mold with a heat gun to pop the bubbles. Then let the resin cure overnight.
Step 4: Demold
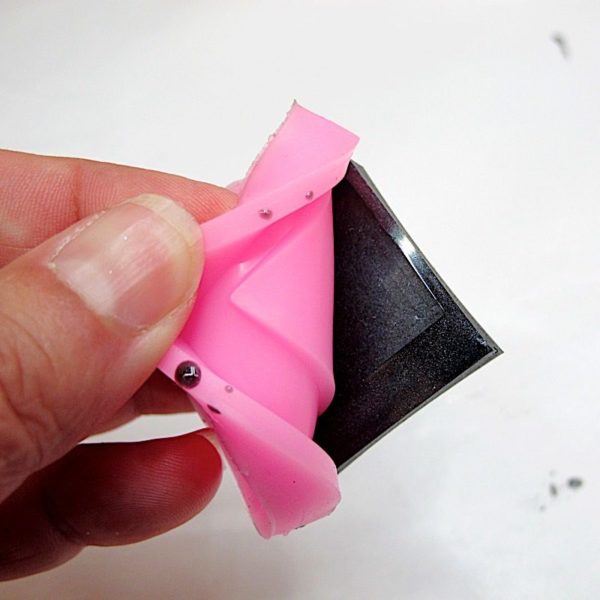
Peel the mold away from the cured resin.
Step 5: Add a photo
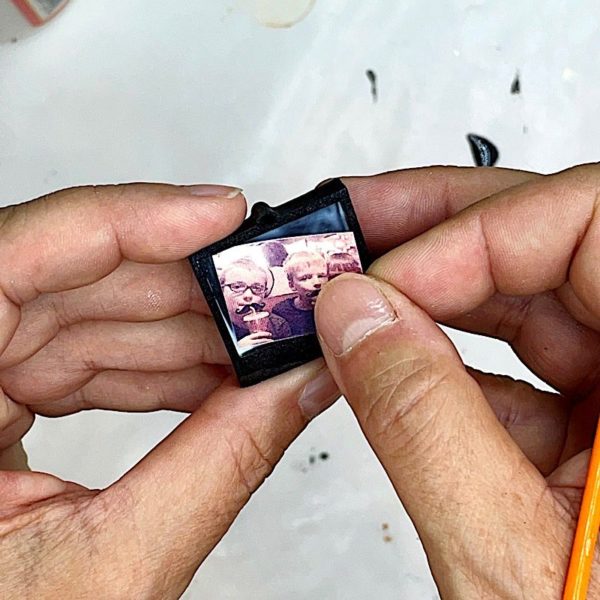
Cut a photo to make the Polaroid part of the necklace. Glue the picture to the inside of the pendant.

Let this glue dry completely before moving to the next step.
Step 6: Add a glossy resin layer
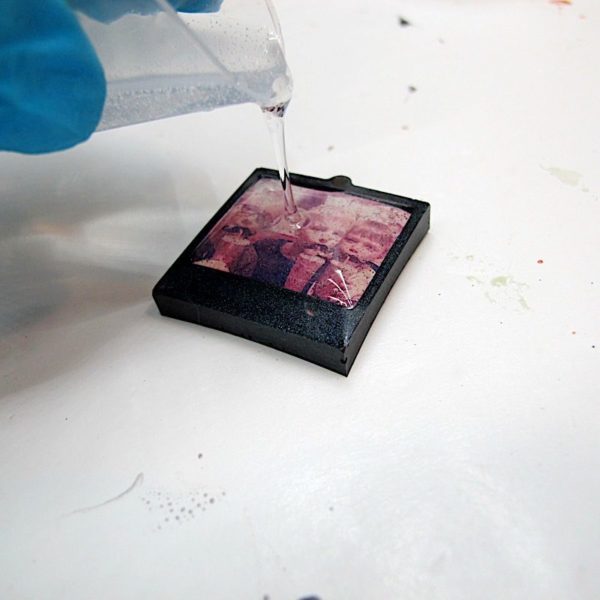
Mix crystal doming resin. Then add the clear epoxy resin to the top of the pendant.
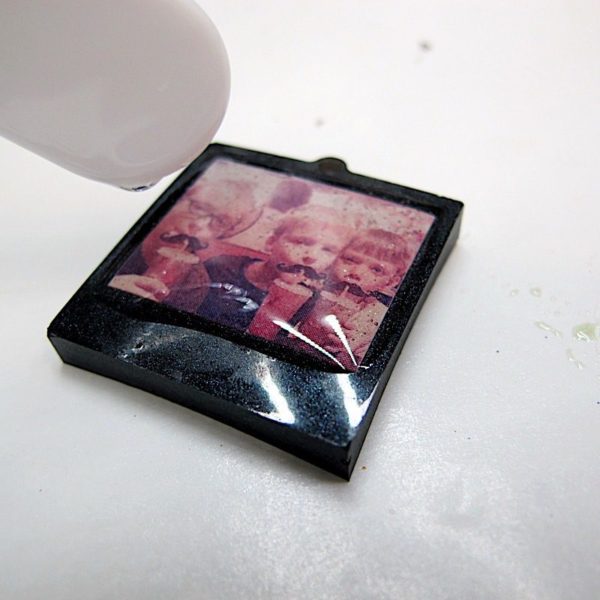
💡 Pro tip: Fill the pendant halfway, then use your stirring stick to pull resin over the surface. Add drops of resin as needed to get a beautiful dome.
Go over the surface with a heat gun to zap bubbles before letting the resin cure.
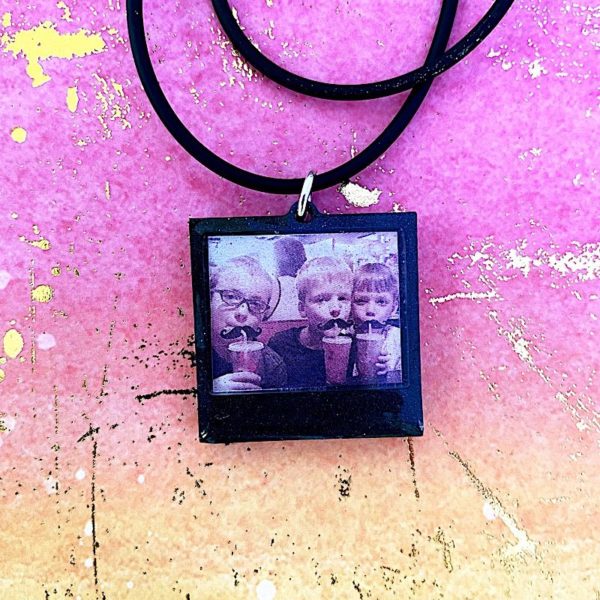
Ta-Da! You just learned how to make a polaroid necklace with epoxy resin.
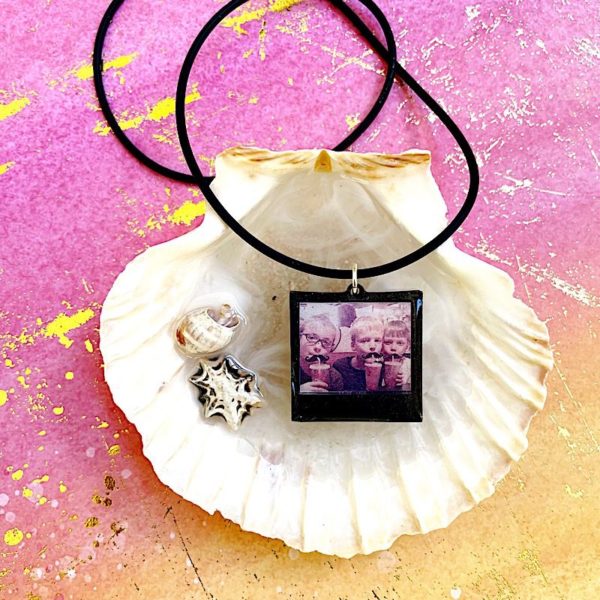
I love how this looks great in my shell trinket dish too.
Okay, resin nerds. Maybe you’ve got more questions about making this polaroid necklace.
You are my people.
Why do you need two kinds of epoxy resin to make this necklace?
Because there is more than one type of epoxy.
Resin for molds is not the same as resin for coatings.
But I only want to buy one resin. Are you sure I can’t just use one?
Yes, you can use just one. But–your polaroid necklace may not turn out like this one.
If you use a coating resin in molds, you’ll have to work extra hard to remove bubbles. WORKAROUND: Add a little bit at a time, then check for bubbles. Keep checking for bubbles, especially along the thin edges.
If you use a casting resin as a coating, you won’t get a dome and may get dimples in your resin. WORKAROUND: Only use the clear resin in the photo depression.
How can you make a photo to fit the Polaroid pendant precisely?
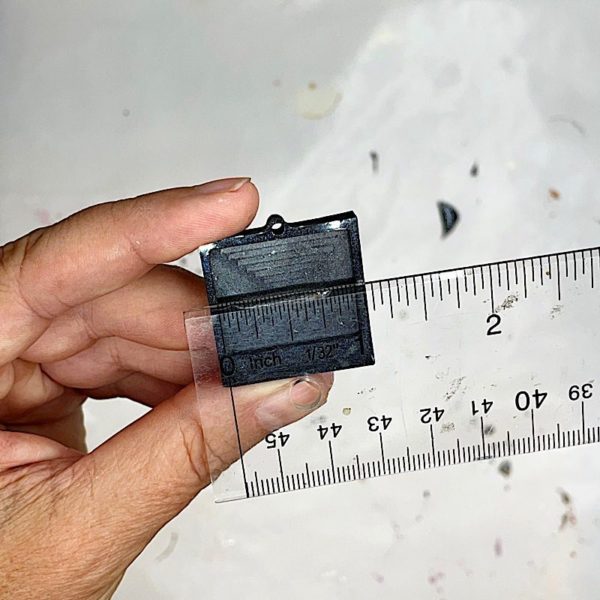
You can use Canva. The photo part of this pendant is 1 inch wide by 13/16 inches tall. Create a custom graphic in that size, then import your photo. The other thing about using Canva is they have some neat filters. You can make any photo for your necklace look like a vintage Polaroid.
Why is the gluing the photo important?
If you don’t coat your photo with glue, it will take on stains when you add the resin. Gluing the image to the back of your Polaroid necklace also ensures you don’t trap bubbles underneath. These bubbles can show up in your resin later.
Ready to take on more resin jewelry projects besides making a Polaroid necklace?
Then you’ll want a copy of Resin Jewelry Making in Bezels. The ebook has 15 projects that you can make this weekend—even if you’re new to resin. Buy the book now and get an email download link in minutes.
Unpublished Blog Posts of Resin Obsession, LLC © 2023 Resin Obsession, LLC