
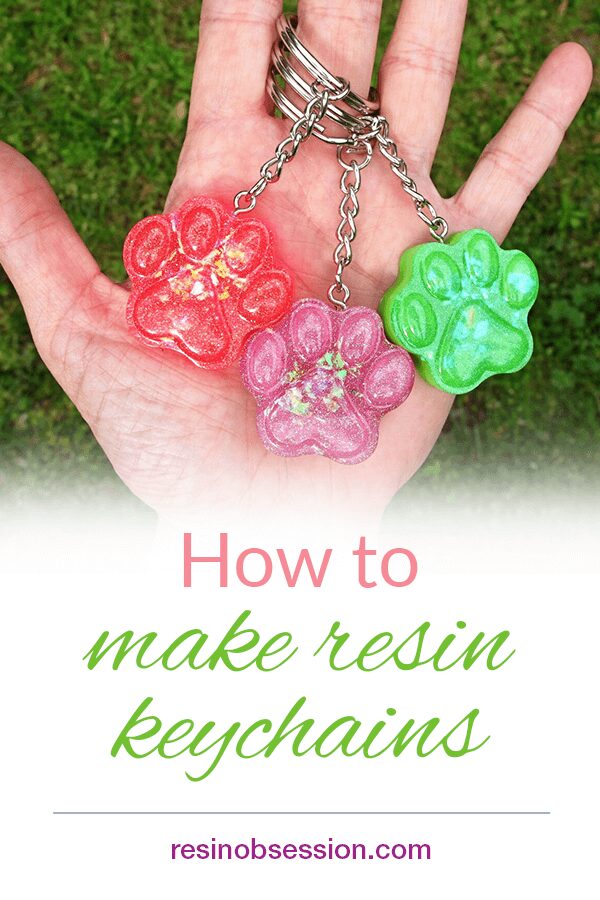
 Who’s ready to make a resin keychain? Cool. I won’t guarantee it will keep you from losing your keys, but it can’t hurt.
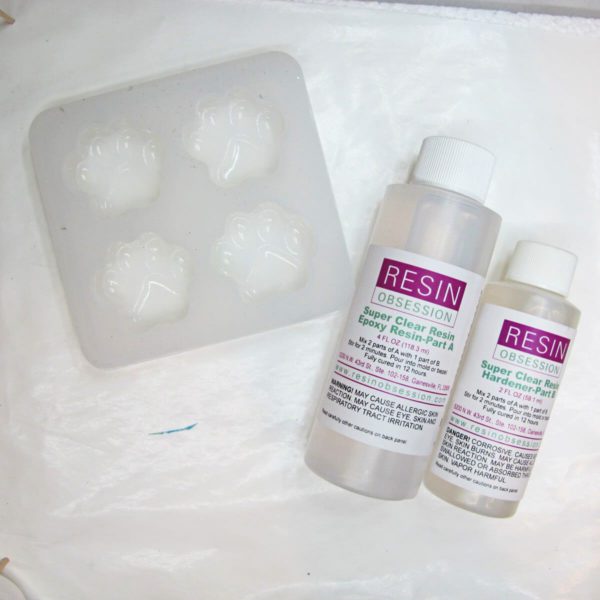
Step 1: Choose a mold
You want to put a little thought into the mold for this project. Like this paw print mold is that it fits nicely in your hand and won’t take up too much room in your purse. Since you’re using a silicone mold, you also want to use the Resin Obsession super clear resin to make these keychains. It is a casting resin for craft molds, meaning it’s specially designed to cure bubble-free and durable.
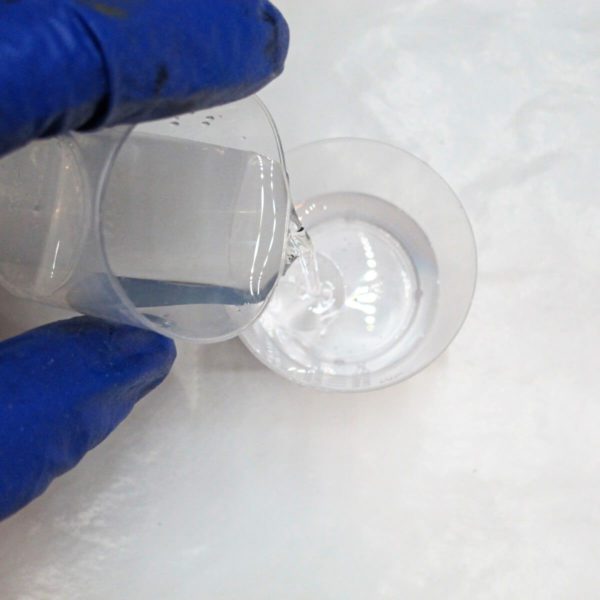
Step 2: Mix and color resin for the first layer.
Mix enough super clear resin for the first layer. You don’t need much — only want enough to fill the toe beans plus a little bit more.
⭐️ BONUS: If you’ve never mixed resin before, you’ll want to read this before making your keychain: how to mix resin in five easy steps.
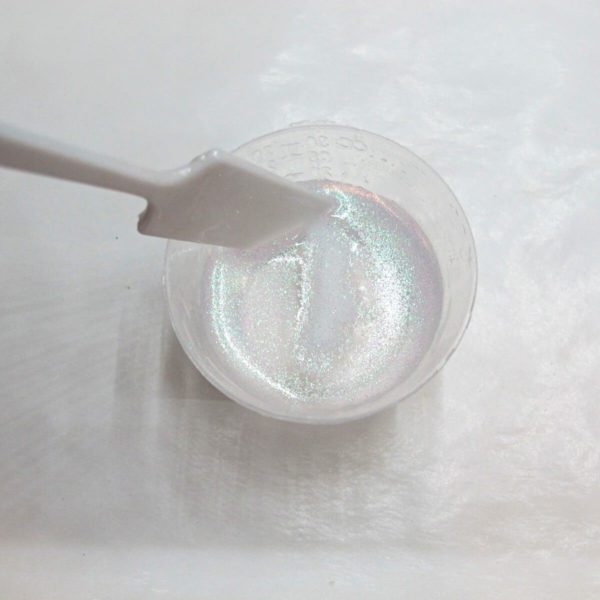
Add in a small amount of fine glitter. You don’t need much, as you only want the resin to have a slight shimmer to it. But, you can always add more glitter to suit your style.
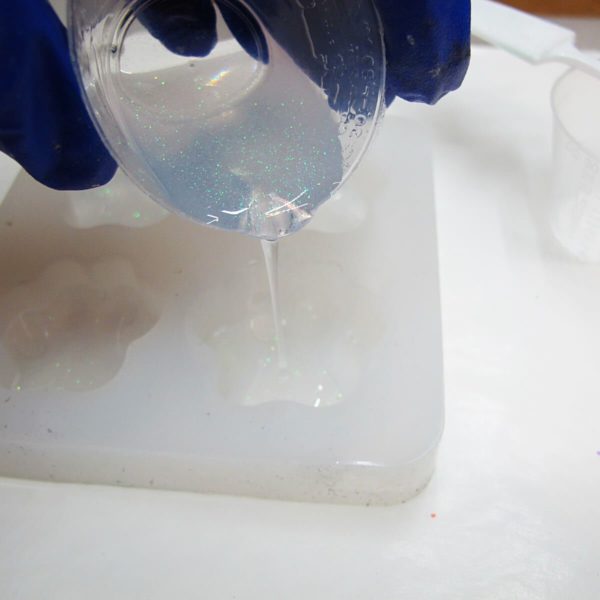
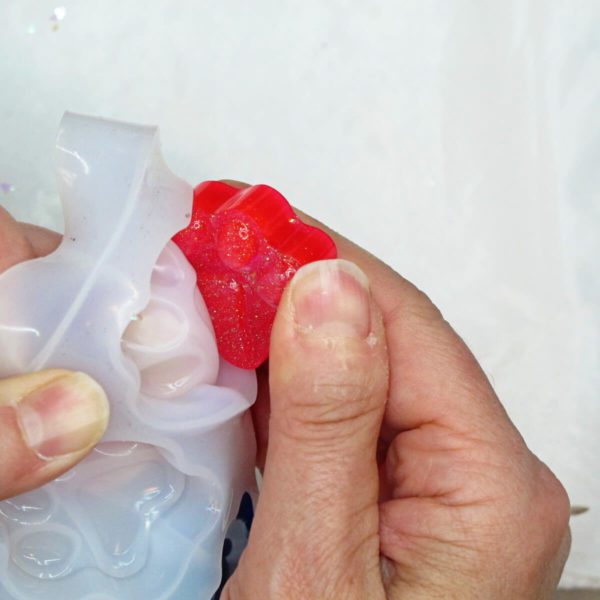
Pour your glittered resin into the mold, only filling the paw print pads and a bit more. (More on why this is important in a minute.)

After pouring the first layer of your resin keychain, gently sprinkle a few flakes of Stampendous shaved ice on top. The flakes will sit on top of the resin and adhere while it’s curing.
Let the resin cure.
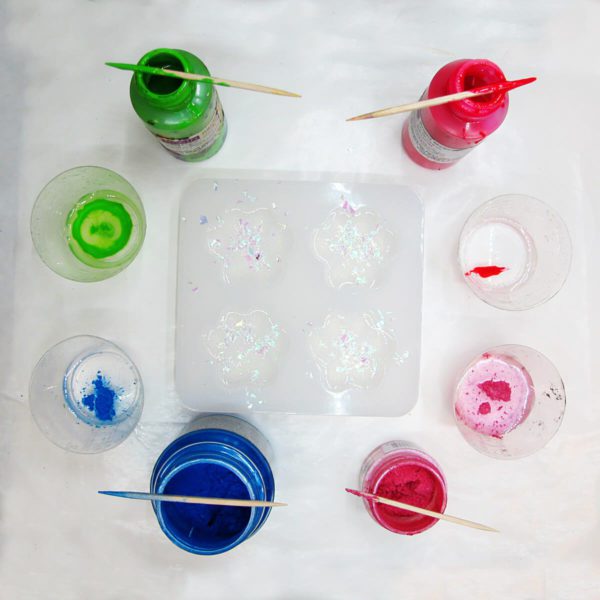
Step 3: Mix and color a second resin layer.
For the next keychain layer, mix more Resin Obsession super clear resin. Then, divide it into separate cups to color it.
The colors here (top left and going clockwise) are Resin Obsession opaque green pigment, Resin Obsession bright magenta pigment, Pearl Ex Flamingo pink, and Pearl Ex sapphire blue. Stir well after adding your colors.
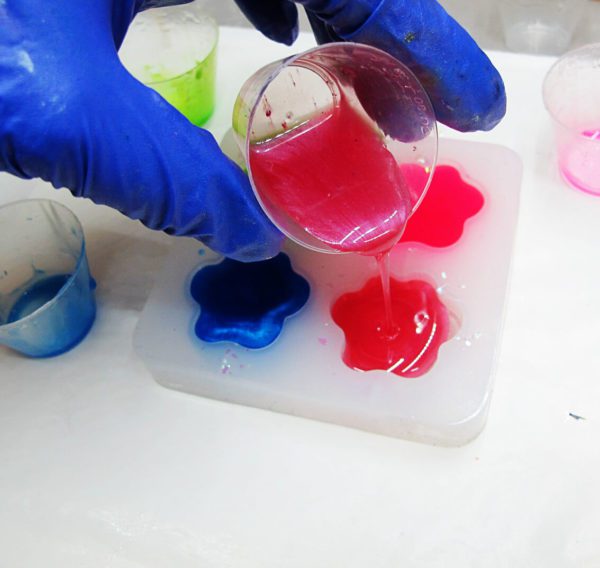
Pour the colored resin into your silicone mold cavities, filling all the way to the top.
Once your paw print mold is full of resin, set it aside to cure.
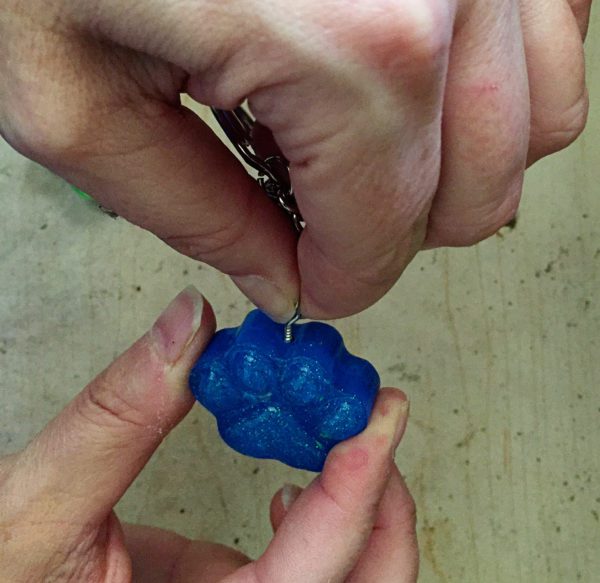
Step 4: Demold
To demold, peel the mold away from the resin while pulling the keychain charm.
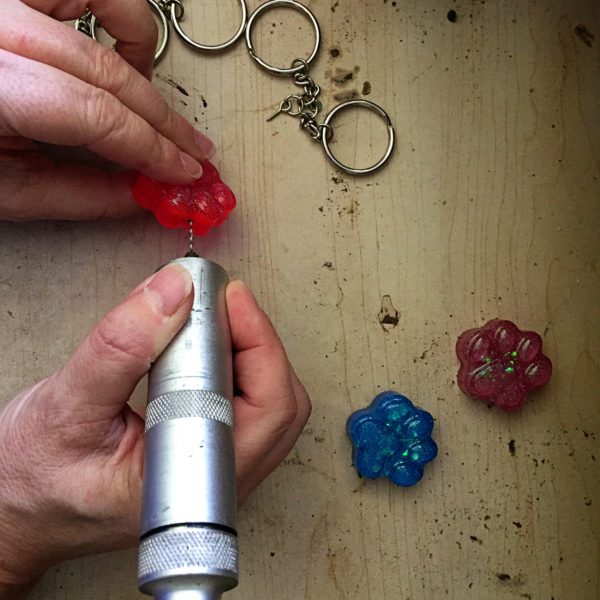
Step 5: Add keychain hardware
To drill, mark the spot with a Sharpie, being sure to mark it in an area of colored resin. This will keep the keychain user from seeing the pin stem.
⚠️ IMPORTANT: Take all safety precautions when using a drill, including tying your hair back and wearing safety glasses.
💡 Pro tip: Start with a drill bit smaller than you think you need. You can always redrill with a larger size if the hole is too small.
Screw the pin stem into the hole. If you are worried the stem isn’t secure, you can add a dot of E6000 or mixed resin to help secure it.
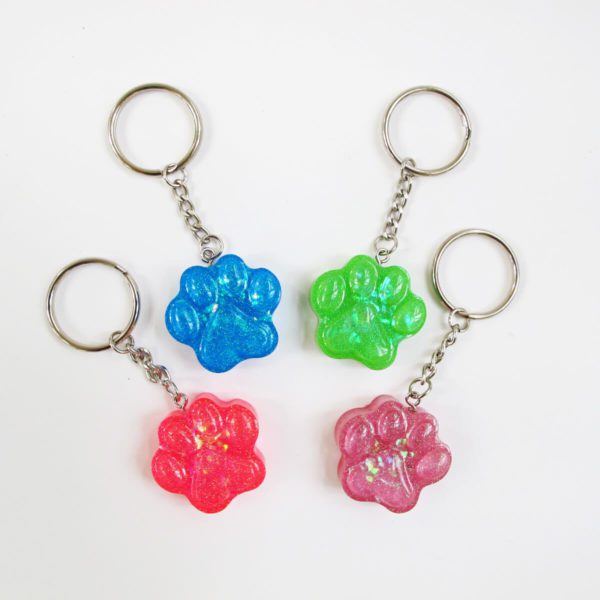
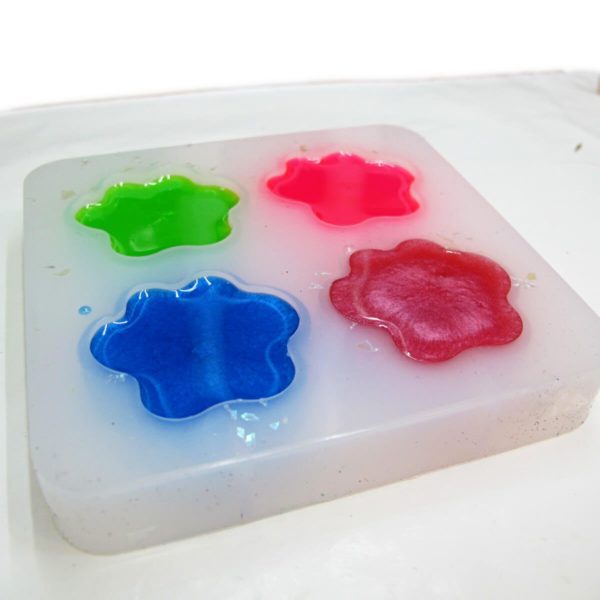
Finished keychains
Your resin keychain project is finished! Now, where are my keys?
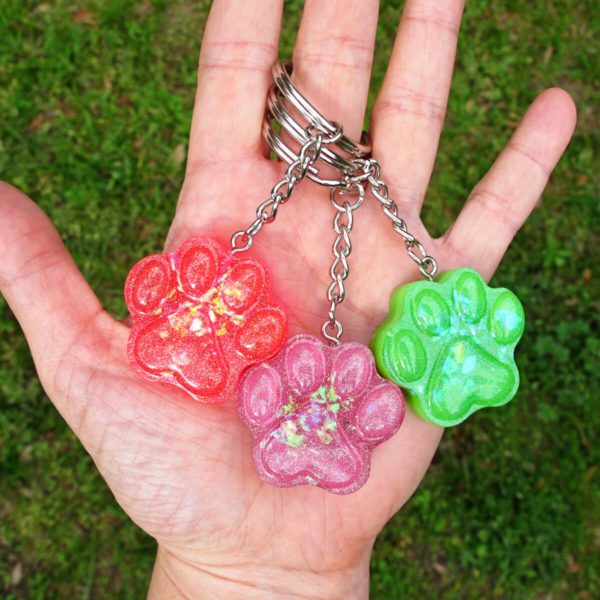
I love how these keychains fit nicely in my hand. The bright colors will also be easy to find in my purse.
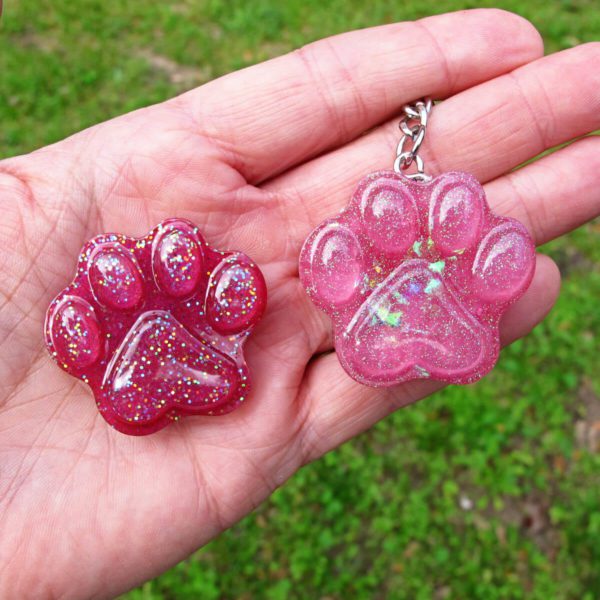
By putting the shaved ice on the resin, instead of mixing it in, it stayed behind the glitter, giving even more dimension to the keychain charms.
If the back of your charms end up having sharp edges, you can sand them down. Here’s how: How to sand resin.
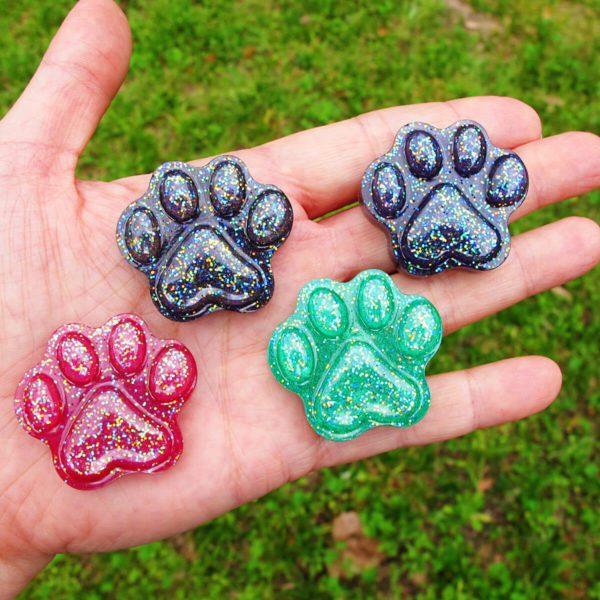
I liked this mold so much that I made another batch of resin pawprint charms to use as magnets. This time, I opted for larger particle glitter that sank in the resin.
Technical note
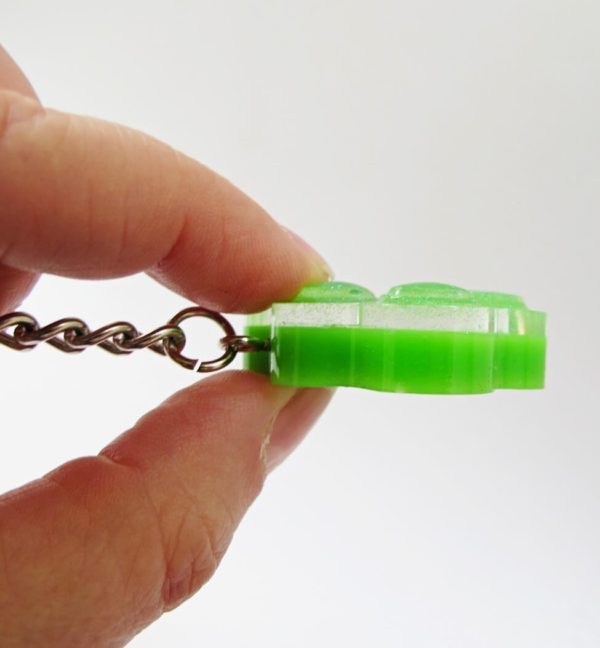
When pouring the first layer of resin, the only reason you want a little bit is that you want the colored resin to take up the back two-thirds of the charm. That will hide the pin stem when you drill.
Want to make your own resin projects but don’t know where to start?
Then grab your copy of Resin Fundamentals. The immediately downloadable PDF book will take you from confused to confident with resin in only an afternoon!
Unpublished Blog Posts of Resin Obsession, LLC © 2023 Resin Obsession, LLC
How do you attach the magnets? What size and where do you get magnets?
I like to use rare Earth magnets. We don’t sell them, but you should be able to find them on a search. Then, I use E6000 to adhere them. We have that in our store here: https://shop.resinobsession.com/collections/tools-and-supplies/products/e-6000-epoxy-jewelry-adhesive
What type of drill do you use to drill hole for eye fastener? All of my dremel drill bits are too large.
I started with a size #61 drill bit with my flex shaft.
Is this kind of resin safe to do indoors?
Yes, it is.
I did exactly this and days after I found that the resin broke where I put the pin stem. What should I do different? Is the piece suppose to be flexible por completely hard before drilling it? Thank you for your help.
Hi Yai, your resin should be fully cured before drilling. This article explains more: https://www.resinobsession.com/resin-resin-resin/can-you-drill-holes-in-resin-how-to-drill-holes-in-resin/
What key chain rings do you suggest? There are so many out there and do not want to attach “cheap”/easy to fall apart rings to customers. Thank you.
Hi Erin, I don’t have any specific recommendations.
which is a good drill for resin keychain making?
A dremel tool or flex shaft works great for drilling resin.
Amazing tips, thanks! I’m doing round ones and using a lot of your colors and glitters. 🙂 But I find that I hate the edges when they come out. Do you know if it’s possible to buy a ring that goes around the outside or anything? When I look it up, I just get more key chains haha. Thanks!
Hi Katie, I’m not aware of a ring, but this article explains why you get edges on your resin: https://www.resinobsession.com/resin-frequently-asked-questions/resin-edge/
Hi,
How do you get the bubbles out?
Hi Jacque, I like to use a heat gun. This article explains how to use one: https://www.resinobsession.com/resin-frequently-asked-questions/heat-gun-for-resin/
If the back is not smooth could you then use a domeing resin on the back to give nice rounded finish? Would you sand it first or leave it in the mold and dome?
Hi Eden, yes, you can use a doming resin on the back. I show how to do that here: https://www.resinobsession.com/resin-resin-resin/fix-resin-edge/
I’m wondering if the key chain will get easily marked/marred/scratched going in and out of my purse. Thinking back on the keychains/ I’ve had in the past, they seem to get beat up after a while. Has this been your experience? Is there a sealer, extra hard epoxy or a different type of resin at would work better than the Let’s Resin or the JDiction brands?
Hi Barb, I don’t know about either of those two brands, but I know the Resin Obsession brand doesn’t scratch. This is the one you want: https://shop.resinobsession.com/products/super-clear-resin-12-oz-epoxy