
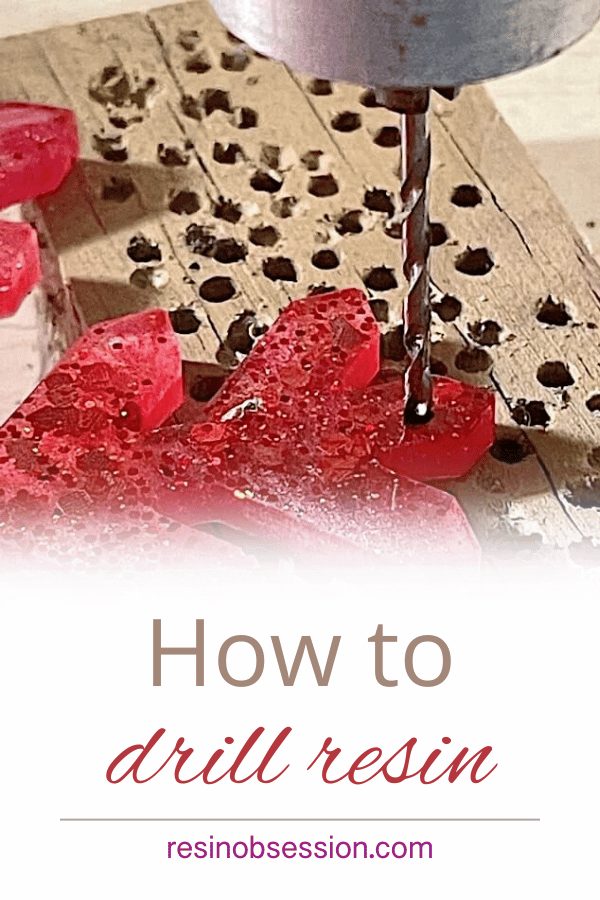
 After making your resin charms and epoxy art, you might be wondering if you can drill epoxy resin. The answer is a definite YES. But…
You’re will need some equipment. Yes, this article is the perfect excuse to buy new jewelry tools.
Here’s how to drill holes in resin.
Before you start
Your resin must be completely cured. You cannot drill uncured or semi-formed resin. Besides being messy, soft or gooey resin will not maintain an open hole. Besides, you’ll ruin your drill bit.
And, you’ll need to take the proper safety precautions. That means keeping long hair tied back and wearing safety glasses.
Step 1: Select your drill bit size
If you’re drilling holes for resin jewelry, use between a size 55 to 65 drill bit. They will accommodate most sizes of jump rings and other resin jewelry findings.
What if you’re unsure what size drill bit to use?
This drill bit to wire gauge conversion chart compares drill bit sizes to standard wire gauges for jewelry. Match up the drill bit to the size wire you’re using.
💡 Pro tip: If you’re unsure which size drill bit to use, go smaller than what you think you need. You can always drill the hole again with a larger drill bit to enlarge the hole.
Step 2: Mark your resin
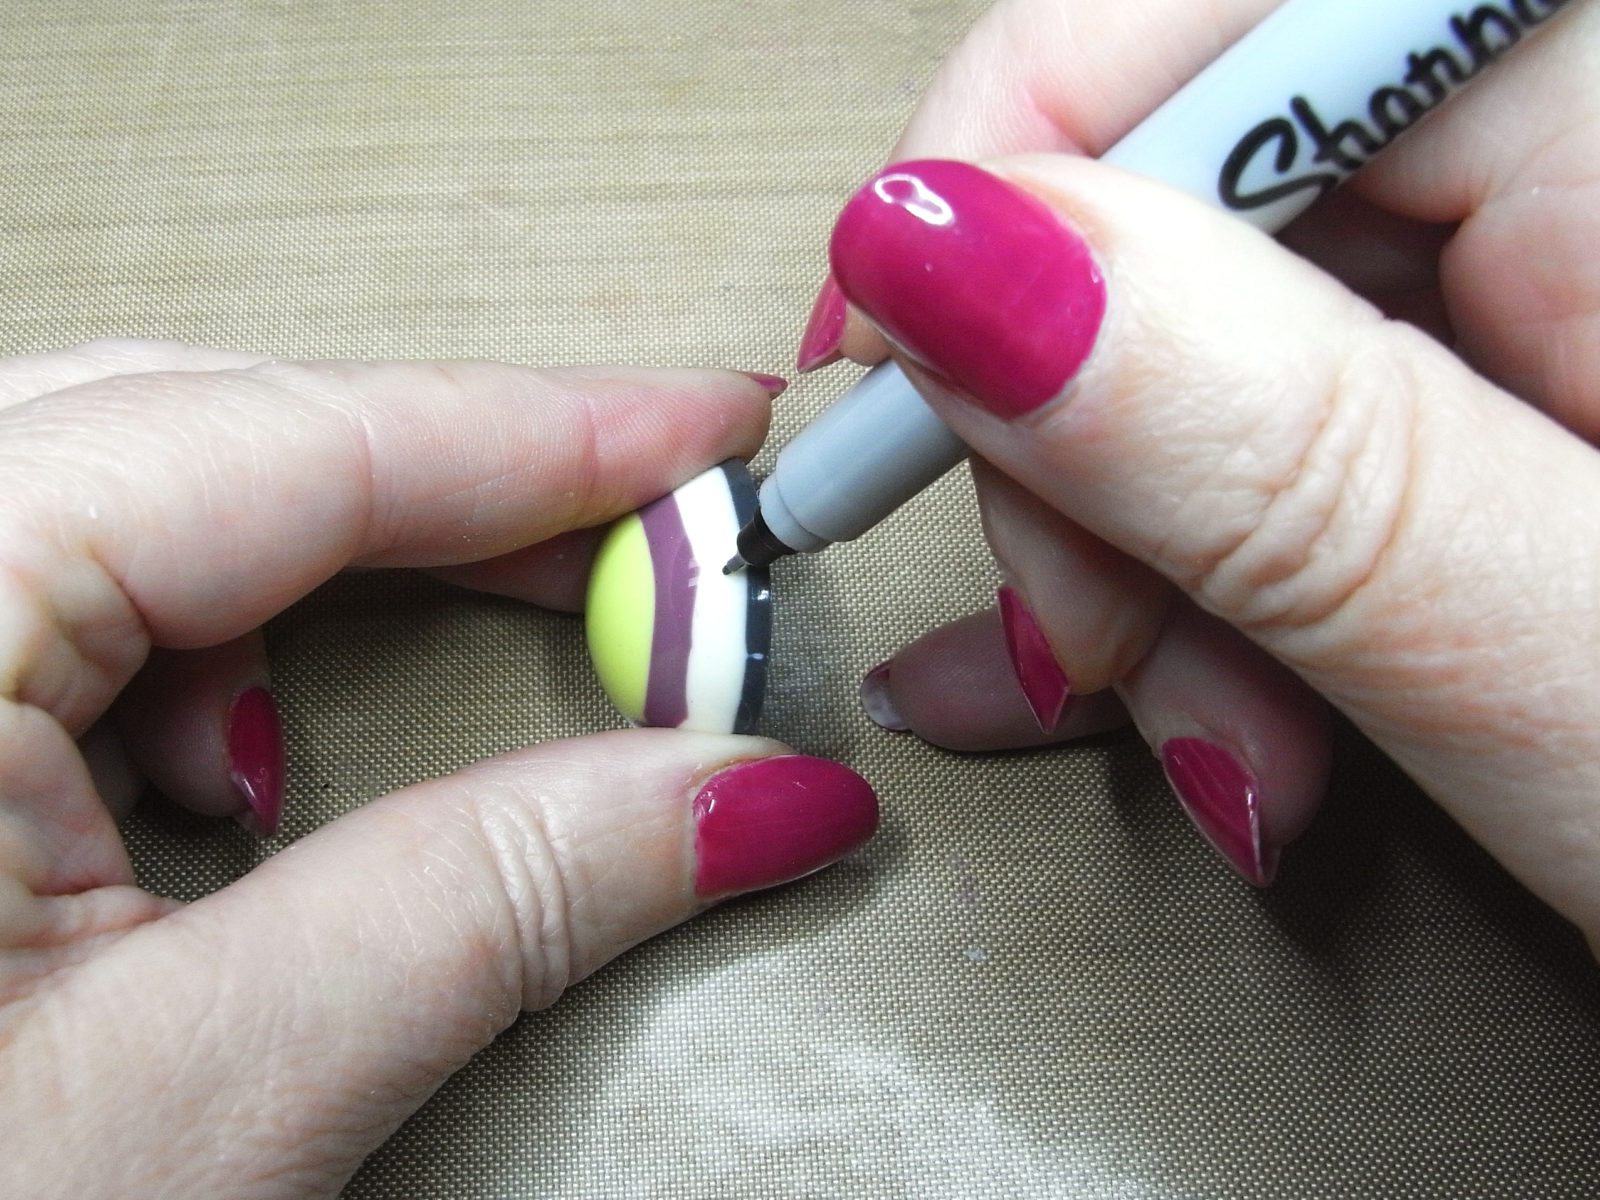
Mark the spot where you want to drill. A fine-tip marker pen works perfectly for this.
Step 3: Drill the resin
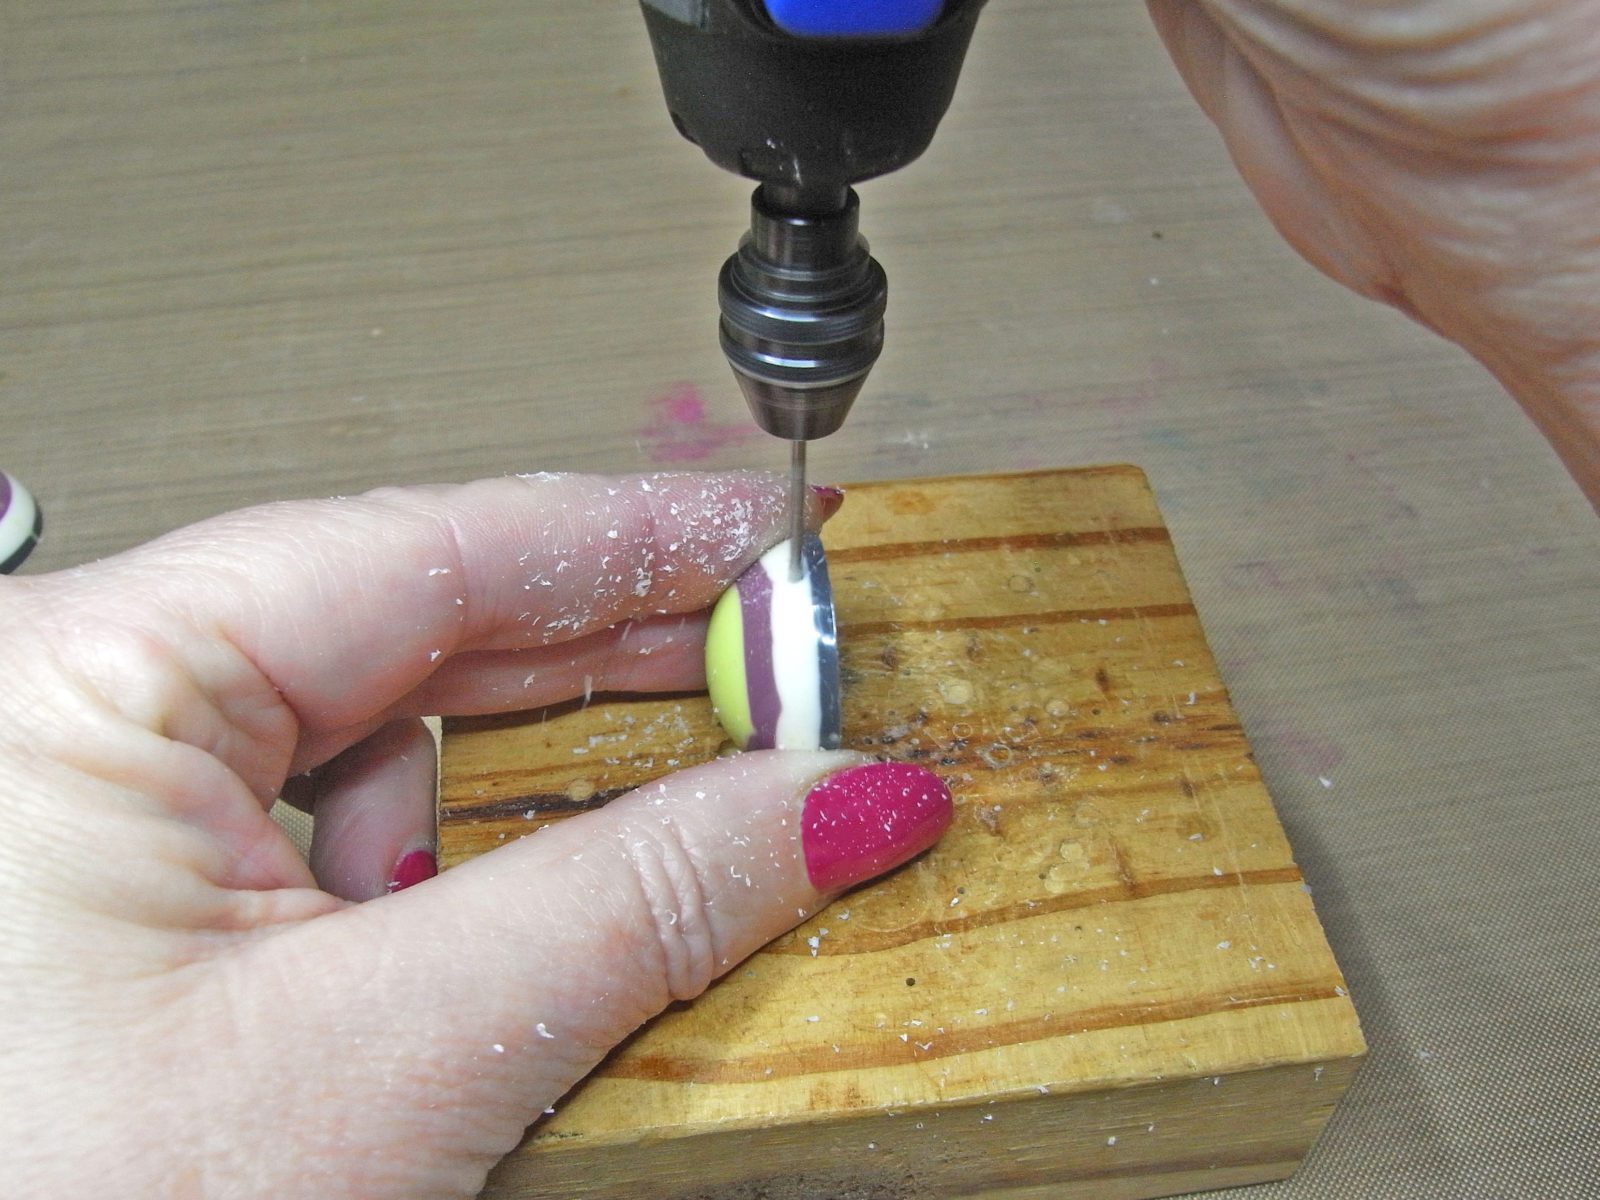
Here’s How To Drill Resin step by step
- Place your resin charm on a scrap wooden block to protect the surface of your work area.
- Slowly drill the hole in your resin by holding the drill bit at the desired angle. Fast drilling causes friction, which can make your epoxy soften or melt.
- Drill all the way through your cured resin, into the wooden block. By drilling into the block, you mess up that surface instead of making holes in a table.
- Clean out the hole. A piece of flexible wire or toothpick works great for this.
If you drill through clear resin, your hole will look frosted.
How do you fix that?
Use a toothpick or a thin piece of wire to lightly coat the inside of the hole with freshly mixed resin. While it will not make the frostiness disappear entirely, it will make it less noticeable. But be careful that you don’t use too much, or you’ll plug up your hole again.
Step 4: Clean the edges
After you drill resin, your might have resin crumbs on the hole opening you can’t scrape off. If that happens, grab a drill bit a size or two larger than the one you used to drill the resin. Then, rest it on top of your hole and spin it by hand for a turn or two to remove the bur.
Step 5: Finish
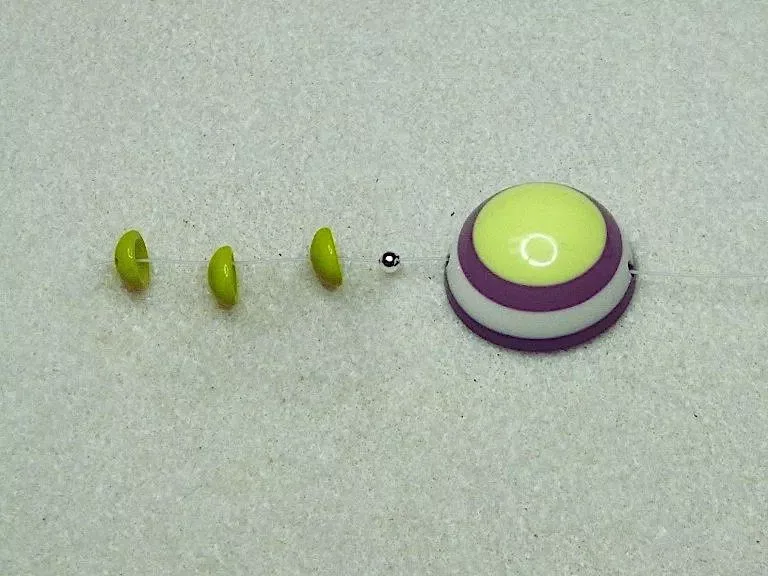
Add your jump ring, bail, or string on a cord to make a resin charm wearable. If you made a resin painting, you can add hardware to hang your new art.
What else should you know about how to drill resin?
Cheap drill bits are fine.
If you make metal jewelry, you may have invested in expensive drill bits. While these are great for drilling metal, resin doesn’t need anything that hard or durable. Resin is soft, and you can drill epoxy with about any drill bit.
The resin serves as a drill bit lubricant.
Extra lubricant on the bit is unnecessary. But don’t forget to maintain your drilling apparatus with lubricants as recommended.
Use a separate set of drill bits for resin drilling and metal drilling.
You don’t want to take a chance that resin crumbs contaminate metal that you could heat with a torch. You don’t want to breathe in those fumes.
Sure, you can use a vice. But…
If you’re worried about holding resin while you drill it, you can use a vice. But, clamping the vice onto the resin will leave marks. Wrap the resin in something soft before including it in the vice.
Learning how to drill resin is hard.
Perfecting the act of drilling small holes in resin is hard. While getting your drill bit to go from one side to the other is pretty easy, getting it to do it straight and even is not. This is a great time to pull out the resin mistakes we all hoard and use them as practice pieces.
💡 Pro tip: If you want to ensure your holes are straight from one side to the other, your best option is to use a drill press. You can see how to do that here:
Want to learn more about how to work with resin but find it all so confusing?
I want to help. Get your copy of the ebook, Resin Fundamentals. You’ll go from confused to confident with resin in only an afternoon. Buy the PDF book now, and you’ll have it to read in a few minutes.
Unpublished Blog Posts of Resin Obsession, LLC © 2023 Resin Obsession, LLC
Your video was great, but your first and third pictures above concerned me from a safety standpoint as it appears you are holding the piece by hand while drilling. I suggest you change out such pictures since someone less adept may follow your example and put a whole through your hand.
Hi Bruce, thanks for sharing your concern. We always recommend taking proper safety precautions when using any type of power tools. We have a collection of safety articles here:
https://www.resinobsession.com/tag/safety/
Using an awl to punch a small dimple will help the drill bit line up with the hole. Also using a vice is always recommended.
Yes. That helps too. But you can also hold the piece with a soft grippy style clamp
How do you make key chains
My first pour (new beginner) using Alumlite Clear Cast. After 48 hours it still has tacky places. I poured in a silicone mold (I used mold release) in low humidity and warmed the Alumlite and the temp outside was 70 degrees. I was pouring over glass pieces affixed to a base of glass with E6400. I am a stained glass artist. The mold is about 3/8 inches high by 3 inches in daimeter. Do I need to wait longer for it to completely cure? It only seems tacky around the rim and on top, otherwise it seems solid. I stirred for 2+ minutes for each of three pours.
Hi Shauna, it sounds like your resin wasn’t fully mixed before pouring. You will need to remix more resin and use it to fully cover the sticky spots. This article explains more: https://www.resinobsession.com/resin-frequently-asked-questions/how-to-fix-sticky-resin/
I bought a keychain mold set from an art company and it came with a “hand drill” (read: thing that looks like a small screwdriver, with the turny part at the top so you can rotate your hand without having to actually lift the screwdriver from the object) and 2 “drill bits.” Will that even work for fully cured resin??
I’ve been trying a Bosch glass and tile bit without success, how to drill through glass and resin?? Thanks, doreen
Hi Doreen, I’m afraid I don’t have any experience drilling glass and don’t have any tips.
How deep can you drill with this equipment? If I have a 3 or 4 inch flat resin disc and I wanted to drill a 2mm hole down the middle of it (so the disc could rotate around the string), is that possible? Thank you!!
Yes, Natalie, you can do that.
Hey! Which brand is your electric dill? Or where did you get it? I’m trying to find one and I can’t 🙁
Hi Tiffany, I like to use a flex shaft, but you can also use a dremel too.
Is there any way to fill a whole that was accidentally drilled in the wrong spot without it being noticeable???
Hi Alecia, have you thought about filling it with more resin?
Definitely agree with Bruce about the hand safety while drilling. That picture looks incredibly unsafe. Also, I have to say, If you ‘always recommend taking proper safety precaution’, then that picture wouldn’t exist at all, let alone be on your website in a how-to article. Recommend removing or replacing!
It sounds like both of you are new to drilling small jewelry pieces these. It’s similar to using a Dremel tool, which are also done by hand.
But, if you don’t have good fine motor skills, then you’re right — you shouldn’t try it this way.
Question about drilling through a hole to clean it up. I made a mold for a plaque and it has holes. I’m afraid the mold pegs aren’t higher or level with the back. So I may have to drill some to clean out the hole. Follow the same steps? I think I
It’s a 1/4” – 1/8” opening for mounting the plaque when finished.
Yes that’s right!
I am new to making jewelry. I have very small doll House like pieces I am trying to drill. I have a dremel and having a hard time. It stops as soon as it goes into the piece and will not go further. Also I need something to hold them in place while drilling. Please any help is appreciated.
Hey there! I would try using a drill with a small sized bit. This works best for me! You can also clamp the piece down and try to work a little at a time. Don’t force through it! Hopes this helps!