
 When it comes to making wall hanging epoxy crafts, pouring epoxy art is the project you probably think of first. But you can grab a frame box and create your art inside a box instead of on a surface. This project is especially geared towards resin beginners, so don’t shy away from resin crafts if you’re new to this.
But, if you’re looking for a project you can make in an afternoon, this isn’t it. Completing this project will take 5 to 7 days because you’re pouring in layers. You’ll add items at different layers to make the box look like a diorama. Have patience – you’re going to love how this finishes.
Supply list:
Wood box
Gray chalk paint
Paintbrush
Wooden butterfly cutout
Metallic purple spray paint
Resin Obsession crystal doming jewelry epoxy resin
Mixing cups
Stirring sticks
Assorted glitters
Heat gun
Rub-on transfers
Glitter glue
Step 1: Plan your design.
Sketch your design, then deconstruct it into layers. In other words, you’re figuring out what items go in which layers.
How much resin do you put in each layer?
This box has 2 1/2 inch sides and is about ¾ inches deep. Then, put those measurements into a hexagon volume calculator. This box can hold 6 3/4 ounces of resin when full. But you don’t want to stuff it with resin – only about three-quarters. That means you only need 5 ounces of resin. This works out perfectly with using the Resin Obsession crystal doming resin. You’ll mix 1 ounce for each layer.
Step 2: Paint the box.
Cover the box with chalk paint. Let dry for 24 hours.

Step 3: Paint the butterfly.
While the box is drying, paint the butterfly. Cover each side with spray paint, letting it dry for 15 minutes between coats. Then, let the butterfly cutout completely dry.
Step 4: Add the first resin layer.
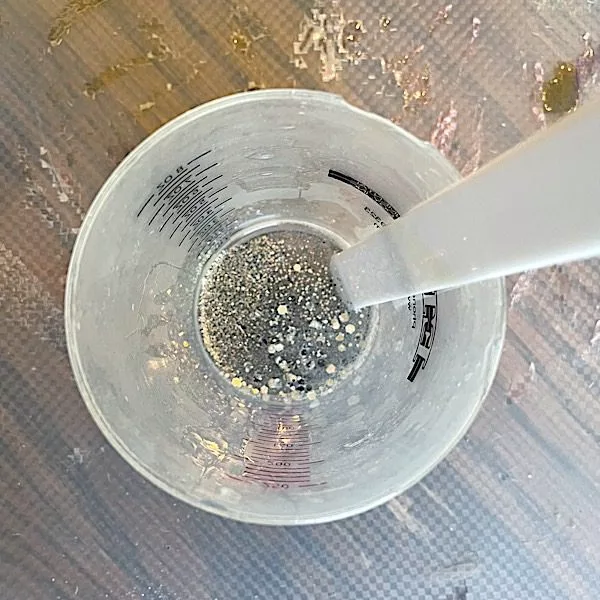
Mix an ounce of crystal doming resin.
Add a bit of glitter. Resist the urge to fill your resin with enough glitter so astronauts can see it from space. Or not. Make wall hanging crafts that ooze with your ideas. 😉
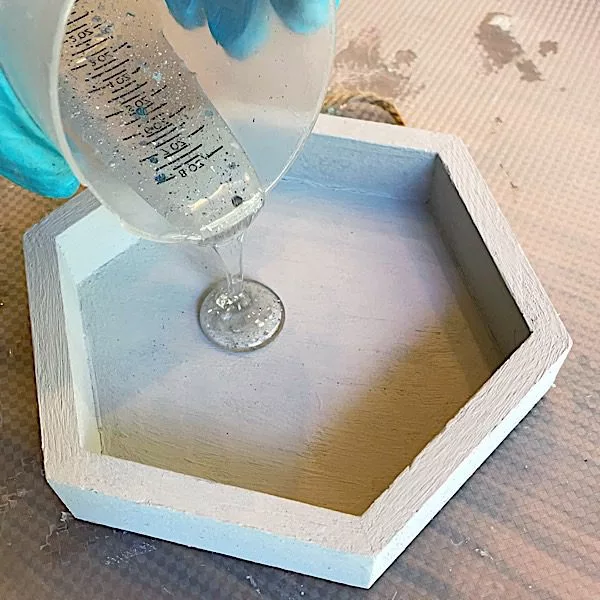
Then, pour the epoxy into the wooden box. Remove bubbles with the heat gun before letting it cure.

Step 5: Add the second layer.
Once the resin is dry, add a rub-on pattern.
Then, mix and add another ounce of crystal doming resin. Check for bubbles, then let the resin cure.

Step 6: Add the third resin layer.
Rub on another transfer.
Then cover it with resin. Check for bubbles and let it cure.
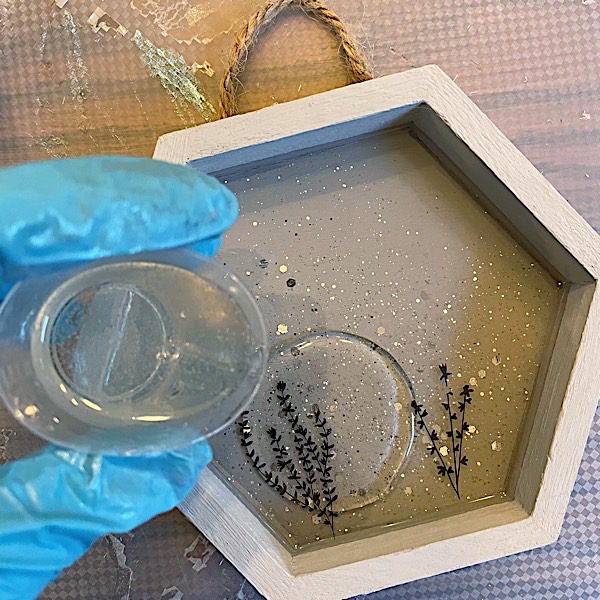
Step 7: Add the fourth resin layer.
Mix more crystal doming resin. Split it between two cups saving some of the clear resin. Add a pinch of glitter that matches the purple butterfly to one of the cups. Stir well. Pour the glittered resin and clear resin into the box on opposite sides. Let it blend in the center.

Then, dip the butterfly into the leftover clear resin. Flip it over until it’s coated with resin. Getting it wet with resin keeps bubbles out of your project.
Then, place it into your box. Check for bubbles and let the resin cure.
View this post on Instagram

Step 8: Add the final resin layer.
Add a few final rub-ons. You can dress them up with glitter glue if you want. Be sure the glue is completely dry before adding your last resin layer.
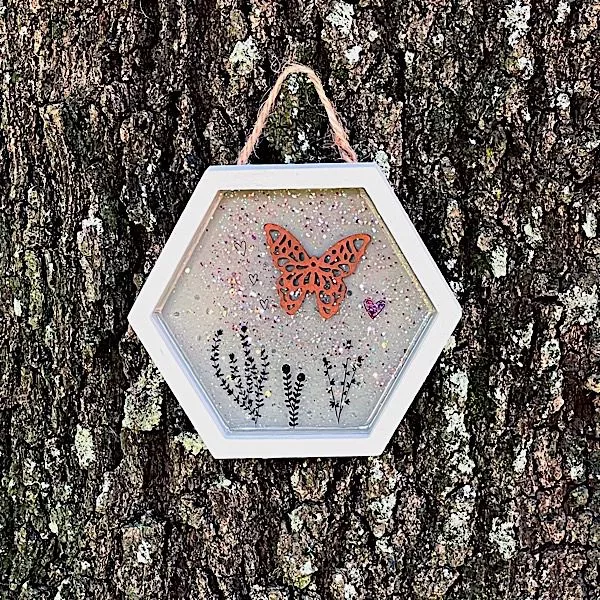
Once it’s cured, your wall hanging crafts is finished. That means it’s ready to hang.

By doing this resin project in layers, you create depth. It will take seven days to complete this box, but you’ll love how it looks.
View this post on Instagram
Okay, resin nerds, this is a footnote for you.
I’ve been preaching that you must use casting resin when pouring into a space. Yet I’m using a doming resin for this project.
Why?

I wanted the self-leveling benefit of a doming resin. I wanted to ensure a smooth, glossy surface for every layer. Doming resins shouldn’t be poured more than 1/8 inch deep. So because each layer was going to be less than 1/8 inch deep, you can use it here.
[Rabbit hole math moment]
The box is ¾ inches deep, but we’re only filling it about three-quarters full. That means we’re only filling about 9/16 inches deep. Divided over five layers means it’s almost 1/9 of an inch deep. That’s less than the 1/8 inch maximum that doming resin should be poured.
You can also use the Resin Obsession super clear jewelry resin for this project if you like. Just be doubly sure that your table is level.
Ready to jump into resin crafting but need more help getting started?
Get all the teachings of my in-person classes from the comfort of home. The ebook Resin Fundamentals has all my beginner class information you can consume this afternoon. You’ll have the resin basics that apply to making wall hanging crafts and so much more. Buy the PDF book now and get an email download link in minutes.
Unpublished Blog Posts of Resin Obsession, LLC © 2023 Resin Obsession, LLC