
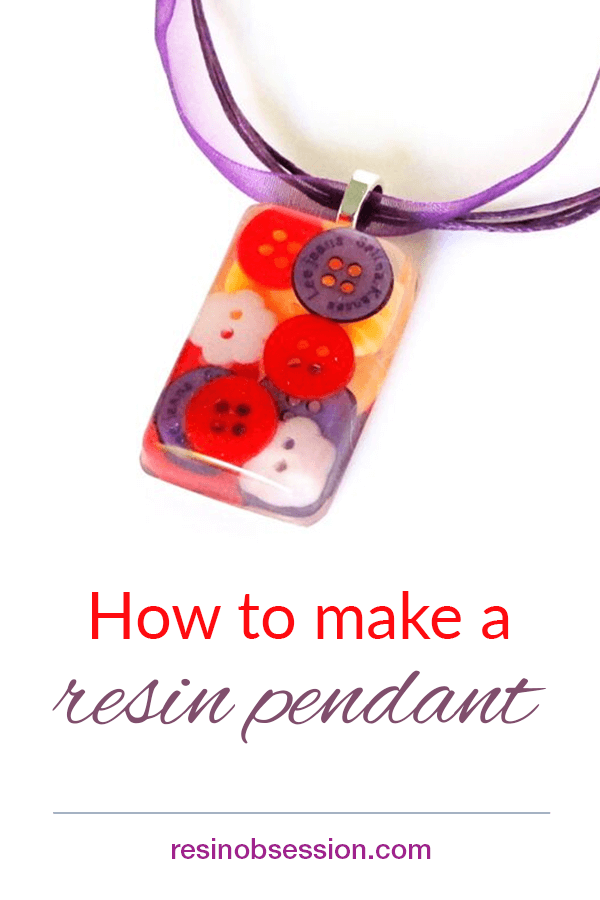
If you’ve spent any time stalking people on social (not talking about exes here), you already know that making resin crafts is the IT thing to do. But, if you happened to take a chance and found this article. (Like you clicked the Google ‘I’m feeling lucky’ button.) Let me tell you why making a resin pendant is an awesome way to spend your afternoon.
✅ Make it today and wear it tomorrow.
✅ Make it with resin supplies that won’t cost you a fortune.
✅ Make it even if you’ve never done this before.
that last one is the best part
So here’s what you’re going to need to make your resin pendant:
- Resin Obsession Super Clear resin
- Castin Craft Mold Release and Conditioner
- Nitrile Gloves
- Resin pendant mold
- Resin Obsession Stir Sticks
- 1 ounce Reusable plastic measuring and mixing cups
- Buttons
- E6000 adhesive glue
- Glue on bail
Step 1: Get ready
When you’re making a resin pendant, this is the equivalent of a warm-up. Put down a silicone mat or tape wax paper to your table. (Resin works like glue too.) You’ll also need to wear your gloves and craft in a well-ventilated area.
Step 2: Prep the mold
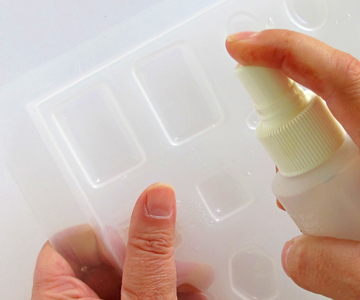
Spray a light mist of mold release over the mold and let it dry for at least 30 minutes.
💡 Pro tip: Mold release is not cooking spray. You don’t want to spray every crack and crevice with a thick coat of release. Instead, think of the mold release like perfume. A light mist is all you need for your resin pendant mold.
Step 3: Mix resin
You want to use the super clear resin for this project because it cures hard and crystal-clear. You won’t get any bendy resin pendants like you can with some other brands. Besides, it’s got top-level UV protectants, so your hard work looks amazing for years.
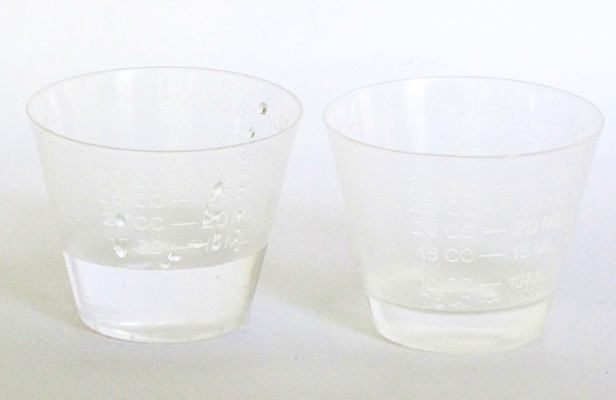
Mix 1/2 ounce (total) of resin. Since this resin mixes two parts A to one part B (also known as a 2:1 resin), you’ll need mixing cups with measuring lines. You’ve got to see what you’re doing.
Measure ten ccs of Part A into one cup and five ccs of Part B into the other. That will get you 15 ccs which is 1/2 ounce.
Technically, it’s 0.50721 ounces, but you get my drift.
💡 Pro tip: It’s tempting to use only one cup. But, using two cups allows you to pour off any extra if you accidentally overpour. Otherwise, you’ll be guessing how much more of the other liquid you need to balance it out. And that doesn’t always work out well when making a resin pendant.
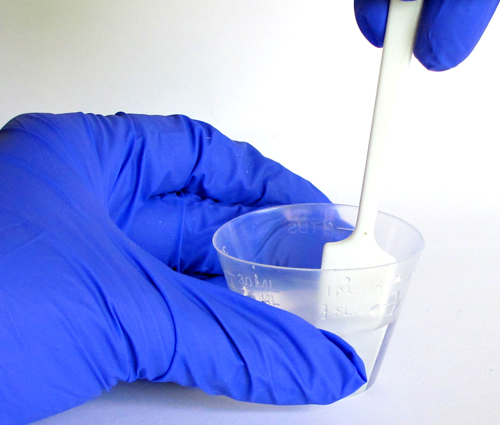
Pour your hardener into the cup with the resin and mix with the stirring stick. Scrape the sides of your cup and stir stick several times during the process.
💡 Pro tip: When resin cures sticky, it’s almost always from incomplete mixing.
⭐️ BONUS: If you want more help in this area, this article breaks down the details of how to mix resin.
Step 4: Add to the mold
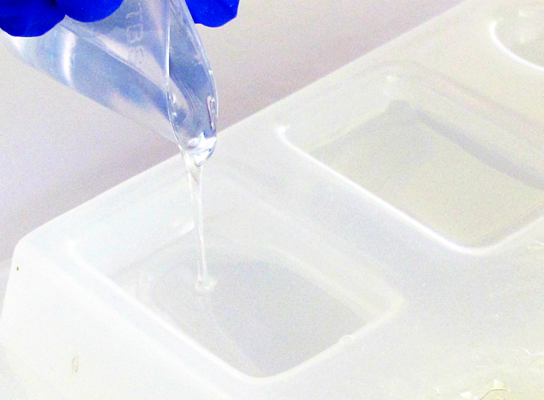
Pour your resin into a pendant cavity.
💡 Pro tip: Squeezing the cup into a spout makes pouring easier.
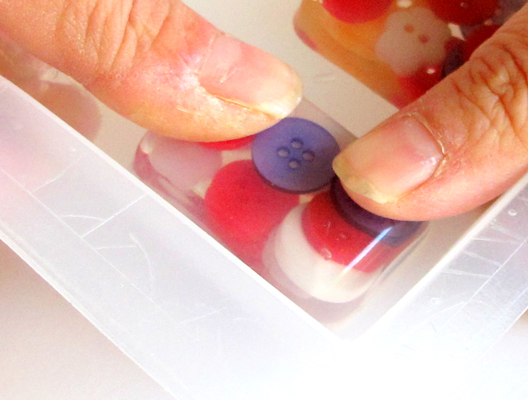
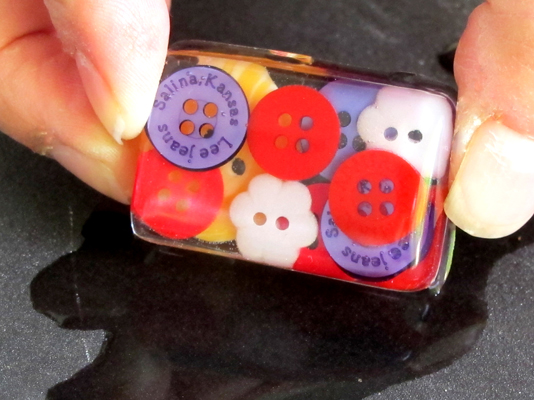
Step 5: Add fun stuff
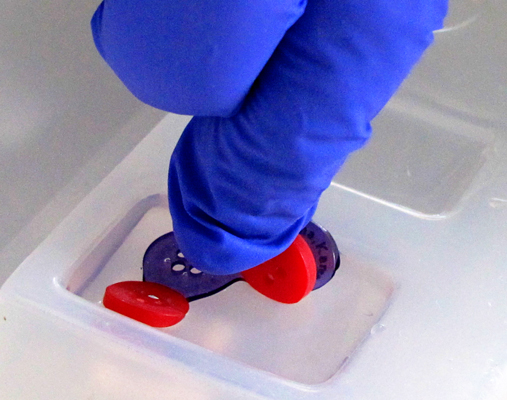
Drop cool things like buttons into the resin.
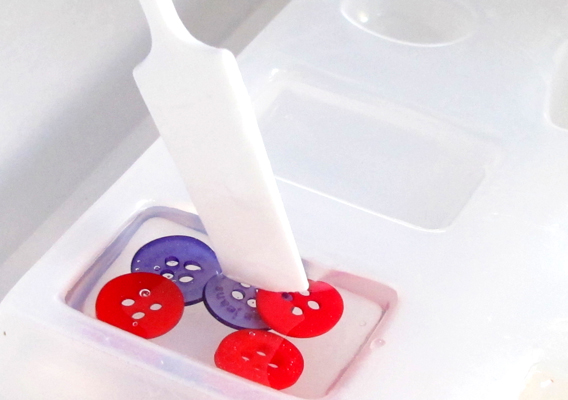
Use your stir stick to move them around.
Before letting your resin pendant cure, be sure to check for bubbles. You can pick them out with your stir stick. Or, my favorite, go over the surface of the resin with a heat gun.
If you don’t have a heat gun, don’t use a hairdryer. Unless, of course, you don’t mind cleaning up the mess of (soon-to-be-cured) resin everywhere.
Sometimes trapped bubbles can come up to the surface later. Be sure to check your resin pendant again in 20 to 30 minutes to look for any new bubbles.
Cover it with a plastic container while it cures.
Step 6: Demold
Remove your resin pendant by pressing from the back of the mold. You can grab the cured resin edge to peel it out the rest of the way.
Step 7: Finish edges
Sand sharp edges or extra resin with a 400-grit wet/dry sandpaper. Wet the sandpaper first.
You can also use a coarse nail file if you only have a couple of spots.
Step 8: Add the bail
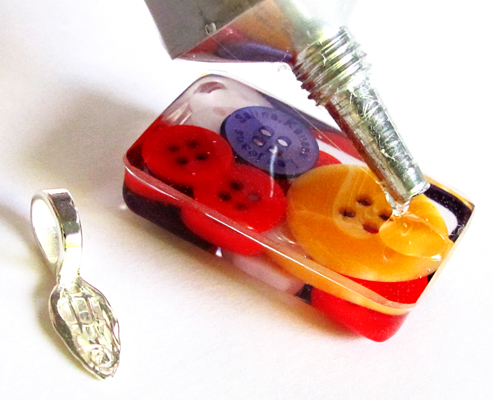
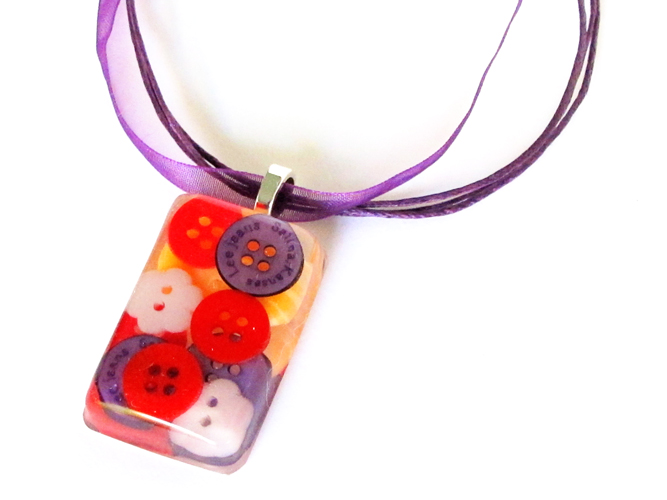
After finishing the resin pendant edge, glue the bail to the back with E6000. (This is what makes the resin pendant wearable.) Apply glue to the bail and the back of the pendant. Let both sit for 2 to 3 minutes before pressing the two parts together. Then, give your resin pendant 24 hours to dry.
Ready to make that resin pendant…and more?
Here’s the thing. I can’t teach you everything you would ever need to know about resin jewelry making.
That’s why I wrote a PDF book about it.
For less than the price of a resin kit, you can learn for me. I share everything I teach in my in-person classes. But you can stay at home in your favorite pajamas.
But the ebook now and get a download link to your email. You’ll learn to make resin jewelry that will have people saying, ‘Wow, you made that?’
Unpublished Blog Posts of Resin Obsession, LLC © 2023 Resin Obsession, LLC
I love the way you make pendant, it’s like magic 123….
Hi, I just wanted to ask about the E6000, what safety precautions should you take when using it?
The manufacturer recommends in their SDS to wear protective gloves and wash hands after use in addition to avoiding eye contact.
Wish I would of found this site when I first started. I’ve waisted ALOT
Oh gosh Diana, I’m sorry to hear that. What on our site has been most helpful to you?
Can you attach the bail directly to the resin later in the curing process and avoid the use of the E6000?
While I like your thinking Debra, I’m afraid there isn’t a way to attach the bail in the ‘mid-cure’ process.
What is the reason for a lot of bubbles – is it insufficient mixing
Hi Beryl, there are many reasons bubbles can happen, but insufficient mixing is not one of them. In general, I think beginners mix too briskly which causes a lot of bubbles.