

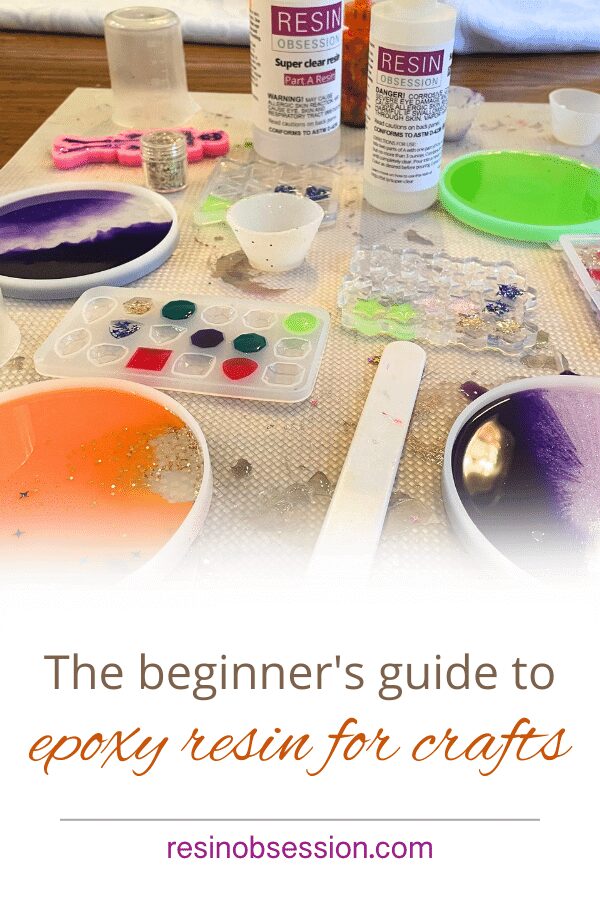
 WHOOP WHOOP! You’re ready to try creating with resin. Like making resin charms or epoxy art. You’ve got the inspiration, and now you need the steps for using epoxy resin to make crafts.
But I’m guessing you’re here because you aren’t sure what those steps are.
And I’m so glad you’re here because I want you to enjoy your resin time without wasting supplies and your time. Because resin mistakes like that will make you want to quit altogether.
I want to get you on the FUN path to making crafts with epoxy resin. And it starts by answering this question…
Do you want the resin to fill a space or coat a surface?
Resin is resin, right? Like why does this matter?
Because there is no one size fits all resin.
I’m going to say it again. THERE IS NO ONE SIZE FITS ALL RESIN.
If it looks like I’m yelling there, you’re right. It’s because I’ve helped thousands of creatives over the last 16 years, and knowing the answer to this question is what fast tracks your resin success.
And you’ll avoid making something that ends up in the trash.
If you are filling a space, like a mold or something with sides to contain the resin, you want to use a casting resin.
These resins
*Mix in a thin consistency, so they release bubbles easily
*You can pour them in thick layers
*Cure hard and durable
Best small pour casting resin
Resin Obsession super clear resin
This is my go-to resin for making small mold projects. You can mix anywhere from 1/2 ounce to 3 ounces at once. Then, pour it into your mold, and it’s ready to demold in under 12 hours. Plus, it contains top-level UV protectants to ensure your resin stays clear for a long time.
Do you know what else I love about this resin? It cures hard and is durable. That means resin rings and resin bracelets won’t soften with body heat. Yep. No more soft and bendy jewelry when you use this jewelry resin.
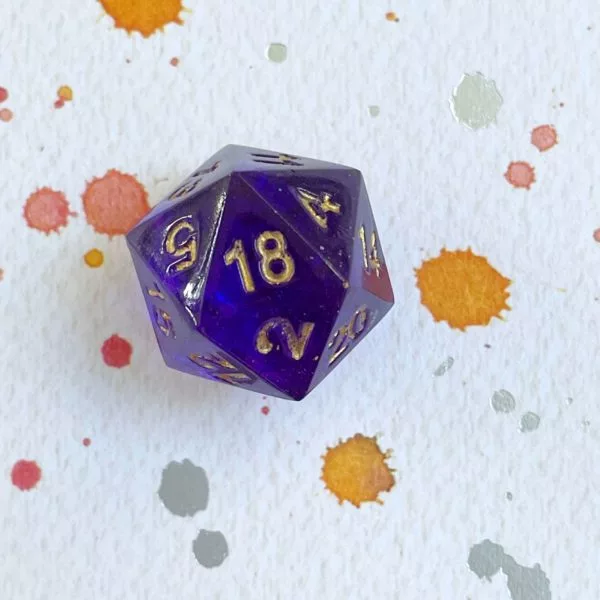
Here’s a D20 I made with the super clear resin.
Best large pour epoxy resin
Resin Obsession deep pour resin
This resin works great for making wood river tables. The thin consistency of the resin means it can fill cracks and holes in wood completely. The slow-curing formula avoids overheating and resin cracks. Plus, you can pour it up to two inches thick at once. Should you need a resin layer deeper than that, let the resin gel, then pour your next layer. Mix and pour as little as 3 ounces to as much as 3 gallons at once.
💡 Pro tip: you can use this thick pour epoxy for casting large figurines, paperweights, and orgones.
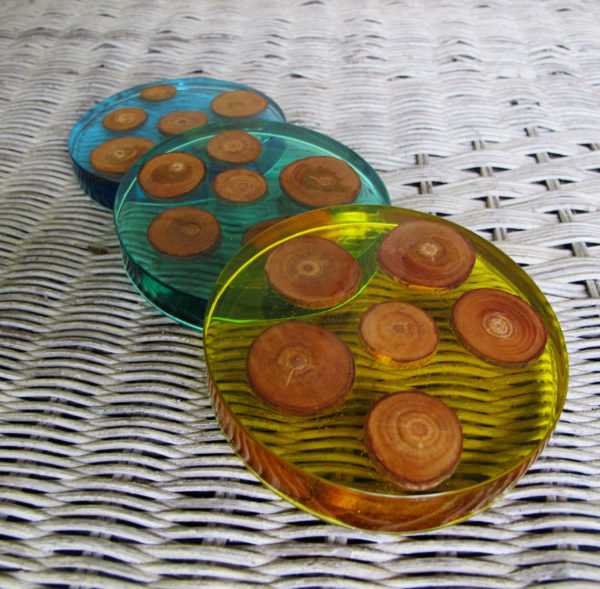
In fact, that’s how I like to use it. Here are resin coasters I made with the deep pour epoxy.
If you want a resin to coat a surface, like giving a glossy coating to a tile, recoating a countertop, or covering a drink tumbler, you need a doming resin.
This formula
*Mixes thicker
*Clings to a surface better and makes it easier for you to avoid holes and fisheyes in resin
*Self-levels to produce an even finish
Because they mix thick, though, you shouldn’t pour them in layers deeper than 1/8 inch. All the bubbles may not escape before it starts curing.
Best clear craft resin for coatings
Resin Obsession crystal doming resin
This is my epoxy of choice when I need a crystal-clear, glossy finish on my jewelry bezels, epoxy tumblers, artworks, and photographs. It contains our best level UV protectants, plus it has a thirty to fifty-minute working time. (If you are anything like me and find that time gets away from you, you will love having the extra time.)
Plus, it cures durable, so I never worry about the surface looking scuffed.
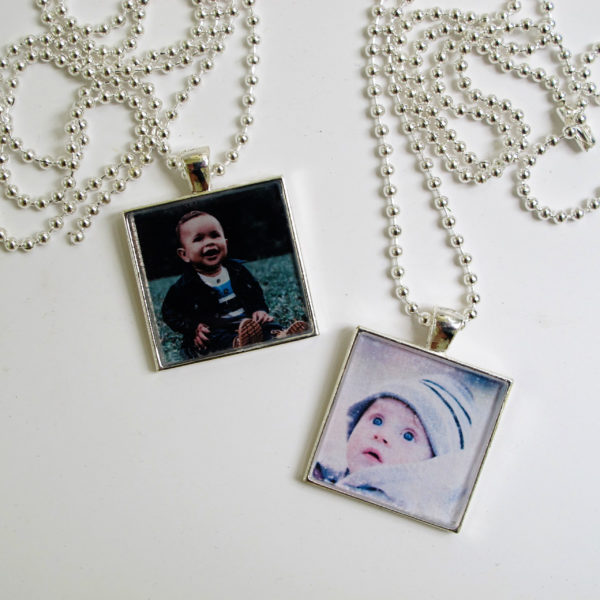
I used the crystal doming resin to make these photo pendants. I love how it gives a glossy finish to the photos and makes them pop out of the bezels.
Best craft resin for coloring
Sometimes though, you need an epoxy resin that’s a great value, especially when you need a lot of it to color for your crafts. That’s where our epoxy art resin comes into play. It locks in colors. They don’t sink or fade and keep their beautiful hues for years. In case you decide to keep it clear, don’t worry. It does contain UV protectants to guard against yellowing.
This resin also has a shorter working time, which comes in handy when pouring colors. Your colors are less likely to blend at the edges, avoiding muddy colors.
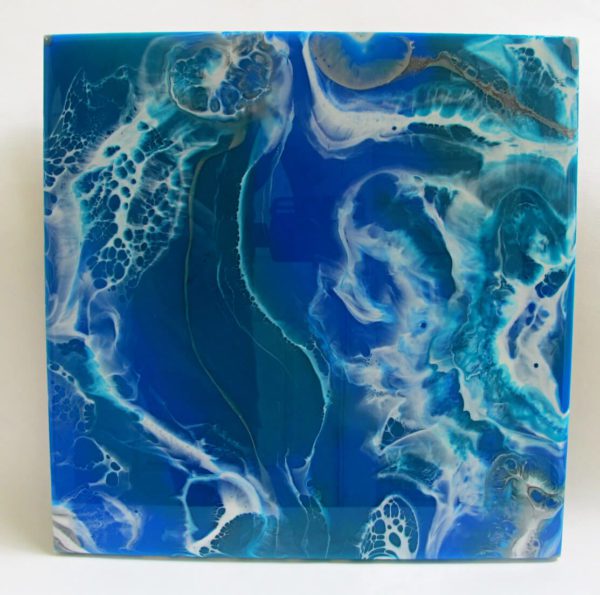
I love this epoxy resin for all my colored resin painting projects. For example, I used it to make this ocean-themed resin painting.
Whichever of these epoxy resin for crafts you choose, rest easy using them for your next project. They are all
*VOC free
*Conforms to ASTM D-4236, which is the highest safety standard (not all resins have this certification!)
*Made in the USA
While our resins are the safest on the market, that doesn’t mean you can ignore resin safety precautions. {Like, I hope you wouldn’t ride around in the safest car without wearing a seatbelt.} Wear gloves, work in a well-ventilated area, and dispose of resin products safely.
Now that you know which epoxy resin for crafts you need, here are a few other things you should know.
How do you mix epoxy resin for crafts?
Once again, all resins don’t mix the same way. Read and understand your epoxy resin directions entirely before starting your craft. Some use equal parts of resin and hardener (parts A and B), while others measure more resin than hardener.
After measuring part A and B, pour together, and stir until the resin mixture is clear and streak-free. This will take two to three minutes, depending on how much resin you are mixing. Make sure you scrape the sides of your cup and resin mixing stick during this process. If you don’t, this resin will only partially cure or leave a sticky surface on your epoxy crafts.
Let me take a moment here to talk about bubbles. One of the best ways to avoid bubbles in your resin is to be very careful when mixing. You are not making whipped cream. Instead, be deliberate but careful about mixing.
If you want more help, then walk through my process on how to mix resin and hardener.
How much epoxy resin do you need for crafts?
Well, that all depends on what you’re making. This article explains a few ways to figure out how much resin you need for a project, including a link to our resin calculator. (hint: The calculator is the ‘easy button’ option.)
What can you include in epoxy resin for crafts?
Pretty much anything you can think of. Here are some of my favorites:
*Resin colors
*Dried flowers
*Glitter
*Candy
*Beads
*Stickers
*Paper
*Metal charms
*Paper clips
💡 Pro tip: You shouldn’t include anything ‘wet’ in resin. That means no fruit, fresh flowers, or anything else with a lot of moisture. Not only can the extra water affect resin curing (resin HATES water), but they will spoil and change colors. If you don’t believe me, here’s what happened when I used fresh flowers in epoxy resin.
Now that you know what epoxy resin for crafts you should use, what are some of my best tips to share with you?
1. Make sure you understand your kit’s directions.
Resin directions are not universal. You need to know
*how much of each part to mix together
*how long you have to work with the mixed resin (pot time)
*how long it takes to cure
2. If you are using your epoxy resin for wood crafts, be sure your wood is sealed first.
If it isn’t, it will release so many teeny tiny bubbles into the resin that they are almost impossible to get out before the resin starts to cure.
3. Your cured resin crafts will only be able to tolerate warm items, not hot items.
That means you won’t be able to put a pan straight from the oven onto a resin countertop without it leaving a mark.
Ready to try using epoxy resin for your crafting projects but want more help getting started?
It’s why I wrote the book Resin Fundamentals. I’ve condensed my resin knowledge into an eBook you can download and read this afternoon. It’s all the exact details you learn at my in-person classes, but all from the comfort of home. Buy the book now, and you get a download link in your email inbox in minutes.
Unpublished Blog Posts of Resin Obsession, LLC © 2023 Resin Obsession, LLC
I am Tanzania
Am very interested with this Epoxy Craft
I would like to have your email or your WhatsApp number, I want to do this business
Hi Mkama, I’m afraid we can’t ship epoxy to you in Tanzania.
I’m just starting out using resin, this info is useful, I did a coaster set and holder, the holder I had to bin as the sides didn’t set and was bendy
I’m sorry to hear about your bendy resin, Lynne. This article explains why this happens: https://www.resinobsession.com/resin-frequently-asked-questions/why-is-my-resin-bendy/
I really like all the helpful tips Whiteand advice you have given me
It is such an amazing idea to create new types of art
You’re welcome, Maria. 🙂
I have just seen this hobby and find it interesting. I had others. Bought all needed and could not sell them. Others did the same thing and made big bucks. Si I am hoping that making epoxy products will be un and I will be able to sell them. Please help me be the best. I am eighty years young and I have a saying I am going to live until I die. I am not going to wait to die. I am alive and want to make my last year’s fun and alive in it being something I can do and sell Thank you.
Hi!!
I am trying to figure out if there is a resin you could use to pour over crushed glass/broken glass in a 30″x35″ mold to make a backsplash for your wall behind the stove that would be safe and non yellowing?
Thank you!!
Hey Jill! Unfortunately, all epoxy is going to yellow on you over time. You can prolong it by using a UV art epoxy. I like the Promise brand!