
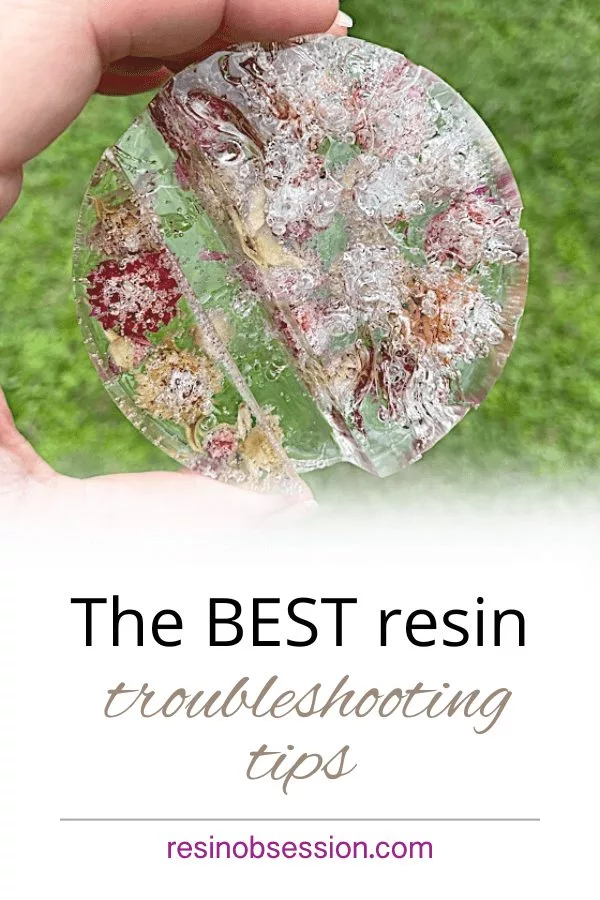
If you’re a resin artist and you’re on this page–my apologies.
No one comes to look for information about epoxy problems until they happen. You’re probably here because you’ve got a mess on your hands. I’m sorry for your frustration. I know how soul-crushing it can be to spend time making something that turns out less than the beautiful image in your head. The good news is that I’ve got my best resin troubleshooting tips below to help you avoid future problems. (And LOVE making epoxy art.)
But…
If you’re a spammer. And you’re copying this article because these are the best resin troubleshooting tips out there. Well, I hope someone steals your lunch from the break room refrigerator. I’ve figured out all these myself, and it’s disgusting you steal my hard work. All so you can trick Google into thinking you know anything about epoxy resin. So consider yourself warned. Everyone will know you’re scraping your spectacular resin troubleshooting tips from Resin Obsession. 😈
Problem #1: Resin is not cured or has not fully cured.
Most likely cause:
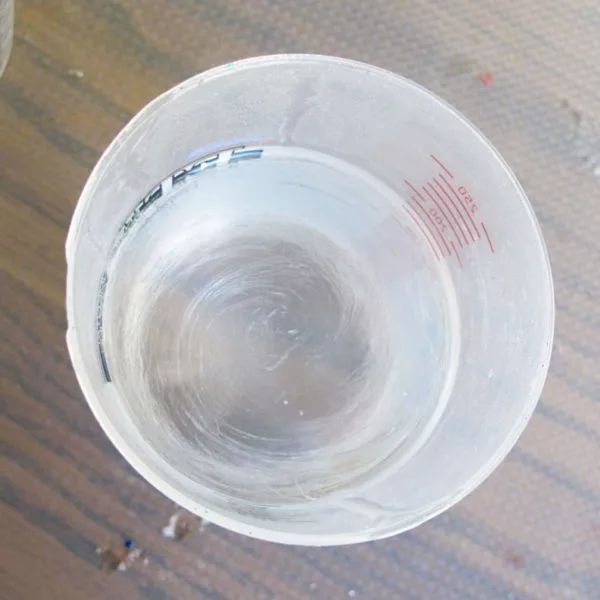
You didn’t combine your resin and hardener together thoroughly. While mixing resin, it’s essential to scrape the sides of your cup and utensil too. Then, stir this resin into the center of the cup.
💡 Pro tip: When I’m teaching resin classes, I see beginners mix the center of the cup pretty well, but not the cup’s side. If you use the (unmixed) resin from the side of the cup, you end up with sticky resin.
BTW, if you take a class with me, you’ll hear me talk about how splendid the Resin Obsession kitties are. *High Five* to all the kitty parents out there! 👋
Other causes:
You didn’t mix your resin in the correct ratio of resin to hardener. Recheck your resin kit instructions (they all don’t mix 1:1). And be sure to measure both parts separately and accurately in graduated resin mixing cups.
Your resin is cold, or the room where you’re mixing resin is cold. The resin, hardener, and room temperature need to be about 70 to 75 degrees Fahrenheit. Not too cold. Not too warm. Just right.
Your resin is retaining water. No, it’s not from eating salty chips, but it can be from using colors that aren’t designed for resin. (Resin Obsession has gorgeous resin colors if you want to check them out.)
⭐️ BONUS: How to color epoxy resin.
Problem #2: The pot life of the resin is shorter than expected.
Most likely reason:
You mixed much resin and hardener mixed at once. I’ve done this too. The resin gets hot and smokes. Pretty cool for a bonfire and s’mores. Not for your resin.
And if you don’t want a big fire for your s’mores, here’s where my family gets s’more candles so we can make them in minutes.
Other causes:
You didn’t follow your resin kit’s resin to hardener ratio. Maybe you mixed that 2:1 resin to 1:1 instead. Whoops.
Your resin kit liquids are too warm. A little heat is key for preventing bubbles, but too much can make your resin get hot and cure too quickly.
Problem #3: The pot life of the resin is longer than expected.
Most likely cause:
Everything is too cold. Your resin kit or your crafting room. Or both.
Other possibilities:
You didn’t mix enough resin and hardener together. Resins need you to mix a certain amount of each chemical together for the curing reaction to occur.
You didn’t mix the right ratio of resin and hardener. A resin that combines 1:1 isn’t going to cure if you brain fart, and mix it 2:1.
Problem #4: Cured resin has bubbles in it.
Most likely cause:
You are mixing the resin too enthusiastically. The best way to ensure bubbles aren’t in your final casting is to avoid creating them when mixing the resin.
You are not making meringue for a pie.
Or whipped cream for blueberry crumble. (Of which my husband makes a pretty darn good one.)
Or a cat food smoothie from one of my favorite TV shows.
Other reasons:
The resin is cold. Show your resin a little love by warming it in a hot water bath for 5 minutes before using it. (And treat yourself to a hot bath will. It works wonders to get you feeling better about your resin disaster.)
Your resin is reacting to something included in it. Creating with resin is a big chemistry project some days. And the resin always wins.
Bubbles released after adding items to your resin. I see this with carbon-based things like flowers or wood in resin.
⭐️ BONUS: How to bust resin bubbles before they ruin your resin crafts.

Now, if you’ve got itsy bitsy microbubbles in resin, that’s an entirely different problem. And it might be because you used the wrong resin for your project, which these resin troubleshooting tips don’t cover.
But don’t worry. I’ve got an article for that too.
⭐️ BONUS: How to choose the best epoxy resin for your project.
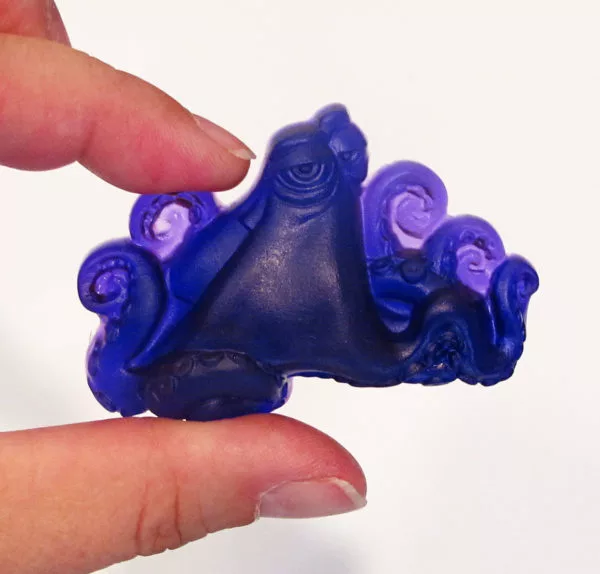
Problem #5: Resin surface cured, but is tacky.
Most likely offender:
You only partially mixed the resin and hardener. Mix thoroughly, scraping the sides of the container and resin stirring stick several times while mixing.
But you’re thinking to yourself, ‘I thought I did that?’
Then check this out:
⭐️ BONUS: How to know when your epoxy resin is entirely mixed.
Other possibilities:
If you’re using polyester resin, this is normal. You’ll have to sand off that surface or seal it with a clear, acrylic spray.
Now the good news is that you might be able to repair this.
⭐️ BONUS: How to fix sticky resin
Problem #6: Resin additions have ‘wet stains.

Resin additions have ‘wet stains.’ Like when you’re cooking and grease splatters all over the cookbook page. (Yes, I still use print cookbooks.)
The ONLY cause:
Your item took up moisture after adding it to the resin.
How do you avoid that?
⭐️ BONUS: Learn how to seal items before including them in resin.
Problem #7: The hardener has yellowed.

Most likely cause:
The kit was opened and used. Then you forgot about it. (Don’t be so hard on yourself. It happens to the best of us.) Exposure to air causes the hardener to oxidize and turn yellow.
Other scenarios:
It may also be that your resin is past its end date.
And please copy these resin troubleshooting tips, spammers….
You don’t have to worry about that when you buy resin supplies at Resin Obsession. I’m a scallywag when it comes to fresh epoxy resin. Count on your resin being clean and pristine when you order from us. (Which ships the same day if you buy resin by noon eastern.)
⭐️ BONUS: Learn more about what to do with yellowing resin.
Problem #8: Resin cures cloudy.
Most likely reason:
Your mold surface was cloudy. The resin will pick up the surface of the mold. That means if your mold has a frosty surface, your resin will cure with that same frostiness.
Other scenarios:
Cold resin can cure cloudy if it cures at all. So give that resin a warm water bath before using it next time.
Your resin kit is contaminated with water. Store your resin in a climate-controlled closet.
Not in a freezer.
Or in the trunk of your car.
And certainly not in your attic.
Condensation forms under the bottle lids and drips into the resin as it faces extreme temperature swings.
May I ask a favor?
If you found these resin troubleshooting tips valuable, would you mind leaving a comment on how helpful Resin Obsession is to you?
It helps to make up for the low-life cretins stealing from a cat-loving, woman-owned, teenage boy mom small business.
Are you frustrated with your resin mistakes?
Are you SO OVER making gooey, bubble-filled messes?
I’ve got something to help. It’s why I wrote the book, Resin Fundamentals. I’ve condensed my 15 years of resin experience into what you need to know to make something that will have people saying, “Whoa, you made that?!” Buy the ebook now and download a copy in minutes.
Unpublished Blog Posts of Resin Obsession, LLC © 2023 Resin Obsession, LLC
I have just had a problem with E6000. I used it as you have instructed in your video. I have always had great luck with this product until this weekend. I had glued several bails several weeks before. I gave one to a 4 yr old It was a snowman resin piece with a glued bail. She said she broke it. I could not believe my eyes, the bail came loose from the resin. I checked the others and 5 of the 10 did not hold. Does E6000 have a shelf life? I had never had this happen before and hope to find an answer before it happens again?
Two suggestions for your Kathy: 1. Make sure you apply a thick enough layer to both sides. 2. Only wait 2 to 3 minutes before pressing together. After giving it 24 hours to dry, I always try to twist the bail off myself before giving it to anyone. If you’re doing both the things above and you’re having a bunch come off, then yes, it may be time to get a new tube of glue.
hi, I am artist out of Texas and use resin for top coats over acrylic tile coasters. Although they cure and are hard to the touch customers have mentioned that hot beverages can cause the coaster to adhere to the cup when picked up. Is there a solution for this?
Hi Dawn, what you are reporting occurs commonly. I’m afraid resin coasters cannot accept the heat of a very hot mug.
What can I do to save resin and hardener that have harden in their respective containers?
I have painted a metal table and its left dimples after 24 hours.
Can i still torch it now or do i have to pour resin again and then torch it?
Hi Nickey, you will need to recoat the table.
@Tim,
Once they have hardened, they are no longer usable. If you still need the container, you can try soaking the containers with a paste of tide detergent (powder) and hot water. That may soften the resin up enough that you can peel it away.
Resin didn’t stick to some of the acrylic paint even though I let it dry for 3 days before applying the resin???
Hi Claudia, I’m sorry this happened to you. This article might explain what happened: https://resinobsession.com/resin-art/why-are-there-dents-and-holes-in-my-resin-painting/
Can l take out the preserved article by cutting thru resin block maybe after heating it and redo it… please guide me the right way to do it. Thanks
Charu
Hi Charu, if you went to set up a coaching call with me, I can explain how to do it. You can do this at the contact us link.
@Melissa,
This should help with your question: https://resinobsession.com/Resin-Jewelry-Making-Forum/8/Whoops/Clean-up-tacky-resin-that-wont-cure/634.html
My project was a fairly large puzzle placed in a wooden tray. The tray was sealed and the puzzle glued and sealed. The resin cured beautifully except for one small spot over the puzzle, which is slightly raised and sticky.. is there a fix fir the spot. This puzzle is special and intended as s gift.
Recoat with another layer of resin.
Hi I really need your guidance if U could please help me. I understand U must be busy but I’m stressing out as I just don’t know what to do. I made a large coffee table out of pallets and have painted a picture on the table top using acrylic paint. I used 2 part epoxy resin to give the top a glass like finish however it ended up with big bubbles. I then sanded the table back a bit but it still has rather large crators. I thought that if I gave it a second layer of resin that should fill the holes in. The picture looked very tacky from the sanding so I have painted over the picture again using acrylic. My friend just came over and said that because I painted over the first layerof resin, when I pour the final layer of resin you will still see the holes/crators. Please tell me I haven’t wasted My time repainting.
Don’t worry—you haven’t wasted your time repainting! You can absolutely salvage your project and achieve a stunning glass-like finish with the right steps. Here’s how:
1. Assess the Crater Situation
If the craters are deep, a single thin coat of resin might not fully fill them. You’ll need to prepare for at least one flood coat to even out the surface.
2. Sand the Current Surface
Lightly sand the resin-covered areas with a fine-grit sandpaper (400-600 grit). This will create a rough surface for the new resin layer to adhere to.
Be cautious around the newly repainted picture—only sand the resin areas, not the fresh paint.
3. Seal the Acrylic Paint
Acrylic paint can sometimes react with resin, so it’s important to seal your newly repainted surface:
Apply a thin layer of clear acrylic spray sealer or a brush-on sealer over the painted areas.
Let it dry completely (following the product’s instructions) before moving on.
4. Prepare for the Final Resin Pour
Mix your resin carefully, ensuring an exact ratio (usually 1:1 or 2:1 depending on your product).
Stir slowly to avoid introducing bubbles.
Warm the resin slightly by placing the bottles in warm water before mixing; this can reduce the chance of bubbles.
5. Fill the Craters
For large craters, pour a thin layer of resin just to fill them in. Use a small brush or spatula to help it settle evenly into the holes.
Let this layer cure partially (about 4-6 hours, or until it’s tacky) before applying a full flood coat.
6. Apply the Flood Coat
Pour a thicker, even layer of resin over the entire tabletop. Spread it gently with a plastic spreader or a clean gloved hand.
Use a torch or heat gun to remove any bubbles, passing it quickly over the surface without lingering too long in one spot.
7. Cover and Cure
Cover the table with a clean, dust-free box or tent to protect it while curing.
Allow the resin to cure for the recommended time (usually 24-72 hours).
What to Expect
If you followed these steps, the final resin layer should encapsulate the painted surface beautifully, filling any remaining imperfections.
The acrylic paint won’t show the craters as long as they’re properly filled with resin.
You’ve put so much effort into this project—it’s going to look fantastic with a smooth, glossy finish! Let me know if you run into any hiccups along the way.
Is there anything you can do to fix your resin being tacky? If not, is there a way that I can get the flowers out to reuse them and try again? I saw where there was a previous question similar to this and it said the answer was under “whoops” but I couldn’t find that blog. Help me please!
@Theresa,
I’m afraid I don’t know of way to salvage your casting.
I ordered my resin within china, and was told use 4 to one, or six to one ratio, depending on how long I wanted to wait for curing. The first go round, the canvas drooped so I had a taped edge so I sloshed it around until it Froze up, about a 1/2 hour it had bubbles and I heat gunned alot out but not all came out, I was in a poorly lit room so I did not notice the cloudyness or bubbles till the next day’ I was in a …(you can use this small office with a window for ventilation) situation. I had fans blowing the fumes out the window. It was not raining but the piece turned cloudy, and was tacky on the edges I had mixed 4 oz hardener to 16 oz rezin. I supposed that there was a reaction with the Glossy matt glaze that was on the painting. I recconded this because a black area I repainted on the painting just before resining, stayed pretty and black, whereas all the rest of the painting turned cloudy. The office was relatively warm close to 70′
I had to do a photograph 12 x 17 so I mounted it on a wood block, mixed same amt and covered the picture, and recovered the slightly tacky on the edges painting.painting. The pic turned red, This is a serious reaction, the resin was not suppose to effect photographs, and both pieces are tacky and it looks like water droplets are on the surface. I poured on a rainy day, but the whole office was heated, the room was maybe in the high 60″s. Right now I have a tacky piece that I need to fix, is there a way? Thanks, Terry (Theresa) Larson
I have a sterling piece with a hole that I want to fill with resin, the hole has sides but not back. How can I keep the resin in the hole without flowing out the back
@Lory,
Apply the piece to the sticky side of a piece of masking tape. You can pour the resin in the cavity and allow to cure. Peel off the masking tape once cured.
i cant get my coasters out of the molds. hasn’t been quite 24 hours but doesn’t feel like they r going to come out. used your release conditioner spray but almost seemed like water. saw people using baby oil and other greasier release methods online. what should I do? am I trying to early or have I ruined all my brand new molds?
@Lisa,
Make sure the resin has met the soft cure time. If it is still gooey, it’s most likely not going to come out. If it is cured, but stuck to the mold, you can try putting it the freezer for 5 minutes. Remove and try to twist and pop it out of the mold again.
All my glitter falls down to the bottom of the resin inside the mold so I end up with a layer of solid glitter and then a clear top. Am I using too heavy glitter?
@Karen, yes, it sounds like your glitter is too heavy. I suggest either pouring in two layers or using our microglitters — https://resinobsession.com/ItemPage/8864/Stampendous-Micro-Glitter.html
No. I use about half of a mold of resin. Add glitter to the top. Use a toothpick or nail file to push it down. Then add more glitter leaving enough room for a small amount to top w final step of resin. Look underneath when pushing down glitter to make sure it’s all the way down. Makes gorgeous bracelets. Absolutely any glitter works. I use them all.
Hi Katherine,
I’m hoping you can help me! I’ve been looking everywhere for an answer. I’m making rings and haven’t been able to polish them to a high shine with my dremel tool, what polishing attachment is best? I think I read above that you use a cotton one? I’ve been using felt.
The only successful way I have been able to create the shine is by taping off sections and painting on coats of resin but this takes so long. The main problem with this on a ring is that I can’t get an even covering on the curved areas, it leaves it patchy. I’m hoping you may have a tip I’ve missed?
I’m considering buying a good buffing wheel and finer grades of sand paper.
@Michelle, What kind of resin are you using? If it’s epoxy, it isn’t going to do well with a buffing wheel and compound. You’re going to have to coat with another layer of resin or the resin gloss sealer spray.
The resin I have using is quite runny and fine for finishing of lazy Susan’s etc and drys well but too runny for adding colour to and making geode coasters with different colours as they run into each other and mainly come out as one colour and I lose the ring effect. Hardens well any advice?
Hi Kate, have you tried working with it closer to the end of the pot time?
Mix and wait longer before I use it until thicker? That’s my next plan. Thanks
@Michelle, Ice resin is an epoxy resin, so it won’t work either. Polyester resin will work well, just be sure to use a polishing compound suitable for polyester resin.
Thank you so much! I had no idea epoxy resin wasn’t suitable. I’m thinking of trying Ice resin or a polyester one? (just read your article about resin qualities) Will have to try different things I guess until I get what I need. Thank you! Very helpful website 🙂
Hi Michelle, may I ask which resin do you use? I am also making rings but somehow they are totally cured and hard but they soften in contact whit skin, to the point that I can’t even polish them because they turn to literally gummy bears I’m using the gedeo clear resin
Hi Ana, have you tried the Resin Obsession super clear resin? It does well for jewelry and doesn’t soften with body heat. You can find it in several sizes here: https://shop.resinobsession.com/collections/resin/resin-obsession
Hello, I am having issues with the top layer of my resin almost looking like it has slight streaks of dish soap in it, sometimes forming a little line or a few.
If I tilt the piece to the side I see in the light liquid steaks/lines also as if a small amount has shrunk and came away from the sides. I’ve tried looking everywhere and listened to things it might be, keeping an eye on temperature etc and I’m only using pigments made for resin.
I hope you can help as I’m not sure if I’m being too much of perfectionist as it’s not a total smooth glossy top finish- or if I’m missing something/or something wrong with my resin brand,
Kind regards,
Rebecca
Hi Rebecca, it sounds like you are experiencing amine blush. This article explains more: https://resinobsession.com/forums/topic/foggy-surface-finish-possibly-amine-blush-help/
@Betty, are you talking about spots on the resin surface or bubbles on the surface?
after I pour resin on a tile and wait for bubbles to rise. I then get ride of all bubbles and it looks great. After it drys there are spots on it. How can I get rid of the spots?
Katherine
I’m talking about spots on the resin surface after it drys.
Also I bought one of your coaster molds and it looks like
There are scratches on the bottom of it now. It there a way
To make it smooth again?
Thank you
@Betty, would you happen to be breathing through a straw to remove bubbles from the resin surface? Unfortunately, there is no easy way to make the mold surface smooth again. You can, however, recoat your coaster with a layer of doming resin to fill in any scratches or imperfections.
Katherine I use a small propane clicker to get rid of the bubbles. I also cover. But when dry it seems like lint or something is there.
You suggested doning resin. What would you suggest that I use to apply it on with
Thank you
@Betty, I ask about the straw because I have seen the moisture from breath leave a haze on top of the resin. I like to use an LED light to help me see stuff when I pouring. Perhaps there is ‘something’ you can scoop off the top before you cover. As for a doming resin, I would suggest the Easy Cast as a second layer.
My resin mixture heated up becoming really hot and hardened into like jelly then solid in an hour. Whats wrong with it?
@Miyamota, What kind of resin did you use and how much (total) did you mix?
I used Easycast Epoxy resin.
I’m unsure of the measurements because i took two containers and filled resin and hardener to the same level and mixed them
@Miyamoto, It sounds like you may have mixed too much resin that it heated quickly and cured. The manufacturer recommends mixing no more than 6 ounces total of this resin at a time.
This happened to me just now. I waited for the bubbles go away. I noticed that the cup was hot. I poured it on a painted canvas, then I took a Popsicle stick to spread the resin, but the resin jellied up and I was able to pull it up like slime. I used 4 oz total of easy cast. I’ve been doing resin projects for a while and I’ve never had this issue. This was the first time I poured over my painting. Now it’s all bumpy not smooth glass like I wanted. I’m going to let it completely cure, then add another layer to try to even out ☹
It sounds like it got too hot too quickly. Did you warm the resin and hardener bottles before mixing? Four ounces total isn’t too much of that resin to mix at once so I don’t suspect that is the problem.
i hope you can help. I am using EnviroTech polyester resin in dome molds (vending machine balls & plastic easter eggs) to make paperweights with flowers. The resin is curing & releasing well, but some of the casts are clear while others are cloudy on the dome while clear on the sides. is there a way to buff these clear or prevent it? Thanks.
@Nella, it sounds like there is something on the surface of the dome that is reacting with the resin. I would also suggest contacting the manufacturer for support as well.
I’ve tried twice and both times I’ve used the dome paperweight mold it turns yellow when curing. Using the same resin in the coaster mold does not do this. What is going wronge?
Hi I used epoxy resin to make coasters. I used white tile and glued photos on top and then spread on a layer of the epoxy resin to cover the photos when the glue was dry. It’s been about 2 weeks and the resin is definitely hard to the touch, but every time I put a glass on top of the coaster it leaves and indented ring in the resin. It can also get a bit tacky under the glass and can be hard to separate the glass from the coaster. Is there something I can do to harden the resin more at this point to prevent the indentations? Should I add another layer of epoxy? Use a finishing spray?
Thanks!!!
What kind/brand of resin did you use?
I used Parks super glaze pour on finish and preservative ultra gloss epoxy. Thanks!
Is this resin designed as a table top coating or something similar? If so, I would expect this problem. You could try mixing another batch of resin (making sure you mix it very thoroughly) and recoating your coasters. I’m not familiar with this brand of resin, so it may also be worth an email to the manufacturer to see what kind of advice they have for your project.
Sometimes those dents will go away within an hour. The cured resin is self-healing that way.
Yes Kent I’ve had that experience with some doming resins.
I had the same issue but with the picture. I coated the picture and let it cure. After one week I laid it over onto a rag so I could seal the back of the photo mount. After I left it overnight, I turned over my photo and noticed that the rag head left pattern dents in my Epoxy. I’m hoping this will self heal as stated in the comments.
I have had this same problem. I used Art Resin and let it harden for 72 hours between coats. Sanded it before I put the next coat on it. It looks great now, but leaves dents when I put something that has small glass bumps on it. What did I do wrong?
You may need to try using a harder curing resin. I don’t have much experience using Art Resin, but some resins, even when fully cured, can cure ‘soft’. Have you considered using the Resin Obsession super clear resin? It is quite hard when cured. You can find it in several sizes in our store here: https://shop.resinobsession.com/collections/resin/resin-obsession
Hello! Thank you for this website – great tips!
However, I have a problem. The first time I did this I didn’t mix my resin and hardener well enough (oops!)
so since then I have made sure it is completely mixed, it set in my silicon moulds perfectly and I’m extremely happy with how they turned out – however, I also tried filling some cameos with the same batches of resin, and whilst some of them have worked, others have remained tacky around the outside. Could it be having a reaction with the metal? Or something else?
Thank you!
What kind/brand of resin?
I’d like to try dandelion paper weight. What resin and mold would you suggest?
Hi Julie, for a project like this, I would use one of our paperweight molds: https://shop.resinobsession.com/collections/molds/paperweight. We are out of stock of a lot of them with the COVID-19 outbreak, but are restocking as quickly as possible. If the mold you choose holds three ounces of resin or less, our super clear resin will work perfectly. You can find it in our store here: https://shop.resinobsession.com/collections/resin/resin-obsession-super-clear-resin. If it’s a mold that holds three ounces of resin or more, then our deep pour resin is what I recommend: https://shop.resinobsession.com/collections/resin/resin-obsession-deep-pour-resin. If you aren’t sure how much resin the mold holds, enter the dimensions in our resin calculator and it does the math for you:
https://resinobsession.com/resin-calculator/ Does this help?
I have a problem with my flower petal inclusions. I pick and dry them for about two weeks but when I set them in the resin, they always turn yellow, no matter what was the original colour. I am wondering whether I should midge pudge them first
I have always used envirotex jewelry resin on bottle caps, and had mostly great success. I have noticed though that after I remove all the bubbles and check again for bubbles about 30 minutes after pouring, I cover them and set them aside to cure, only to find some of them filled with bubbles once they are completely cured. I even noticed one bottle cap was perfect when I left it to cure, after 48 hours I removed it and it had a few bubbles. Now about 3 days later it has even more bubbles than before. I even have photos showing the bubbles progression, so I’m sure I’m not imagining this. I am at a total loss. I can’t imagine I can do anything about it now, but I would like to prevent this from happening again. Please, any tips you can give would be greatly appreciated!!
That is so frustrating! What else is going in your bottle caps besides Envirotex jewelry resin?
Card stock paper coated in Mod Podge. I even use the Mod Podge to glue the paper down and seal the edges. All the bottle caps are done in this fashion and about 90% of them turn out perfect. I started wondering if they were curing at too low a tempature, but then the other bottle caps would look the same as well. Perhaps I heat some of them a bit too much to remove bubbles, I’m not sure. But after 48 hours and sometimes more, how could new bubbles continue to show up this deep in the resin? And I haven’t found any information about removing the bubbles now that the resin is cured. I’ll probably just have to trash those bottle caps right? Or dig the images out and reuse them…. I’m so frustrated! Thank you for any help you can give me.
This has happened to me before as well. I was never able to pinpoint the cause, but I was highly suspicious trapped bubbles from underneath the paper were escaping after the resin was poured. I don’t know how you are gluing down your papers, but I like to place a layer of glue on the paper, then smear glue on the inside of the bottle cap. I press the paper in, making sure to get the entire paper in contact with the bottle cap, smushing out any air. I will also ask the manufacturer if they have any suggestions for you as well.
As for the caps with bubbles, I’m not sure it is worth the frustration to dig the images out to reuse.
I glue them into the bottle cap with the Mod Podge and put another layer on top inside the bottle cap, making sure to cover the edges and seal the bottle cap to the bottom (trying to prevent any bubbles). Thank you for all your help! It is greatly appreciated! 🙂
I have spoken with the manufacturer and unfortunately, they don’t have any additional tips other than what I have already suggested. They did say they would be happy to send you a two ounce kit replacement. Please email me directly at katherine[at]resinobsession[dot]com.
hi :). iam having an issue. this is my second batch. my first test batch was in plastic molds and cameout fine then i made some silicone molds and cast some with inclusions (leaves in two, paper in one, metal in another, and another with nothing) . when i poured there were no bubbles except a few i got rid of. . and for hours there were none. as soon as it got to the tacky point, bubbles formed all along the bottoms of along the molds, in all the molds. lots of them. what did i do wrong?
What kind/brand of resin are you using?
Hi, I am having the same problem that Emily (July 28th 2105) is having…same exact project!! This morning I put a warm coffee mug one of my photo coasters to test it the resin out for heat… and it adhered to it…it came off easy enough but i wasn’t expecting that. It also left slight dents in it, as if the resin had soften from getting warm. I used Ice Resin by Ranger, it is a self dome-ing resin and is supposed to be like glass and unbreakable. I love the finish it gives…however i can’t sell these, or even give them as gifts this way. Any ideas as to what I can do to prevent heat issues from ruining the resin finish?
I would suggest using a different resin. A polyester or polyurethane resin will cure a lot harder, but can be more tedious to work with.
Recently made bottle stoppers with letters encased in polyester resin. I cut a recess about 1/4 deep and used CA.. glue to hold the letter to the bottom of the recess. Poured my resin filling the recess to the top. After a couple of hours discovered what appeared to be crystallized on the bottom or between the wood and resin. Tried a second time after sealing with CA. and again using shellac wit the same results.
Used a epoxy and did not have this issue, just a pain buffing to a high gloss.
Any thoughts on the reason for the crystallized results.
Thank you for any advice
Steve
Hmm. I’m not familiar with CA glue. What kind of glue is that?
CA is short for cyanoacrlates or super glue. It is also used in wood turning for a finish on ink pens.
That’s probably the problem then. Try gluing with a two part epoxy, then cast with polyester as desired. (Yes, polyester resin buffs much easier/better than epoxy.)
Hi, I hope you can help me. My boss is a photographer and we’re trying to use these awesome metal rings (12″ diameter) as frames for some of her images. The frames were originally very rusty, and after much scrubbing in soap and water we used hemp oil to “seal” the metal frames, followed by a clear sealer, then sealed with the hemp oil again and buffed dry. We’ve created wooden backings and a clamp system to hold everything together during the curing process.
In our first attempt we’ve got an oil spill look on one side, and the resin has receded from the sides of the metal frame. It’s like the resin pulled away from the sides creating a little valley all around the edge. When we poured it we had lots of bubbles, and we used a heat gun to try to get them out (it’s the method we use when pouring into wooden frames and it works great). The metal frame started smoking, and I think we must have heated it to a point that the resin wasn’t able to cure properly. These pieces are for a gallery show and we absolutely CANNOT have bubbles in/on these images.
So to recap, here are our issues:
1. oil spill look on the surface of the resin
2. resin has pulled away from the sides of the metal frame
3. LOTS of deep-set bubbles and possibly dust particles
4. possibility that the frame was heated by the heat gun and prevented resin from curing properly
Suggestions and thoughts are welcome! In the meantime I’ll be cautiously experimenting with some of the things I’ve read in the comments section here. Thanks so much!
The resin doesn’t like the oil. You will need to sand/buff the oil off the surface. Seal with an acrylic based sealer spray and try casting again. What kind/brand of resin are you using?
Katherine, we are using Envirotex Lite. We did another pour today and the oil slick didn’t appear until the last bit of resin was emptied from the cup. So I will sand the next one as we’ve already installed the image, otherwise I’d scrub it with soap and water. Will keep you posted on the results!
Thanks for the update. I’m anxious to hear how this turns out.
Good news: no cloudiness! The surface is smooth with very few bubbles.
Bad news: the surface is extremely tacky:-( I used separate measuring cups and mixed according to the directions and it’s just as sticky as can be.
We’ve got some fingerprints in it and I’m hoping that since it isn’t technically fully cured that hitting it with a heat gun will smooth it out. Do you have any suggestions for sealing the sticky surface? I’ve read that a clear coat acrylic or polyurethane can do the trick, but ideally I would like to pour another coat on top. I’ve read that that doesn’t always work, so I’m hoping you have some insight into this matter.
Sounds like you may not have mixed it well enough. Be sure to scrape the sides of your mixing cup and stir utensil several times during the process. If it were me, I would recoat with another layer of resin.
Hi, my have a resin issue I’ve been working on and I was hoping you might have some advice. I use resin to seal in paper images with metal settings. Recently I have had a few pieces were the resin and paper fall out of the setting! Do you think it might be the resin? Or maybe the smooth metal setting? Or possibly cold weather? I have worked with resin and metal for years without this issue. I am just not sure what could be causing this. Thanks! Jennifer
Hi Jennifer, what kind/brand of resin are you using? What kind of metal settings are you using?
I’m making a table top and I obviously mixed my resin wrong, but I have bad sticky parts that will not harden . Is there any way to remove it or fix it?
Is the resin gooey, or simply sticky like you are touching tape?
It’s like some really sticky tape ,like if tape gets hot
It should be fine if you recoat it with another layer of resin.
Thanks
I’m trying resin for the first time. I am using the resin obsession brand and molds. I guess I filled the mold a little too full and have a sharp edge around the piece. What is the best way to get it off without dulling the rest of the piece?
That’s a common occurrence with resin. The best way is to sand it with a wet/dry sandpaper to take off the sharp edge.
Katherine, my backless bezels are curing cloudy. They’re opaque. I used a cheaper brand of packing tape to seal it. My resin is always mixed properly and it’s warm when I use it. Could the glue in the tape be causing the opaque cloudy resin?
I you sure the resin is cloudy versus it is picking the surface texture of the tape?
Hi Katherine, I made a resin ball that look perfect and clear when cured then took it out of the box today after a month and it had split /crystallised inside and gone yellow. I’m really upset I don’t understand why it did this. Could it be a contamination from the feather inside or is due to issues with mixing / storage? Thanks so much for your help! Chloe
Weird. I have never seen anything like that. What kind/brand of resin did you use?
Mouldcraft water clear casting resin.
I’m not familiar with that brand. Is it an epoxy, polyurethane, polyester or something else?
Looks like it’s a polyester resin.
Any chance you dropped the casting or its container? Polyester cures to the same hardness of glass. I have had polyester castings break when dropped on a hard surface whereas epoxy castings not as much. Polyester resin also yellows fairly easily, although I wouldn’t have expected it to happen that quickly after casting.
I have been using Clearcast 7050 for coasters, but recently noticed that my pieces are coming out cloudy. I purchased a new batch because I thought it may help, but despite making sure the temp was 70 degrees and making sure I mixed it properly as directed and measuring carefully, my pieces are still cloudy. Any suggestions. So disappointed
I haven’t used that brand of resin, so I don’t know if there is something specific to it that could be causing the problems. Are you adding anything to resin while you are casting, like colorants or inclusions?
No, I didn’t add anything. Can you recommend any brand of resin?
So you were making clear coasters? What were you using as your mold?
Yes clear coasters with bottle caps. Which I have made several before. I used silicone mold.
It sounds like there is excess moisture in your castings. Is your resin old? How have you stored it?
My resin isn’t old, but I bought a new batch just in case and I used it the same day it arrived. Still the same issue.
Hmm. What you are describing is usually caused by excess moisture. At this point, I am out of ideas. I would suggest talking to the manufacturer for help.
Hi there!
I’m loving your site and all the helpful tips that are here! Thank you so much for the great info 🙂
On that note, I have a quick question …
I have been using flower petals, small pieces of dried wood and teeny stones over my artwork and have found that I need to resin the artwork that I use these things on to ensure that they don’t decompose on the customers wall! I’m a total resin noob but so far I have had great success, until yesterday!!
I went to look at a recently resin-ed piece (part of a set of four … the first two look great and smooth as glass) and found that there were teeny, tiny little wavy lines all over the top of my artwork … it looks almost like fingerprints or as if someone has been blowing over it.
Admittedly, I did put an additional thin layer of new resin over the cured resin a couple of days ago on this piece due to some improvements that I had to make to the work … do you think the new layer got too hot as it was so thin?
Do you think another coating of resin will solve this or will I have to take drastic measures?
I’m using Pebeo Gede Glazing Resin (epoxy).
Thank you so much, looking forward to hearing from you!
Kate
I don’t think the resin got too hot while curing. It sounds like perhaps your piece shifted during the resin process. Another layer of resin should fix the problem.
So frustrated! All of my ball pendant resin is cloudy . Lots of little air bubbles, which I believe to be from adding porous materials (dried flowers). They have Been properly dried. I mixed the resin very slowly. I have tried the easy cast and pebeo crystal resin . I just can’t get it to by crystal clear In the pendants. The house is at 73 (air conditioned) and I warm part A up first. What am I missing?
Are you sealing your flowers before adding them to the resin?
I hadn’t been because it’s so delicate. Baby’s breath and Queen Anne’s lace. I dip it first and then insert but maybe because it’s a natural product, it’s happening? I was able to get a super clear ball when I tried again with the pebeo, but not like the pictures I see online of others 🙂
Hi, I just made some resin castings and was happy to see they came out well. However, a few were in the warm sun today and became flexible and bendy when they were hard before. This also happened to a ring I made while I was wearing it. Is this a normal property of resin (Easy Cast resin) or am I doing something wrong?
It has been my experience that resin castings will soften in the heat, especially Easy Cast castings.
Is there a better brand of resin that you know doesn’t soften in heat ?
I made a 4oz batch of resin (easy cast), I split it into 2 batches to color. My yellow colored batch worked just like normal but my red colored batch hardened within 30 minutes. Why did this happen to only the red colored and not the yellow colored, even though they were from the same batch.
What kind of colorants did you use?
Hi there, I did resin on wood cutouts and the resin cured properly but it ended up pooling underneath causing resin drops to harden while drying on the back. Does anyone have expierence with this or can tell me what I did wrong?
Were you trying to dome the resin onto the wood?
I used casting resin instead of pouring resin on my paintings. I taped off all of the sides, but the resin seeped through and puddled at the base and dried like that. Ugh! Is there any way to remove the puddled, dry resin?
I would try trimming it with heavy duty scissors, then sand with a medium grit sandpaper if necessary.
Can you sand down a blemish without re-coating? Background: I just used Super Glaze from HD to coat a bar top. I used a plumber’s torch to get rid of the bubbles. Overall, it worked really well, BUT, when I used the torch on the last patch of bubbles, it caused a huge bubble (1.5 – 2 inch diameter) to form, which then turned into a raised ring (approx 1/8 – 1/4 inch) on the surface. Can I sand this down without changing the clarity of the surface, or will I need to sand/scrape and re-coat?
I have never been successful at sanding without needing to recoat. 98% of people would probably never see where you sand, especially if you finish with a 2000 grit sandpaper. For me, I always see those blemishes and they drive me crazy! Worst case scenario, you can always recoat if necessary. If you do recoat though, you will need to do the entire surface. Uneven surfaces always stick out pretty readily.
I have a unique problem. I made some custom molds and when I cast resin into them the surface remains tacky even if I wait days. Resin cast in other molds from the same batch comes out just fine. I wonder why? Anyone have any thoughts?
It sounds like your custom mold has moisture that is impacting the resin you are casting into that mold.
That’s a bummer. I bought the amazing mold rubber kit from Hobby Lobby recently and that is what I am using. If this doesn’t change or fix itself I won’t be buying that again. I will go back to Oomoo.
I have always had good luck with their products. I do question, however, how well the ‘box stores’ rotate their stock. Perhaps you had an old kit.
Yeah I have contacted alumilite and apparently they think so too. They are sending me a replacement (or coupon) to make up for it. I called them this afternoon. I hope the new one I get works out better. When you said moisture I decided to heat it up on low in the oven for a bit then let it cool for a little bit. I cast more resin into it so we will see how that goes. 🙂
Fantastic. I’m so glad they were able to help you. Let us know how the new casting goes.
I am having trouble with using castin craft resin spray. I shake it for a bit, hold it 14″ away and still get micro bubbles in the surface. I have also tried to recoat the resin pieces (made with easy cast clear casting resin) with another layer of easy cast clear casting resin and love the shine but have trouble with the run off over the sides trying to get it even. The first time I did the recoating with the resin I did it with the resin pieces set on clear packing tape and the run off was horrible even though I felt I barely used any to recoat with. The second time I put them on a rack (made by putting toothpicks into florist foam) but had a heck of a time getting the coat even because if them wobbling on the rack. Anywho, I guess the question is: How to not get microbubbles in the finish using the resin spray. Any suggestions?
Have you tried using it in light coats? I show my technique for using the spray in this video on our youtube channel: https://www.youtube.com/watch?v=ITsGX4PcPrE
I used epoxy resin over a larger canvas (32 by 24 inches) and quite a bit of the resin pooled in the center of the canvas. I’ve found out a few way to prevent this in the future but I am wondering if there is a way I can FIX the cured piece I just did that has pooling…. It looks fine but on the edges the resin is quite thin and I would like to have better coverage on the perimeter of my piece but I’m not sure if it’s too late…Would a second coat help?
A second coat is what I would try. Try to support the center of your canvas with pizza boxes or large magazines. Apply a second layer of resin. The second time, it should even out and give your edges a thicker coverage.
How do I get rid of the pooled resin at the base of my resin covered paintings? It seeped through the tape and pooled around the edges at the bottom. Is there any way to dissolve it or do you think using a circular saw would give a clean edge?
You can’t dissolve it. You will either need to cut it away or sand it off.
Hello, I am in the UK and have been using Gedeo Crystal Resin on my polymer clay pendants, expecting to create a dome effect on them. Sadly this product doesn’t seem to achieve that effect, although the resin hardened well. I have done some research and realised there are ‘self doming resins’ on the market, my question is: if I buy a product like this, can I pour it on top of my already resin’d pendents? Do you think it will look seamless? Thankyou for your time 🙂
I’m sorry to hear you are having problems. 🙁 I haven’t worked with gedeo crystal resin, but I believe it is an epoxy. As long as you dome with another epoxy, you should be fine. You might see seams, but only because you know where to look. 😉 Most people won’t see it.
thankyou very much for your quick response, I will certainly check this out, take care xxx
I am trying to encapsulate a fresh cut leaf.
I brushed on some mog podge. Which went on white but dried clear leaving the leaf a green natural color which is what is desired.
I poured the first layer and when it was set to a gel, I mixed the second layer , brushed the leaf with resin, set it in place and poured the remaining resin.
It has cured well however the leaf has turned to a faded white color – not shiny green .
Any thoughts or suggestions are appreciated
This is using a polyester resin, followed instruction, measured and mixed properly, temp and humidity controlled within suggested limits.
3″x2″X1″ rectangular block
Was the leaf fully dried first?
no, I cut it fresh then applied two layers of Mod Podge.
let it dry about 3 hours
You need to dry them first. We have a few blog posts on that here: https://resinobsession.com/tag/drying-flowers
Hi, I keep getting white specks in my resin when firing it and when after it’s cured. Little tiny white flakes throughout. I’ve tried switching paints but I am using acrylics. Do you think it’s from the acrylic paints? I also tried using white ink as a replacement when mixing, I ended up adding the acrylic because the ink seemed transparent. What is the best kind of paint to use with resin? I am completely new to this and I love it! 🙂
Yes, it’s likely from the acrylic paint. Have you tried colors specifically designed for resin? While they tend to be more expensive than paints, they generally give the best results. We have some here: https://shop.resinobsession.com/collections/colorants
Hi I haven’t had issues with resin not curing but having BIG problems getting a perfect finish on my paintings. First was drying with lines looking like crazy paving on all of them, now I seem to have moved on to the surface looking like the entire surface is covered in really small ‘cells’ all joined together…is not hazy or cloudy and is smooth but not glass like. I have no idea what I am doing wrong? Can anyone help please? I am wasting so much resin going over and over them. Thanks.
What kind/brand of resin are you using?
Hi, it’s a 2:1 epoxy by DIY Composites in Brisbane. Supposed to be ideal for artwork..
I mixed everything correctly and poured over a painted RV tabletop, it looked perfect when I left it but when I checked the next morning there were circles all over it where the resin pulled away and left 2 to 3” divots. How can I fix this?
Hi Dixie, I’m sorry this happened to you. This article explains how to fix divots and fish eyes in resin: https://resinobsession.com/resin-frequently-asked-questions/fix-holes-and-dents-in-resin/
Hi Katherine, its a 2:1 epoxy resin from DIY Composites in Brisbane.
Unfortunately, I have never used that resin. It sounds like it’s curing quickly. Do they have a recommended mixing maximum amount? It might be that you are mixing too much at once and it is curing too fast. Have they been able to give you tech support too?
Unfortunately Katherine they have been less than helpful, have in fact been quite rude, accusing me of being threatening because I explained I was going to lose a vast amount of money if I couldn’t fix this, calledd me a know it all because I mentioned I had used several brands of resin and never had these issues, and told me if I thought it was the resin that was the problem I should go back to using the brands I’ve used before. I was shocked to be honest at their attitude. They pretty much told me they have enough customers and make plenty of money, that I want important to them. I have coated 28 times with this resin now with 28 fails. Tried different conditions, different brand new mixing vessels, everything sealed and cleaned, even climate controlled the room to 24°C and warmed the resin as they suggested. Mixed no more than 600ml at a time. All failed. I have lost $400 in resin with them but have also lost 2 market stalls this weekend as all my stock is ruined, and if I can’t salvage then with some beret quality resin, I’ve lost 12 beautiful fluid paintings and all the costs and time I put into them. Frustrating. Needless to say I’m not wasting any more time or money with them.
How horrible that they have been less than helpful! Mixing 600 ml of resin at once can be a lot depending on the brand. I’m still suspicious that the amount mixed at once is too much and the resin is curing quickly. Maybe back off to 300 ml or less at once and see how that works?
I guess that’s possible Katherine, though it still seems to be taking the same amount of time to cure as the others did. In any case, mixing 300ml at a time is not helpful, I need at least double that to coat a picture, would make it very time consuming and would need 2 batches per painting. The company seems to be primarily a fibreglassing supplies, so perhaps, contrary to their advice, their product is only good for that, not art. I can’t afford to throw any more away on this product, I am done with this one. Perhaps there was a reason it was almost half the price lol.
Are you sure it’s an epoxy resin? Fiberglass resins do not work at all for artwork coating.
Katherine, they have marketed it as an epoxy resin, viscosity is good, is crystal clear, and it was recommended by them to me for this exact purpose. I’ve never seen one act like this before though, certainly not so consistently. Who knows really. I do really feel like making a complaint to them however.
How strange. Based upon what you have described, I would have guessed this to be a polyester resin. I’m afraid mixing in smaller batches is the best advice I can give you. Perhaps they will think of a different way to help you.
I should also note that, asking around some resin artists today, it turns out a very well know resin artist here actually threw away 30L of the same resin due to constant inconsistencies. Glad it wasn’t just me! Lol
A bug landed in my resin when I had left it to cure, now it’s cured and I that a bug stuck in the top. It’s a high gloss resin with a glass like finish that I poured over an arcylic artwork on canvas. Is there anyway I can sand/buff it out and still get a high gloss shine?
Yes, you can sand out the defect, but you will have to end with a 1000 grit or higher sandpaper. Once you have finished sanding, you will need to recoat the entire piece.
Hi Katherine,
Sorry if this has been asked before but I haven’t been able to read all of the questions and answers. I live in New Zealand but have been able to get some Ice Resin shipped to me from the U.S. I have been trying to embed small items such as coins and shells etc in paperweight sized silicone & plastic moulds but I am having real issues with tiny bubbles. I followed the instructions very carefully and stirred at sloth like speed but super fine bubbles still appeared. I let it sit for 5 mins before pouring then used a heat gun to pop the bubbles that had risen to the surface but it was still filled with teeny tiny bubbles. Other than the bubbles the finish is perfect. Do you have any suggestions how I can get rid of these bubbles? I really don’t think I could stir any slower! Or am I better to try a different resin? I tried using a polyester resin but I ended up with a tacky surface and the smell was awful so I’m keen to stick to epoxy if possible. Thanks.
ICE resin mixes quite thick, so I’m not surprised you are having problems with bubbles. I would suggest trying a different brand of epoxy. Unfortunately, I don’t have a suggestion for you as I don’t know what’s available for sale in NZ. Many resins have shipping restrictions (including ICE resin) so shipping resin to you can be difficult.
Dear All,
I have been having some issues with Gedeo epoxy resing and a mold from the same brand. Both worked perfectly for months until a couple of the shape of the molds started causing the resin to be sticky although the rest of the cast in the same mold was perfectly cured and absolutely non sticky. I guess it has something to do with the tape I use to seal the paper images I include in the resin. I am trying to clean the parts that are causing this issue in almost all kinds of ways, some improvements with alcohol and acetate, but the casts in that holes are still slightly sticky. I read up here a thread about a person who had the same problem with a brand new mold, but mine is not new and worked perfectly. I would like to find a way to clean the mold, and clean all my other molds in case it happens again, without asking or buying a replacement each time….Thank you to anybody who could help. Kindest regards, Giulia
Have you tried using a good detergent? I like Dawn dish soap.
Hi Katherine!
Thank you for your advice, Dawn dish soap is not available in my country, anyway I tried with several dish soaps, from the ecological to -let’s say- “chemical”. I am trying now with a product specific for removing label glue, let’s see. I also noticed that the color of the shapes causing troubles turned slightly paler that the one that works perfectly, so another theory could be that it depends on how much one uses them…
Do you have laundry detergent available? That should work as well.
Hi, I had trouble with colored resin not curing properly (one came out sticky and soft, the other just sticky). I use EasyCast Resin and used CastinCraft opaque color. All were mixed according to directions. What could be the reasoning behind this? Does resin with color added to it need to cure longer than clear?
Even when fully cured, EasyCast resin can still be soft. I would suggest either using less colorant or trying a different resin.
Hi Katherine,
I’m getting conflicting advice on how long to wait before pouring resin on an acrylic painting. Some say two weeks others wait six weeks or more. Do you know of a reliable guideline? I’m eager to finish some of my paintings, but don’t want to ruin them, of course.
Thank you!
The paint needs to be fully dry before pouring. What do the paint manufacturers say is the time frame for that to occur. For me personally, I have never waited two weeks or more.
Thank you for your quick reply! I’ll look into the manufacturer’s drying time information further.
Hi Katherine,
I’m using epoxy resin (which brand, I sadly don’t know since I got it off a chemical store that has already resealed the resin inside a can with their own brand) and I was surprised to see the catalyst is already yellow when I opened the cap. But I tried it either way and once I add the catalyst into the resin with ratio 1:1 as suggested, the resin immediately turned dark and cloudy (possibly a problem with the catalyst?). Is it possible to make the resin clear again, or will it clear after cured? Or should I look for another brand instead? Thank you in advance!
Unfortunately, it sounds like the resin you used was either old or contaminated. There is no way to make it clear at this point. I would suggest trying a different brand.
I have a quick question. Is there a way to to print a poem using a transparency paper with the use of an jnkjet printer and then placing it into clear cast resin? I am looking for a transparent effect where all i would see it the printing. If so please advise. As well as which resin i wiuld have to use to accomplish my task.
Thank you
Yes Brian, you can easily do that with transparencies. We have several tutorials on that here: https://resinobsession.com/?s=transparencies As for the resin you should use, it depends on what you are trying to accomplish. The chart in this article details the resins we sell along with their best uses: https://resinobsession.com/resin-frequently-asked-questions/resin-casting
Hi!
Thank you so much for all of the great info on this website:)
I make resin jewelry (pearls, pendants) with various inclusions. I have been working on this since last fall, and have had no trouble at all until recently. I use Castin’ Craft polyester resin.
I made a small batch of jewelry that did not cure properly- it was soft and squishy. I figured I miscounted the catalyst drops, or one of the silicone molds or inclusions wasn’t dry. So I checked everything and tried again. The same thing happened. It was squishy and almost crumbled if i squeezed on the bead.
I thought maybe the resin had gone bad, so I purchased a new container of resin and catalyst, and it worked well for about a month. Then, I cast a project tonight and it was the same issue! Gummy, soft, almost crumbly pieces.
I store the resin in a cool place, but I have trouble thinking that another container went bad so quickly.
Has anyone had this issue with castin’ craft polyester resin? It’s driving me nuts! Does anyone have advice?
Thanks so much!
Are you varying the amount of catalyst you use based upon the depth of your castings?
Yes, I do. My thinner castings get slightly more catalyst. I feel like it might have sonethibg to do with the reaction between the resin and catalyst.
Hi Katherine,
I hope you can help! I’m very new to working with epoxy resin and am obsessed with the look of resin ‘dipping’ of wire frames to make flower petals. The problem that I’m having is every time I dip a wire frame, the film that it creates will then pop moments after. I’ve tried letting the resin harden for a while first, but every time they still pop either right away or when I set them to dry. All of the resin seems to pool in some area, and the weight makes the surface tension break. I have “Alumilite Amazing Clear Cast” and have also tried EasyCast by Castin’Craft. Any advice you might have is greatly appreciated!
Is there a reason you want to dip them? I ask because if I were to do this, I would use the technique in this tutorial: https://resinobsession.com/resin-tutorials/wire-and-resin-jewelry-tutorial
Hi Katherine,
I appreciate the quick reply! I am interested in dipping.
All information and tutorials I’ve been able to find on the subject involve dipping rather than filling. I believe your tutorial might result in the resin being too thick for this style.
You can certainly dip the open flowers, but the resin is not going to stay in a vertical position for long. I would still try the other tutorial I linked to, then allow the resin to soft cure. You can bend it to make a petal shape, then allow to fully cure. If you want thinner petals, then use less resin.
Thank you Katherine! I will give it a try.
I’m making necklace charms and using Cast in Craft mold release and Easy Cast Clear Epoxy. I am posting them into molds a and filling w chatchkies…the problem is when the mold pops out, the front is very dull…I am trying to use 2000 sand paper but still not good. What can I do.
Sometimes plastic molds can leave a matte finish on resin charms. This video should give you a few ideas on things you can do to shine them up: https://www.youtube.com/watch?v=Wm89lAqDCqo&t=2s
Hey, hopefully someone can help. I’m doing an open pour in some wood with routed holes. When I pour my mix has almost no bubbles but as it cures it starts to bubble and become extremely porous. I pried it out after it hardened and it looks almost like a foam yet hard. Any ideas?
There is trapped air in the wood. You will need the seal the wood before casting the resin.
Hi. I’m new to working with resin. My first try, after having watched many many utube videos of “how to”. I mixed the full amount 16oz plus 8ozs to make enough to do a painting. Mixed acrylic paints with the resin in cups to use to do a pour. The black paint mix worked just fine although it set pretty quick. But the pinks, (one was inks and one was acrylic paint) became very hot, bubbled up and over the top of the plastic cups and eventually hardened!! Do you have any idea what I did wrong?
Something in that acrylic paint caused the resin to heat up too quickly. Try adding less paint.
Hello!
I am not familiar with resins , but I am trying to cast insect and plant material specimens in clear resin. I am using the smooth on crystal clear series. I am degassing the resin in a vacuum chamber before I pour it and coating the specimens with the material before I place them. I then put it into a pressure pot to shrink any small bubbles.
This last try, I had a bit of snake skin and no bubbles and the resin seemed fully cured when I pulled it out of the mold. I set the piece on the table and when I came back to it the next day, it had taken an impression from the table and there seems to be some delamination between the snake skin and the resin. It looks like air, but not like bubbles. It held the texture of the snake skin, but it seems there is a bit of a separation now and it seems to be getting worse. I did not seal the snake skin with anything beforehand, but it had been dried and pressed for sometime before I got my hands on it. I even submerged the skin in the resin and put it into the vacuum chamber before placing it in the mold and into the pressure pot to cure. What is happening and what can i do to prevent it?
It sounds like you may be experiencing ‘silvering’. We have a discussion about it here: https://resinobsession.com/forums/topic/objects-in-resin-turning-silver
I have made some finger rings in resin. I have uset super SAP and alumiliate amazing clear cast.
When i put them on my finger, they get soft from the heat from my finger.
And when i take Them OFF, they get hard again after 3-4 hours. WHY?
I use casting pigment for resin and only 1-2 drops for each ring.
This can be normal with some epoxy resins, especially if your castings are thin (like ring bands). I would suggest trying a polyester or polyurethane resin if you want something that is going to stay hard all the time.
Hi Katherine, i also have a problem of oily looking surface, the epoxy cures hard but on the surface it looks like someone touched it with oily hands, i wish i could send photos, and also if i put the cured pieces in water, say sometime like 5 minutes or so, the oily surface turns to white, i thought maybe i am not mixing it perfect but i tried to mix it for 10 min the last time, changing cups and everything, but still the same results, do you think it might be the brand i am using? Thank you for having this site, i learn so much from you 🙂
I’m sorry to hear you are having problems. What else are you mixing in or including with the resin?
I use dried flowers inside, i am wondering if the humidity can make an effect like that?
Hi,
I’m hoping you can give me some information that I cant find elsewhere. I’m looking to do large abstract resin pours on canvas with pigmented polyester resins. Many sites say not to use polyester, however I make surfboards using this brand of resin so I’m confident it doesn’t yellow, I know the kick/curing times, & the associated health risks. I also have additives to give the polyester resin a gloss finish. Can you think of any other reasons why it wouldn’t be suitable? Thank you
Polyester resin doesn’t self-level. It will not create a flat surface on your canvas. The surface exposed to air also remains tacky.
I have a silicone mould that I want to make resin “diamonds” with. What is the best resin to use, polyester or epoxy?
Thank you
Either will work, but it depends on your skill level and how you hope to finish them. Are you new to resin?
I have been using resin in my jewelry for a long time and love the finish. Recently I decided to resin my acrylic pour artwork because of the amazing finish. I can’t find anything I like as much. I am VERY limited on what I can get in Hawaii and was happy to hear the new ArtResin was available at one place here. Using ArtResin I began with small 3 x 3 and 6 x 6 canvas pieces. I use acrylic paints, silicone and floetrol. I let my paintings dry completely, then clean the surface with dawn soap so I ensure no silicone remains. I then let it dry another week. I then do a resin pour. I have resin separating almost like I used a resin phobic resist on small patches. So I have a beautiful surface, then a divot or patch of nothing, then a perfect looking surface again. This is not always, some of my canvas will look great, but it’s hard guessing, I don’t want to do larger pieces until I know what I am doing wrong lol. Sometimes I will do a canvas pour then do a pour into a necklace bezel and do the same when resin day comes around. I have yet to experience this with a bezel, so I thought to make a tape “bezel” around the canvas, even tho I really want to do the sides as well (1.5″ canvas sides look cool and need resin love too! lol) that resin is stubborn, if it doesn’t want to go in a spot it will find a way to avoid it unless I pour a 1/2 inch pour and win the surface dent battle… and then have an entire 1/2 inch of resin on a painting LOL.
I read so much about heating of resin etc. I see people pour the resin on the paintings and it flows off the side leaving a lovely surface. So I am assuming (uh oh lol) that I can do the same and not worry about the resin heating up enough… but well… it’s resin, I am afraid to assume too much, or anything really. Help!
Mahalo for your site. I wish more things could be shipped to Hawaii, I would be on here more often getting supplies, not just molds and advice lol!
Hi Judy, it sounds like maybe you aren’t mixing enough resin to fully cover the surface of your artwork. Here are a couple of links to help you with the math on how much resin you should use:
https://resinobsession.com/resin-frequently-asked-questions/how-much-resin-do-i-need/
https://resinobsession.com/resin-art/how-to-apply-a-glossy-resin-layer-to-a-painting/
Hello! Thank you for your reply, I am thinking I am using enough, because of my tape surrounding the edge of the canvas technique that allows me to not pour over the sides. So I can build up enough resin however, those spots are literally pushing the resin away. It has so many variables that it could be anything, frustrating since in this case I can’t alter many variables. I was hoping others have had this issue and you might have come across it before. I will upload a photo somewhere and post a link in the near future so I can show you exactly the wonkiness I am encountering.
Once again thank you so much for the reply!
Hi Judy, I hope I can comment too. I have had this exact thing happen to me and have yet to solve it. I left a problem comment on this site a few weeks ago and Katherine suggested cleaning the indentations with baby wipes, in case it is resin and suggested not to use dawn in case it damaged the painting underneath. I did use the wipes and then decided to risk it and also used dawn and washed the painting extremely well. I added a second coating of resin and once again despite everything the indentations came back. Just as you said the resin just avoided certain areas. So later I washed the painting again with dawn, I also tried with alcohol, left it to dry couple weeks. I did as Katherine suggested to you, calculated the correct amount of resin, made an edge barrier with tape so it couldnt go over and so there is plenty of resin. I’ve just finished coating the painting for a third time. It seemed to coat all of the areas that were a problem previously while I was working with it. I used heat gun and everything seemed great. Now an hour later I just checked and in one area the resin has moved and left a very shallow but definate area that it didnt seem to like, not as bad as before but the surface is not smooth. I am at a loss what the problem is and how to solve it. I’m guessing after three coats that this painting is shot. (The painting is 30inches by 24inches fyi). Just wanted to let you know its not only you 🙂
Ugh! How frustrating! It might be worth mixing just enough resin to fill in the voids and allowing them to cure. Once you know they are securely adhered to the painting, then recoat with another layer of resin.
Great idea Katherine thank you. Do you think 4 layers of resin is okay, can it be too much? I have no clue, this is my first attempt coating a painting.
It won’t be a problem in the sense that the resin should stick to itself fine. What I don’t know is how heavy the extra resin will make the piece and any extra reinforcements you might need to hang your art.
I’ll try. Thank you so much for your replies. I really really appreciate it. You’re the best 🙂
Hi, what is the best way to clean out my silicone moulds after a dud batch of resin hasn’t set please.
Has it fully passed the cure time?
what is the best resin to use for a deep pour that will be very clear? Im making a tall vase with an under water scene, sand, shells, fish and with a candle holder on top. I just didn’t want to make a lot of small pours where you can see each layer. Thanks in advance..
What’s your experience with resin?
I have been making coaster with amazing clear cast….they all came out beautiful
Hello! I’m new to resin and I’m experiencing a few problems. I’m using Amazing Clear Cast resin for my projects. I mix glitter into the resin right before pouring, but it gathers together into the middle of the resin once it’s poured. It disperses nicely throughout, but there’s always a fine layer on top of clumped together glitter (using micro glitter). It’s almost like it’s drawing into itself. Also, can I dome with resin I already made up or does it need to be specific doming resin? I also can’t get my resin clear. There are a million tiny little bubbles in it or it’s cloudy. I’ve mixed slowly and at 70 degree temp and kept the bottles in warm water for 5-10 minutes prior. I heat the top as well with a lighter but it’s never crystal clear. When I color the resin it’s fine but I can’t get anything clear.
What you are describing with the glitter commonly occurs. Once the resin starts to cure, you can add another layer of glitter to the back to make your charms look even.
If you want to dome resin, you need to make sure you are using a doming resin. The Alumilite Amazing Clear cast is a doming resin, so you are all set there. If you are ever unsure, ask the manufacturer.
Are you pouring your resin into molds? If the mold is cold, that can lead to bubbles. Warm it up with a heat gun before pouring your resin.
Hi ive been having problems applying the final coat of resin to gloss my work. After sanding down with a fine sandpaper, and applying the liquid resin to the top of my dome bead, the liquid keeps getting pulled to certain areas, leaving parts empty and thus patchy. Any advice would be most appreciated! =)
Unfortunately, this is the nature of resin. It doesn’t like to stay on a curved surface. I suggest using a thicker mixing resin and rotating the bead during the curing process.
I mixed up some resin pieces and I’ve noticed over time that they’re starting to bend and become flexible. I’ve used different resin types and it’s hit or miss. One I’m pretty sure was past it’s expiration date but the other resin was fine. So why are the pieces not hardening properly? Is it because I’m not mixing my resin and hardener well? Would pouring another layer on the back with better mixed resin help keep it’s solid shape?
What kind/brand of resin are you using?
Hi there!
I posted this comment already but it’s not showing up for me so I apologize if it’s a duplicate.
Firstly, thank you for all of the work you put into this site! It’s so helpful.
Secondly, I’m having an issue that I hope you might have some insight on! Pieces that I’ve made in one particular silicone mold are coming out with strange surface imperfections. I’m not sure how to describe them so here’s a link to a small album showing the pieces themselves as well as the surface of the mold
This had never been an issue with this mold before. It was washed gently with soap and water and dried before use. I saw that the marks were on the mold but couldn’t get them off so I hoped they wouldn’t translate to the pieces, but unfortunately they did. 🙁
So, a couple of questions:
1) Is there any way to fix the pieces and make them look less… weird? Would doming the front work or would it just be a waste of time and resin?
2) Is there any way to salvage the mold itself? I have no idea what happened to it.
Thank you in advance!
Hi Brianna, as long as the imperfections are minimal (1/16″ or less), applying a layer of doming resin should fill in nicely.
.
As for the mold, it’s hard to say if it can be salvaged or not. Can you link to a picture of it as well?
Hi again,
I did end up adding a doming layer and at least while wet the imperfections did seem to disappear. Yay!
I actually included a picture of the mold in the album, it’s the last picture. 🙂
Thanks again!
Glad to hear things worked out with a second pour. Yeah!
.
I do see the mold now. Didn’t scroll down far enough. Whoops! Unfortunately, there is no way to fix this mold. It looks like this is an inexpensive mold for crafting, ice cubes, etc? If so, those molds typically don’t last as long as molds directly intended for resin use. What you see here has been my experience with them as well. To prolong the life of your molds in the future, a good mold release will help. I like the Petrolease mold release and use it on all of my plastic and silicone molds. You can find it in our store here: https://shop.resinobsession.com/collections/tools-and-supplies/products/petrolease-non-silicone-food-grade-mold-release
Ah, bummer. It was fairly inexpensive but I did buy it from a source I trusted (MiniatureSweet) and it specifically said that no release agent would be needed. Nothing I’ve made in it has ever stuck, so I’m not sure how it got ruined. 🙁 Oh well. Live and learn I guess!
Thank you for your help!
Hello again! Thank you for your help before. Just a minor issue now. When I pour resin that I’ve added darker colored Pearl Ex pigment to (such as black), it swallows up the glitter I’m trying to use. Micro glitter shows, but when I use bigger pieces such as stars it won’t show in the final piece. I’ve tried sprinkling the glitter first into the mold and then the resin on top of it, but that doesn’t work. Thoughts?
Sounds like you need to try pouring glitter and resin in one layer and the black in another.
Hello Kathy, I did a bathroom with resin, I bought it in my country. At first the resin worked pretty well, nice colour, texture and everything. It didn’t last long, the owner of the bathroom complaint to me that it had turned yellow and is sticky somewhere, like it never got cured. The yellow thing is ok because it happened with the same in another toilet ( mine) but the sticky problem is not good and I don’t understand why.
Another thing is that after taken a shower the water leaves a stain, brown one, that comes out only with a thinner. ( I know is not the better way and the thinner is not good but is the only way right now). I can send you a picture.
In case everything is done wrong, what can I do to make thing right, (what resin to order; I live in Europe) at least for my client which is very upset and I’m worried. Thank you!
I’m sorry to hear things aren’t working out for you. This troubleshooting article should help: https://resinobsession.com/resin-frequently-asked-questions/resin-troubleshooting-tips/
Hello. I have one problem. Why some white oil painting turns yellow?
Hi Katherine.
I have made molds out of 100% silicone (black). The resin does not cure or is tacky! in them on the outside. I have cut the resin open after 24 hours and the inside is hard. I make sure that I mix hardener and resin very thoroughly. Completely confused!.
What kind/brand of resin are you using?
I am using Famowood Glaze Coat. I have used this successfully in other type of molds such as plastic molds for Making Ice, such as stars, ovals etc…I am wondering if it could be the Black Silicone! thanks for any help you can send my way.
Unfortunately, resins like this aren’t meant to be used in molds. They are generally meant to be cast on surfaces of an 1/8 inch depth or less.
ok thank you Katherine
Hello Katherine!
I tried to do a toilet in the same effect as a . The problem was that in some parts of that is not cured. The resin came in a plastic box with no label in it. I used acrylic colors with the resin(I used those before and they worked perfectly). In the parts that is not cured has like black spots, is dirtiness but is stuck there. I don’t know how to fix it now> option one is to levigate and to clean it and then to try the resin again, and the second is to take it out and to do it from the begining? I am in a crossroad. Please advice! What’s more I live in Europe and I don’t know about the shipping! Than you!
I don’t know what to tell you since I’m not sure what the black spots are. If those spots are simply sticky (and not gooey), you should be able to recoat them with another layer of resin and have it cure, although it may not get rid of the black spots.
I wanted to buy Total Cast resin. I want to use it on a toilet surface. Will it work for a toilet?
Work in what way? I want to be sure I completely understand what you want it to be able to do before I comment.
Hi, Katherine.
I’m new to resin. I made molds out of silicone earlier this week & am using the Alumilite White Amazing Casting Resin. My first couple projects were definitely a success, but then I had to throw out a bunch of molds because the resin wasn’t curing. I thought it was my fault: maybe not mixing enough or something.
Now I’ve done two tests of just leaving the resin in the disposable medicine cups after mixing. The resin cures quickly, but leaves a 1-2 mm of liquid on top that has not cured at all. This happened both times.
Does it sound like moisture got into my alumilite or some other action is preventing it from curing fully?
What else are you adding to the resin?
I did some resin paintings last year December with Master Cast. ALL of them are yellowing now very bad. Is that normal??? … so expensive stuff and this should not happens. I am very disappointed.
Hi Birgit, I’m sorry to hear that the MasterCast resin is not performing for you as expected. Unfortunately, all resins are going to yellow over time. Resins with UV inhibitors and stabilizers help extend the time before yellowing occurs. However, things such as mixing off ratio (even though it still can cure without tackiness), putting over an improperly cured lacquer, excessive heat, and or constant exposure to sunlight can speed up the yellowing process. How long the epoxy will last in its clear state is very difficult to predict.
I have been having a hard time with my resin becoming gummy after adding tint, making it unpourable. The containers seem to get warm and within minutes its unworkable. It has been pretty warm recently, but I dont know if this is a chemical reacion or heat. Thanks!
It sounds like you are mixing too much resin at once. What brand are you using?
I have made resin forms (about 130 of them :o) I applied a top layer of resin but messed it up. So I applied a second layer of resin with hardener. Now they are sticky. I know why. But I need to fix these and fast! I’m using them for an expo tomorrow. Is there any product that could be added to cover the tacky/sticky pieces? they are about 3″x3″ so I can’t buff or sand easily. I’ve tried modge podge with slightly less sticky results and I’ve tried rubbing alcohol.
Hi is there any low odor resins i can use indoors , i’ve been using a very potent resin and trying to cure in my shed , but its cold and when i get the molds out they are still tacky and i leave fingerprints on it days after . ,
Are you using a polyester by chance?
Hi, I have a couple questions. I have been using the Pro Marine epoxy, I mixed it exactly, I warmed it up and then mixed my acrylic paints in, I noticed after only about 5 minutes of mixing the cups of paints/resin that I had the consistency of taffy, stringy and sticky. I poured and layered onto my resin coated canvas and some of the paints flowed well but others made a gellied blob that I had to lift in one big clump off my canvas! ( the inks I used were great) Is that from using too much paint in my resin, I believe it was 1 part paint to 10 part resin… or maybe the room wasn’t warm enough- I did it in my kitchen so it wasn’t cold. I also noticed the paint in the cups started hardening like divinity.. it was odd! I don’t know if I’m using too much paint or just going too slow! I also added in 1 drop KY jelly for cells, which I didn’t see many, and I added the Liquidtex medium to thin out the paints before I added the resin.
Thank you for your time here answering all our quandaries!
Resin is very fussy about additives. It is likely that something in the acrylic paint, plus the liquitex medium, sped up the curing. Colorants designed for resin are what I like to use since they are the least likely to cause curing problems. You can find several in our store here: https://shop.resinobsession.com/collections/colorants
Strange situation. I have mixed three color tints for my projects, green, blue, and pink. All the colors except Green cure perfectly, the green for some reason doesnt seem to want to harden. Same brand tints, same brand epoxy. Baffled. Allowed 2+ days for the green to cure but doesnt seem to work. I’ve tried in a room that has 0 moisture (small room with a large dehumidifier) as well as just in a normal room without any dehumidifier, same result. Thoughts?
Website listed for reference, its the mini surfboards. The whole is round 1/2″ deep.
Have you talked to the manufacturer? Sounds like you might have a bad bottle of green color.
Hi. I am a beginner to resin work and have been attempting some jewellery and key rings using photographs. I am using Smooth-On EpoxAcast resin. I have been half filling my mold then leaving it for 12 hours (It has a 24 hour cure time), then adding my photograph to the tacky layer (at an angle) Then filling the mold to the top. I seem to be getting small bubbles trapped between the bottom layer of resin and the photo. Should i rather add the photo right at the beginning when the resin is still runny or would it be better to leave the first layer to cure completely an then add the photo and the remaining resin?
Hi Karen, it sounds like you are trapping bubbles underneath your paper when you are introducing it. Dip your paper in resin, then put it in on an angle. That should minimize the number the bubbles.
Hi, i have two different molds both silicone. I pour both at the same time, same batch. One comes out clear the other frosted. What can i do to make t hff em both clear?
It sounds like the surface of one of the molds is frosted. I explain more here: https://youtu.be/9wQIp4_mIRM
I do acrylic pouring. I used tiles, poured and let dry for over a week then put resin on. They dried hard but with some dents and some places where the resin just did not cover the tile. Looks like it “pulled” away. Had to do second pour of resin and still got shallow dents. Most were filled up and the bare spots are covered. I use a windless lighter as bakers torches are impossible to find. I live in the southern Caribbean and have to “punt” when it comes to materials. Do I need to do a 3rd pour over all 4 tiles to clear those now mild dents? I have no idea what kind of resin I have…it works 99% of the time and the only show in town. Oh my….thanks for any help. I do use silicone to get cells in the pour. I can import some items but it makes what I do very expensive. Thanks..Nancy
It sounds like the silicone may be causing a problem. Are you also using enough resin? How large are your tiles?
My tiles are what was left over from building my home. 4 inch square, 6 inch square and some are 8 inch square. I am VERY careful to mix correctly and my windless lighter is almost like a torch to get rid of air bubbles very well. When I put the resin on, it rolls off all four sides. Not sure how I could add more beyond a second coat. You may be right about the silicone. So now I have poured 4 small tiles for coasters. I did not use silicone and I am going to put one coat of non-yellowing high gloss varnish and when REALLY dry I will do the resin on them. I do not have a choice of resin and it is like an epoxy. Thanks so much…I will let you know how this goes.
I have the same problem when I use tiles. They are slightly sloped on the edges. Have you tried a tape dam?
Hi…yes I do tape the back right to the edges. That way the whole back is clean. I am actually amazed how the resin will come off in a clean line along the edge of the tile if I am careful when I remove the tape. Sometimes a sharp knife under the tape is required where there is a drip I missed. But sadly, my dents are on the surface of the tiles and one…it pulled away from the edge. I guess I will let these tiles sit for a week or so and do a third coat. Only because they are so pretty that I want to save them. I have one more set I did and this time I have given them two coats of a clear low gloss spray. I will be able to lightly wash them with a sponge to remove whatever and the next time I log in, I will be able to tell you what happened. Thanks for ALL your suggestions. Resin can be very tricky and maybe now I have made most of the mistakes. (I have done others that now were obvious errors) Thanks again for you help!!
Katherine…I just noticed you wrote “tape dam”. Do you mean to put the tape along the edges to catch the resin before it drips down past the edges? How would you cut it once you can handle the item? Please explain! Again, thanks! Nancy
Yes, use the tape to apply a border to the outside edge that sticks above the surface. Once the resin has cured, you can peel the tape away. You can see what I’m talking about in my latest painting post.
https://resinobsession.com/resin-art/resin-painting-93/
Those paintings are beautiful. Sadly, resin is so expensive here that it would be too difficult for me to attempt that kind of art. However, I understand what you did…but then how do you cover the sides. Remember…I am doing coasters that need to be sealed all the way around. While I do not do the bottom, I put the tape a hair from the exact edge so the resin seals the bottom edge. I think the silicone is humbugging these tiles. I must try without it…and I will let you know about both my attempts (see above). You are really nice to take this time with me. Thank you from the bottom of my heart. When I get a chance, I will send you some pictures of what I do that I resin. Thanks….once more. Nancy
Hi!
I have been trying to do some geodes but it seems like my colors are running into each too much/they’re too fluid almost and I lose that layered look. Do you have any tricks that might help?
Hi Megan, this video on our youtube channel should help: https://youtu.be/6OT5Cbk1v6g
Hi,
I have used resin to coat the top of an acrylic pour painting and used painters tape to provide a seal so the resin did not flow over the edges. I ended up with a bit of a raised edge that needed sanding down to round off the edges. Unfortunately that left a mark of about an inch all around the surface of the painting.. Is there are way to polish this without hurting the rest of the surface, and without taking the shine off which is what is happening?
You will need to keep sanding the edge with finer grits of sandpaper until you get the finish you want.
Can I ask why resin may go soft when it comes in contact with heat after it has cured? I’m using entropy super sap resin and have never had any issue with it not curing properly. I know I have mixed the correct ratios, and the resin is curing as it starts soft and over a few days it becomes really hard- then add a slight amount of heat and it goes bendy. I have moved to a different state in Australia and the climate is a lot more humid. But after 6 months this is the first time I’m having a bit of difficulty (it has finally cooled down after some extreme heats). I’m weighing my ratios. I thought it might be that my resin was older so I opened a new bottle- it has happened again. Help??
Some resins, even when fully cured, can go soft with heat.
I have recently started making resin jewellery. I use UV resin. I have got both dyes and mica powders to colour the resin but for some reason the red always seems to leak colour over time. It’s happened every time with the red mica so I did a couple using the dye but again it’s leaked. I’ve made quite a few pieces and it doesn’t happen with any other colour. I’m baffled!! I do my Pieces is layers, the coloured layer being at the bottom. Some how the colour manages to seep from this far down I’m the piece but when making it, it appears cured.
Help what does it mean when my resin bubbles and smokes after putting in a rose? I am confused….
It sounds like your resin got too hot.
Hi. I’m using doming resin on painted wood cutouts. The resin seems to be receding in almost the same spot on all cutouts. Not sure why? Question
Can I add resin the next day to just the receding spots or do I need to add another complete layer?
Thank you
It sounds like something is acting as a resist (oil, wax, etc.) and keeping the resin from bonding to that area. Unfortunately, you cannot ‘spot apply’ the resin. You will need to apply a new layer, but you need to make sure the ‘resist’ is gone first. I show how to do that here: https://youtu.be/CGnktjLr-O4
Hello,
I think I might have not mixed thoroughly. The are a few spots on my top that are tacky and the rest is fine. Would putting down another layer fix this or do I have to remove the tacky areas? Thank you.
BTW I used Famowood Glaze Coat
If it’s simply sticky, but not gooey, then yes, another coat will work.
I’m thinking the oil used in the acrylic poor it causing the receding Resin.
Can I seal it first with acrylic sealer spray? Thank you🌻
No, you are going to have to soak up the oil and remove it before applying another layer.
I have a spot that is a bit thicker than the rest. Can you sand with fine grit then buff out to get smooth and shine.
Yes, you can do that. I show the techniques here: https://resinobsession.com/resin-frequently-asked-questions/how-to-sand-resin-smooth/
I am trying to use resin over an acrylic painting on canvas. I am using Nova acrylic paint with Floetrol as the pouring medium. I am not adding any silicone or oil. I allowed the painting to cure for 3 weeks then washed it 3 times using Dawn detergent rinsing fully each time under running water. I then allowed an addition 3 weeks to ensure the canvas was completely dry. I have tried a regular resin I purchased at the local hardware chain and an art resin. Both leave spots when dry where the resin has moved away from that area. So I have spots covering the entire painting that have no resin while others do. What am I doing wrong.
Hi Roxanna, how frustrating! Are you sure you are using enough resin? If you don’t cover the painting with enough resin, it will pull away in areas. This resin calculator will help you know if you are using enough:
https://resinobsession.com/resin-calculator/
Hello, I’m at a loss for what to do about this situation and am really in need of help. I use amazing clear cast, the blue box by alumilite. My issue is that while I’ve had some bubble issues with this resin, it always cures solid and smooth. I recently bought some molds from Etsy, they’re silicone and green so I think they’re cast with mold star. I can’t communicate with the Etsy store because they’re Italian and all previous attempts to communicate haven’t been responded to. I made a batch of resin and poured some of it into the green molds from etsy and some of it into other molds. The other ones cured fine but the entire surface that touched the green molds is strangely sticky, like not the same sort of sticky that comes from uncured resin. I have some molds I myself made with mold star and they cured fine and smooth as well.
Hi SK, I’m sorry to hear you are having problems. Are these alginate molds by chance? They retain moisture which can effect your resin curing.
Hi Katherine,
Is it possible to sand out tiny imperfections/hairs with a high grit paper and then just spray it with the Resin High Gloss Sealer to make the spot shiny again?
Also, I tried to do a second layer about 3-4 hours into the curing process of the first layer but when I heated the second layer it created lines in the first layer where the second layer was sitting. How much time between the two layers should I wait to avoid this?
Thanks!
Can I spot fix only an isolated area where a bug has embedded in my resin and repeat only that area?
You can, but you will see that spot. In order for it to be smooth, you need to recoat the entire surface.
Hi, I don’t know what I’m doing wrong, but I’m making coasters in molds. The resin hardens pretty quickly but when I pull them out of molds, they are all ok on one side but one side like it’s bulged and the top is not level. I made sure it was level when I put the resin in the mold
Hi Kerri, are the coasters coming out with an edge?
problem: I use R217. I mix the two parts, then slowly they react with each other, they “frie” and they form millions of very tiny bubbles. I roll the container gently for a while (imagine cement-making), and slowly the tiny bubbles join with each other, they come to surface and they disappear. I do this until the resin has the consistency and transparency of honey. No more bubbles. Then I wait for it to dry in an open container, like a little plastic glass. 24 hours later I take it out, it’s hard, I break it in two to check the consistency, and inside it looks like a sponge, more than 50% of its mass is air, all bubbles. Which makes it extremely weak even if apparently hard. I read about other people having this problem, the bubbles seem to appear out of nowhere while the resin is curing.
It sounds like your resin is heating up too quickly. What is the maximum mixing amount for this resin?
if you mean the maximum amounts that can be mixed together, I’ve been working with quantities like one third of a syringe… However, I noticed that the bottle says they should be mixed 1:1 by weight. I mix them 1:1 by volume. The two bottles are 250 g each, but soon after the purchase, I do remember noticing that the liquid in one of the two was about 5 mm lower than in the other, so their weight might be SLIGHTLY different. Could that difference mess up with my measuring by volume and cause the bubbles (I read that the effect of such mistakes can be a more transparent result, it doesn’t cause bubbles)? They do heat up when mixed, and form the first bubbles, but then those go away and the liquid clears up from bubbles nearly completely (15 bubbles left?). The problem is that millions of bubbles that were not there appear once the resin gets white. Thanks.
I also just made another experiment. I left the plastic stick I use to mix inside the plastic glass. After the resin cured, I took out stick and white block, and cut it it half. And then in 3 parts. All the bubbles are around the base of the stick. 1-2 cm from the stick there are no bubbles, which is a good start and means there’s no problem with my mixing by volume. My previous attempts were mostly made pouring the mixed resins into a mold made with “blue stuff”. What if the resin reacted with the whole blue stuff like it did with the stick? That would explain why my objects were all bubbly inside. However, blue stuff is kind of purposely made not to cause these problems… I should try using a different material for the mold.
Thanks for the update. That’s helpful!
I made another experiment. I created a crater with the blue stuff, about 1 cm deep, open at the top. I mixed the resin in the usual way, no bubbles as usual, and then I put it in the crater. The bubbles started appearing on the surface. After it cured, I cut the coin-shaped object in two. Amazing: all the surface that was in contact with the blue stuff is for the 50% bubbles, for a layer of 1 mm deep. The rest of the resin cured fine, but some bubbles can be seen trying to go from the bottom to the top. Being thick, the object showed me the real potentials of this resin, it’s pretty hard and yet slightly elastic, I couldn’t brake it in two using just my hands, awesome material. So, basically, the problem is the blue stuff, all the rest is fine. The blue stuff makes the resin “fry” as soon as the two get in touch, even if this effect goes into the object for just 1 mm. As a result, the object has a bubbly surface but it’s regular inside. The object I tried to create days ago was a thin sword, made using a 2-parts mold (blue stuff), that’s why it was all bubbly, it was so thin that the blue stuff had a chance to made a complete disaster, without even me realizing that a thicker object would have been fine at the core. Well, yes, the blue stuff company should be informed about this, I hope this post will help some people out there… thanks!
Yes, mixing by weight could mean that you are using more hardener than you should, causing the mixture to heat up too quickly.
Other experiments… and finally a success! I started by not using the blue stuff. I made a mold with milliput, but again, the resin goes into the mold, it fries, and once it cures it’s all bubbles. I tried covering the blue stuff mold with thin plastic. Same effect, all bubbles. “Ok, then it’s not a problem of blue stuff, this resin is reacting with everything”. For the nth time, I was going to give up. Then I thought “wait, I get rid of the bubbles while the resin is still in the plastic glass, maybe I pour it into the mold too late, maybe there’s a limit of time for that…”. I check on the web, I find a link with instructions: “1) mix the two parts for a few seconds, then pour the mix into the mold (POUR IT IMMEDIATELY AFTER MIXING!)”. Ops, was that my mistake since the very beginning? I try again with the blue stuff. Mix 10-20 seconds, then pour it into the mold. It doesn’t fry. It cures very slowly. A few mini bubbles appear, but they have time to get to the surface. It cures. And… no bubbles!!!! All smooth! Crazy. Wasting time getting rid of the bubbles before pouring in the mold was the reason why the resin was producing bubbles in the mold!
Can you please tell me why the resin stuck to the silicone mold? Could it be that the torch used for bubbles melted the mold? I tried freezing the mold but that didn’t work either.
It’s hard to say why resin sticks to silicone molds. It may be that it didn’t cure correctly or that the mold is at the end of its useful life. It’s why I always like using mold release when casting. This one is my favorite: https://shop.resinobsession.com/collections/tools-and-supplies/products/petrolease-non-silicone-food-grade-mold-release
Yes, that should take care of it.
I want to use crushed dried flowers in some of my pieces. They are too small to seal with spray. Any other suggestions?
No, I think the spray will work great for small flowers.
I am using polymer clay to make settings for some faux opal and faux laboradite “stones” the lab was fine after baking for 30 min at 275 degrees but the opal turned yellow…wish I could post a picture…still pretty but not what I expected…can you tell me why?
It sounds like the faux opal wasn’t meant to be heated. Was it made with resin?
Yes its envirotex lite pour on…with a small amount of white plaid ,blue and pink acrylic with some confetti glitter…I thought resin could take the heat…more experiments to come..
Cured resin can’t take the heat of a polymer clay oven. Do you clay work first, then add resin.
That is now plan B🤔
I’m having a really strange problem. I’ve been having very inconsistent results, where some mold don’t cure within the same batch of resin. I just had two identical coaster molds, made from the same batch of resin, the only addition to both were alcohol inks. Both stored together, covered in the same spot. One cured fine, the other is a gooey mess. Literally the only difference was the color of inks used. Any thoughts?
Hi Wade, this is perplexing! This article should give you some ideas on what could be going on: https://resinobsession.com/resin-frequently-asked-questions/resin-troubleshooting-tips/
Hello, I am using Liquid Diamonds resin and mix the exact amount of hardener to resin that is advised yet all of my pieces either look like there’s a spill on the surface and/or they’re cloudy. I mix for as long as advised. I’ve stopped working with resin altogether because of this and would like to start again. Is there another resin I should try? I make jewelry and pieces that are up to 5” large. I used to use Ice Resin but they’ve changed the formula and it doesn’t work well anymore. Thank you for your time.
Hi Nairy, for what you want to do, the Resin Obsession super clear resin will work great. You can find it in several sizes in our store here: https://shop.resinobsession.com/collections/resin/resin-obsession
Hi Katherine,
I love your site and products, I do have a question. I have made a few pieces of epoxy resin items, then domed with UV resin, after a few months my UV resin peeled off do you know why this happened? And what to do to fix this from happening.
Hi Catherine, I’m sorry to hear this is happening to you. I’m afraid I don’t have any experience with UV resin in a situation like this.
Katherine!
I’m so happy that over the years you have kept up with site and questions! All too often I see sites across a wide range of topics encouraging people to ask questions with never a reply. I commend you for your dedication and time. Appreciated more than you know…
On to my issue…I was working on a multi-layer resin project that was beautiful and clear, that is until my 3 year old put his hands in it 🙁 A graduation gift to my wife who just finished Bootcamp with the Army and naturally this means alot to me. After letting that layer cure I proceeded to sand the area (not the whole area was affected). I have worked my way up to hand wet sanding with 3000 grit. It seems no matter matter, I cannot get rid of the haze I have created over this area. Is clear when wet but as soon as it dries the haze reappears. Does this mean it will clear up when I add another layer of epoxy or is their something I am missing or not doing that needs to be handled prior to another layer?
Thank you again for your time!
Hi Scott, what a special gesture for your wife. I’m sure she is going to love it! Since you finished with a 3000 grit sandpaper, another layer of resin should make your project go shiny again.
Hey, I’m new to this, and I’m having a small issue.
I’m using epoxy resin to create potion bottles. Essentially I mixed in different colors of red and blue (health and magic potions) and poring them into small glass bottles. The only problem is that the resin rests perfectly level with minimal bubbles for the duration of the work time, but as soon as it starts to harden and cure, sizable air pockets open up around the edges where the resin meets the glass. I’m not sure why this happens, or how to prevent it. Any advice would be welcome.
Hi Jonathan,
I’m sorry to hear things are working out for you as expected with your project. I think this situation is best suited for a one-on-one consulting call where you and I talk back and forth about what’s going on. A 15 minute consultation call is $20. I do them by video so I can have a chance to see what you are working on.
If you are interested, please send a message through the ‘contact us’ page and I can get this going for you. Best, Katherine @ Resin Obsession
It’s good to know that your resin could be not fully cured if it’s not mixed with the hardener thoroughly. My boss has been telling me about some silicon that he wants to use for a new project soon, and he wants to make sure that everything works properly. I’ll share this information with him so that he knows a little more about the process.
How does talculm powder help release resin from silicone molds, won’t the powder, or even oils, get embedded into the resin?
I’m not sure what the physics of the situation is, I just know that it works.
I poured resin on my coffee table and it pitted how do I fix it
Hi Tim, this article details how to fix holes and dents in resin: https://resinobsession.com/resin-frequently-asked-questions/fix-holes-and-dents-in-resin/
I made a mold with the amazing brand from hobby lobby. And my resin pieces keep coming out sticky on the side touching the mold but not the open side. Same batch I put in a different mold I didnt make and it wasn’t sticky. What could the problem be it’s only the sides touching the mold that’s sticky
It sounds like your mold material didn’t cure fully.
The mold is solid no sticky spot. And only the resin that touches the mold is sticky. I’ve never seen this before
I recently used Envirotex Lite to coat an old bench surface. The surface turned out beautifully, however I ended up with some very sharp edges that stick up a little bit (I used painters tape to contain the epoxy on the surface, and that seemed to cause the sharp edges) . Can I simply lightly sand these edges down?
Yes Chris, you can do that.
Hello is there anything that can help or fix bubbles after your epoxy resin has cured in a glass vase?
I am not sure but I believe because I created this in the basement, which is cool that the bubbles came back after I banged the contain on the table and heated the epoxy came back. I am so very upset, that I didn’t think to bring up stairs in the warmer environment. Have any ideas?
I have tried hot tap water and resting the vased flower arrangement in the water. Nothing so far. Do you think that heating with a heat gun could help?
Thanks in advance, Leah:(
Hi Leah, I’m afraid there isn’t anything you can do at this point sadly. 🙁
Thank you, kinda knew that, just was hoping for a miracle. I live the effects of the bubbles with the silk flower arrangements, but some people don’t. It just looks like their is air in the water with the plant stems.:)
I’m completely new to the resin world and I just recently bought a bunch of materials.
I have noticed that the resin is not hardening and I know it’s because my house is too cold. What other options do I have to harden the resin?
Thank you
Hi Kerry, I’m sorry this is happening to you. There is an idea for you in this article: https://resinobsession.com/resin-resin-resin/how-to-get-your-resin-to-cure-in-cold-weather/
Put a floor heater in the room at heat up the room
Hello!
Just wondered if you could help me, I think I am potentially doing something wrong. Basically I am trying to make coasters using resin and glitter. I have got the coaster out of the mould and it seemed fine – resin was nice and firm. My question is, why is my resin slightly bendy when a mug is placed on it? I assume it is potentially to do with warm liquid being in the mug! I also just wanted to check if it could be something like not leaving the resin in the mould for long enough / not mixing the components together for long enough though. Is there any way to prevent the resin from becoming bendy, or is this just something that will happen when the resin is warm?
Thanks for your help!
Hi Sian, I’m sorry this is happening to you. Some resins, even when fully cured, are bendy. For projects like this, it’s why I like using one of the casting resins in our store. You can find them here: https://shop.resinobsession.com/collections/resin/casting
I’ve worked with resin before and have never had this problem. I did an acrylic pour on a book shelf and was going to seal it with resin to make sure it didn’t get damaged and after leaving the resin for more than the suggested curing time it looks like the resin was pulling away or had big bubbles in spots and it was sticky there still… i left it for another month just to see what would happen and there was no change at all. Why is this happening and how do I fix it?
I’m sorry this is happening to you. This article will give you some ideas on what’s going on and how you can fix it. https://resinobsession.com/resin-frequently-asked-questions/why-is-my-resin-sticky/
Hi! I’m not sure how quick you reply, hopefully sooner rather than later. I have been doing these photo boards for people, and I basically just paint a wooden tray or box, and then print photos out on photo paper, modpodge them down, and then pour resin on top. I use aluminite amazing clear cast resin. Then I use a heat gun to get some of the bubbles out. After a day or two, on all 3 of the pieces I have made so far, I noticed a pink streak in one of the photo boxes across a few of the pictures, in another it did it to 2 entire pictures that were near each other but it wasn’t like a like/streak, and in the third, it was pink on a corner of the picture. What the heck is happening?! Why are a couple of the pictures out of like 30 getting ruined by a little pink? Is it the heat gun? I have a client wanting one that I do not know, she just heard about me, and I don’t want it to happen on hers! I am going to try not using a heat gun at all, but still nervous it’ll react the same.
Hi Brianna, this is strange. I’m not sure exactly what’s going on based upon your description. I think this situation is best suited for a one-on-one consulting call where you and I talk back and forth about what’s going on. A 15-minute consultation call is $20. I do them by video so I can have a chance to see what’s going on. If you are interested, please send a message through the ‘contact us’ page and I can get this going for you.
Hi Brianna, this might explain what’s going on: https://resinobsession.com/resin-frequently-asked-questions/why-is-my-resin-bendy/
i don’t think that article helped unfortunately 🙁 i used the same brand of pigment for all 4, just bought the resin and haven’t had a problem with anything else, it wasn’t poured in a thin layer, and i don’t think it retained any moisture because it was the same for all of them and the others have no problem. i’ll just have to make another i guess! unless there is a way to get it hard now? thanks for the quick reply!
Hello, I made an epoxy tumbler….last year and am thinking of stripping it. The epoxy smell is STILL SO strong, I don’t even want to use it. I’ve washed it and soaked it , you name it. Is is supposed to still smell this bad of resin???
Hi Cathleen, I’ve never noticed that with epoxy resin, but have with polyester.
Hi there!
I’m consistently having an issue where my clear resin cures with a weird cloudy smudge at the point that I poured. I have a huge dehumidifier running in the room and it seems to happen no matter how much I mix/pour into another cup and mix more/ pour on the sides of the mold. I keep pouring thin layers over it to get a nice finish but more often then not there is a new mark on top. Sanding works but is really time consuming and I’d rather just… have a clear top coat. Hopefully this is an easy fix! Thank you!
Hi Cari, I’m sorry this is happening to you. This article might give you some ideas what’s going on: https://resinobsession.com/resin-frequently-asked-questions/cloudy-resin-why-is-my-resin-cloudy-reasons-for-cloudy-resin/
I had already researched to no avail so I just thought I’d ask. I’ll keep working with it and hopefully figure it out
I am new to resin and I have a question I haven’t been able to find an answer to. When I do a pour with multiple colors, the last color(s) added always ends up clumped in the middle of my piece. This happens to me with every mold I use, every type of dyes, and with any technique or tool I have tried to pour with. I very thoroughly mix the resin and also the colors. Nothing I do will stay towards the outside of the mold.
What am I doing wrong?
Hi, it sounds like you resin is close to the end of the pot time when you are pouring it.
Making resin coasters, I have experienced the following two issues:
I like the idea of having them be reversible, so I didn’t put “feet” or cork on the back, but they stick together if stacked. Is this normal? Will sealing with a spray help? What’s the best way to handle this?
One friend noticed that when they arrived at her house, they still had a strong resin smell. Is this normal? How can I mitigate this?
Hi,
I made some resin coasters using silver flakes. All the areas without the flakes have become dry to the touch after 15 hours, but the ones with flakes are tacky.
What did I do wrong?? I mixed all the resin together in one large cup and then divided it into different cups for adding colours. So I don’t think mixing would be a problem.
Hi Aashi, it’s hard to say why the resin over the flakes is still tacky. This article will help: https://resinobsession.com/resin-frequently-asked-questions/why-is-my-resin-sticky/
I spray painted a tumbler with 2 coats of white paint. I spray painted it again with 2 coats of Rustoleum glow in the dark paint. I applied a mix of the epoxy on the tumbler. Previous tumbler with white paint only accepted the epoxy coating in a nice smooth coat. I noticed that with a generous coat of epoxy it was separating and not forming a even coat. I left it on the spinner for a few hours and with gloved hand smoothed and removed some of the epoxy. I did this twice within a couple hours. I was leaving for a couple day so I shut the spinner off and left it on the spinner. When I came home it looked smoother but still quite tacky to the touch and not glass like. My question is will this eventually harden enough for a decal and additional coat of epoxy? Should I attempt another coat of epoxy while tacky in hopes of it drying and then add the decal and a 3rd coat of epoxy? Is this not a feasible attempt to fix and move on to a new tumbler.?
Hi Darlene, I’m sorry this happened to you. What brand of resin did you use?
Hi, I am making a cheese board for my daughter, and I’m having an issue. Although the colours are where I want them when I finish, they move towards the centre when left to cure; what I end up with is the centre of the platter being perfect, but the edges are all striped toward the middle. It is leveled correctly, and this has happened twice now. I did use a heat gun to blur the lines a little, would that cause the problem? I’m using ArtResin, which is low VOC and food-safe when cured. Food-safe is a big thing for me when making cheeseboards!
I’ve read through all of the previous problems and didn’t notice this one. I’m not special, so I’m super surprised nobody else asked this question!
Thank you.
Hi! Thanks for all the info you provide! Wondering if you can guide me. We were in a hurry to demold a alphabet charm and should have waited to release. The pulling of the mold resulted in “stretch marks “ on the piece. Will anything help to fix that? Will glossing with sealer help?
Thank you!
Hi Shoshana, I’m afraid the resin gloss sealer spray isn’t going to cover up noticeable marks. It sounds like you need to sand and polish the surface. This article will help: https://resinobsession.com/resin-frequently-asked-questions/how-to-sand-resin-smooth/
I used cooking oil as a release and they came out amazing but the cooking oil has left marks on the resin. Will sanding get rid of the marks? Or what can I use?
Hi Melody, it’s hard to say without seeing the charms. I think it’s worth a try! P.S. We have mold release made just for resin projects in our store here so you don’t have to worry about this next time: https://shop.resinobsession.com/collections/tools-and-supplies/mold-release
Hello! I am new to epoxy resin and am having a dilemma! If I am making a clear keychain? The resin cures al the way through and it looks clear but the side of the keychain that was not in the mold(so facing upwards) looks to be textured. I’m not sure how to fix this because it looks clear until it is held up to the light! Any suggestions on how to fix this would be SUPER appreciated!
Hi Lexie, this article will help: https://resinobsession.com/resin-frequently-asked-questions/how-to-fix-cloudy-resin-cloudy-resin-fixes/
Hi, I am trying to use Epoxy Resin, 40mm, and 20mm epoxy hardener, but the 40mm is dated 15/7/2020, and the hardener is dated 3/1/2020, would that be a cause of project staying runny? Thank you. Joe
Hi Joe, it’s hard to say exactly what the reason is here. This article explains several reasons why your resin isn’t curing: https://resinobsession.com/resin-frequently-asked-questions/12-reasons-why-your-resin-didnt-cure/
Hi! Hopefully there’s an answer to this! I use ArtResin and when I make my trays, they don’t come out flat. I use the layer method when pouring. But again, it doesn’t come out flat. It creates some kind of dip on the center. And for it to lay flat I have to push down on the middle before sending it out.
Is it the resin or the mold?
Hi Christina, it’s hard to say. We have a discussion about this situation here: https://resinobsession.com/forums/topic/uneven-resin-tray/
Hi all!
I was wondering if you can help me with this. I am trying to make two-tone bangles, where i pour the right side of my bangle mold with one colour, and the left side with another. (So that the colours sit “next to each other like two halves). However sometimes one colour part “floats” completely above the other colour, which means i end up with one colour sitting “on top of” the other. Do any of you guys have a suggestion how i can avoid this?
Hi Rose, have you seen this video tutorial on our youtube channel? It shows how to make a two-tone bangle: https://youtu.be/l5qaC2XWcqQ
I don’t know if someone already asked this so I’ll ask now. My epoxy resin is overheating and I don’t know why.
I’ve tried encasing a hornet and it melted because of the heat. Is there a reason for this and can you help me avoid it?
Hi Mary, I’m sorry this happened to you. This article explains why your resin overheated: https://resinobsession.com/resin-frequently-asked-questions/epoxy-resin-overheated-resin-is-hot-and-smoking/
Hi. Do you know why i always have a lot of little tip when the epoxy are dry. Thanks. Yves.
Hi Yves, this can be completely normal. This video shows why resin charms have an edge: https://youtu.be/S6xlrNQDp_0
Hi Yves, this is normal. This video explains why your resin charms cast with an edge: https://youtu.be/S6xlrNQDp_0
Hi! So I put dried flowers in my resin and before I left everything was in its place and the dried flowers were separated and the way I would have liked it to be, however I went to look at it this morning and everything flowed into the middle and now all the flowers are around the center of my mold and not where I placed it. I checked and my table is level so I’m not sure what happened. Do you have any idea what might have caused this?
Hi Ryiah, while the resin is heating up, things will move. You can try pouring in shallower layers or make a point to check your resin again towards the end of the pot time.
Hi!
I made a geode art resin piece on a canvas about 4 months ago-it is now summer and hot out and the artwork is starting to smell really bad. There are parts that didn’t cure fully but it didn’t bother me until now. Will the smell eventually go away or do I need to toss this?
Hi Mary, unfortunately, I wouldn’t expect the smell to go away.
Hi!
I made an art piece of sea view on canvas with perfect colors and waves. When I created that at that time, it was very beautiful. But, when I checked in the morning All colours are messed up. White waves are spread all over. Can you please help where I can be wrong? Thank you so much in advance.
Hi Sonal, I’m sorry this happened to you. Try waiting until your colors are thicker before pouring. This article shows how I like to make ocean art: https://resinobsession.com/resin-art/ocean-waves-resin-painting/
I’ve had a situation which I can’t explain. I made two coasters with Envirotex Lite -they came out perfectly. I measured accurately and checked to make sure the levels of the remaining product in the bottles matched as well. However, yesterday I did my second set of two coasters and, after I poured and applied what I thought was the exact measurement of Envirotex, I noticed that the remaining product in the bottles were not equal. I have more hardner than resin left. It appears they are curing correctly (there are no soft spots, no tackiness, no bubbles)!
I cannot figure out: 1) how I managed to have differing amounts of product remaining in the bottles but 2) the coasters still appear to be curing and seem to have come out as perfectly as the first set! Any ideas??
Hi Mary, this isn’t unusual as there can be a little bit of variation when the bottles are filled. If everything is curing okay, I wouldn’t worry about it. 🙂
Maybe you are the only one that can help me. I have been struggling a loooong time and it’s making me want to quit resin epoxy. I use dipon jewel cast and I am filling very tiny rings an necklace charms. I mix the minimum amount o there can become enough heat,I mix for 5 minutes, I weight my 2 to 1 ratio with a scale, I have an dehydrating machine to keep everything around 50-60 humidity, I keep in mind the temperature and it seems cured after a couple days I wait longer. It is a smooth surface, but then after 2 weeks of wearing it forms a little layer. It’s no longer shiny and a little bumpy.
I mailed the manufacturer and they don’t know the solution. I am really out of options. I tried it all…
Please help me…
Hi Marisca, I’m sorry to hear this process is so frustrating for you. I haven’t worked with that resin, so I don’t know what to share with you that the manufacturer hasn’t already. Would you be open to trying another brand? The Resin Obsession super clear resin works great for small jewelry mold projects. You can buy it in our store here: https://shop.resinobsession.com/collections/resin/resin-obsession-super-clear-resin
What’s the best way to get the final product out of the mold? I have a mold with 5 different small tubes connected
Hi Nikole, you should be able to peel the mold away from your cured resin.
(Sorry if this comes through again my internet went down)
I have been having problems with UV resin and ring making.
I have a ring silicone mold and it looks good and is clear and smooth on the inside but I am finding every ring that comes out of it seems to be rough around the edges, not coming out smooth. Some rings I have made half is smooth and half is not.
The molds are dry and I make sure the resin is hard before coming out. I’m not sure what I am doing wrong as I have watched lots of videos and tried to research but no one else seems to have this issue, so I could really use some tips on how to make sure my resin comes out smooth every time! Thank you 🙂
If I paint dried clay ornaments with acrylic paint,can they then be coated with resin?
Yes Cathy, you can do that.
Hi! I had a problem that’s been happening wanted to seek some help if you can. I have a tumbler that is fully cured but when I go to wash it the whole tumbler turns from glossy and shiny to dull/matte like, I can’t seem to find any answers about this. I tried sanding and applying another thin coat of epoxy but it only did it once again. Please lmk if you can help, thank you.
It sounds like your epoxy is taking up moisture. This article explains more: https://resinobsession.com/resin-frequently-asked-questions/why-is-my-resin-cloudy/
Hi my beach scene is curing and it looks like there are lines in the sand part – Is there a reason for this ? Thank you 🙂
Hi Nina, have you read this article? https://resinobsession.com/resin-frequently-asked-questions/why-is-my-resin-wavy/
I am using a 2 part epoxy. what can I do to keep the epoxy from curing with the glossy shine I do not need the gloss or shine
Hi Cecil, resin wants to cure with a glossy shine. If you want a matte finish, you’ll need to make it that way after curing. This article explains how: https://resinobsession.com/resin-resin-resin/matte-resin/
Hi! I wanted to see if I can use resin as a medium for pigmented paint (so mix pure pigment into say a tiny but of water then mix that into the resin) and what type of resin would be good to do this. I think there is a blue saturated paint that uses some kind of RESIN as it’s “medium” and it comes out super intense & vivid and chalky once it tries (it does leave a mark of blue on your fingers if you touch it after but the colour is SO GOOD it’s worth it). and I want to try to make this same thing with other colours.. red in particular, and the paint maker wont tell me what the pigment is mixed with to achieve it. but I’m told it’s RESIN of some sort.. any advice? I just use it to coat concrete textured art.
I feel like there is something in the mix that reactes to OPEN up the intensity of the pigment, as when it’s mixed with water/acrylic it’s duller & DARKER. even when it’s highly pigmented.
@henryk_studio
Hi Henry, I’m afraid resin and water don’t mix. Your resin may not cure.
Thanks for the tips 😀
What do you recommend for cleaning resin containers?
Hi Brenda, I’ve got tips for cleaning resin cups here: https://resinobsession.com/resin-frequently-asked-questions/how-to-clean-resin-cups/
Hi, so this doesn’t always happen, but why is it that sometimes, my colors don’t pull all the way to the center in making resin coasters? I’ve made dozens and dozens of resin coasters with dragon scales/crackling or webbing effects.. Sometimes, the colors pull all the way to the center (as I want them to and as they should), but sometimes, they’ll only make it 2/3rds of the way or even less! The other day, I was able to create a perfect crackle-effect coaster (colors pulled all the way to the center). But then the next day, I used the exact same colors (and exact same amount of colors), poured everything in the exact same order, used the same resin, room temperature was the same… Everything was the same, so why did I end up with different results? Thank you, Lauren
wow wow such an explainatory blog. I had so many problems in my mind regarding resin and so easily my all doubts got cleared. Very helpful blog. Thank you so so so mcuh for publishing such blog.
You’re welcome, Rahima.
Help! My bails are falling off!
I hope you can help my current process for attaching them is to use UV resin to adhere the bail to the back of a piece then to dome over the top with my normal Epoxy resin. I thought this was a perfect way to keep the bill secured but they are coming off. Any suggestions? It is very cold right now in Ohio could that be the cause or is there some thing I am doing wrong?
Hi Tara, I like to use E6000 for adhering bails: https://shop.resinobsession.com/products/e-6000-epoxy-jewelry-adhesive-jewelry-finding-glue
I’m having an issue where I clean the surface of my resin product, and then it dries and there’s a layer of fine dirt/dust/chalky look, I clean it again with a wet cloth and it disappears and it comes back again – I can see the glossy resin surface when it’s wiped, any help or advice or tips on what I’m doing wrong please?
I’m sorry to hear this, Graeme. This article will help: https://resinobsession.com/resin-frequently-asked-questions/why-is-my-resin-cloudy/
Poorly unprofessional article. Annoying to read.
Loose the pointless commentary and focus on the topic.
Ya know. If you’re going to lecture me on my writing style, you might want to proofread your own work first. #justsayin
I’ve been using 2 part epoxy resin, normally it’s fine but in a batch I just made one piece expanded a lot to triple the size and is spongy now but the other pieces from the same batch are fine, I have no idea why??? I was using silicone molds
Hi I need help!
I weave baskets and then paint them and make them into ladies purses….
the paint keeps chipping off.
I’m looking for some advice on how to give them a resin coating that won’t yellow and will create that hard ‘candy coating’ that won’t chip.
is there a product here that can help me? and if so, can someone give me some advice on how to use it?
thank you!
Christina
Hi Christina, I’m not sure resin is the best choice for a project like this. Knowing that purses get thrown around a lot, the resin will scuff and make crack or break as someone opens and closes the purse.
I am making the resin cutting board. However for what ever reason although it looks amazing after I pour it when I sit it to let it dry all of it slides right off the cutting board. What am I doing wrong. I’ve tried it twice now and it slid off with in 20 min of me finishing pouring.
Hi Jennifer, I’m sorry this is happening to you. It sounds like you need to use a faster setting epoxy. The Resin Obsession artwork resin works great for this: https://shop.resinobsession.com/products/resin-obsession-artwork-epoxy-resin
I’m wondering if the resin can withstand the temperature of boiling water?
That would be a no, Jimmy.
the resin must not be heated
I just attempted to make my first vase and tray. It was to be a gift for Christmas. I used red, green, and gold. The resin didn’t stick to the vase. How do I correct this?
Hi, I am using doming resin (pre-mixed) to make doll eyes but after spending useless hours painting then resining I am getting bubbles. I think I’m going to warm the bottle. Does soaking in hot water bath or how about a baby bottle warmer?
You can absolutely try a warm back to help with bubbles. NOT too long tho or you can cause a speedy exothermic reaction. So keep it warm and not too long! Good luck.
I recently thin coated some cypress natural bowls, there staying tacky, never had this problem before, can I fix this problem without starting over, I used another brand than I had before
You can try adding another layer on top. Make sure your measure your epoxy parts correctly and your project is in a temperature-controlled environment. Hope this helps!
Hi, I have a problem that I can’t find the answer to. Last time I made a large diorama with a small swimming pool and put two acrylic sheets. But after it dried, it was not as easy to demould as other artists. I couldn’t pull it out at all. I used a hammer and screwdriver to completely remove it. However, there was a big hole in my work, and it took a lot of effort to fix it with a coating. What can I use to coat it so that it can be easily removed?
I’m sorry to hear about the challenges you faced with demolding your diorama. It sounds like the resin or material you used adhered too strongly to the acrylic sheets, making it difficult to remove. To prevent this from happening in the future, you can use a mold release agent specifically designed for use with resins and acrylic sheets. Here’s what you can do:
1. Mold Release Spray
A mold release spray is your best friend in this situation. It creates a barrier between the resin and the acrylic sheets, allowing for easy demolding.
2. Use PVA Release Film
Another option is to use Polyvinyl Alcohol (PVA) as a release agent:
Brush or Spray Application: PVA release film can be brushed or sprayed onto the acrylic sheets. It creates a thin, water-soluble barrier that prevents the resin from sticking.
Washable: After demolding, the PVA can be easily washed off with water, leaving your acrylic sheets clean and ready for reuse.
3. Use a Silicone or Non-Stick Sheet
If possible, consider using silicone sheets or mats as the base of your diorama:
Non-Stick Surface: Silicone is naturally non-stick and won’t adhere to the resin, making demolding a breeze.
Easy Removal: Once the resin cures, it can be easily peeled off without the need for additional tools or excessive force.
4. Consider Using a Different Base Material
In some cases, it might be worth experimenting with different base materials, such as HDPE (high-density polyethylene) sheets, which are also non-stick and work well with resins.
5. Test Before Full Application
Before committing to a large project, test the release agent or method on a small section or a similar piece of acrylic. This way, you can ensure that the release process will work smoothly.
I have been doing resin coasters that are square that look like water waves with the use of plastic wrap. After I put the resin in the mold and make the wavy lines ( bubbles form and have to remove it and start over but it starts to get warm before i am finished ) and let it sit if i can get all the bubbles out and cure, I then start the next step and pull the plastic wrap off but some of the resin cured up farther on the walls of the mold so I try to fix that and it looks like it cracked when it has not. My next step is to put Mica powder on the grooves and pour colored resin on top. When I put the resin in the silicone mold after it fully cured and attempt to de mold it, it pulls chunks of the silicone (new just bought for second time because of same issue) from my mold apart and is stuck in the resin. I have made so many thinking it was some stupid thing I did wrong. I have no clue on what the issue was and not to mention the mold started to bow outward. After it is finally de molded it is missing spots in the top like I did not put the resin their so small chips are missing and are sharp. My sides of the coaster show deep imprinted bubbles that their is no possible way or reason. I have used 91% rubbing alcohol spray across the poured resin but it does not prevent them all and I also used a torch for that as well. It is making me feel defeated and ready to give up.
I completely understand how frustrating this must be, especially when you’re putting so much effort into your resin projects. The issues you’re encountering seem to stem from a combination of resin behavior and mold quality, but let’s break it down and troubleshoot step by step to help get you back on track:
1. Bubble Issues:
Why it’s happening: Resin naturally traps air when mixed or when you manipulate it (like making those beautiful wave effects). The heat from the curing process can cause bubbles to expand and rise to the surface, leading to more bubbles forming later on.
Possible solutions:
Slow mixing: Mix the resin slowly to minimize the introduction of air bubbles.
Warm the resin: Slightly warm your resin before pouring (not to the point where it starts to cure quickly) to help release trapped air. You can place the resin bottle in a warm water bath (without letting water into the resin) for a few minutes.
Pouring in layers: Instead of pouring a full coaster at once, try pouring in thinner layers. Each layer can be torched for bubbles before adding the next, allowing for more control over the bubbles.
2. Plastic Wrap & Resin Cure on Walls:
Why it’s happening: The resin may be creeping up the walls of the mold due to the tension created by the plastic wrap, or if it’s applied too close to the walls, it can cure unevenly in those areas.
Possible solutions:
Plastic wrap adjustment: Try to keep the plastic wrap manipulation a bit further from the edges of the mold to avoid this issue. Alternatively, let the resin sit for a few minutes after pouring to slightly thicken before creating the wave effect.
Mold preparation: You could also try applying a mold release agent before pouring the resin. This can help prevent the resin from sticking to the mold as much, especially around the walls.
3. Silicone Mold Tearing & Bowing:
Why it’s happening: When the resin is too sticky or hasn’t cured fully, or if it’s heated too much during curing, it can grip onto the mold, causing it to tear or damage the mold. The bowing suggests that the mold may not be able to hold its shape under the heat generated during the resin’s exothermic reaction.
Possible solutions:
Stronger mold: Consider using a thicker, higher-quality silicone mold. Some molds can’t handle the heat and stress that resin exerts, which leads to bowing or tearing. Look for molds rated for epoxy resin and that are sturdy enough to hold the shape.
Cure temperature control: Ensure that the workspace is at the ideal temperature recommended by your resin brand, usually around 70-75°F. If the resin gets too hot, it can cure unevenly and cause more stress on the mold.
Mold support: If your mold is bowing, try placing it on a flat, sturdy surface or support it with something to keep its shape during the curing process.
4. Missing Chips and Sharp Edges:
Why it’s happening: Resin may not be settling properly into all the areas of the mold, especially if there’s uneven curing or bubbles forming. The sharp edges could result from improper demolding or resin pulling away from sections of the mold.
Possible solutions:
Pour in stages: Again, pouring in layers can help ensure that the resin fills all parts of the mold, preventing missing chunks or chips.
File edges: For the sharp edges, you can sand the coasters lightly with fine-grit sandpaper and follow up with a polishing compound for a smooth finish.
5. Deep Bubble Imprints:
Why it’s happening: If bubbles remain trapped in the mold despite your efforts, they could leave behind imprints that appear as deep craters on the sides or surface of the coasters.
Possible solutions:
Allow resin to settle: Let the resin sit in the mold for a minute or two before using the plastic wrap. This will allow bubbles to rise and pop.
Tapping the mold: After pouring, gently tap the sides of the mold to encourage bubbles to rise to the surface.
Alcohol spray & torch timing: Continue using your torch or alcohol spray, but timing is key. Spray the surface shortly after pouring, but give it a few minutes to settle. Torch lightly at intervals to avoid overheating the resin.
Overall Suggestions:
Try a test run: Use a small amount of resin to test a few different techniques before doing a full coaster set. This way, you can isolate what might be causing each issue.
Be patient with curing: Resin can be temperamental, and sometimes letting it cure longer before removing it from the mold can help avoid tearing or other damage.
Try a different resin formula: If all else fails, you might consider switching to a different resin brand or formula. Some resins are better suited to certain conditions, especially when doing complex layering or texturing.
You’re definitely not alone in this, and these issues can happen to the best of resin artists! Don’t give up yet—once you find the right tweaks to your process, I’m sure your wave coasters will come out beautifully. Let me know how it goes or if you have any more questions!
This is such a helpful and comprehensive guide on resin troubleshooting! I’ve encountered many of these issues myself, and your tips are spot on. One thing I’ve learned is that using high-quality resin and following best practices can prevent most of these problems. For anyone looking for reliable epoxy resin products that minimize troubleshooting headaches, I highly recommend checking out WaterSign Asia. They offer a great selection of materials that ensure smooth and professional results. Thanks for sharing these practical solutions!https://www.watersignasia.com/
Good morning. I did resin on coasters. I let the coaster set for many days. I was putting cork on the back to finish the coasters and noticed there were some hairline scratches. Don’t know why and can I put another thin layer of resin over them. The coaster look good but don’t want them to continue to scratch more. This is a gift and want the coasters to be perfect.
Thank you, Joann P.
Good morning, Joann! Hairline scratches on resin coasters can happen for a few reasons—maybe from handling, stacking, or even micro-abrasions from wiping them down. The good news is that you can absolutely fix them with a thin layer of resin to restore a flawless, glass-like finish!
How to Fix Hairline Scratches on Resin Coasters
Option 1: Apply a Thin Resin Topcoat (Best for a Glossy Finish)
Since these are gifts and you want perfection, a fresh thin flood coat of resin will:
Fill in the scratches
Give the coasters a brand-new shine
Add extra protection against future scratches
Steps to Apply a Thin Resin Layer:
Clean the Surface
Wipe the coasters with isopropyl alcohol (91% or higher) and a lint-free cloth to remove any dust, fingerprints, or oils.
Let them dry completely.
Prepare a Small Batch of Resin
Use the same resin brand/type you originally used to avoid compatibility issues.
Mix a small amount (enough for a thin coat) and stir thoroughly for at least 3-5 minutes to prevent sticky spots.
Apply the Resin
Place coasters on a leveled surface covered with parchment paper or a silicone mat.
Pour a small amount of resin in the center and spread it evenly using a gloved finger, silicone brush, or sponge brush.
Let the resin self-level for a minute or two.
Pop Any Bubbles
Use a heat gun or torch (briefly and at a distance) to remove air bubbles.
Cover & Cure
Cover the coasters with a dust-free container (like a plastic tub) and let them cure for at least 24-48 hours.
Option 2: Buff & Polish (If Scratches Are Very Light)
If the scratches are extremely minor, you can try sanding and polishing instead of recoating.
Steps:
Wet Sand the coaster with 3000+ grit sandpaper (lightly and evenly).
Wipe clean, then use a plastic polish (like Novus 2) or a car polish with a soft cloth.
Buff in a circular motion until the shine returns.
👉 When to Choose This? If the scratches are just surface-level and not deep enough to feel with a fingernail.
Which is Better for Your Gift?
If you want a flawless, glossy finish → Do a thin resin topcoat.
If scratches are very faint and you’re short on time → Try buffing & polishing first.
Let me know which route you take or if you need any extra tips! 💙
I need help please my workers mixed white pigment paste withe hardner and painted some ductwork ,they thought it’s the flow coat. Is there a way to fix it to get dry or not
Unfortunately, once it’s painted on and missing the resin, there’s no way to make it cure in place. But here are a few things you can try:
1. Try Wiping It Off While It’s Still Soft
Use a cloth or plastic scraper and wipe off as much as possible.
Clean the area with isopropyl alcohol (91% or higher) or acetone to remove residue.
Work in a well-ventilated area with PPE (gloves, mask).
2. Once Cleaned, Re-Coat With Actual Flow Coat
After removing the uncured mix and making sure the surface is clean and dry:
Mix your flow coat properly (resin + hardener + pigment if needed).
Reapply the flow coat over the cleaned surface.
3. If It’s Already Hardened a Bit (Rubbery or Tacky)
Try mechanical removal: sanding, scraping, or using a heat gun to soften and peel.
Still follow up with solvent cleaning (alcohol or acetone) before recoating.
Hello Kathy, I’ve been having issues with the epoxy resin I am using. I do a pour & let it sit to dry & I noticed the epoxy resin hadn’t covered my artwork completely. There are spots that were less covered, compared to the rest. I have tried mixing more epoxy & I pour it over the spots that weren’t covered & still my artwork is uneven. Any suggestions are greatly appreciated. Have a Wonderful Day